Dead State

Dead State

32 ratings
Tips and walkthrough for days 1-7
By MegaMidboss
I included a number of base management and combat tips to help players. This guide will cover days 1 – 7 which is the demo duration. From there I expect you to use what this guide covers to play the game on your own.
   
Award
Favorite
Favorited
Unfavorite
Controls
Z – Loot detection toggle
Esc – Main Menu
1-0 keys weapon alternate actions. Instead of 1 being the basic attack with 2 being the second attack they made 0 the basic attack all the way near backspace and 1 being the second alternate attack listed for a weapon.
F5 – Quick save (Your best friend)
F9 – Quick Load
Tab – Cycles through party members outside of combat if you don't want to click on their portrait.
Ctrl (plus left click) – splits stacks of items up.
C – Character menu
I – Inventory menu
G – Goals and allies
H – Shelter Tab
J – Party toggle (allows moving individual units)
T – Car trunk when on exit grid
P – Party commands your main character can use while in combat and it is their turn
M - World map on exit grid
Space – Enter and exit combat
QE – camera rotation
WASD – camera movement
arrow keys – camera movement
Left mouse button - interact and move
Double click left mouse button - run
Middle mouse button – camera movement
Middle mouse scroll wheel – zoom
Right mouse button – Alternates between attack, loot, bash, swap places with ally, throw item and swap inventory depending on target. Try not to throw a grenade when you are trying to loot.
Right mouse button on an equipped weapon – Shows the list of alternate attacks a weapon is capable of and their AP cost.
Recommended settings
Press escape. Choose options. Set the animation to 2X. This will make the game play faster as I feel the default animation speed is too slow. It does however give you less time to press space to enter combat when enemies are coming towards you. Also remove the check mark on live shelter. This will make allies at your shelter stick to a location so you don't have to go hunting around the shelter for them.
Tips
Press F5 to quick save as often as you can remember. The game crashes sometimes when going to bed or when interacting with objects. I wouldn't want you to lose 10 minutes of inventory management just because you forgot to press F5 before going to bed.

When you get back from scouting for goods you should revisit the job board to assign people to tasks like construction of projects. Then in the morning re-assign them to your party.

If you really want to you can choose wait at the bottom right of the jobs board to pass time while in the shelter. This is useful when you're done looting for the day and want to re-assign people if a project will be completed in an hour.

Lockpicks are reusable. Give them to people with mechanical aptitude as you will likely have so many you won't know what to do with them all.

If you run out of carrying capacity you should drop extras of weapons you already have. Such as dropping your 10th kitchen knife for more food. Items put into a medical bag do not increase the bag's weight. So if you put those painkillers you found into a medical satchel you can carry more. You could also drop 3 pounds of CDs which have a morale value of 1 for numerous batteries with 2 value per 0.5 pounds.

Dogs can carry items and can't get infected. Since they won't have to carry weapons and armour they can devote more of their carrying capacity towards carrying loot.

Write down which locations still have loot in case you want to revisit an area to loot it with a weaker team. Or even once done looting a further location and it is on your way back. Also mark down which direction it is from the base.

Player characters who are resting in the Shelter heal 1 HP (and 1 lost Max HP) per hour in normal mode, and 1 HP per 2 hours in Hardcore mode, while allies heal more slowly, with 1 HP per 2 hours in normal mode and 1 HP per 4 hours in Hardcore mode. By resting it doesn't mean your character is doing nothing or going to bed early. You can help build things while recovering HP.
Combat Tips
Your main character has abilities only they can use in combat. Pressing 'p' when it is their turn will bring up the list of combat commands. The first command you know is Go! It makes an ally go immediately after your character ends their turn. This is useful for getting 1 more round of attacks in early game versus zombies. Especially for an ally which is positioned behind the zombie. More party commands are unlocked as you progress through the leadership skill.

Pressing J allows you to switch between moving individual units or as a group.

Melee and ranged weapons have alternate attacks they can do. Such as cripple and hamstring for melee weapons. It is a good idea to have a mixture of weapon types for combat rather then arming everyone with claw hammers because their dps per AP is high. Trying different things will lead you to figure out things like Joel is good with a baseball bat because his 8 AP allows him to hit twice if he stands still. The higher damage per hit of the baseball bat also allows Joel to two shot a zombie if he runs up, hits once and ends his turn. Then he gets another 2 hits from the benefit of your main character's Go! Party command. Your main character benefits from taking Joel's nightstick if they have 9 AP as they can do a cripple attack for 5AP followed up with a basic attack for 4AP while standing still.

The game doesn't have mechanics in place where if you miss your target it may hit an ally behind the target. You can only hit allies after clicking on them then agreeing to target them despite not being hostile. It does still hit allies with Area of Affect attacks like grenades.

If you are fighting out in the open its best to form a line and wait for an enemy to walk up to you if they are facing you as opposed to running up to the enemy's position and letting them get two attacks in rather than just 1 or 0 if they run to your position.

If you are fighting in a choke point like a doorway allies with two handed weapons can attack diagonally at enemies in the doorway. Polearms can attack from 2 squares away.

Your first thought to combat might be to run up and hit them as many times as possible with your whole party. This leaves characters with less HP like Renee within melee range. Since Renee's combat skill is so low I actually have her run up to only do one or two attacks then step away one square to prevent her from being attacked by a zombie. She can also take advantage of the swap places command to get one hit in and swap places with that same character to leave someone else within danger's reach. This ends up using 4 of her 9 AP on swapping places and 3AP for a single swing of a claw hammer.

Zombies can detect you from behind at a range of 4 tiles. Their frontal vision is higher. If you are standing on the 5th tile away from their back then either initiate combat or try to move one square forward and initiate combat while your character is moving. If you are unsure of how much distance there is between you and the zombie you can press space to enter combat, highlight the tile you want to move to to see the AP cost then press space again to leave combat.

If you are standing 4 AP movement tiles away from the enemy's detection range and if you move your character 1 square closer then quickly press space you can start combat within 3 AP of movement from the enemy.

Weapons have varying effectiveness on enemies. A kitchen knife does reduced damage to zombies but has the benefit of having the ability to counter attack and cause bleeding which makes it a good choice versus humans. This damage modifier can be viewed in the inventory screen.

Combat takes facing into account. Hitting an enemy from behind provides a 20% higher to hit chance than attacking an enemy from the front.

Ammo needs to be in an item slot in order for weapons to be able to reload. Just having it in inventory is not good enough.

Character and ally levels are not based on kills. Your character levels up by completing goals like collecting 150 food. Press g to look at your character's goals. Your allies level up by surviving each day.

Zoom in to see what an enemy is wearing. Medics generally wear soldier helmets and are susceptible to tear gas and mace. Soldiers generally wear gas masks and will require attacks like molotovs to subdue them. Looters and Coyotes can wear things like science masks and bike helmets which reduce the effectiveness of tear gas or mace although it is not guaranteed that they will be unaffected.

Diagonal attack weapons allow you to initiate combat and start hitting enemies within 3 AP of movement as you then don't need to be standing directly behind the enemy to hit them. You can instead hit them from the back right or back left while being 4 AP away from directly behind them. This allows characters like Max with 9 AP and a 6AP weapon to get a swing in instead of no swings in if they try initiating combat from 4AP away.

Molotovs thrown directly onto an enemy immobilizes them.

The sawed off shotgun shoots the 2 shells loaded into the gun in one shot. This uses up more shells per shot than the hunting shotgun at the benefit of being one handed and having more front loaded damage. The downside is the increased ammo usage and the hunting shotgun has more damage per shell if you are trying to conserve ammo.

The nail gun has 1 range but can hit diagonally.
Stats
Each point of str allows 10 carry weight.

1 agi = 7AP. Each even number after 1 agi gives 1 AP. 2 = 8 AP. 4 = 9 AP. 6 = 10 AP.

Each point of Vigor provides 10 hp. 4 Vigor provides 1 AC. Each point of vigor past 4 also gives 1 AC.

Each point of Melee skill provides 5% to hit. Each point of agility provides 5% dodge.

Ranged chance to hit is mostly based on range and perception stat. Perception 4 has a 100% chance to hit from 4 range. This is then reduced starting at 10% for 1 agility and an additional 5% per agility point.

Ranged damage and crit chance is based on Ranged skill and distance. Having a ranged skill of 4 at a distance of 1 provides 20% damage increase with an additional 15% chance to crit.

Chance to poison starts at 1% for level 1 science, 5% for level 2 science, 10% for level 3 science, 20% for level 4 science, 50% for level 5 science, 50% for level 2 poison at level 6 science, 60% for level 2 poison at level 7 science, 70% for level 2 poison at level 8 science, 80% for level 2 poison at level 9 science and 100% for level 2 poison at level 10 science.

Negotiation provides 0.5 morale per point obtained.
Melee Weapon alternate attacks
Bash – 100% chance to move the target. 50% chance of knocking the target prone. (shield only)
Break – Destroys the weapon. Causes a critical hit.
Cripple – 75% chance to cause arm sprain.
Critical Strike – Critically hits the target.
Flurry – 3 attacks at -30% accuracy.
Fortify – Ends your turn and doubles your defense.
Hamstring – 75% chance to cause leg sprain.
Knockdown – 100% chance to knock the target prone.
Push – Moves the target 1 square.
Roast – 100% critical hit. 100% immolate effect. The weapon is destroyed.
Slash – Causes the target to bleed. (Undead do not bleed)
Skullcrusher – Critically strikes an undead unit. Destroys the weapon.
Stagger – Causes the target to be dizzy. (Undead cannot be dizzy)
Wild Swing – 30% accuracy reduction for a guaranteed critical.
Ranged Weapon alternate attacks
Burst – Attacks three times with an automatic weapon but expends three times the ammo. MK5 does 30-50 for 4 AP. The MS4 does 50-85 damage for 6 AP in this mode. The AKA7 does 35-65 for 7AP in this mode.
Auto – Allows the MK5 to fire 9 rounds. This does 60-100 damage for 6AP. The AKA7 does 50-120 for 9 AP in this mode.
Spray – Allows the MSG-10 to fire 9 rounds. This does slightly more damage then firing twice. Fire does 20-30 per shot at 3AP. Spray does 40-80 at 7AP.
Dog alternate attacks
Bark – 20 noise.
Takedown – 50% chance to knock the target prone.
Ferocity – Cause 20 noise. 50% chance to panic the enemy.
Status Effects
Bleeding can also be removed with Healing. Some resistances or accessories reduce or nullify the chance of being inflicted by these status effect

Immolated - Immolated characters have been set on fire from a fire-based attack or when hit by a weapon that has the Immolate weapon effect. Human targets will put themselves out if on fire when their turn comes, causing them to lose 4AP.. The undead will take 30% of their total HP every round until dead while on fire. If Fire Resistance = 100%, characters take no damage from fire and do not get Immolated or Burned by fire attacks. When attacked by a fire-based attack, the chance of being Immolated is equal to half the difference of their armor's fire resistance. For example, if a character has a fire resistance of 30%, the difference would be 70%, and their chance of being Immolated would be 35%.

Bleeding - Certain weapons have a chance to cause bleeding damage. Bleeding causes a character to lose 1-5 HP every round for 3-5 rounds. The damage is random every round (between 1-5) and the number of rounds (3-5) is generated at the time the status is inflicted. If Bleeding status is inflicted while the target is bleeding, the status is reset, not stacked. Does not work on zombies.

Prone - Target has been knocked to the ground. Prone targets have a temporary Agility of 1. Requires 50% of AP to get up (need to be healed first if at 0 or fewer HP). Certain weapons/attacks do more damage to Prone targets.

Dizzy - Target’s to-hit temporarily lowered by 50% for 3 turns. Does not work on zombies.

Panicked – (NPC humans and allies ONLY) Target will try to flee from combat. Caused when their Panic or Horror threshold is triggered. Your character does not get panicked.

Blind - Agility and Perception are set to 1 for 3 rounds. Does not work on zombies.

Poisoned - Target takes damage over time. Only affects humans, and appears in two levels: Level 1: does 1-5 HP damage for 1-3 rounds. Level 2: does 5-10 HP damage for 3-5 rounds.

Persistent Status Effects that can usually only be healed with bed rest. Chance of getting these can be reduced or nullified by Armor or Accessories. "Duration" equals the number of days patient must not be taken into the field if they want the status to heal.

Burned - The chance of being Burned is 10% each time Immolate status is applied. Reduces to-hit with melee and ranged weapons by 30%. Requires advanced medical treatment or rest. Duration: 48 hours. Does not apply to zombies.

Wounded - If a human is KO'd and healed, it causes the Wounded status. Wounded status temporarily reduces max AP by 2 and only allows HP to be healed as much as 80% of their maximum. Wounded can only be cured with rest. Duration = 72 Hours

Fatigued - Target has been active in the field for more than 12 hours or is starving. Fatigued status reduces Accuracy and Dodge by 25%. Fatigue can be cured with Flashback Energy Drink. Duration = 12 hours

Arm Sprain - Accuracy reduced by 10%. Duration = 48 hours

Leg Sprain - Reduces the ability to evade by 10%. Duration = 48 hours

Infected - (NPCs ONLY, except in Player Infection mode) Target has been infected with the undeath virus. If left untreated, this condition will kill the target and raise them as undead. Infected targets will come back as the undead if killed in combat. Treated with daily doses of antibiotics. Duration = Permanent
Infected status is only contracted when a character is severely wounded and an undead uses a bite-based attack.
If a character is Infected, they will need to consume one Antibiotic per day. As with food, Antibiotic use is automatic, subtracted from the Shelter's total supply at the end of each day. If there aren’t enough Antibiotics for the day, it causes an Antibiotic Crisis Event. Anyone who doesn’t get antibiotics for three days is automatically killed. For more information on this, see the Crisis Events section.
Infected targets will come back as undead after a turn or two if not killed by fire. Anyone killed by the undead will be considered Infected and also become undead in a few turns.

Discouraged - (NPCs ONLY) Overall mood is low. Reduces damage dealt by 25% and halves productivity for NPCs back at the Shelter. Duration = 72 hours

Buffs - Buffs are the only positive Status Effects, and are only available for your ally characters. While other Status Effects are acquired in the field, Buffs are gained either through using a certain consumable or through a day’s use of a certain upgrade, and will only last for a certain amount of time before they naturally expire.

Pumped - (Allies only) The target has worked out in the Gym upgrade for a full day (8 hours), and has a 10% damage bonus to their melee attacks. Duration = 96 hours

Aimed - (Allies only) The target has practiced in the Shooting Gallery upgrade for a full day (8 hours), and has a 10% accuracy bonus to their ranged attacks. Duration = 96 hours

Clarity - (Allies only) The target has taken Stuporax, which has granted them a 25% bonus to their accuracy for 3 rounds. Duration = 3 rounds

Soothed - (Allies only) The target has taken Soothinum, which has granted them an immunity to Panic for the day. Duration = 24 hours

Panic - Panic applies to allies and enemies alike, and humans only: It governs when NPCs lose their will to fight or become frightened, and causes them to run to an area away from enemies (for enemies, this may involve fleeing the area entirely).There are two forms of panic - Horror and Damage - and either can contribute to the character’s breaking down. The player will never be able to see these specific values for either allies or enemies, but will be able to see certain character Traits on their companions that hint at their capabilities.

Horror - Horror is an abstracted amount of the psychological strain of seeing/dealing with the undead. Once a Horror value exceeds an individual's threshold, they will Panic. As there is only a vague limit for how many undead can shuffle into a space, there is no maximum Horror value.

Damage - The Damage value is the basic value of how much pain the character can take within a given amount of time, and, like Horror, is meant to represent the psychological toll of taking physical trauma. Certain characters will face down masses of the undead without fear, but when injured moderately, will turn tail and run – while others can hardly face down a single undead but can work themselves within inches of death.
Armour Effects
Dodge - Enemy to hit chance is reduced by 10%.
Leg Guard - Protects against the leg sprain status effect.
Marksman – Ranged attacks have +10% chance to hit.
Arm Guard – Protects against the arm sprain status effect.
Eyewear – Protects against the blind status effect.
No Panic – Provides a 50% chance to resist panic.
Mask – Protects against status effects caused by Nerve Gas, Tear gas and Jars of Acid.
Nocturnal – Eliminates range penalties at night. Night reduces visual range by 50% and chance to hit by 25%.
FireProof – Protects against burned status effect.
Sealed – Protects against all damage and status effect caused by nerve gas, tear gas and jars of acid.
Hazard protection – Protects against damage from fire and chemical attacks.
No Head – Cannot use a helmet.
Bulky – Reduces AP by 1.
Missable allies based on time
For a full list of allies please view http://deadstate.gamepedia.com/Allies

Craig and Karen - Before day 25. Random encounter south of route 190.
Lloyd – Right on day 26. Lane will talk about a plane landing on the radio on this day. Located at Hamilton Airfield South East of Stephenville.
Jodie - Before day 30. Located at Carmichael's Garage East of Splendid on route 190.
Melina and Oscar - Before day 30. Located at Downtown San Saba North East of Splendid on Route 190.
Jenifer - Before day 33. Located at Soaring Eagle Resort West of Splended at the end of route 67.
Nathan - Before day 41. Located at Menard Graveyard West South West of base.
Aggro - Before day 41. Located at Dublin Bar.
Aimee - Before day 41. Located at Wicked Lily North West of base.
Smoky (cat) - Between day 50 – 67 at the summer camp.
Sara and Mia – Before day 68. The summer camp is raided on day 68.
Lane - Before day 51. Located at KHCK Radio station.
Parisa Sharazi – Rescue her from the Militia HQ before the military takes it. I think the Militia HQ is held by the Sons of Liberty for a short while after the military takes their Oil Refinery on day 70. Day 70 is when Nash comes to join you after the refinery is lost. I am unsure whether you can recruit her after the military takes over the Militia HQ.
Morale Information
It's best to give morale items to someone who it would change their morale from disgruntled to okay than from content to good as that is a difference of 15 morale per day compared to just 3 per day.

Morale effect name
Morale effect
Good mood
-4
Content mood
-7
Okay mood
-15
Disgruntled mood
-30
New ally
+30
Food found >=50
+20
Parts found >=30
+10
Fuel found >=20
+10
Antibiotics found >=10
+5
Upgrade completed
+20
Positive morale for 7 days
+30
Staying out past 3am
-50
Stocking undesirable food
-2 per food
Not enough fuel to run the generator
-20
Opening the memorial
+3
Starting a new game
Click new game. Choose which difficulty options to enable. I chose PC infection and hardcore. I left ironman off as I have not had a good experience with games that only have 1 save slot. This is because sometimes games crash after a lot of work or even have that one save game get corrupted.

Choose a portrait. I recommend default male or custom female.

Type in a name.

Chose either a preset or custom built character. I chose the preset diplomat build to see whether I could beat it with this sub-optimal build. It is only sub-optimal due to the perks that are chosen by default. Negotiation is actually quite useful as a skill. I recommend choosing the diplomat build then when you get to the screen that says start you can click back to customize the preset build. I then recommend re-assigning the points to where they were before and choosing the negotiation perk 'likeable' and the medical perk paramedic.
Intro
The plane you were on crashed. Press z to display the lootable container icon. Grab the aluminum bat from the suitcase. Hit the zombie. Don't worry about losing the tutorial as even if you end turn the zombie doesn't attack. Run to the cops. Lose that sweet aluminum bat you found.
Day 1
Loot the Survivor's bag. Equip the medic satchel in the item 1 slot. Drag the bandages into the medic satchel. Talk to Davis to proceed. You will be tasked with getting parts to fix the fence. Request to take Anita with you. If you decide to take Renee with you then take Anita's wooden baseball bat via the shelter's storage menu and equip it on yourself or Joel. If you forget what goal an ally definitely wants completed press G and then press the to-do button at the bottom right. Loot the school for items. The loot sign only appears above objects if you are close enough and you have pressed z like I said to. The shelving units in the basement has a hammer. Equip the hammer in weapon slot 1 if your strength is less than 6. Weapon slot 2 can contain the pipe wrench if your strength is 6 or more. Not meeting the weapon's strength requirement affects your damage by 10% per point below the requirement. So swinging that pipe wrench at a cost of 5 AP compared to getting 2 swings of the hammer for 6 AP makes the hammer the better option for lower strength characters. Choosing which weapon to use is determined by what you are fighting. Use blades and guns on humans. Use blunt weapons on zombies. Your inventory screen will let you know what damage modifiers a weapon has versus zombies. A hammer has a 125% damage modifier. A kitchen knife has a 40% damage modifier. Interact with the shelter storage like the tutorial instructs in order to stockpile the gas, parts and luxuries you have found. Remember to press stock to add it to the shelter's inventory. If you aren't strong enough for the pipe wrench then just store it here. The radio near Davis can be clicked to hear what the radio host is saying. Each day the radio has a different message from the host. Talk to Elaine on the second floor. When you are ready to leave stand on the exit grid and press M to bring up the map.

Head South East to Llano Commercial. Select Anita by clicking her portrait. Use Anita's bat to lay the beat down on the zombie outside the building. I recommend standing on the 5th square behind the zombie then pressing space to start combat. Run up and hit it once. Then once its the main character's turn press P to bring up your commands and use Go! To give Anita another turn. When you have cleared out the Diamondback Hardware store get ready for a fight with this next step. Bash the door to the small room once. You do this by right clicking the door until a crowbar appears then you left click it. This will cause one zombie outside the building to come inside to investigate the noise. Press spacebar to initiate combat once it is close enough. Give Anita the Sledgehammer from the locked room as she has an additional 5% crit chance with sledgehammers. Also give Anita the lockpick. Trade Anita's baseball bat with Joel by right clicking on her until a backpack appears then left clicking. Then take Joel's security baton for yourself.

If you lockpick the back door to the restaurant there is a hostile survivor inside with a screwdriver. She is a named mob called Cindy and named enemies generally have more stats than regular ones. In this game if a mob doesn't have a special portrait they are not a survivor you can recruit. Once dead she comes back to life as a zombie and you realize that this game doesn't allow you do what I call a “dead check” to hit corpses on the ground before they come back as zombies. I used to do that all the time in Dead Space. Anyway for the 3 zombies in front of the diner I recommend avoiding them as you are likely hurt somewhat from that lady with her screwdriver causing bleeding and countering your attacks. If you're dead set on fighting them you can try forcing them to funnel into the doorway. Press J to move individual allies when out of combat and position your characters so that only one of them gets to hit at a time. Once immediately in front of the door the zombies will try to make their way in. Make your main character the front man. Joel can swap out with him to hit once then swap back. You can swap positions during combat by right clicking a character until 2 hands appear then left clicking that character. Anita can hit diagonally to an enemy in the doorway. Your reward for pulling this off is to be able to loot the police car. I managed to find 2 gallons of gas from it. Watch out for the last remaining zombie that is standing in the parking lot behind the Diamondback Hardware store. If you run too close to the wall you risk aggroing her by turning around the corner.

If you found downtown Splendid on your way there you should loot what you can without drawing too much attention to yourself then head back to the shelter. If you want you can go back out to locate places. Don't stay out beyond 8PM or your allies will get fatigued which will impact their ability to hit by 25% and their ability to dodge by 25%. If you stay out past 11pm the main character gets fatigued. Once 3 am rolls around you are teleported back to the school and lose half your health, lose 50 morale and everyone takes a mood hit. Mood is a character's personal stat that can be viewed when you press g. It affects your daily morale. So since it took from 8am – 10:41pm to travel to that location as a diplomat you should keep roughly 3 hours of travel time for your return trip. If you do happen to get fatigued you should have some Flashback Energy Drinks either in your stockpile or in the school that can remove this condition. You also want to keep your health in mind as per the manual, “Player characters who are resting in the Shelter heal 1 HP (and 1 lost Max HP) per hour in normal mode, and 1 HP per 2 hours in Hardcore mode, while allies heal more slowly, with 1 HP per 2 hours in normal mode and 1 HP per 4 hours in Hardcore mode.” By resting it doesn't mean your character is doing nothing or going to bed early. You can help build things while recovering HP. West of downtown Splendid is a human campsite with some neutral npcs that warn you to leave them alone. I take their laptop before leaving them. That and their fishing rod, stuff in the dumpster and their car fuel. I took these 2 detours and ended up back at 5pm.

I ended up finding 2 undesirable food, 2 special items, 20.5 food, 4 fresh food, 2 gallons of fuel, 11 luxury items and 73 parts just from Llano Commercial. If you loot a little bit from downtown Splendid you can end up with 10 undesirable food, 3 special items, 29 food, 8 fresh food, 2 gallons of fuel, 13 luxury items and 74 parts. If your numbers differ from this I think dead state has randomized loot. I had one playthrough where I ended the first day with 80 parts. Throw your extra weapons into the shelter storage. Your bed is on the second floor above the main entrance.

Your morale at the end of the day if you chose the diplomat pre-made character and looted a bit of downtown Splendid will be -99 on one run. This second run through for the guide I am at -127 morale.
Day 2
If Renee requests that her mother stay at the school you have the option using Negotation to convince her to replace Anita. Renee can disable security systems for you, heal you, lockpick doors up to 20 hp, let you move faster on the map on foot and has a chance to find forage sites with her survival skill. Her 90 hp means she should be kept at least 1 square away from enemies at the end of her turn as zombies first prioritize distance then whichever direction they are facing for who they will attack. If Anita won't be accompanying you on your excursions make sure you take her baseball bat and give it to Joel if your main character has 9 Action points. This is so your character can do a cripple attack with Joel's nightstick which reduces accuracy by 10% on any enemy without armor classified as arm guard followed up with a basic attack with the nightstick. Also the cripple status effect stops zombies from doing a swipe attack in addition to their bite if they are immediately beside one of your allies. Joel only has 8 Action points so he could only do 2 basic attacks limiting his usefulness with the nightstick. As an added plus now that he has a baseball bat which is considered a two handed weapon he can now attack diagonally instead of immediately beside. This means Joel can then hit enemies without moving as often. Also the baseball bat has a stagger attack that also reduces accuracy by 10% on human enemies. I recommend equipping Renee with a screwdriver. This is because it's basic attack requires 2 AP and she has 9 AP to spend. It is also lighter at .5 compared to the hammer's 2.5 pounds. Carry an extra one in your inventory in case one breaks.

But onto the actual day planning. First check the radio. The radio mentions there is a restaurant on Bison Street to the North East. Now that there is a whiteboard where the lunchroom is don't put all your parts into the fence hp. Leave 30 parts for the well that Davis mentioned this morning. I put Anita on the fence repairs as it was only going to take 8 hours with my 25% reduced time on upgrade repairs. I assigned Davis on building the well. Talk to Elaine on the second floor. Oh and you know how Renee said she used the last of her medical supplies on you? Well it turns out she has plenty in her inventory. Take Anita's lockpick from her as she won't need it via the shelter storage and give it to Renee. Leave for Bison Street to the North-East.

As you enter the map the left house has choice words scrawled on it for you to read. Siphon his gas. The right house has a less straightforward message “Stay out” scrawled on it. In this situation I base Joel's equipment on what enemy might be in a building. Pistol for zombie or possible human. Shotgun for definite human. This is because the one handed pistol can be switched for another weapon without incurring a 2 AP penalty. You definitely don't want to enter the left house though as you only have a 3 man party and the encounter is geared towards having 4 party members. Most of which should have guns to take them on. The Mmm, Bison! here contains 1 looter with a gun so make sure to clear the map of zombies if you want to take him on. Ready your guns. Then start combat and open the back door.

Once the map is clear you can head to the southeast to find an old church. Here you can put Renee's science skill to use disabling that pesky alarm that is blinking red. You can do this by selecting her then left clicking the alarm. She can also lockpick that back door for you. Beware of entering the church proper. It contains a total of 8 zombies. I recommend writing down that there is loot and zombies there. Also you are probably quite laden down with loot at this point.

When you return to the school the fence should be almost finished. You can have your party members help build the well. I returned with 14 undesirable food, 6 special items, 56 food, 2 fresh food, 3 gallons of fuel, 42 luxury items, 25 parts and 1 data item. Wait at the job board until the fence repair is completed then assign your fence repairmen to building the well.

I ended with -107 morale on one run and -92 on my second run for this guide.
Day 3
Davis mentions that you need antibiotics to heal Doug. As he mentions the situation is not critical and Doug just has a fever at the moment. One playthrough I waited until day 8 before letting Davis know I had enough antibiotics. That playthrough had morale issues though as I didn't try to keep the holy baseball bat on a party member which affected my combat performance and ability to get more loot per day.

Check the radio. Tell your crew to join your party via the jobs board. Talk to Elaine on the second floor. There is a negotiation option for her today. Head to Brady Pharmacy to the North West. The main focus of this map is that there are 3 zombies standing outside the pharmacy. There are also looters inside the pharmacy one of which is armed with a .38 snubnose pistol and I believe they are all infected already. Logically if you hit the red door in the back of the pharmacy the zombies in front would try to path through the pharmacy towards the door or the looters inside would path out front to see what the ruckus is and get spotted by zombies. Since the AI pathing in the game is iffy it instead just teleports the looters into combat with you. If you want the intended effect of zombies vs looters to happen you have to first engage combat and bash the door. Then once combat ends you re-engage combat to bash the door more. The looter inside will attack you once the door swings open. I believe his is infected so if you're having trouble closing the door after he dies that would be why. If the looters try to shoot you despite the zombie being right next to them just run far enough away to cause the zombie to attack their nearest target. The zombies will then properly path towards the looters in the store. The looters won't try to open the door for some reason. While clearing out the map keep in mind the Ol' Scratch Pizza place contains a looter armed with a 9mm pistol.

Return to the school. Re-assign people from your party to build. When you return talk to Davis if you have the 5 antibiotics. You should have 15 from the pharmacy. Go to the job board and assign jobs before turning in. I only turned in after looting one place as I had taken a lot of damage from the zombies and gun toting looters. If you have hot sauce give it to Joel. If you have chocolates give them to Anita. I ended this day on my second run with -86 morale.
Day 4
Joel will mention a location with food. Check the radio. Talk to Elaine on the second floor. Tell your crew to join your party via the jobs board. Mason Supermarket will be on the map to the South. There will be a named zombie there named Itchy Tasty which has increased stats. He is located in the middle of the parking lot. Your reward for beating him up is a data item and 2 9 millimeter ammo. If you want to be cautious inside the Bargain Owl grocery store's back area you can use the doors in the back part to restrict zombie vision to the main part of the store. There are 4 zombies in the larger blood stained area near the coolers and you won't be able to take them on just yet unless you somehow have a molotov. Especially since your party still consists of only 3 survivors. So write down that this location still has loot available in the bargain owl. If you are feeling brave you can see what you can loot without drawing their attention. Such as the fridge in the corner. The giddyup drugs pharmacy on this map contains 4 zombies. If you bash the front door they stack on top of each other bugging out their ability to attack until only 1 remains. When you bash the front door to the restaurant one zombie will come to investigate the noise.

Once you are done with that area you can steal a fishing rod, laptop and dumpster stuff from the human campsite if you haven't looted it already. Then head to downtown Splendid and get Renee to disable the security system. The looters here are probably still too tough to take on so write down that there are looters here.

Return to the school. Re-assign people to build. I ended this day at -25 morale on my second run as completing the well helped quite a bit.
Day 5
Doug should be awake if you raided that pharmacy the first day it was mentioned (and notified Davis that you had the antibiotics). However he will still be sick for 1 day. You've been appointed leader by Davis. Check the radio. Talk to Elaine on the second floor. Tell your crew to join your party via the jobs board. You can start work on the watchtower if your well is complete. If you head South East like I did and end up in Llano Residential walk to the yellow spraypaint on the house on the right. Renee will let you know that she has seen that information sprayed on houses before. I believe the game is basing this off of the INSARAG search and rescue symbols. https://en.wikipedia.org/wiki/Urban_search_and_rescue#The_INSARAG_marking_system. At any rate those two dead bodies are now 3 zombies. One in the bathroom, one in the baby room and one in the room with the bag on the bed. The left house contains 3 looters. One of which has a pistol. I recommend looting what you can and avoiding them. The house with the bullet holes in the windows and zombies standing around contains a neutral npc.

Return to the school. Re-assign people from your party to build. I ended this day at 0 morale.
Day 6
Max shows up. Let him in. He will be sick for 72 hours.

At this point you should get the gist of combat, exploration and micromanagement. If you had Doug up and running when I did in this guide he will set up a computer in the library that you can click on to do a password decryption puzzle game. If you have trouble with it I recommend writing down the letters with their blanks and a list of the letters next to what was provided to you. Then try to sound out what might be a part of the word. Failing that you can refer to the list of passwords at http://deadstate.gamepedia.com/Data_items. I don't think the list on the wiki article is accurate as to which password corresponds with which number. The list can still help you narrow down the potential password you are looking at. If you have a word with two 't's press Ctrl F to search for 't' and look which word the password could be. Also, navigating away from the password then back will re-arrange the characters that have to be filled in.

Check the radio. Talk to Elaine. Add people to your party. Now you can have a proper 4 man party with Doug. Give Doug soothinum in an item slot or equip an MP3 player in his head slot to prevent him from panicking as despite his big talk he is a pretty big wuss. If you still need direction you can head west like I did and end up at Menard Strip Mall. This map features Coyotes which are tougher than your average looter. They are there to find 2 looters located in building with the 40 hp glass door closest to the black car. And my game crashed when I went to bed. Good thing I was quick saving before going to bed. I ended this day with -9 morale.
Day 7
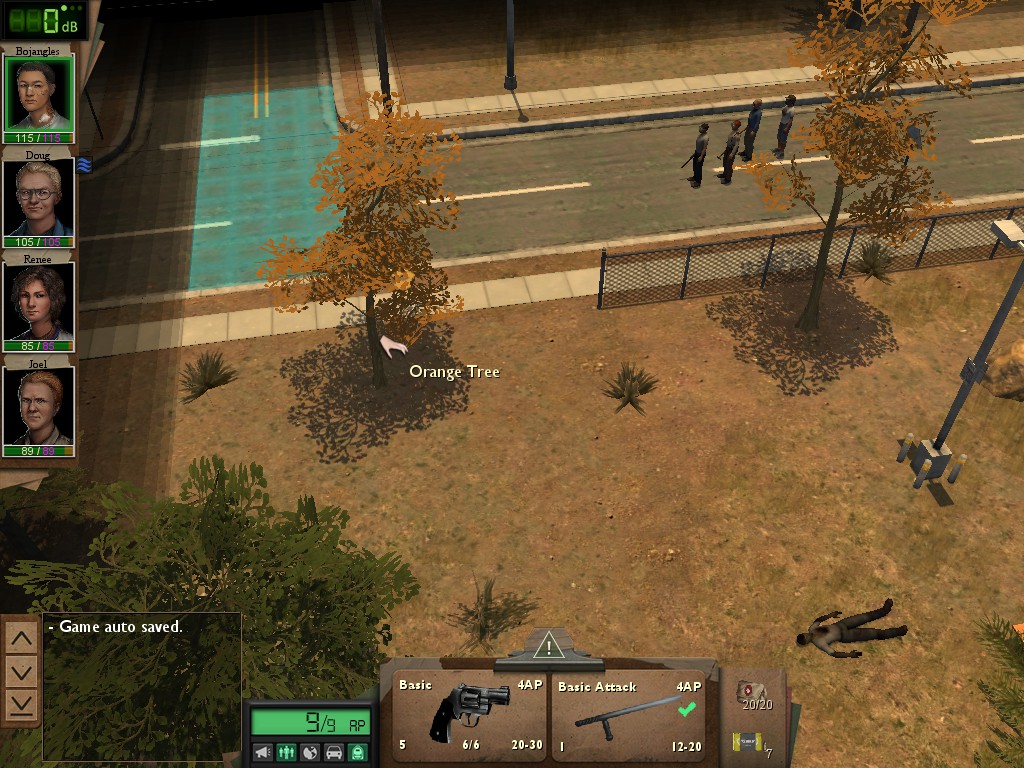
Elaine should now be able to be taken into the field if you tried calming her down. Her high agility makes her a good candidate for weapons like the makeshift pike. She has 10 AP which will let her get 2 hits in if she is stationary. Alternatively you can equip her with a screwdriver and she can get more hits in than Renee and she has more HP than Renee. She can replace Renee in the field as a slightly downgraded field medic as she has 5 medical skill. The downside is she has no science skill for alarms you encounter and she has no survival skill which makes the party move slower. If you end up leaving her at the base she has 0 mechanical skill so she cannot help build any projects. If you told her to go the counselor path she can do the hospitality job at the job board for +4 morale in addition to what her new negotiation skill will provide. My party at this point consisted of Joel, Doug and Renee. Remember to check the radio for any information and to assign people to your party with the job board. I went South East and fought the looters in Downtown Splendid and the looters at Llano Residential. I ended up in Memorial Park and cleared the outdoors except for the bushes and the building. Trying to bash open the shed will result in 3 building zombies and 1 bush zombie coming over to investigate. There is a zombie in the building in the middle that is covered in football gear. This map also features an orange tree near the exit to the left.

I gave Elaine 2 sticks of deodorant. This brought her from Unhappy to Okay for her mood. I ended this day with 34 morale. Good luck past day 7.
5 Comments
Hope Of Morning 14 Feb @ 6:40pm 
Possible day 1 strat for the three zombies in front of the diner. If you approach them from the sidewalk from either way you only aggro the one facing you, and maybe the side zombie I haven't perfected not aggro-ing that one yet. Still it does reduce the fight from a 3v3 to a 2v3 and a 1v3 instead, if you can figure out how to avoid aggroing the side zombie you could even get 3 separate 1v3s.
Asuzu 14 Jan, 2024 @ 10:32pm 
Bud and Nathan both have good Survival, which increases your travel speed, allowing you to make more distant rushes on foot before horses are available (e.g. to pick up Fiona, Aggro, etc.)
Also they get you to spot more harvesting locations, which translates into more food delivered = more skills points.
MegaMidboss  [author] 14 Jan, 2024 @ 5:47am 
Nice. Although you forgot to finish your thought on why you do your scavenging runs with Bud and Nathan.

If you wanted an alternate start suggestion, I think I was reading that there is a strategy out there to get horses early on. Before Priscilla even mentions getting them on day 18. But I think its from a different location than the one Priscilla mentions. The wiki mentions on the page about horses that the location I am thinking of is in the northwest area of the map near Route 277. However the wiki also mentions that the location is defended.
Asuzu 13 Jan, 2024 @ 11:29pm 
I open Day 1 with a sprint Llano Commercial -> Truck Stop to pick up Marc + Rayan + Michiru + Old Neighborhood to pick up Bud + Menard Graveyard to pick up Nathan.

This gives you strongest opener since now you got Chef and the Japanese lady starts learning English asap. Bud and Nathan will be mainstay in your scavenging team with their

If you move perfectly between these locations you can rush back to Shelter until midnight, and next day use your cans of energy drinks to clear tired effect so you can fight again.

Day 2 Another rush to Carmichaeils garage, you pick up Craig and Karen on the way, pick Jodie. Skip San Saba since Melina is bitten, and you don't want to spend antibiotics on her that early, wait until day 20-29 to pick Guzzmans up.

Then over next days I rush again to pick up Aimee, Fiona, Aggro in their specific locations.

With that opener you can build shelter up super quickly and start car garage, giving you best capabilites.
catobia427 4 Oct, 2019 @ 5:18pm 
Thank You