Einlanzer

Einlanzer

Not enough ratings
Einlanzer Bestiary (AKA The Unofficial Walkthrough)
By Reedtanguerra
A significant component of Einlanzer's tactical combat involves managing status effects and enemy weakpoints. This guide hopes to compile a list of enemies encountered by location, along with status effects they can inflict, and elemental weakpoints.
   
Award
Favorite
Favorited
Unfavorite
Introduction
Einlanzer's turn-based combat system is easy to learn, but even an adept player can get tripped up if they encounter an enemy immune to their party's attacks. Enemies can attack you with elemental spells, or status effects. The savvy Einlanzer player changes equipment and party strategy according to the attributes of the enemies in the area.

This guide hopes to present a list of enemies that you might encounter by location in the game, along with effects they inflict, and elemental weakpoints, so you can design your party strategy in the most efficient manner. A secondary goal is to provide useful achievement related hints reasonably spoiler-free.

This guide is a work-in-progress as I play the game myself, so don't flame me if it's not done yet!
Things I Wish I Knew Before Starting Einlanzer
I'm now 12+ hours into my longest play attempt to date, and here are a bunch of things that I really wish I knew before I started!

Use the default subclasses on your first time though
I didn't pay much attention to the subclasses, and a couple hours in, I can tell that the game is optimally designed for you to be playing the default subclass. About half my party is using non-standard subclasses and it's not that the other subclasses aren't fun. I feel like the other subclass varients will be an added fun challenge for a player who knows what they're doing, but maybe not the best choice for a newbie learning the mechanics on their first trek through the game.

smjjames's Subclass Guide

Agility is NOT EQUAL to Evasion
If you play a lot of RPG games, you're probably used to the Agility stat going hand-in-hand with evasion. For Einlanzer, Agility corresponds to the order your characters take their turn in combat. If one of your peeps has defensive buffs, you want them moving first so your buffs go up before the enemy hits you. Keep that in mind when allocating those nifty permanent Agility stat increases. :)

Put the Lanser Statue Skills on Victor
They all seem to require 50 RP, which is easier for Victor to muster quickly due to his Rage & Berserker skills.

Don't Be Afraid of Victor's Berserker Skill
I instinctively shied away from this skill because I didn't like how I didn't have control over Victor's target. I also thought he would spam regular attacks using it, so why bother when he has stronger RP-based attacks. Nope, he uses all of the skills at his disposal including the Lanser Statue skills mentioned earlier, enhanced by the Berserker atk stat boost. Load Victor up for bear with appropriate accessories and turn him loose on your enemies! It doesn't matter whom he hits if he does a gazillion dmg per turn, right? :D

Don't Be Afraid to Bench Victor and Alice
Let's face it, Victor is your primary melee damage dealer, and Alice is your primary healer. They are likely going to be in your lineup about 90% of the time, so much so that you get used to their presence in battle like a security blanket. However, several of the other classes are hybrids who can stand in for Victor or Alice's role, as well as fulfill another party need. For example, Borm the monk is a hybrid damage dealer/healer. His Chakra skills both heal and cure status ailments at the same time, something Alice's skills take two turns to do. Borm can assist an ailing partymate and then turn around and punch the enemy in the nose in those same two turns. Galadin is a tank/auxiliary healer hybrid. She can stand there soaking up damage while throwing heals around. Don't be afraid to bench your long-standing friends Victor and Alice if a tactical situation calls for a different skill set. They'll be right there waiting for you when you're done.
The Bestiary - Prologue
Please Note: enemies are susceptible to physical attacks unless otherwise noted. Status effects inflicted are described as (one) when it targets one party character per attack, or (multi) when it targets the entire party.

The Ore Cave Near Sea Breeze
  • Burrower - medium HP, can inflict poison (one)
  • Rabid Bat - low HP, can inflict blind (one)
  • Fungusoid - medium HP, can inflict poison (one), poison cloud (multi)
  • Imp - low HP, can confuse (multi), Dark (one)
  • Boss: Chimera - high HP, can inflict stun (one) or attack with ice breath (multi)

You don't have many skills when you begin the game. Alice joins you at the beginning of this dungeon, and she is a stellar healer. When dealing with multiple attackers, recommend targeting Rabid Bats or Fungusoid immediately with Victor's special attacks as they can inflict annoying status effects. The Burrower uses regular attacks more than poison. The boss fight is pretty straightforward. Whittle the Chimera's HP down with Victor's physical attacks, while Alice keeps them both alive with her heals.
The Bestiary - Act I The Riddari Paradigm
Please Note: enemies are susceptible to physical attacks unless otherwise noted. Status effects inflicted are described as (one) when it targets one party character per attack, or (multi) when it targets the entire party.

Riddari Mountains
  • Dire Hornet - low HP, high agility, can inflict poison (one)
  • Slimes - low HP, no effects inflicted, appear in large groups of five
  • Rabid Rat - low HP, can inflict stun (one)
  • Burrower - medium HP, can inflict poison (one)

Grasslands Around Riddari
  • Same enemies as Riddari Mountains
  • Dire Ferret - low HP, no effects
  • Python - medium HP, can inflict poison (one)

Thus begins your epic journey! Victor and Alice set off across the mountains to reach Riddari. The enemies in this area are still quite easy. The Dire Hornets can be a bit tricky to hit due to their high evasive stats. Recommend targetting them with Victor's special attacks. The Rabid Rat poses no particular offensive threat, but can also be annoying due to its stunning attacks. The Python appears alone, and can be targetted by a full party offensive to one shot it.

Side note: You'll come across a gravesite by the sea with a bag of gold. You can make the choice to take the gold or leave it (affects the honorable or dishonorable achievements). Alice provides a verbal warning each time the party encounters a choice that affects this pair of achievements.

Riddari Castle
  • Royal Guard - medium HP, no effects inflicted
  • Guard Dog - medium HP, no effects inflicted

Finn joins your party just before you enter the castle. His rogue stealth skills will prove quite useful. The enemies in the castle are not complicated, but can be a bit taxing on Alice's healing skills as it will take several rounds to kill them. The dining hall throws a back-to-back battle of four Royal Guards each at you. This can be challenging as you still lack in AOE attacks at this point. Have Alice throw Alchemist's Fire potions (many thanks to dev Oreo for the tip!).

Side note: There is a house in the bottom left-hand corner of Riddari with a locked door that Finn can lockpick. Choice of action affects the honorable/dishonorable achievements.

The Grasslands Enroute to Talik and Alm
  • Dire Ferret - low HP, no effects inflicted, high evasion
  • Python - medium HP, can inflict poison (one), weak to Ice
  • Man-Eating Plant - medium HP, can inflict poison (multi), or sleep (multi), weak to fire
  • Scorpion - medium HP, can inflict poison (one), weak to Ice
  • Orc - medium HP, no effects, weak to Ice

Once you reach Talik, Salome joins your party. Your offensive capabilities are now greatly expanded with her elemental magic. Enemies are getting stronger, so paying attention to elemental weakpoints can make the difference between an easy fight and getting roughed up.

The Python appears in groups of two here, but at this point your party should be strong enough to oneshot both of them in a single round. The Man-Eating Plant can be very annoying with its multi-target status effects.

Optional Boss - The Unknown Swordsman - high HP, can heal, blind (multi), blizzard (multi)

The Unknown Swordsman is quite strong with his magic spells and self-healing. Recommend Alice spamming Recovery and Victor and Finn tag-teaming their strongest melee attacks. Also, Alice's Force Wall and the Plains of Balance skill are useful here. Reward: Tempered Steel Axe.

The Alm Bridge
  • Royal Guard - see Riddari Castle section above
  • Lieutenant - high HP, resistant to physical attacks, attacks twice per round, no effects

You pass the Orc Cavern just prior to reaching the Alm Bridge. You could detour to the cave but recommend continuing to Alm first. The Royal Guards on the bridge appear in groups of two, and should be an absolute cakewalk for your party now. Steamrolling through the bridge gains you a level or two and some nice equipment. The Lieutenant is tough opponent. Keep plugging away with Salome's spells while Alice keeps everyone alive. Alm has a very nice gear shop with upgrades for your whole party.

Optional: The Orc Cavern
  • Orc - medium HP, no effects, weak to Ice
  • Orc war dog - medium HP, no effects
  • Blue Orc - medium HP, stun (multi), weak to Ice
  • Scorpion - medium HP, no effects, weak to Ice
  • Boss: Orc King - high HP, physical attack hits multi, no effects, weak to Ice & Poison

You should have picked up a Chill Bracelet by now, and Poe gives you another one. Equiping said bracelets on Victor and Finn, along with Salome's ice spells should help tremendously in this dungeon. The Orc King hits pretty hard. Use defense buffs on your squishier party members. Poe's quest reward is a Frost Flail for Alice. Also, one of Alm's residents gives 10 potions for killing the boss.

Enroute to Elnae
  • Man-Eating Plant - medium HP, poison (multi), or sleep (multi), weak to Fire
  • Scorpion - medium HP, no effects, weak to Ice

Groups of one each Man-Eating Plant and Scorpion appear on the way to Elnae. These shouldn't be much trouble if you're using ice-oriented gear. Recommend targetting Victor on the Man-Eating Plant as his melee attack is the strongest to one-shot and avoid annoying status effects.

Elnae
  • Lieutenant - high HP, resistant to physical attacks, attacks twice per round, no effects
  • Baiz - high HP, resistant to physical attacks, confusion (multi)

A cutscene begins as soon as you enter Elnae and you face Baiz and his lieutenants. You are not intended to win this fight, and indeed, Baiz and his buddies will wipe out your party without much trouble. When you wake up, the shipbuilder gives you a little rowboat and a mission to visit the Royal Riddari Crypt to retrieve an artifact there.

The Coastal Waters
  • Silver Barb - low HP, paralysis (one)
  • Jellyfish - medium HP, water (one), Tsunami (multi), weak to Lightning
  • Sahagin - medium HP, Magic Reflect, Tsunami (multi), Sleep (multi), weak to Lightning

Of these guys, the Jellyfish & the Sahagin can be the most annoying with their Tsunami water attack. The water creatures are not particularly difficult to kill, especially if Salome opens with a lightning AoE.

Optional Location: The island to the northeast of Alm has a pond location with some permanent stat increases.

Optional Boss: The Unknown Swordsman - Blizzard (multi)

The Unknown Swordsman is hanging out on the bigger desert island with a single tree on it east of Riddari. Reward: Rune Knife.

The Royal Riddari Crypt
  • Skeleton - low HP, paralysis (one), weak to Holy, Fire
  • Zombie - medium HP, paralysis (multi), weak to Holy, Fire
  • Ghost - medium HP, high evasion (resistant to melee), confusion (multi), poison (multi), flame (multi), weak to Holy
  • Boss: Ghost of Royal Mage- high HP, confusion (multi), flame (multi), Nightfall (multi), Ice II (one), paralyse (multi), weak to Fire & Holy
  • Bat Familiar - appears with above boss - low HP, vampire drain (one)

The Crypt here is, you guessed it, full of undead. Alice's Light skill is effective here, but unfortunately Alice will have her hands full healing the party. The Ghosts are very annoying in groups due to their confusion song and poison cloud spam. Recommend Alice attacking the most annoying enemy present with her Light skill on the first round and Salome setting everything else on fire. The Boss is quite tricky with its destructive multi-target spell spam. Victor's Rage skill, Alice's Force Wall buff, her Avalice's Boon (multi regen), Plains of Balance & Lake Effect skills are all quite useful here.

Side note: If you're attempting the honorable achievement, you'll want to refrain from peeking in all of the coffins. However, the coffins contain a number of useful permanent stat increases if you don't mind disturbing the dead.
The Bestiary - Act I The Riddari Paradigm Continued
After a tedious rowboat ride back to Elnae (see The Coastal Waters section above), the shipbuilder sends you off to Riddari to fence the broach for him.

Side note: You have an ethical decision on how to approach the shopkeeper (affects honorable achievements).

One more tedious rowboat trip, money delivered, and now we're off to the Tier Tower and a neighboring town called Sand.

The Desert & Grasslands Surrounding Sand
  • Red Slime - low HP, Fire (one), weak to Ice
  • Devourer - low HP, Poison (one or multi),
  • Cockatrice - medium HP, Stone Stare (one), Quake (multi), weak to Ice
  • Water Seeker - medium HP, Spark (multi), Heal II

Red Slimes can appear in very large swarms. Salome's Sleep and Blizzard spells, as well as switching to ice-oriented gear are of use here.

After reaching Sand, the party learns of another Swordbearer being held captive in nearby tower Tier. Storming the tower to rescue the Swordbearer is in order! Finn will exit your party, and Borm (a monk) will join the gang (note: if you plan on completing Warren's quest, do so before speaking to Borm at the thieves' guild as Finn is required). Also, be sure to check out Sand's weapon & armor shops, and the unmarked item shop in the western tent for some very nice accessories.

Optional: Warren's side quest
A diligent explorer will discover a side quest elsewhere in Sand to rescue a young man named Warren who ran off in the opposite direction of the tower. Warren is directly east of Sand on the sand peninsula in a tiny little tent, which you'll only see if you've spoken to his grandmother Eloise and have Finn in the party. After speaking to Warren, return to Sand and corner the thief in the storeroom of the Inn. Completing this quest (speaking to both Eloise and Warren in Sand) gets you an achievement and Warren's Sai (dagger, +12% evasion, def +20, luck +10, +10% magic evasion).

Optional Quest Boss: Thief - medium HP, poison (one)

Tier Tower
  • Magic Construct - low HP, Lightning Breath (multi)
  • Tierian Royal Guard - medium HP, no effects
  • Tierian Mage - low HP, Flame (multi), Blizzard (multi), Spark (multi), Poison (multi), Ice (one)
  • Rodent Familiar - low HP, Curse Weapon/Atk down (multi), Maim (one)
  • Experienced Tierian Mage (3rd floor only) - Ice II (one), Spark (multi), Poison (multi)
  • Boss: Steel Golum - high HP, melee resistant, Silence (multi)

Go downstairs to the basement first. The party's progress is halted on the second floor without the key from the mage in the basement. The tower enemies are rather irritating as they lack any handy elemental weaknesses and love to spam AoE skills. Recommend targetting Rodent Familiar first as it has the lowest HP and its Curse Weapon debuff is difficult to remove quickly. Victor's Rage, Borm's Claw, Salome's Sleep and Alice's full party regen skills will be useful here.

Just as the main party reaches the fourth floor, they are captured by Baiz. Oh no! Dun Dun Dun! Now we rejoin Finn on his solo quest to save the day. Finn gains an "panic button" skill which allows him to escape combat, so you're never really in any danger despite fighting solo. Once Finn reaches Galadin, things get more interesting. She is best classified as a superb tank with mediocre healing skills. Use Galadin's Provoke skill and then Finn can finish enemies off with his daggers while they wail on Galadin's armor.

After some A+ entertainment courtesy of Finn occurs, the entire party is reunited, and you can choose four party members to be active. This provides you with some more customizable defensive and offensive options, which is good because the Tier Tower boss awaits you at the front door. You'll want to configure the party heavily towards magic and attacks against magical def as the boss is heavily armored and physical attacks do no damage at first. After the characters comment that the boss looks weaker, you can start using melee again. Make sure someone in your party, preferably Alice, is wearing the Red Pendant to protect from the Steel Golum's silence attacks. The Steel Golum primarily uses physical attacks, so recommend using Galadin's Provoke skill and opening fire with Salome's magic, Alice's Light skill and Borm's skills attacking the magical def instead of physical def stat.


The Bestiary - Act II The King's Clout
After some further theatrics (poor Finn), the party is once more on the move east towards the town of Alabaster. Your boat is moved to the southeast corner of the continent. Make sure you reconfigure to ice-oriented gear before trekking across the desert (see section above on area surrounding Sand).

One tedious rowboat ride later (see The Coastal Waters section above), you set foot on your third continent. It can be hard to spot, but you're headed for a mountain tile with a little path coming down out of it to the south of your landing point.

Grasslands Near Alabaster
  • Air Nixie - low HP, high evasion, Wind (one), Tornado (multi), weak to Fire
  • Anaconda - low HP, poison (one), weak to Ice

Forestlands Near Alabaster
  • Plague Rat - low HP, poison (one), weak to Fire
  • Death Imp - low HP, poison (one), confusion (multi), Sudden Death (one)

None of these creatures are terribly hard. Equip Flame or Chill bracelets on your melee folks, and the Breeze Ring on your choice of partymate and have at it. The Air Nixie can be hard to hit physically due to their high evasion but Salome will cheerfully set them on fire. The Death Imp occasionally uses an attack that causes a party member to faint regardless of HP or Defence.

Alabaster Mountains
  • Vampire Bat - low HP, vampire drain (one), weak to Fire
  • Plague Rat - low HP, poison (one), weak to Fire
  • Anaconda - low HP, poison (one or multi), weak to Ice
  • Grizzly Bear - high HP, Maim (one), Rage

All the poison floating about gets annoying. The Vampire Bat's vampire drain skill does 250-400 HP per hit and doesn't seem to be affected by evasion. Recommend loading Galadin up for bear with defense and RP boosting accessories (or the Green Pendant when you find that halfway up the mountain), and then opening with Provoke. Meanwhile, your melee teammates have at it with Flame/Chill bracelets, while Salome declares open season. Recommend switching Alice out for Borm for his chakra skills. This is a section where the hybrid classes really shine. You can also use the skills of your inactive teammates outside of battle, so make use of Alice's heals even if she isn't frontline.

Great Forest Near Alabaster
  • Same creatures as Forest, Grasslands & Mountains above

Optional Boss: The Unknown Swordsman - high HP, acts twice per round, Ice II (one), Blizzard (multi), weak to MP dmg (Salome's Nightmare skill)

The foot of the Alabaster Mountains brings a great big forest, and an optional encounter with the Unknown Swordsman again. The Desert Wind skill fairs well here, as well as Victor's Rage, Alice's regen and buff skills, Borm's Wave Claw, and Galadin's tanking skills. The boss's weakpoint is difficult to get at given our available MP dmg skills. With his lack of physical resistance, melee spam works just fine as long as Alice/Galadin can keep up with defence buff and healing ice damage. Reward: Time Slip Cloak (10% chance of acting twice, +5% evasion).

Make sure you reconfigure your party before you leave the clearing again. Recommend putting Green Pendant and Breeze Ring on Galadin, and planning for fire and ice oriented offense for forestlands trek to Alabaster. Alabaster is to the northeast of the mountain exit.

Once you finally reach the town, enjoy some well-deserved rest, Mithril gear upgrades for the whole party, and be sure to check out the item shop for useful accessories. Check out some of the local optional attractions in the area, or head northeast around the foothills to continue your journey to the Mithril Mines.

Optional: Tricky Nixie
  • Boss: Tricky Nixie - medium HP, high evasion, Flame (one), Nuclear (multi), Ignite (multi), Life Drain (one), weak to Lightning
  • Anaconda (appears in second battle with above)
  • Grizzly Bear (appears in third battle with above)

Tricky Nixie is located at the Lanzer statue southeast of Alabaster. She offers a holy relic if you defeat her, and leads you on a merry chase through the forest with multiple battles. Recommend Salome targetting Tricky Nixie with her strongest Lightning skills as Tricky Nixie throws a lot of fire spells around. Reward: Blessed Ribbon (resists all status effects).

Optional: The Hidden Grotto
The Hidden Grotto is the lone small foothill tile in the southeastern most corner of the continent once you've crossed the bridge. Pick up some permanent stat increases here.

Optional: The Snake Pit
  • Python - low HP, poison (one)
  • Anaconda - low HP, poison (one or multi), weak to Ice
  • Basilisk - medium HP, Stone II (one), weak to Ice
  • Boss: Queen Snake - high HP, paralysis (multi), strong poison (multi), immobile (multi), weak to Ice

This tiny dungeon looks like a hole in the ground just north of the foothills. Her minions will likely be a cakewalk for your party, but the Queen herself will not be. Recommend using Chill Bracelets, Green Pendants, Salome's Ice spells, Borm's Chakra cleansing skills. Don't forget to go back to Alabaster and pick up your reward (8K gold).

The Mithril Mines
  • Elite Royal Guard - low HP, Immobile (one), weak to Dark
  • Grizzly Bear - high HP, Maim (one), Rage
  • Death Imp - low HP, poison (one), confusion (multi), Sudden Death (one)
  • Tarantula - medium HP, confusion (one), immobile (multi)
  • Mimic - high HP, Fire II (one), Flame II (multi), Poison (multi), Vampire drain (one)
  • Boss: Captain - high HP, Blind (one), weak to Dark

The Elite Royal Guards appear in groups of one to three, and don't pose any particular challenge. Watch out for the Mimics masquerading as the red treasure chests. Those little buggers have ridiculous HP and love to spam fire spells. The boss is two Elite Royal Guards and a Captain. The Captain fight drags on due to his high HP, but he doesn't pose much of a tactical challenge. Recommend equiping Blessed Ribbon on Galadin and have her hold down the fort with Provoke while Victor goes to town wearing a Vile Bracelet & a Rage Belt. Almost any party/gear/skill configuration will work here though.

The Epic Continues
Upon return to Alabaster, things go a little pear shaped. Salome, girl, you have problems. Lots of freaky stuff happens...and now we get to meet Abel. Abel is a swordsman who can change his weapon's elemental affinity, as well as spellsling different elements to Salome.
The Bestiary - Act II The King's Clout continued
Riddari Castle Dungeons
  • Blue Slime - low HP, Ice II (one), weak to Fire
  • Elite Royal Guard - low HP, Immobile (one), weak to Dark
  • Mimic - high HP, Fire II (one), Flame II (multi), Poison (multi), Vampire drain (one)

We rejoin our heroes as they, sans Alice, are fighting their way out of the Riddari Castle dungeon.

This place is full of Blue Slimes and they will be the bane of your existence. Appearing in swarms of anywhere from one to eight, these amorphous blobs sling Ice II around like candy. The party is hamstringed by the lack of Alice's heals and defensive buffs. For this floor, the best defence is a stellar offense. Salome is the MVP here. Equip a couple peeps with Vile & Flame Bracelets, and Salome with Speed Boots. Salome's Flame AoE should obliterate most if not all of the slimes on the opening round, leaving your remaining party members on cleanup. The Elite Royal Guards are much less effort. Abel has a Dark magic spell. They should go down fairly easily. For the Mimic, recommend incapaciting by any and all means at disposal in the first round (Victor's Reckless Strike, Abel's & Galadin's Soul Blade, Salome's Ice II etc).

Riddari Castle Hallways
  • Royal Berserker - medium HP, no effects, weak to Dark
  • Royal Rogue - low HP, high evasion, poison (one), weak to Dark
  • Royal Mage - low HP, poison (multi), Ice II (one), Fire (one)
  • Elite Royal Guard - low HP, Immobile (one), weak to Dark
  • Mimic - high HP, Fire II (one), Flame II (multi), Poison (multi), Vampire drain (one)
  • Boss: Lamia - high HP, attacks twice per round, Sleep (one), Stone (one), Water (one), Slow II (one), Mana Drain, Tsunami (multi), weak to Lightning

The first stairway on the left eventually leads to a treasury with lots of goodies. The first stairway on the right leads to Finn's buddy Biggs who sells weapons & armor. The second stairway on the left leads to a raw gold storeroom. The second stairway on the right leads to the roof, where there's a stairs down to a soldier's office, and the left side of the castle.

Victor fares poorly at hitting the Royal Rogues & Berserkers. Recommend switching him out. Green pendants are of use. Galadin's Provoke skill while wearing the Blessed Ribbon is of use. Finn's Flashbomb and Dagger Flurry skills shine here, especially if he's wearing the Vile Bracelet.

The Lamia is weak to Lightning -many thanks to Rookie (ZOE) for this intel-. Abel's Lightning ele attacks, Salome's Lightning spells, Victor's Rage/Berserk skills w/a Volt bracelet, Galadin's Rain of Javelins w/a Volt Bracelet -credit Rookie (ZOE)- are of use. Brown pendants to defend against the stone attacks are useful. This fight is an endurance race to kill the enemy before it kills you as you lack the healing/regen skills to really keep up with the Lamia's attacks.

I'm On A Boat (ft. T-Pain)
  • Bubbles - high HP, Stun (one), Water II (one)
  • Merman - medium HP, Tsunami (multi), weak to Lightning
  • Man-o-war - medium HP, Heal II, weak to Lightning
  • Water Nixie - low HP, high evasion, Tsunami (multi), weak to Lightning

Yeah! Way to go Alice! Our heroes tumble out the Riddari Castle sewer to discover their pimping new ride waiting on them. Unfortunately, the aquatic fauna aren't terribly friendly, so best not spend too much time out on the open waters. Let's make our way to...The Swordbearer Temple.
The Bestiary - Act III Fusilier's Might
While visiting the Swordbearer Temple, we discover an adorable stowaway and our next destination: a town named Dryden suffering from a plague of monsters. One ocean voyage later...

Dragonmouth Cave & Surrounding Area
  • Claw Beast - low HP, counterattacks physical attacks, weak to Water
  • Whump - medium HP, weak to Ice
  • Vampire Bat - low HP, vampire drain (one), weak to Fire
  • Earth Nixie - Stone II (one), Sleep (multi), Quake (multi), Recovery, weak to Ice

The enemies on the Fusilier continent are susceptible to elemental magic and some can counter physical attacks, so recommend reconfiguring the party for primarily magical offense.

Dryden Husk Lair
1st map:
  • Claw Beast & Whump from Dragonmouth Cave
2nd map:
  • Husk - medium HP, Maim (one), Tsunami (multi), Water (one)
  • Digested Human - medium HP, attacks twice, Deteriorate (one), Mana Drain (one), Poison (one)
  • Boss: Husk Queen - high HP, attacks twice, Deteriorate (multi), Ignite (multi), Maim (one), Poison (multi), Tsunami (multi), Mana Drain (one), weak to Lightning

EPILEPSY WARNING: FLASHING LIGHTS. The second map of this dungeon features water that slowly poisons the party as they walk through it and the whole screen flashes red at every step to show you're losing health.
11/3/19 Edit: Dev Oreo promised an update so poison immunity accessories prevent poisoning outside of battle. This change cannot come fast enough! Ugh!

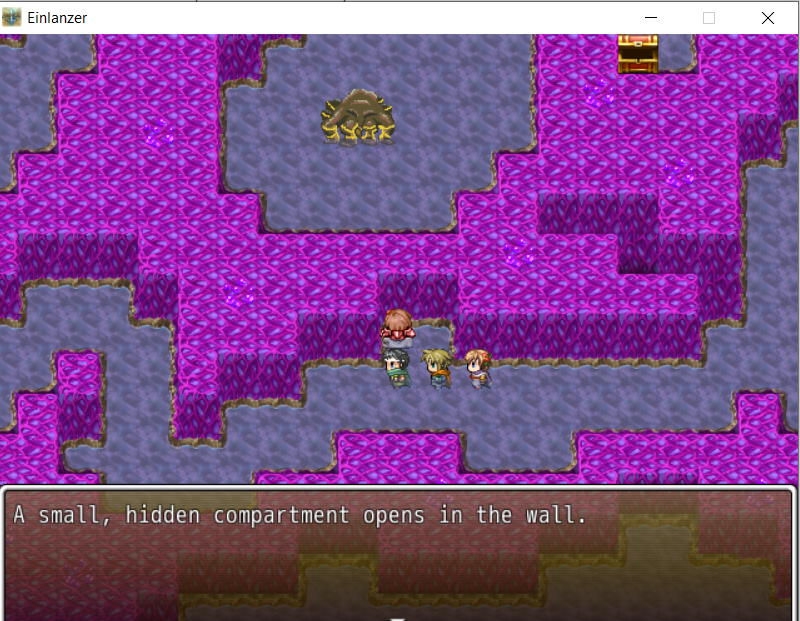
The location of the hidden compartment so y'all don't have to spend any extra time with the dang flashing lights -.-


Boss fight: The Deteriorate status effect cannot be removed and slowly leeches health. Volt Bracelets, Green Pendants (for poison) and Black Pendants (for fire) are useful. Alice's Recovery skill is mandatory. While Salome & Abel can use lightning-oriented skills, both are very squishy and hard to keep alive in this situation. Victor, Finn & Galadin all fare better at staying alive. Recommend loading them up with Volt bracelets and going to town.

After defeating the Husk Queen, return to Dryden for some well-deserved rest and gear upgrades. Head out the northern entrance of town towards the Dryden Passage, or check out the optional fun in the area.

Optional Boss: The Unknown Swordsman - attacks twice, Life Drain (one), Ice III (one), Blizzard II (multi), Blind (one)

Shen is standing by the edge of a cliff nearby the Husk Lair. Equip as many magic defence or magic reflecting accessories as you can, and Green Pendants for the Blind effect if you have the slots. Equip Alice with speed boots to get her defensive and regen buffs up as quickly as possible, and then turtle down. The key to defeating Shen in this encounter is amping the party's magical defences and reflecting as much of Shen's magic back at him as possible. Reward: Genji Gloves (allows second melee weapon hit per turn).

Dryden Passage
  • Whump - medium HP, Stun (one), weak to Ice
  • Yellow Slime - low HP, Lightning II (one), weak to Stone
  • Claw Beast - low HP, counterattacks physical attacks, weak to Water

This dungeon features an adorable character-building cutscene in the middle (be advised that your party formation is unexpectedly changed following the cutscene, so remember to reconfigure). The Whumps usually appear in groups of two, or a single Whump flanked by two Claw Beasts.

Once on the other side, continue to Fusilier. Fusilier's shops offer the same gear as Dryden, so stock up on anything you didn't already grab. The accessory shop offers a whole line of elemental protection rings. There is also a wagon service to Dryden for 500 gold.

After an audience with King Fusilier, he joins the party as a samurai for the journey to the next town, Kuli. King Fusilier is lvl 42 when he joins the party, likely quite a bit higher than our travelling band of Swordbearers. Kuli is to the south of Fusilier.

Optional: Poe's Tent - Poe offers a new side quest to gather 10 Whump Stones. Chances are good that you've gathered most of them already just wandering the area. Reward: Time Charm (50% chance of inflicting Slow)

Optional: Hidden Cave/Buried Fort
  • Bombardier Beetle - weak to Stone
  • Lingering Soul - attacks twice per turn, high evasion, counterattack physical attacks, Dark II (one), Confusion (one), Nightfall (multi), Silence (multi), weak to Holy
  • Samurai Ghost - no effects, weak to Holy, Fire
  • Cave Bear - high HP, attacks twice per turn, Rage, Great Cleave (multi)
  • Ancient Basilisk - high HP, Stone (multi), Burst II (one), weak to Ice

The historian in Fusilier wants a relic from this Buried Fort to the west of Fusilier. This is the world's most tedious dungeon with locked doors and moving pathways. If you have King Fusilier in your party, he can translate the various inscriptions hanging on the walls -credit Rookie (Zoe)-. Recommend Dark Rings & Red Pendants. Galadin struggles to hit the Lingering Souls with her Holy attacks. Recommend using high evasion to avoid being hit while Alice charges her 50 rp Avalice's Will skill. Both Finn & Borm excel in this area. Salome's Fire spells, and any magic reflective accessories are also very useful.

The Ancient Basilisk attacks you directly once you read the inscription on the hero statue, so be ready. The boss periodically throws up a strong defensive buff, so recommend Abel use his Dispel skill. Chill Bracelets & Brown Pendants are of use, as are Salome & Abel's ice-oriented skills. The biggest problem is the boss's high HP, and he's immune to poison and fire, so this fight just takes a while. Reward from historian: Minerva's Plate (resist poison, stun, silence, paralysis, blind & stone)

South of the Fusilier Wall
  • Whump - medium HP, weak to Ice
  • Earth Nixie - Stone II (one), Sleep (multi), Quake (multi), Recovery, weak to Ice
  • Fire Nixie - Sleep (multi), Lightning (multi), Fire II (one), Flame (multi), weak to Water

The enemies here are similar to those encountered previously. Recommend targetting any Nixie with offensive magic first as they like to throw destructive spells around. You may also want to equip Blue Pendants to protect from Sleep.

Once we arrive at Kuli, we find that unfortunately other parties have arrived first. Yikes! After a cutscene, the party finds itself facing a battle against six Royal Guards from Riddari. If you remember from Riddari Castle, the Royal Guards are weak to Dark. Abel's Nightfall spell is highly effective, as well as any melee using a Vile bracelet.

Following this encounter, King Fusilier wants an escort to the nearby Ancient Castle Ruins. This is great, because a local mage in Kuli is offering a quest in that location. Kuli's weapon & armor shops are the same as Dryden & Fusilier's, but the accessory shop offers some new goods. There's also a fortune-teller who provides a hint of where to go next.

Side note: There's an opportunity to assist an old lady in Kuli (affects the honorable achievements).

Ancient Castle Ruins
  • Cursed Child - low HP, can attack twice, Poison (one), Confusion (one)
  • Walking Dead - medium HP, strong melee attack, weak to Holy, Fire
  • Ancient Warrior - medium HP, Confusion (one), Paralyse (one), weak to Holy, Fire
  • Banshee - low HP, high evasion, Blind (multi), Flame II (multi), Poison (multi), weak to Holy, Fire

The Walking Dead hit incredibly hard and appear to ignore defence. The Cursed Children appear in groups of up to four. Recommend equiping Borm with an Intimidation broach and switching him in as the party tank for his evasion & counterattack skills. King Fusilier cannot be equipped with additional accessories, but he comes with a Blessed Ribbon and his melee attacks are very strong. Green Pendants to protect against poison are useful here.
The Bestiary - Act III Fusilier's Might continued
Once you reach the third floor library, some cute stuff happens. Don't forget to check in at Kuli and receive your tablet quest reward on your way back to Fusilier. Upon arrival at Fusilier, it doesn't take our heroes long to find the traitor in King Fusilier's staff.

Boss: General Kyra - high HP, counters physical attacks, reflects magic, attacks twice per turn, Heal II, Silence (one), Mana Drain (one), Maim (one), Poison (multi)

This boss fight is tricky as you have very limited offence that they can't turn against you. Borm's Counterattack & Ki Burst skills are effective at doing damage without triggering a counter. Equip him with an Intimidation Broach. If the attacking party member has high evasion, the boss's counter will likely miss. About half of your party will only be along to provide buffs. Alice's Avalice's Boon & Embrace skills are effective. Salome's Invisibility skill is useful for adding evasion. Pop that on Finn, especially with the Lake Effect skill, and he can melee the boss with impunity. Green Pendants or Immunity Rings are useful for protection.

Following some very sad events, we next pick up with our heroes as they prepare to depart Fusilier enroute to Tier Tower again to destroy the evil crystal controlling the Riddari King and soldiers. Lucille finally joins our party. She is an archer/bard-type hybrid with mana-based buffing skills.

Airship Battle
  • Gargoyle - low HP, attacks twice, Immobile (multi), Paralyse (multi), Maim (one), immune to Stone, weak to Wind

It doesn't take long for trouble to find our intrepid adventurers. The Fusilier airships are attacked enroute. The Gargoyle's Paralysis Breath spam can be annoying. They are susceptible to melee attacks though, so load your peeps up with Breeze Bracelets and Blue Pendants and have at it.

Tier Tower Upper Floors
  • Master Tieran Mages - low HP, Fire III (one), Ice III (one), Lightning III (one), Instant Death (one), Flame II (multi), Poison (multi), Blizzard II (multi), Magic Removal (multi)
  • Boss: General Baiz - high HP, attacks twice, counterattacks physical attacks, Giga Drain (one), Bio III (one), Confusion (multi), Darkfall II (multi), Spark III (multi), weak to Dark, MP dmg

Upon entering the tower, the party will encounter back-to-back fights with a group of four Master Tieran Mages, and then General Baiz. The party is healed between fights though. The mages throw a lot of magic around but they are reasonably low HP and susceptible to Sleep, Poison & Fire. Equip your folks with Red Pendants, Dark rings, magic resistant or reflective accessories and declare open season! For Baiz, a magical offense is best due to his counterattack. Be sure to employ defensive buffs as some of his magical spells are quite nasty. Abel's Slow & Dark magic skills, Salome's Nightmare & Dark Wrath skills are particularly effective.
The Bestiary - Act IV Three Pillars to the Gods
One exceedingly long cutscene later, Borm has left the party to train to become a Swordbearer. Meanwhile, the rest of the party follows King Fusilier back to his home. The mission now is to find and explore the three temples to the gods. The first one is nearby but our heroes must trek through a poisonous swamp to reach it. Immunity Rings to the rescue!

Fetid Swamp
  • Harpy - low HP, immune to magic, Wind II (one), Tornado (multi), Confusion (multi)
  • Spore - medium HP, immune to magic, Bio III (one), Plague II (multi), weak to Fire (melee only), Poison
  • Poison Ooze - low HP, immune to magic, Bio II (one), Putrid Cloud (multi), weak to Fire (melee only), Poison

EPILEPSY WARNING: FLASHING LIGHTS. The swamp acts similarly to the map in Dryden Passage by constantly leeching health and the screen flashes red at every step. It's headache inducing.

Flame Bracelets, Immunity Rings, Finn's Poison Dart skill & Abel's Fire sword skills are useful. Since the enemies are magic resistant, your melee folks will carry the day here. If a Poison Ooze appears, target it first as its Putrid Cloud attack adds too many status effects to even list.

Temple of Yvalak
  • Drop Beast - low HP, attacks twice, Blind (one), weak to Lightning
  • Water Elemental - medium HP, Confusion (multi), Stun (multi), weak to Lightning
  • Spore - medium HP, immune to magic, Bio III (one), Plague II (multi), weak to Fire (melee only), Poison
  • King Crab - medium HP, attacks twice, Water II (one), Stun (one), weak to Lightning
  • Boss: Sea Dragon - high HP, attacks twice, Instant Death (one), Slow II (one), Plague II (multi), Tsunami II (multi), Putrid Cloud (multi), Immobile (multi), weak to Lightning & Poison

The regular mobs in this dungeon are straight-forward and capably dispatched by any combination of party members wielding Volt Bracelets and Lightning-oriented abilities. The boss at the very top of the temple appears as soon as you examine the magical gate, and throws an absolute deluge of powerful water spells. Lucille's Head Shot, magical defence & agility buffs, Abel's magical defence buff (which stacks on Lucille's) & Lightning-oriented skills are useful. Finn's Dagger & Poison Dart skills are effective but Finn struggles defensively against the spell onslaught despite agility buffs. Liquid rings, Immunity rings, and any magic resistant/reflective accessories are helpful.

Note: You can drop down between floors. Look for the one square surrounded by walkable path. Drop down to pick up hard to access goodies, and to exit the temple quickly. -credit Rookie (Zoe)-

One incredibly tedious and headache-inducing slog through the poisonous swamp later, our heroes are resting at the Fusilier Inn. The Einlanzer directs them to travel to... The Temple of Lanzer. To get there, our heroes must ocean voyage back to the 2nd continent and then traverse a large forest. Unlike other forested map areas, this one opens a dungeon as soon as you set foot in it.

Lanzer Forest
  • Hobgoblin - low HP, Stun (one), Cleave (multi), Immobile (one), weak to Ice
  • Plague Blossom - low HP, high evasion, Plague Cloud (multi), weak to Fire
  • Demon - low HP, Instant Death (one), Confusion (multi), weak to Holy
  • Ank-heg - medium HP, Berserk (one), Stun (one), weak to Ice
  • Gold Nixie - low HP, high evasion, Blind & Stun (one)

The characters comment that making a map might be useful upon entering this dungeon, and indeed this forest has lots of winding paths across twenty screens to explore. Tactically, the enemies in this forest aren't very difficult. Immunity Rings are useful for the poison. Recommend putting a Angel Pendant and the Blessed Ribbon on Alice to avoid her getting one-shotted by a Demon or wandering off script after a Berserk attack by a Ank-heg. Also, most enemies possess enough evasion to give your melee folks trouble, so configure to primarily magical offense.

Temple of Lanzer
  • Gargoyle - low HP, attacks twice, Immobile (multi), Paralyse (multi), Maim (one), immune to Stone, weak to Wind
  • Ank-heg - medium HP, Berserk (one), Stun (one), weak to Ice
  • Basilisk - medium HP, Stone II (one), weak to Ice
  • Earth Elemental - medium HP, acts twice per turn, Stone Stare (one), Stone II (one), Quake (multi), Paralyse (multi), weak to Ice
  • Assassin (3rd floor & up) - low HP, Blind (one), Flame II (multi), Nightfall (multi), weak to Lightning
  • Royal Guard (5th floor only) - low HP, no effects inflicted
  • Mini-boss: Stone Golem (6th floor only) - attacks twice, resistant to physical attacks, Stone II (one), Paralyse (multi), weak to Ice
  • Boss: Earth Dragon - attacks twice per turn, Stone II (one), Quake II (multi), Immobile (multi), weak to Ice

Most of the regular mobs in the temple are weak to Ice, so build your offence around that. Similar to the forest outside, melee attacks are not particularly effective, so Salome will be MVP.

Once you reach the 6th floor, one of the random encounters is a Stone Golem. Upon reaching the boss room at top of the temple, our heroes encounter Baiz, who sics a group of 4 Assassins on the party. Unlike the assassins on the lower floors, these guys can throw poison darts, and those do a lot of damage. Recommend equipping Salome with Speed Boots and letting loose with her strongest Lightning AoE to avoid poison darts.

The boss guarding the magical gate is an Earth Dragon, and you are intended to lose the first round with it for story purposes. You are healed, and given the opportunity to reconfigure the party & equipment for a second round vs the Earth Dragon. Chill Bracelets & Ground Rings are useful. Salome & Abel's ice-oriented skills, and the Poisonous Deluge skill are very effective. Interlocking Lucille & Abel's magical defense buffs is effective.

Now that the party has acquired the completed Amulet of Canaan, the Princess can fly. Safe and speedy transport! Before tackling temple #3, our heroes decide to check in on Borm.

Meanwhile, Borm is having a rough time of things on his final pilgrimage to become a Swordbearer...

Mysterious Mountaintop
  • Werewolf - medium HP, weak to Fire
  • Vampire Bat - low HP, high evasion, Vampire (one), Confusion (multi), weak to Fire
  • Gold Nixie - low HP, high evasion, Blind & Stun (one)
  • Purple Slime - low HP, Dark II (one), Slow (one)
  • Boss: Water Fiend - medium HP, Water II (one), Giga Drain (one), Tsunami II (multi)

Borm is joined on his quest by hunter Ratt, who has a number of useful bow and debuffiing skills. The Vampire Bat's & Gold Nixie's evasion can make it difficult for Borm to land a physical hit, but Ratt's Aimed Shot skill & Borm's Ki Burst will take them out. The Purple Slimes can get tricky as they appear in swarms of up to eight, and Borm & Ratt lack in AoE options. Equip the True Knight Belt or an Intimidation Broach on Borm, as Ratt is unused to the adventuring life and rather squishy. For the boss fight, Liquid Rings are useful.

Dun dun dun, scary events happen. The entire group of Swordbearers is reunited once more, but what will become of our favorite heroes now?
The Bestiary - Act IV Three Pillars to the Gods continued
Our heroes are off to the fourth continent, the snowbound home of the dwarfs. Check out the local optional attractions in the area, or head straight for Nynnyaw in the northwest.

Optional Location: One of the southern-most islands has an igloo on it, with some stat increases and a new spear inside.

Snowy Forest Enroute to Nynnyaw
  • Ice Whump - medium HP, immune to magic, Stone II (one), Quake II (multi), Silence (multi), Poison (multi), weak to Ice (melee only)
  • Ice Nixie - low HP, high evasion, Ice III (one), Recovery III, Blizzard II (multi), weak to Fire
  • Dwarven Sentry - medium HP, deflects magic, Cleave (multi), Paralyse (multi)
  • Frozen Child - low HP, attacks twice per turn, Confusion (one), Slow (one), Poison (one), weak to Stone

Recommend reconfiguring your party to a well-rounded mix of melee and magic offense. Chill bracelets & Ground rings are useful in this area. Target the Ice Nixies with magic or bow attacks due to their high evasion. The Frozen Children are primarily annoying due to their status effects.

Optional Location: Frozen Valley
The Unknown Swordsman - attacks twice, Conflagration (one), Life Drain (one), Ice III (one), Blizzard II (multi), Silence (multi), weak to Poison

It looks like a single dead tree on the narrow peninsula north of the Lanzer statue. Cold Rings & Poison Barbs are useful. Finn's Poison Dart, Lucille's Leopard Line Dance & the Poisonous Deluge skill are useful. Victor using the Undying Rage skill while wearing the True Knight Belt or Intimidation Broach is effective.

Once at Nynnyaw, check out the weapon, armor & accessory shops, and talk to the Dwarven Captain. The discount shop offers a side quest to retrieve some stolen ingredients. One house offers a treasure chest finding game (Dev Oreo wrote a guide on where to find them). Once ready, head out the western gate towards the Titanium mine.

Side note: You will have the choice to offer the weapon shopkeeper a sack of raw gold, assuming you picked it up in Riddari castle. Offering it gives you access to better Titanium weapons & armor on the second floor of the shop. The Dwarven Captain gives you access to these same items as a reward for slaying the Flesh Golem in the Titanium Mine.

Titanium Mine
  • Fleshling - medium HP, Regenerates, Giga Drain (one), Dark II (one), Nightfall (multi)
  • Brownie - low HP, high evasion, Dispel Ally (one), Starlight (multi), Poison (multi), Paralyse (multi), weak to Ice
  • Dwarven Sentry - medium HP, deflects magic, Cleave (multi), Paralyse (multi)
  • Frozen Child - low HP, attacks twice per turn, Confusion (one), Slow (one), Poison (one), weak to Stone
  • Ice Whump - medium HP, immune to magic, Stone II (one), Quake II (multi), Silence (multi), Poison (multi), weak to Ice (melee only)
  • Boss: Flesh Golem - high HP, attacks twice per turn, regenerates, resists Poison & Dark, Absorb -makes a character faint - (one), Bio III (one), Sicken -multiple debuffs- (multi), Plague II (multi), Putrid Cloud (multi)

Side note: There's an injured cat just inside the mine entrance. You have the choice to heal it with an elixer (affects the honorable achievements).

The Brownies are invisible. It can be disconcerting to be attacked by seemingly empty space. Immunity Rings and Chill Bracelets are useful here. Watch out for the Dwarven Sentry that deflects magic back to the caster. Kill them before you cast AoEs, or you have a rebound problem.

The rotten log spawns three back-to-back fights of maybe two-three Brownies each? It's hard to tell when they're invisible. xD

The boss is brutal with all the status effects & debuffs. Immunity Rings & Blessed Ribbons are useful. Abel's Dispel skill is useful. A high evasion strategy is effective at avoiding the effects in the first place. Otherwise, you just need to cause more damage than the boss's regen gains every turn.
The Colisseum
Located to the west of the Swordbearer temple by the mountain ridge, the Colisseum is accessible by ship. There are ten rounds, and you will fight them consecutively until you fail to win a round. You will be healed and allowed to save, and reconfigure the party after each round. Each attempt to run the Colisseum costs 2000 gold. Subsequent attempts begin at round 1 again.

Round 1: Red Orc - Cleave (multi), weak to Ice
Reward: Elixer

Round 2: Symbiote - attacks three times per round, Life Drain (one), Nightfall (multi)
Reward: One of every type of permanent Stat increase

Round 3: Troll - Regeneration, Stun (multi), Great Cleave (multi), immune to Ignite & Poison, weak to Fire
Reward: Genji Gloves

Round 4: Armored Bull - resists physical & magical attacks, Ice Breath (multi), Nuclear (multi), Paralyse (multi)
Reward: 10 power-ups

Ignite & Poison will work, Salome's non-ele skills like Burst & Nuclear work, Borm's Ki Burst works.

Round 5: Rainbow Slime - attacks twice per round, Quake (multi), Nightfall (multi), Tornado (multi), Spark II (multi), Tsunami (multi), Starlight (multi)
Reward: 10 Elixers

Ridiculous AoE spell spam. Recommend High evasion strategy with magic reflective accessories & magic defence buffs.

Round 6: Death Wraith - attacks twice per round, Instant Death (one), Nightfall II (multi), Deteriorate (multi), Ignite (multi), Poison Cloud (multi), weak to Holy, Fire
Reward: Blessed Ribbon

This boss fights similarly to the Ghost of the Royal Mage in the Riddari Royal Crypt. Dark Rings are useful, as are Holy/Flame Bracelets and Green Pendants. Of the skills listed above, this boss is most likely to spam Nightfall.

Round 7: Changeling - attacks twice per round, Rotating Ice, Lightning & Fire AoEs, counterattacks physical damage, Confusion (multi), Sleep (multi)
Reward: Mirror Shield

Ice, Lightning, Fire, repeat. The Changeling changes element every round in this specific order. The color it is indicates the element it just used. Ice is weak to Fire, Lightning is weak to Stone & Fire is weak to Water. Stack magical defence buffs, and anticipate the next weakpoint element in sequence.

Round 8: Death Bloom: attacks twice per round, Vampire (one), Bio III (one), Putrid Cloud (multi), Plague II (multi), resists Ignite & Poison, weak to Fire
Reward: Runic Plate Mail (+def & +mdef 135)

This boss loves to spam Putrid Cloud, which adds a lot of status effects. You have one, maybe two Blessed Ribbons assuming you've taken more than one attempt to beat the Colisseum. Keeping everyone free of status effects long enough to wear down the boss is a problem. Abel's Fire and Delta Weapon, Salome's Fire skills, Victor's Rage skills w/a Flame Bracelet, Lucille's Poison resist are all effective. Immunity rings, and the previously mentioned Blessed Ribbons are effective.

Round 9: Void Demon: attacks twice, Astral Furor, Nightfall II (multi), Flame III (multi)

Yeah, okay, this boss is impossible at my current party lvl 50. TBC later.

82 Comments
Reedtanguerra  [author] 11 Feb, 2024 @ 1:29pm 
@Lost Froggy. Ooh. I don't think I tried subbing in Ratt. I'll have to check that out next time I'm playing Einlanzer.
Lost Froggy 10 Feb, 2024 @ 6:14pm 
okay so I as a level 48 manage to make it all the way to Tiamat (round 10) without a guide. She then handed me my internal organs "is this your spleen sir?"

I mostly relied on Borm and Ratt. Borm had ability to do both physical or magical damage so I kept with that since i didn't know what was coming next. That worked out. His Chakra being both a cure and a heal in one go saved me several times as well. But it was really Ratt's debuffs that pretty well carried me.

Until Tia. There's just no way to beat Tia this early, need to come back later when I am stronger.
Merim 19 Jul, 2021 @ 6:59pm 
I was able to beat Death Wraith without too much of a hassle with Angel Pendant. Prevents you from getting Instant Death status, will always fail. You'll need it if you want to prevent your team from dying.
Herr Glaube 20 Aug, 2020 @ 9:58pm 
Thought i'd mention that you can walk back into the Riddari Guard's Quarters right after you auto-leave and pick up any treasure you missed(or couldn't reach) the first time.
Rookie (ZOE) 24 Jun, 2020 @ 8:49pm 
I still managed to finish the main story before that drive-killing nerf happened, so I guess I can consider myself quite lucky I suppose. ^^
Reedtanguerra  [author] 20 Jun, 2020 @ 10:02am 
@Rookie (ZOE) I do want to finish this. I personally play games like I have ADHD, so actually finishing long narrative games is a bit of a problem. Now shhh fun distracting people while I somehow make it through my second professional credential exam. I'll happily get lost in Einlanzer with you all after 12pm on June 29th! :D
Rookie (ZOE) 20 Jun, 2020 @ 9:17am 
My drive for this title is pretty much dead anyways, especially with the aforementioned nerf to the skill that REALLY helped get past annoying bosses, such as the one when you temporarily lack your white mage obviously.
Reedtanguerra  [author] 16 Jun, 2020 @ 10:29pm 
@DragonAstaXiel You are very kind to nudge me so politely to finish this walkthrough. My apologies that I don't have the time to play right now due to professional obligations. :)
DragonAstaXiel 15 Jun, 2020 @ 10:30am 
I wish there were a more extensive walkthrough of this game, considering it has been out a long while now ^.^ .. would certainly help those like me whom have a hard time recalling the scattered help through the game itself (^.^)
[NAG]Oreo  [developer] 1 Mar, 2019 @ 9:07pm 
I would say find other strategies to rely on and give it another shot. Try new things. There are a lot of different character combos/equipment/builds, etc. that are very strong if you try them out. I beat the game on Hard before release before many changes that made the game easier later, so it is possible. :-)