Take On Mars

Take On Mars

31 ratings
How To Pressurize A Habitat - Outpost-Style
By Mr. Monochrome [Hood Certified]
This step-by-step guide will show you how to properly pressurize an Outpost-Style habitat.
   
Award
Favorite
Favorited
Unfavorite
Step 1 - Prep Work
So you've finished building your habitat as shown in the screenshot below and now you want to pressurize it so you can work and live comfortably on Mars.


Before we continue will need to make a checklist so we know the inside is ready to go.

1. We need a 'Barrel Slot' wall piece, this will hold our barrels of O2, CO2 or Nitrogen.
2. We need a 'Life Support Module', this will provide O2, CO2 or Nitrogen to the habitat.
3. We need a 'Power Socket' wall piece, this will provide power to the habitat.

Referring to the screenshot above we can see these 'machines' on the back wall.

1. Our 'Barrel Slot' wall piece is on the right side and has barrels loaded onto it.
2. Our 'Life Support Module' is on the left side wall, has power and is functioning fine.
3. Our 'Power Socket' wall piece is also on the left side next to the Life Support Module.

Step 2 - Prep The Airlock (Inside The Habitat)
In the screenshot below you can see the 'Internal Airlock' we've constucted using the following:

1. A 'Door Frame with Floor' attaches to the floor below. (The white part connects to our 'Floor' piece)
2. An 'Airlock Door' is attached to the 'Door Frame with Floor'.

Step 3 - Prep The Airlock (Outside The Habitat)
On the outside of the habitat we attach a 'Corridor' piece to the opposite side of the 'Door Frame with Floor' piece. Then once we've made the corridor as long as we want using 'Corridor' pieces, we close it off with a 'Door Frame' and then an 'Airlock Door'.

As shown in the screenshot below.


The screnshot below shows an 'Airlock Door' opening correctly outward after being placed.

Step 4 - Time To Pressurize The Habitat
Now that we've prepped both the inside and outside of our habitat it's time to pressurize it. Go back inside your habitat and face the inner door.


Inside our habitat and facing the inner door.

In the screenshot above you can see we're back inside and we've left the inner door open. Now we need to look at the 'Life Support Module'.


Looking at the 'Life Support Module'.


A closer look

The controls are as follows:

Stop Icon
This button will stop any process (Pressurize/Depressurize)

Human Icon
0.3 - Sets habitat atmosphere to 0.33 kPa (Uses O2 Only)
1.0 - Sets habitat atmosphere to 1.0 kPa (Uses O2 & Nitrogen Only)

Plant Icon
0.3 - Sets habitat atmosphere to 0.33 kPa (Uses O2 & CO2 Only)
1.0 - Sets habitat atmosphere to 1.0 kPa (Uses O2, CO2 & Nitrogen)

EX. ATM
This setting will start filling your barrels (or huge resource tank) with the atmosphere of Mars. Mostly O2, CO2 and Nitrogen.

PRESSURE
Local - Displays the current pressure inside habitat. (Martian Habitat)
Exterior - Displays the current pressure outside habitat. (Martian Surface)
Martian Habitat: 0.3kPa (Safe), 1.0kPa (Safe). (Suit Required If Not Pressurized)
Mars Surface: 400-500Pa (Deadly, Suit Required On EVA).

STORAGE
320/1254 - The number on the left is how much of said resource you have (O2, CO2 or Nitrogen). The number on the right shows the required amount of resources needed (O2, CO2 or Nitrogen) to fill and pressurize the habitat.

LOCAL COMPOSITION
The current mixture of gases inside the habitat. If these are randomly changing the habitat is filled with martian atmosphere.

Is there a difference between the two settings Human or Plant?
No. You can use either human or plant setting to pressurize the habitat. This might change as Dram said the 'Plant' settings were suppose to make you dizzy/sick cause of the added gases. But at the moment you can use either one without any issues.

How many 'Life Support Modules' do I need to fill my habitat?
You will need 1 LSM per room built. If you have a single room habitat meaning one large 'base' a single LSM will do just fine, however the resources needing to pressurize will be higher vs. a multiple room base.

What constitutes a room for placing a 'Life Support Module'?
As explained in the previous Q/A, if you just built one large square habitat it will fill fine with just one 'LSM'. But if you've built sharp turns or rooms back to back they will require an 'LSM' seperate of your 'main room'.

F**K THIS IS HARD...... I KEEP DYING AND CAN'T FIND WHERE I SHOULD PUT AN LSM FOR A ROOM....F**K THIS GAME!
Well that isn't much of a question but.... Keep your suit on and walk around your base after you've finished it. If the HUD on your helmet doesn't show 'EXT. SAFE' after you've pressurized the habitat then you need to place an 'LSM' on the wall in that section of your habitat.


Step 5 - That's All Folks!
After selecting whichever atmosphere (Human or Plant) turn back around and face the airlock again.


Facing the airlock after selecting an ATM on the Life Support Module


At this point you should see the words 'EXT. SAFE' on your suit HUD. You should now be able to remove your suit. If you want to go outside now you just need to enter the airlock, close the door behind you, walk over to the outer door and push the 'Cycle' button on the airlock door. This will depressurize the 'airlock' and leave the habitat behind us pressurized. Don't forget your suit!!!
Additional Items - Huge Resource Tank
The huge resource tank can also be used to provide resources to the habitat. The screenshot below shows how to attach them properly.


A 'Huge Resource Tank' attached and providing Oxygen to our habitat.


This screenshot shows us 'how' it's all done.


Additional Items - Multi-Room Habitat
Here we have a multi-room habitat, notice anything different?


This type of habitat not only has airlocks but introduces hallways now.


So how do we pressurize a Habitat, Airlock and Hallway?


As we can see in the screenshot above we're inside one of these hallways. First off, if we need to, let's scroll all the way back up and refresh ourselves with how we pressurize a habitat with an airlock. Ok? Are we refreshed? So if we want to pressurize a habitat that has an airlock along with a hallway to another habitat and maybe another airlock? The formula would go something like this:

HAHAHA!!! Formulas... You thought I was gonna pull some math on you huh? Nah. Just make sure you open the door going into your hallway just like we did with the airlock.


Open the door where the LSM is located. It's behind us in this screenshot so we need to keep this door open to pressurize the hallway, the door at the other end needs to stay closed. Keep in mind hallways use regular doors not airlock-type doors. You can use airlock doors for your hallways but you might run into pressurization issues between habitats, airlocks and hallways.


Remember: 1 LSM per Room, Keep innermost door open to fill corridor, Airlock doors for going outside, (regular)Doors for hallways.


So we opened the hallway door and we opened the inner airlock door, now what?


Now we can select which atmosphere setting we want and then both the airlock and hallway will get pressurized along with our habitat! YAY!! GO US!


Remember: The bigger the habitat the more resources we need O2, CO2 or Nitrogen. Airlocks and Hallways add to the habitats size.
Glossary - Habitat Pieces
The following are screenshots showing the different parts used in this guide.


Door Frame with Floor


Door Frame


Corridors - Solid, Glass and Suit Holder


A door (L) and an Airlock door (R) - Don't mix these up!


An Airlock and Habitat/Living Quarters
12 Comments
guyinachair2 27 Jan, 2022 @ 5:17pm 
Good guide 10/10 How long did it take to make it.
PestMastah 14 Aug, 2019 @ 6:51pm 
Thanks! :D
Mr. Monochrome [Hood Certified]  [author] 14 Aug, 2019 @ 8:02am 
@PestMastah

"Btw.. you got an idea the ratio of normal barrel slots per room with a LS panel?"

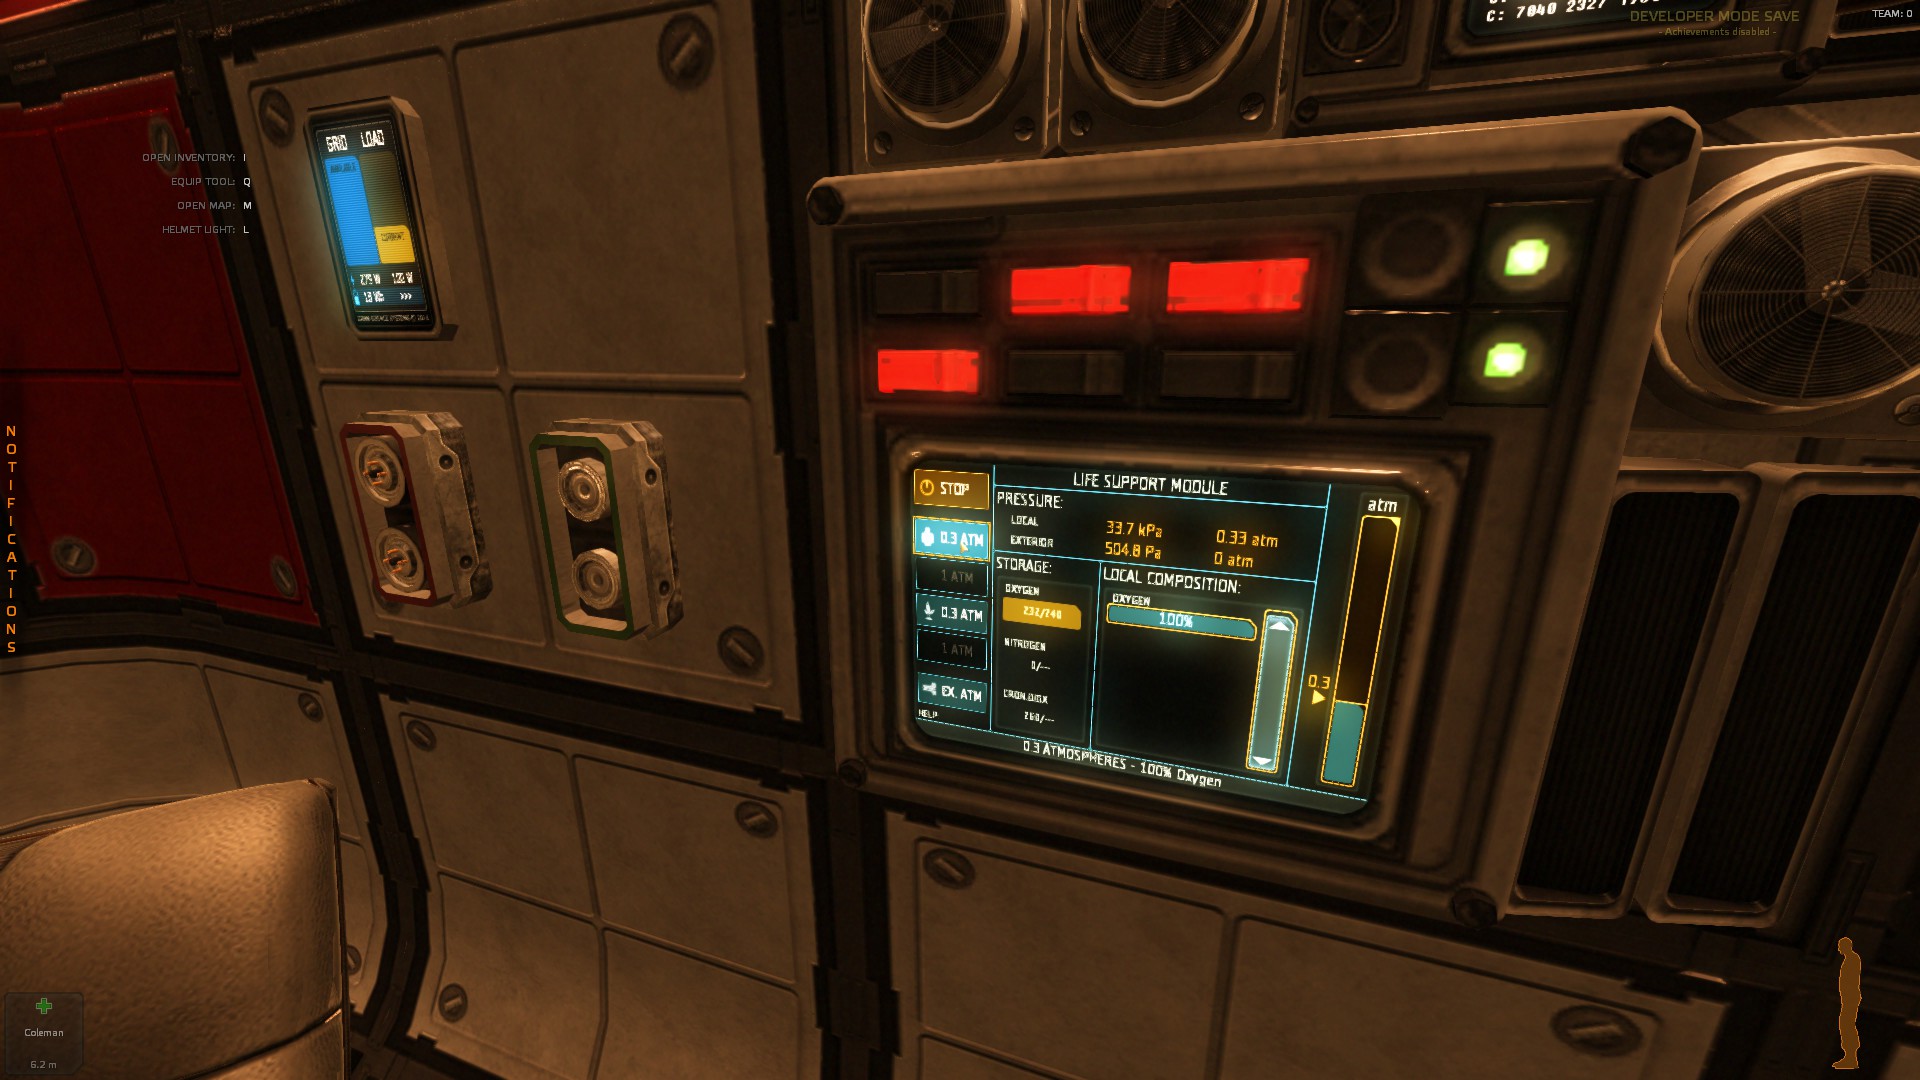
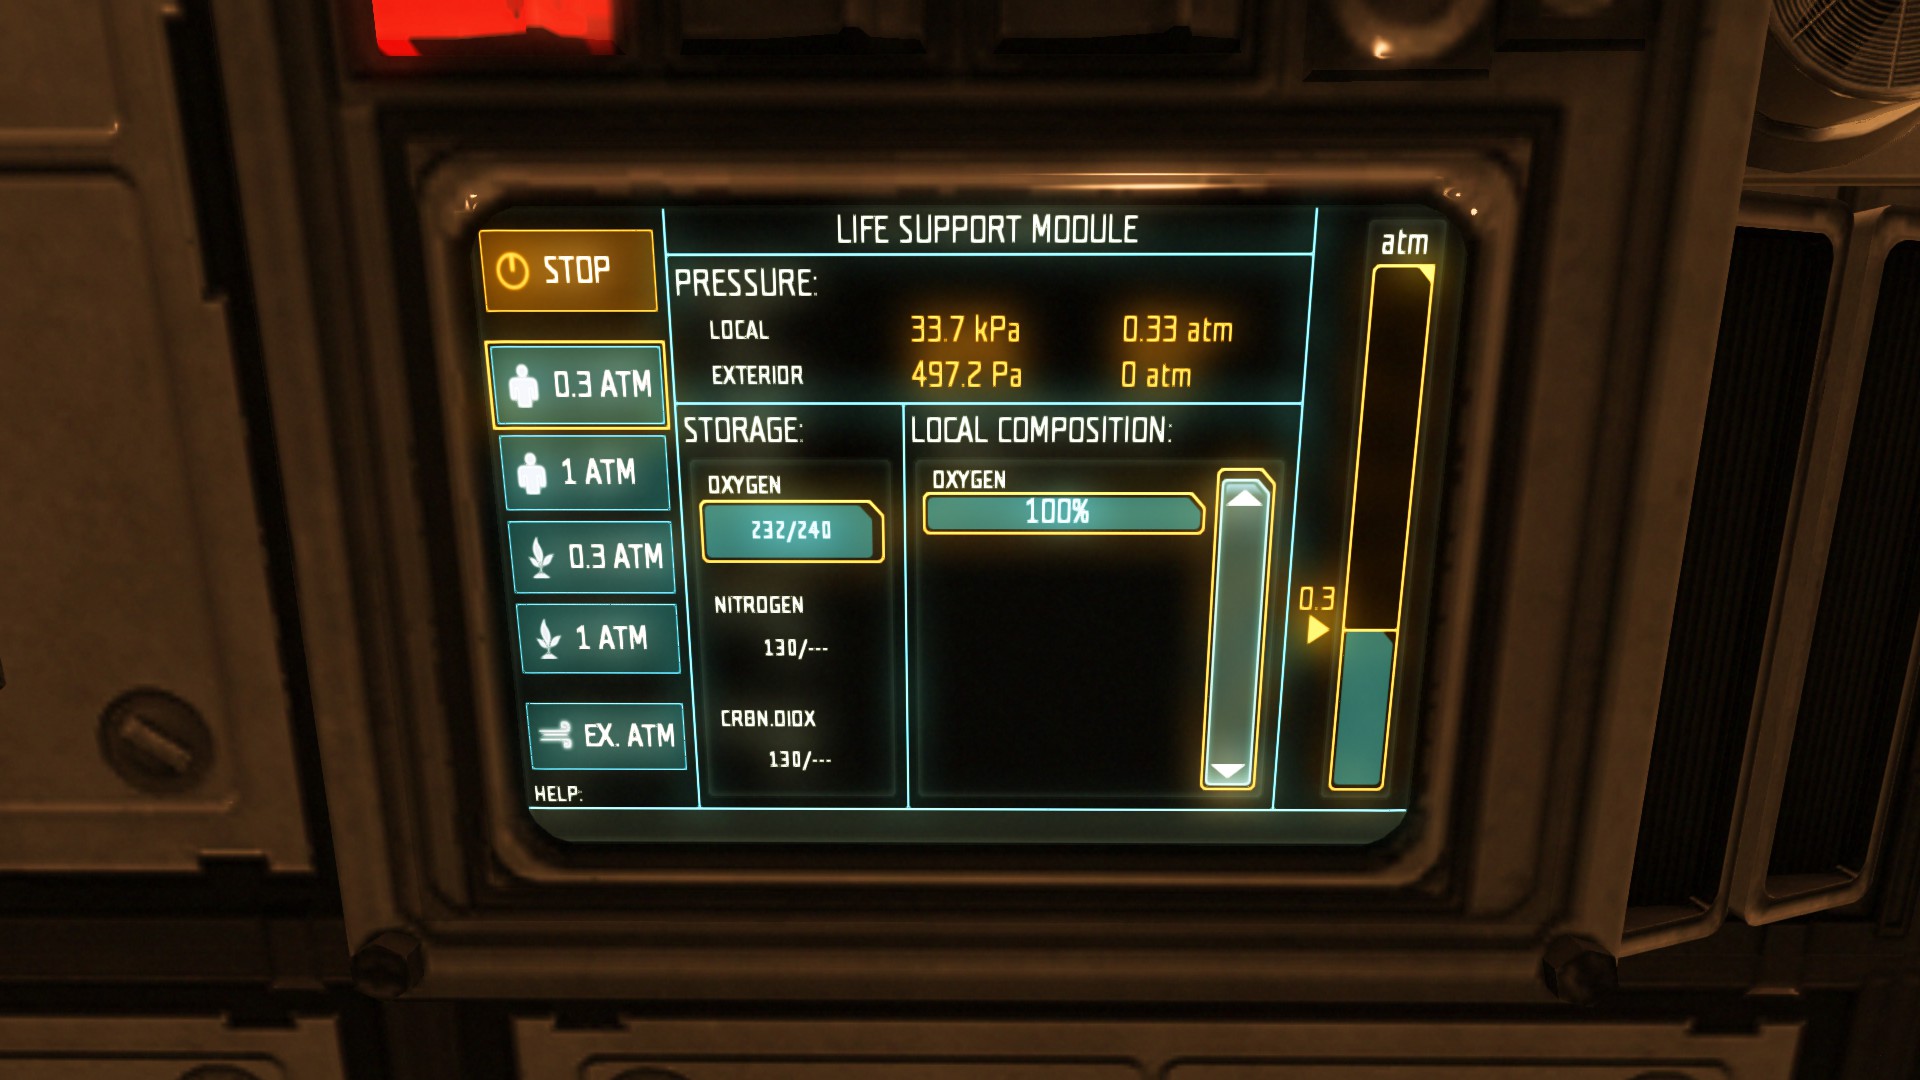
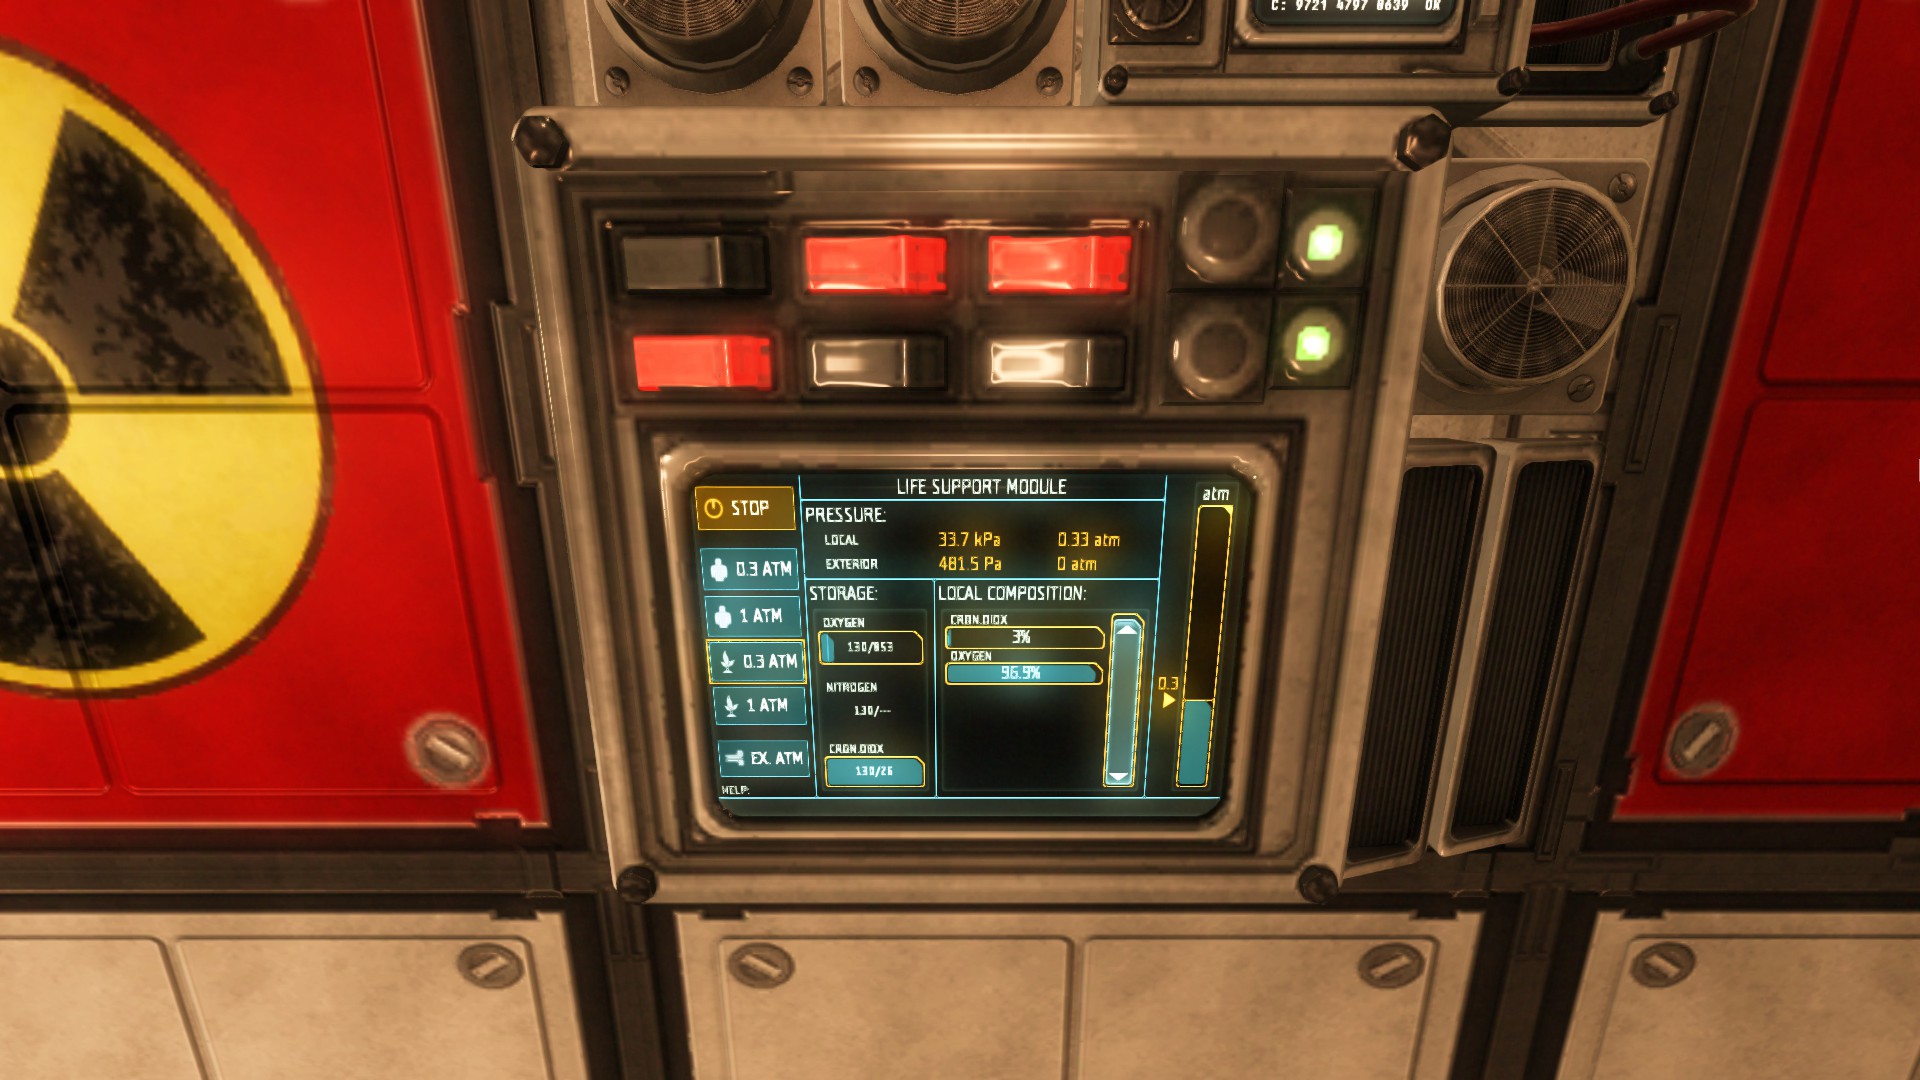
You can get an idea of how much you need of each resource if you check the 'STORAGE' section on the LSM. It will show you how much you have vs. how much you need to fill the habitat.

Also barrels hold I believe it's 120 or 150 max, and the large tank is like 2400 or something. So if you check the 'STORAGE' section on the LSM you can calculate how many barrels or tank of resource you'd need total.

Best I can answer your question.. hope that helps.
PestMastah 14 Aug, 2019 @ 7:33am 
You should have seen the dilemma I was in last night...

I had Nitrogen storing up in the tank.. (before I discovered the barrel slots)... so I removed it.. couldn't lift the tank! Too heavy. Used the mobile lab crane to lift it ... it was out of the hab for a day or so.. decided to reinstall it. Took days!

I had to use a combination of fork lift... mobile lab crane magnet..(even broke the magnet once-- quit... reloaded) Finally got it installed again..
Then casually walked by the tank carrying a barrel... saw the input panel pop up!

That didn't happen the first time I used this tank. Might have been a glitch or that floor panel leak causing it not to take ?

Either way..I'm glad it's working now.

Btw.. you got an idea the ratio of normal barrel slots per room with a LS panel?
PestMastah 14 Aug, 2019 @ 7:19am 
I finally got it to take a barrel. The first time I tried making this I also had a leak in the room and didn't know it. The Habitat starting acting weird...
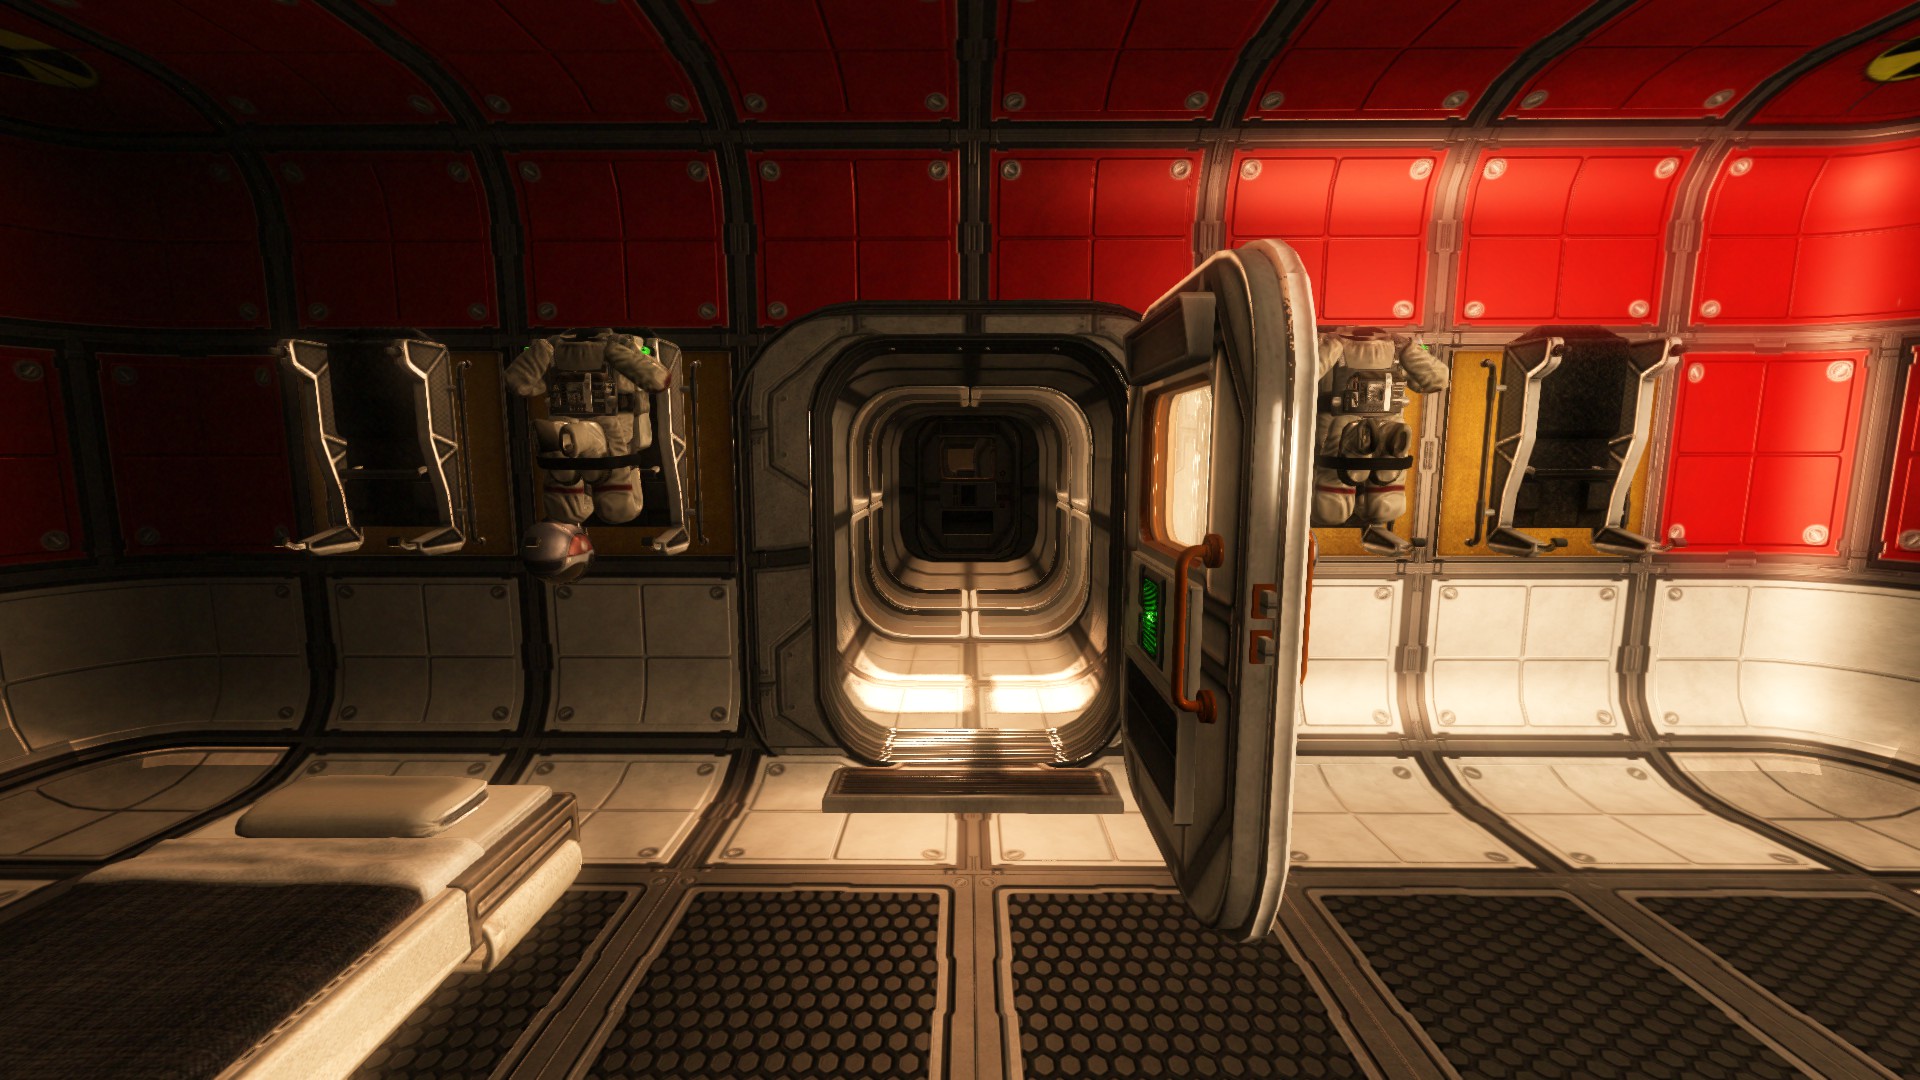
I tried to make a glorified deluxe airlock with the generator inside... this way I could toss in barrels of oxygen through the open door to it.
The weird episode was when all my regular tanks filled with oxygen as if something was generating the O2... I didn't put the O2 in the hab.. but I had 19 barrels full of it...

It all got wasted though... the leak was an overlapping small floor tile near the tank.

New base has it inside also... and for a while I had the open door policy until a reload (of the mp game) turned on the LS panel.. and the door had the cycle option.

Thanks for the tip about the frame rate drop! I'll try something new now with a newer base! :D
Mr. Monochrome [Hood Certified]  [author] 13 Aug, 2019 @ 7:34am 
@PestMastah

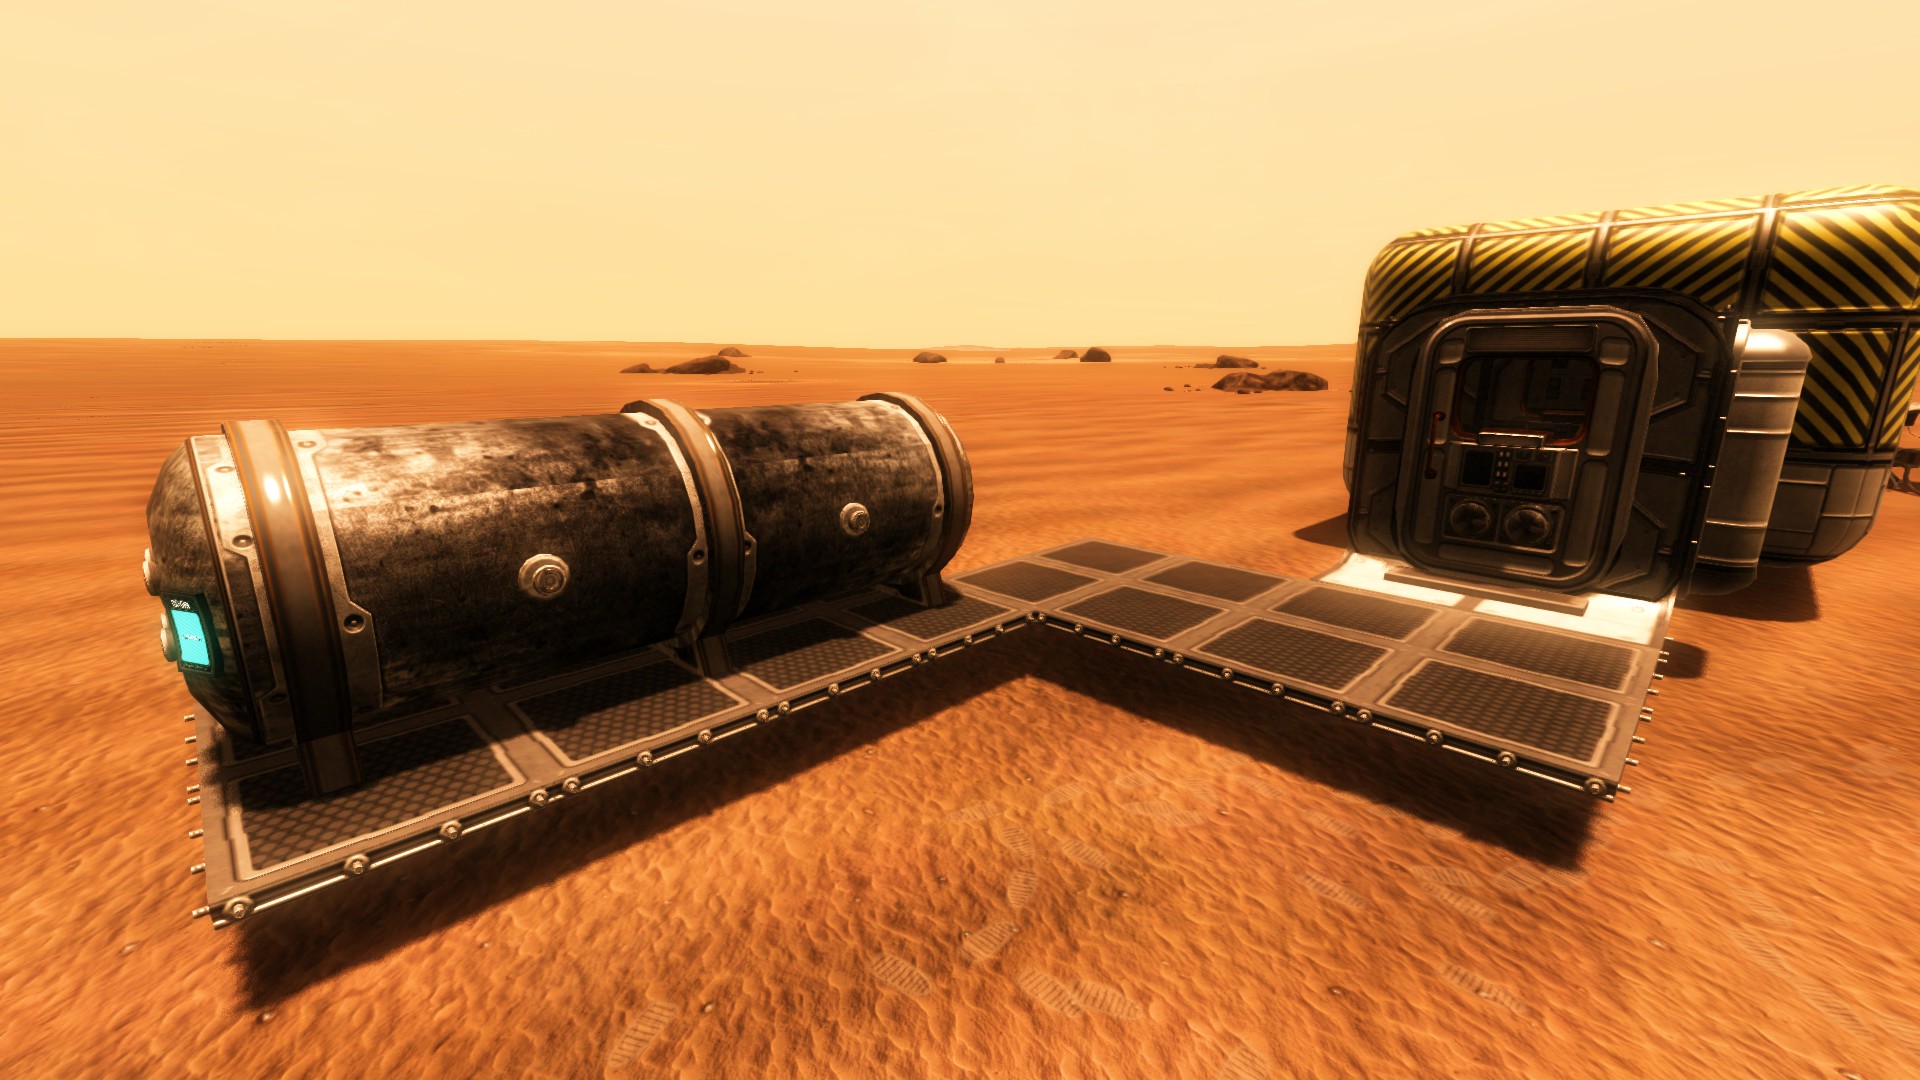
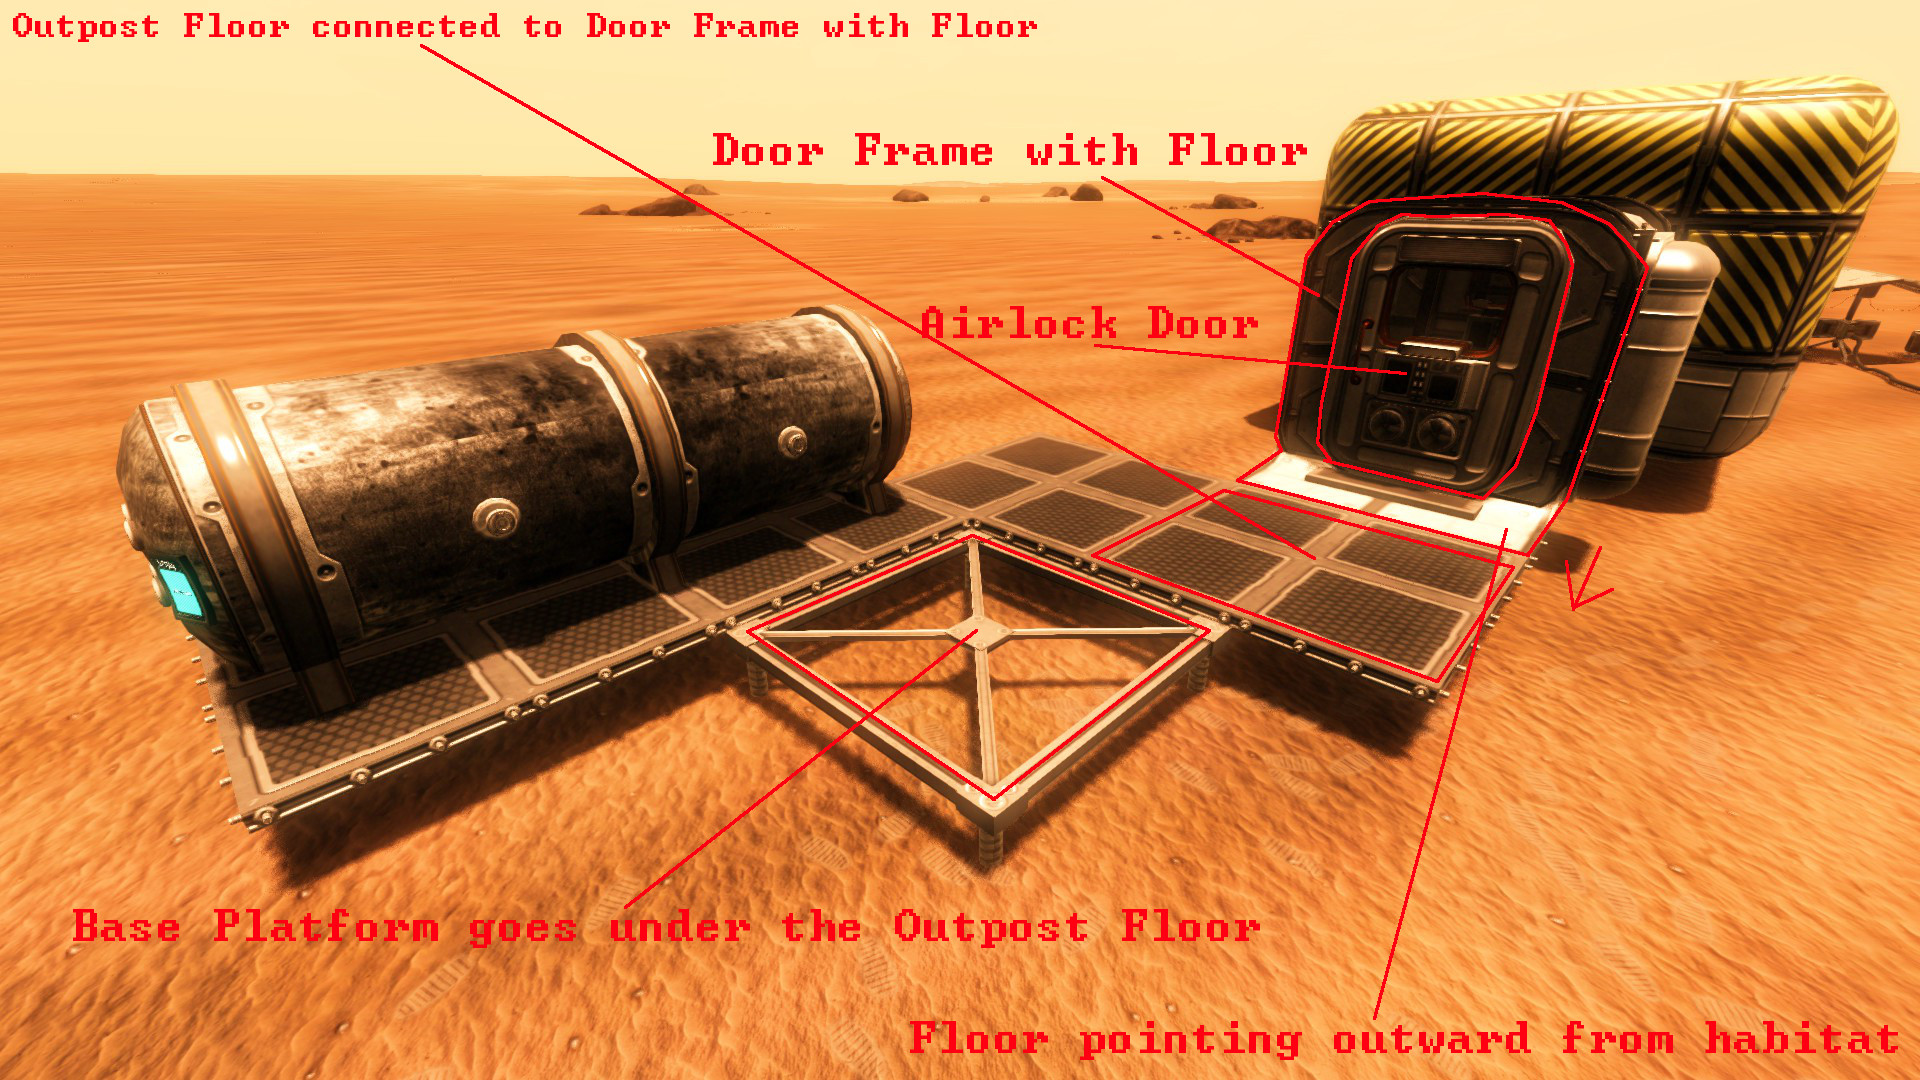
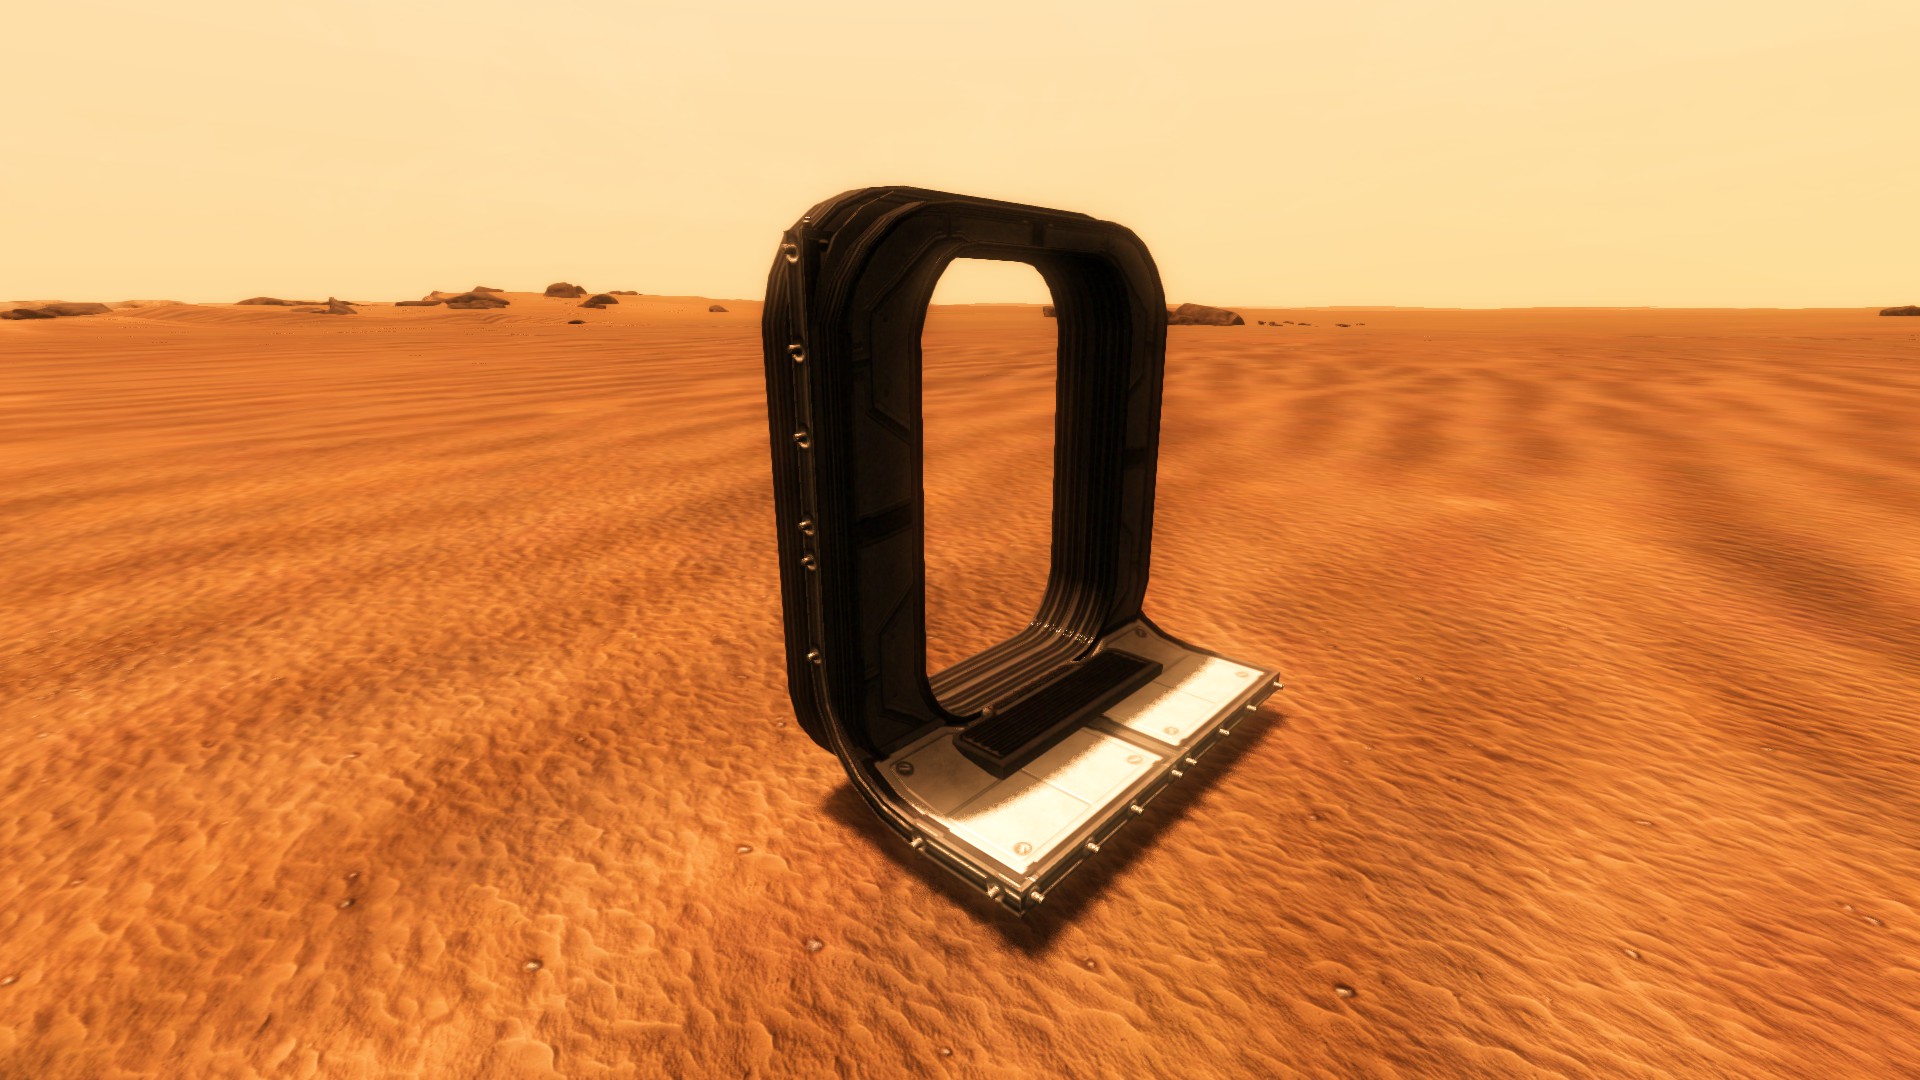
1. You can place it outside or enclose it inside the habitat. You may experience frame drop though. So having it outside helps.

2. You will either need to attach a barrel to the output port and drain the CO2 until the tank fills with O2. Or, You will need to split the CO2 at the refinery and make O2 thus filling the tank first with O2 and then attaching the tank through the floor to the habitat.

3. Print a barrel from the 3D printer and attach it to the 'Output' port on the tank.
PestMastah 12 Aug, 2019 @ 1:44pm 
Few questions...

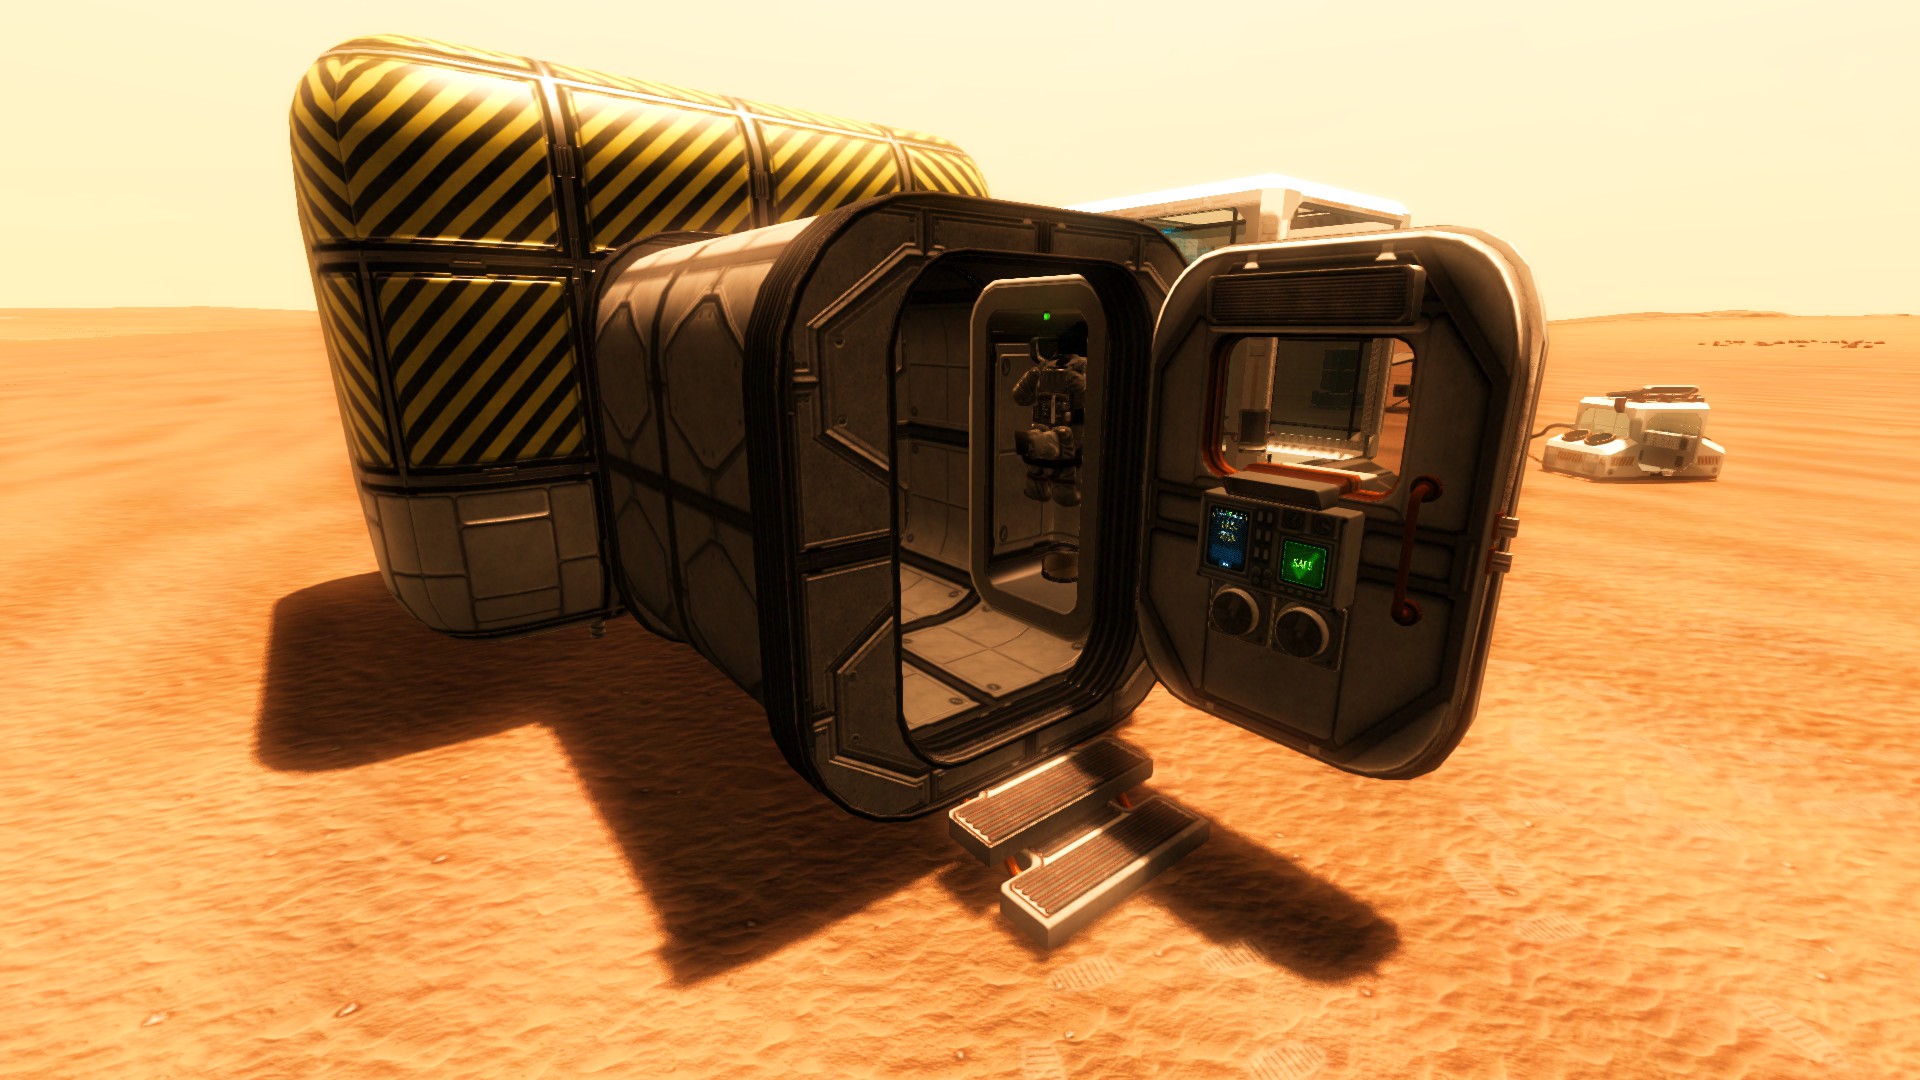
1. Is the Huge Resource tank supposed to be outside like pictured?
2. How do you get Oxygen into the huge resource tank (I keep getting Co2)
3. How do you drain the huge res tank once it does have Co2 in it?
DeltaforceAKAwalker 18 Oct, 2018 @ 10:01am 
thank you so much buddy that helped me a lot:steamhappy:
Mr. Monochrome [Hood Certified]  [author] 17 Oct, 2018 @ 8:47pm 
@indeepj

No problem, I'm here to help.
indeepj 17 Oct, 2018 @ 5:58pm 
Thanks For Ensuring That Those Whom Are New To The Game Can Still Make Outposts!