Lobotomy Corporation

Lobotomy Corporation

86 ratings
Boss Fights (Sephirot Cores)
By Grim Xzag
This is a Work in Progress. Currently writing and confirming information. If you have any suggestions, strategies, info I missed and corrections to strategies please let me know by leaving them in the comments.
2
3
8
   
Award
Favorite
Favorited
Unfavorite
Intro
Warning: I will be mentioning many abnormalities, that you may or may not have seen. By this point in the game, you should be exposed to most of these abnormalities I will be mentioning and possess knowledge of the basics of the game.

If you are struggling with some abnormalities, you can check out my guide or the links provided in other Guides and Resources.
https://steamproxy-script.pipiskins.com/sharedfiles/filedetails/?id=914741032

Basics of Sephirah Meltdown
The "Sephirah Core Suppression" (Sephirah Meltdown, core suppression, SCS, etc) is a 'boss fight' styled event that can be unlocked after meeting the departments unlock conditions, most likely completing all the Missions of that department. In order to play these Core Suppressions, the player must be past a certain day threshold. These thresholds being:
  • Asiyah: After day 21
  • Briah: After day 36
  • Atziluth: After day 41
Once the player has met the requirements of a core suppression and is past said day, they can activate it in the deployment phase by clicking the button that says "Sephirah Core Suppression" on the department's upper left corner. The player can only have 1 core suppression activated at a time, for balancing reasons. When activated, the department will be under a special state, preventing any employee from being assigned to the department, along with kicking out any employees that were assigned to it.

When pressing the start day button, replaced with "Core Suppress", the Sephirah's abnormality will be located in the department's main room. There are 2 things that most Core Suppressions have. That being, there no clerks assigned to the department and the department will be immune to Qliphoth Meltdowns(except 1). Certain aspects of the management phase will be under the core's control, usually linked with the department's job. E.g. The employee's stats are reduced under the effects of Hod Core Suppression. Depending on the core suppression, the anomaly(Sephirah) located in the department can not be effected by employees (with an exception of 2 cores).

When meeting the clear condition of the Sephirah Core, the game will auto complete the day. You can take advantage of this such as to skip having to deal with Ordeals. It can also spare employee lives that are working on abnormalities with a kill condition after clearing the work.
Extra
About Missions during Core Suppression(Testing)
  • The player can not complete a Management Phase Mission during a core suppression. An example of such mission is Gebura's mission "Our work"(Suppress a Midnight Ordeal) .

  • Missions that auto complete at the start of the day can be completed during a core suppression. An example of such mission is Tiphereth's mission "Proving Competence 4" and Chesed's mission "For the Aftermath (1-4)". However in the case of some auto completing missions, the player doesn't have to follow the missions requirements(such as completing a day in 90 seconds).

  • Missions that require something at the start of the day (such as Hokma's mission "Virtue of Creation" and Binah's mission "Shell of self-consciousness") will complete at the end of the day as long as the player had the requirements before the day starts.
[Asiyah]
By this point in the game, you should have seen and defeated at least 1 Dusk Ordeal. So your employee levels, E.G.O equipment and/or abnormalities, must be of class to be able to handle all of the Noon ordeals, probably not perfectly. If you have not seen all 4 Noon ordeals, or are struggling with 1 or 2, it is best to practice before jumping right in. You have all the time in the world, don't rush it and complain about not being able to beat it.

Summary
Required day: 22 to 45
Gear expectations: Class HE or better
Employee levels: Around IV or V in all stats
Abnormalities: At least 1 ALEPH class (non-carry)
Ordeals: At least 1 Dusk Ordeal defeated
Malkuth

"Everything’s all jumbled up, messed up, flustered… hahaha…"
- Malkuth

Clear Condition: "Reach Qliphoth Meltdown Level 6 + Meet Energy Quota"
Effect: "An error with the work assignment system is detected."

Malkuth is the Sephirah of the Control Team, and the first Sephirah you meat. After completing Malkuth's 4th mission, the player will unlock her Core Suppression.

The effects are the following:
  • The works will be randomized per meltdown. For example insight could be instinct, instinct could be attachment, and attachment could be insight, with repression being unchanged.

    Note: When hovering over individual works in the Briefing Menu, the names(Instinct, Insight, Attachment, and Repression) will be replaced with "???". On top of this, it also replaces the text in the Work Log, replacing normal work text(like Instinct) with "unknown". E.g. "Employee Joshua starts unknown on abnormality Nothing There."

  • After Meltdown 2, the appearance of Malkuth will change, no new effects.

  • After Meltdown 4, Removes the ability to prevent an employee from working on an abnormality, no matter what.

As you can tell, this boss is extremely heavy on memorizing patterns, so get your notebook and pen or pencil if it isn't your strong suit. Remember to take advantage of abnormalities that don't care about the work you preform(E.g. Child of the Galaxy). After Meltdown 4, you must be perfect at remembering what works are what, because you only have 1 shot and you can't prevent the employee from not working on the abnormality if you made a mistake.

Example battle:

Yesod

"This impenetrable darkness is inexplicably lonely."
- Yesod

Clear Condition: "Reach Qliphoth Meltdown Level 6 + Meet Energy Quota"
Effect: "An error with the information and camera systems is detected."

Yesod is the Sephirah for the Information Team. After completing Malkuth's and Yesod's 4th missions, the player will unlock his Core Suppression.

The effects are the following:
  • Starting effect, the UI (pause menu, observation menu, etc) are all pixelated or blurred.

  • After Meltdown level 2, The whole screen is all pixelated or blurred making it hard to see words on containment rooms and looks of abnormalities.

  • After Meltdown level 4, The colors on the screen will become saturated and making it really difficult to make out somethings on the screen.

This one is the simplest one in the game, only containing visual changes. If you are not familiar with the game's layout, you might have some problems here and there, but nothing too major.
Hod

"Well, shall we partake in an employee educational video together?"
- Hod

Clear Condition: "Reach Qliphoth Meltdown Level 6 + Meet Energy Quota"
Effect: "An error with our employees’ statuses is detected."

Hod is the Sephirah for the Training Team. After completing Malkuth's and Hod's 4th missions, the player will unlock her Core Suppression.

The effects are the following:
  • At the start of the boss, Hod will decrease all the employee's stats by -15.

  • After Meltdown level 2, all stats will be reduced by -25.

  • After Meltdown level 4, all stats will be reduced by -35.
Note: The game will not go below the minimum stat value of 10 when it is applying all of the effects stated above.

This one can be the toughest in Asiyah if ill prepared, but is really easy if you over prepare. Requires either a lot of farming or a Tool called You Must be Happy to nullify or decrease the issues with higher class abnormalities. It is recommended to do this core suppression first, more specifically on day 22, since the lower the amount of abnormalities the better.

If you don't have You Must Be Happy, it is important to know the minimum level's you can work on an abnormality, such as Nothing There requiring level 4 Fortitude and level 4 Justice and Blue Star requiring level 5 Prudence and level 4 Temperance. This is important to know because it determines weather you are under leveled or not in the Core Suppression.

If you want to make your employees very over leveled, you can check out this table, which I don't think the game expects you to know about:
Base level
I
II
III
IV
V
EX
Values (excluding Title Bonuses)
10-29
30-44
45-64
65-84
85-99
100 (at this point)

Having all of your employees in level EX with the Maximum amount they can go to, putting them under the maximum reduction only puts them at 65 which is barely level 4 on every stat. With the title bonuses it is ~71 for the not targeted stat and ~75 for the targeted stat, still in the level 4 range.

Example battle:

Netzach

"No one is actually safe here. You know that the Safety Team is just for show, right?"
- Netzach

Clear Condition: "Reach Qliphoth Meltdown Level 6 + Meet Energy Quota"
Effect: "An error with the healing and recovery systems is detected."

Netzach is the Sephirah for the Security Team. After completing Hod's Core Suppression and Netzach's 4th mission, the player will unlock his Core Suppression.

This boss has only 2 effects at the start of the Core Suppression:
  • Prevents most healing sources in the game. Army in Black is an exception to this rule.

  • Will heal every employee to full HP and SP after a Qliphoth Meltdown.

This one has similar requirements to Hod's Core. That being if you are over prepared, it becomes super easy. Having lots of armor and weapons to quickly slaughter and take less damage the better. If you truly want to make it easy, pick up a few ALEPHs and obtain their armor and weapon. Possessing both will guarantee that the Ordeals will be taken out swiftly and without any issues.

For working on abnormalities, it is business as usual: Just work on the abnormalities. You must also keep in mind that one abnormality doesn't like it when the employee's HP isn't full.

Lets talk about the exception to the boss, Army in Black. Doesn't make that big of a difference in the long run, unless you are down on equipment and seem to not be able to deal with escaped abnormalities or ordeals as easily without the healing from all sources, excluding the exception of course. Army in Black can also be your down fall, due to overusing the ability will cause its heart to become corrupt, causing more problems if ill prepared. That is not including the fact that if Clerks die, it will escape containment. So it causes a lot of Pain rather then Reward.

Example battle:

[Briah]
Probably the biggest leap, but the player must have seen at least 1 Midnight Ordeal. However it doesn't mean you have completed one. Along with the exposure to the Midnight ordeal, by this point the player must also have acquired some gear from the strongest beasts, also known as ALEPHs.

Remember, before attempting any of these Core Suppressions, make sure to practice. Practice makes people better at what they do. It will not make someone perfect however, but enough to make a big difference in outcome and results. Another thing to remember is to stay determined on reaching your goal and don't be afraid to start over, sometimes clearing the canvas and starting over improves the results.

Summary
Required day: 37 to 45
Gear expectations: Class WAW or better
Employee levels: V
Abnormalities: 3 to 4 ALEPHs or Apocalypse Bird
Ordeals: at least 1 Midnight Ordeal defeated
Tiphereth

"Every Containment Unit is under my reign."
- Tiphereth A

Clear Condition: Reach Qliphoth Meltdown Level 10
Effect: "Mass Qliphoth Meltdowns are detected; Department immunity has been bypassed."

The Tiphereths are the Sephirot for the Central Command Team. Tiphereth-A is the only one that can be fought in the Central Command. After completing all of the Asiyah Core Suppressions and Tiphereth's 4th mission, the player will unlock her Core Suppression.

The Effects are the following:
  • At the start of the day, all artificial meltdown immunity(The Sephirot Boss Reward) is removed from all departments(including Tiphereth's). The Player will still receive the reduced number of Qliphoth Meltdowns if they did have the rewards.

  • After Meltdown level 4, Tiphereth's appearance and music change (no new effect)

  • After Meltdown level 7, Tiphereth's appearance and music change (no new effect)
The obvious tip for Tiphereth's Core Suppression is to keep an eye on Tiphereth's department, since it is massive, and make sure there are no meltdowns or Ordeals(E.g. Dawn of Violet) in the area that might cause problems.

By this point the game expects the player to be able to deal with a Midnight Ordeal, which I feel is kind of too early, but whatever. Clearing one is kinda hard without a key thing: Elevators are OP. That should give an idea of how to tackle all 3 of them


.

Gebura [part 1]
"Let me show you how to actually wield E.G.O."
-Gebura

Clear Condition: "Neutralize Gebura’s Core"
Effect: "The Red Mist makes her return."

Gebura is the Sephirah for the Disciplinary team. After completing all of the Asiyah Core Suppressions and both Gebura and Chesed's 4th mission, the player will unlock her Core Suppression.

Red Mist
ALEPH
HP: 3000
Abnormalities deal 2x damage to her.

Summery of her AI throughout the fight
Gebura will move back and forth at random intervals in the main room, but she is most likely going to stop close to the entrances of the main room she is located in.

(Phase 1-2) When an employee enters the area, she will move quickly towards them and attack them with whatever weapon she is wielding in the present Phase. If there is another employee in the same room, she will continuously switch targets after each attack.

(Phase 3) She will stand her distance and use her ranged attacks to potentially damage the target. But if the employee is standing out of range, her attacks will miss as she will frantically cycle between her attacks, trying to get an attack that will connect.

(Phase 4) She is no longer confined within her Main room as she will chase after a marked employee.

Phase 1:
At the start of this Phase, she will be located at the top of Disciplinary Team. Gebura possesses 3 E.G.O. weapons: Red Eyes(Spider Bud), Penitence(One Sin) and Gold Rush(King of Greed). Her attacks are the following:
  • A normal swing from Red Eyes, dealing decent Red Damage(25-30).

  • A normal swing from Penitence, dealing decent White damage(25-30).

  • Double hit attack, with both Red Eyes and Penitence, dealing decent Red and White damage(25-30 / 25-30).

  • After 1/3 HP has been depleted, she will pull out Gold Rush as a few gates will open in hallways and main rooms. She will then run full force through them, dealing Red damage(100) to anything in her path. Once she reaches the desired Main Room, she will preform a heavy attack, dealing high red damage(290-310) to anything in the room. She will not go through any sub areas of a department(such as the top of Disciplinary team, those tiny rooms in Control Team, etc). Will be used 2 times.
Defenses: Red 0.9 ; White 0.9 ; Black 0.9 ; Pale 1.0.

Phase 2:
At the start of this phase, she will use Gold Rush to get to another department. Gebura possesses 3 new E.G.O. weapons: Da Capo(Silent Orchestra), Mimicry(Nothing There), and Heaven(The Burrowing Heaven). Her attacks are the following:
  • A 3 hit multi attack with Da Capo, dealing high White damage( 15-25 / 15-25 / 40 ).

  • A strong attack with Mimicry, dealing a high amount of Red damage( 70-90 ).

  • She will use Heaven as a spear and toss it in front of her, as it passes the entire facility, dealing high Black damage (100) to entities in the way of the attack. 50% chance of using it to the Left or the Right.

  • After 1/3 HP has been depleted, she will toss Da Capo to a random department, dealing heavy White damage(145) to any entity in the way. She will then pull back Mimicry and leap to the Department, dealing high Red damage(100) to any entity in the way and deal an insane amount of damage(450-500) to any entity in the department's main room upon impact. Will be used 2 times.
Defenses: Red 0.4 ; White 0.4 ; Black 1.2 ; Pale 1.0

Phase 3:
At the start of this phase, she will throw Mimicry and Da Capo in opposite directions, dealing insane amounts of White or Red Damage(300 for both) to whoever is unluckily hit by them. Gebura possesses 2 new E.G.O. weapons: Justitia (Judgement Bird) and Smile (Mountain of Smiling Bodies). She also possesses 2 old E.G.O. weapons: Gold Rush and Heaven.
  • A swing with Justitia, slicing a long ranged X shaped projectile that deals high Pale damage(50-70). 50% chance of using it to the Left or the Right.

  • She will slam Smile into the ground, slowing every entity by -99.99% Movement Speed. Following this is another hit with Smile, with the initial hit dealing 90-110 and followed with a grinding effect from the hammer, invoking continuous minor Black damage (8-12) every second for 10 seconds. 50% chance of using it to the Left or the Right.

  • Burrowing Heaven and Gold Rush are unchanged.
Defenses: Red 1.0 ; White 1.0 ; Black 0.2 ; Pale 0.2

Phase 4:
At the start of the Final Phase, Gebura will destroy Smile, dealing minor Black damage(10-15) every seconds for 10 seconds, and change Justitia into Twilight. She possess 2 E.G.O. weapons, Twilight and Gold Rush, both used in unique ways. Unlike other Phases, she is no longer confined within the Department she is located in. Her Attacks are the following:

  • (50%) She will select a random alive employee/clerk and run after them with 4 times her movement speed. The marked employee can not preform work on abnormalities, this is to prevent them from removing the mark. Any employees in the way will be dealt high amounts of a random damage(90-110). Once she reaches the target, she will jump in the air and slam down with twilight, preforming a ton of cuts in the area, dealing high amounts of random damages(90-110) 7-10 times, all damages being rolled accordingly (E.g. it can deal Pale -> Red -> Pale -> Black -> Black -> Black -> Black -> Red -> White -> Black. Essentially, its random what damage type string it will deal). If she doesn't reach her target in time, 20 seconds, or has preformed her slam attack, she will become groggy for 20 seconds.

  • (50%) She will use Gold Rush, but not in the normal way. She will instead toss gold rush through the gates, as it will travel through them like normal, while Gebura runs behind it. Similar to the regular Gold Rush attack, Gold Rush will deal high Red damage(100) to anything in its way, on top of that a crazed Gebura following behind which will deal the normal damage(90-110) to anything in her path. Once Gold Rush reaches its destination, it will not do its fatal attack. However following behind it, Gebura will preform her fatal attack, dealing high amounts of all damages(90-110) 7-10 times and become groggy afterward for 20 seconds.
Defenses: Red 1.5 ; White 1.5 ; Black 1.5 ; Pale 1.5.

Reward:


Note: The upgrade only grants one extra copy to the E.G.O. weapons and armor that were produced from PE Boxes. You can not get an extra copy from WhiteNight(weapon), Apocalypse Bird(weapon and armor), and Fiery Bird(weapon) since they require to be suppressed in order to obtain their EGO equipment.
Gebura [part 2]
"Thanks to that strange body of yours, Red Mist, your strength is much greater than before. Though your expertise seems to have rusted."
- Myo

This will be split into 2 parts.

Employee only:
Taking advantage and exploiting her weakness is key to beating the Red Mist with your team of employees. I do recommend obtaining the Apocalypse Bird's armor and weapon, as it is a really big game changer in my opinion. The Armor and weapon can pretty much deal with 3 out of 4 phases of the boss and they aren't that hard to obtain and equip as long as you have an employee over 110 on every stat. Another good E.G.O. set is Da Capo, with it possessing -1.0 White resistances(heal SP if hit with White damage) if the employee possesses the armor and the gift from the Silent Orchestra.

Another method is utilizing ranged attackers so that they can stand their distance and easily be moved away from attacks, if needed. The only problem is the introduction of the quick attacking Heaven spear making it hard to not lose some employees. My recommended E.G.O.s are any ranged weapon and Smiley Mountain's E.G.O. armor (or any armor that has 0.4 and lower). Make sure the employees have high enough HP and SP to survive at least 1 or more hits from the spear just so they can enter a safe space and heal up for more attacks.

For the Final Phase, you could throw away the marked employee, use them as bait, allowing the rest of your employees to shred through the Red Mist's HP*. With Slow bullets, you can actually outrun her, as they reduce her movement speed by 50%. Alternatively, you could dodge the attack right as she is about to reach and shred apart the employee. Make sure you found the needle in the haystack, just so the Red Mist isn't going to destroy your entire attacking squad.

*Tip: a good way to know if you have enough DPS (damage per second) to shred through her HP is by using Big Bird. Big Birds lamp shakes are about the same amount of time it takes for Red Mist to get back up and attacking again. The only difference is that Big Bird is more tanky then Red Mist in Phase 4. So if your team of employees can tear through Big Birds HP with no problem, then one is ready to take on that phase.

Thought process
- Went in with only an idea to only use an employee equipped Smiley armor + Sound of Star (Eden) and an employee equipped with Twilight (Haru, Fun Fact Haru lost the use of the armor and weapon the day after), no real reason why. Both Haru and Eden are given the child's pebble for the additional healing.

- When she is about to attack: You. Run. Away. I know, who would have thought. But seriously some people just don't know you have the option to run away from the enemy when they are about to attack, and the red mist is the easiest to run away from because of all her attacks being telegraphed. I utilize this fully to the best of my ability, with some mistakes.

- As for Phase 3, I dropped sending Haru and simply sent Eden into a solo battle against the Red Mist. Because all of her attacks are ranged instead of Melee, Eden is perfect for the job because they stand the max distance away and will not be hit.

- Phase 4 was lucky to have the coin flip be in my favor instead of having to use a dodge.

Abnormalities:
The second way of beating the Red Mist is utilizing her weakness to Abnormalities. There are 2 ways to go about this:
  • 1st way is to lure abnormalities, such as Nothing There, around the facility and have them deal with the Red Mist. This takes knowledge of how Abnormalities work, but it is quicker then the Method below.

  • 2nd way is to have someone chill out in the shelter and watch all hell break lose. if you are doing this Method, I recommend using Facility wide AOE attackers, such as Blue Star, or abnormalities that travel across the facility and target the Main Rooms, Big and Might be Bad Wolf. This one takes forever, about 3 hours, and is the slowest method here which is understandable since you are chipping away HP slowly over time.
(Optional) You can spawn a Midnight Ordeal. The Midnight Ordeals are way stronger then regular ALEPHs, so it would speed up both option 1 and 2.

Dialog

Phase 1
  • (Red Eyes attack) "Red Eyes"
  • (Penitence attack) "Penitence"
  • (Both Red Eyes and Penitence attack) "Get blown to pieces"
  • (Gold Rush attack) "The Road of Gold opens"
Phase 2
  • (Throwing Heaven) "The Burrowing Heaven"
  • (Mimicry attack) "Nothing will remain" and "Slash out"
  • (Da Capo multi hit) "From the Overture" and "Adagio e Tranquillo (Slow and Calm)"
  • Travelling between departments:
    1. (Tossing Da Capo) "legato"
    2. (Mimicry Leap) "Let’s do this, partner"
    3. (Arrive) "Only bloody mist remains"
Phase 3
  • (Tossing Da Capo and Mimicry, end of Phase 2) "This isn’t enough",
  • (The Smile Attack) "Black Laughter" or "Be eaten"
  • (Justitia Attack) "Justitia" or "Judgment"
Phase 4
  • An employee in the way of the Red Mist: "Beat it, coward", "Don’t try and stop me", or "You’re weak"
  • (Reached the Target) "Be torn apart before my eyes"
  • (Gold Rush attack) "The hunt begins" and "The Road of the King opens'
Chesed

"Rain is falling; this rain, the tears of all the employees. The downpour will never stop."
- Chesed

Clear Condition: "Reach Qliphoth Meltdown Level 8 + Meet Energy Quota"
Effect: "An anomaly with the damage our employees receive is detected."

Chesed is the Sephirah for the Welfare team. After completing all of the Asiyah Core Suppressions and both Chesed and Gebura's 4th mission, the player will unlock his Core Suppression.

The effects are the following:
  • Chesed's boss starts off with a random letter selected at the top of the screen (cannot be Pale), where the pause symbol is located. The letters(R W B P) at the top represents an attack type that will have a 5 times increase in damage to employees or clerks. After each meltdown the highlighted letters will be randomized. .

  • After Qliphoth Meltdown 2, 2 types of damages are selected.

  • After Qliphoth Meltdown 6, 3 types of damages are selected.

Avoidance and thinking rationally is what the boss teaches. If Red is illuminated, I must do works on X, Y, and Z abnormalities.

At the beginning, the boss really isn't that difficult with it only selecting 1 damage type and amplifying it per Meltdown. After the first phase, things get a little slower if you are avoiding the damages selected, but still business as usual. However, this boss can be really difficult if the 3 selected damages are R, W, and B making it hard to work on stronger abnormalities under Qliphoth Meltdowns that do not do Pale damage, along with forcing a change in strategy for those who are avoiding abnormalities that possess the illuminating damages.

What I recommend doing instead is to not avoid working on some abnormalities that deal a damage that is amplified and instead look at how to minimize the damage. Maybe look at abnormalities like Laetitia, Snow Queen, Snow White's Apple or Melting Love. These abnormalities have high success rate and don't deal that much total damage to employees unless they are under leveled. You can also look at abnormalities with low damage, such as One Sin, and work on them.

For Ordeals and escaped abnormalities, it is a bit more complicated. The worst it can get is having to deal with Noon of Green when Red is Illuminated. A good tip is to avoid the escaped abnormalities or Ordeals that can deal a lot of constant damage as much as possible during these moments, and try to push the Meltdown, forcing a switch in what damage is being illuminated.


[Atziluth]
Congratulation, You have now reached the late game. By this point the player must have challenged all the Midnight Ordeals and have grown enough experience in the art of suppression or Cheese. Either way, you can now call yourself a pro at this game, if you are making money off of this of course.

For the equipment requirement, you must have obtained most of the ALEPH equipment because of the mission that Binah has and how many containment rooms available. If you don't, you are at a major disadvantage in this area of the game if you aren't as good as that player who can beat abnormalities with Default equipment.

All Jokes aside, pre-planing and remembering how to deal with abnormalities is key to victory, along with understanding the new enemies and challenges that await in the late game.

Summary
Required Day: 42 to 45
Gear expectations: Class WAW and ALEPH
Employee levels: EX
Abnormalities: 4 to 7 ALEPHs. Apocalypse Bird and/or WhiteNight
Ordeals: All Ordeals should have been challenged

Extra notes:
Must expand both Record and Extraction equally in order to do both of them on the same week (with a memory repository of course), otherwise you have to reset back to day 1 in order to do the second one, of course after you unlock their core first.
Binah [part 1]
"If you cannot defeat me, you shall be crushed by the Head and its ruthless Claws yet again."
- Binah

Clear Condition: "Neutralize Binah’s Core"
Effect: "An Arbiter awakens."

Binah is the Sephirah for the Extraction team. After completing all of the Briah Core Suppressions and Binah's 4th Mission, the player will unlock her Core Suppression.

An Arbiter
ALEPH
HP: 4000
Attack delay: 25-30 seconds.

Immune to all damage from Abnormalities. Will not harm Abnormalities.

Unlike The Red Mist, An arbiter is not confined within her department, and will most likely travel toward specific areas in the facility. Picking a certain destination pseudo randomly and focusing on this locations until it reaches that area. Once it reaches that area, she will travel to another location, repeating the possess until chaos unfolds or is suppressed. Binah also still possesses her previous abilities and adds more as the player pushes her further through the fight. However her strategy and motive doesn't change.

She possess 5 basic abilities in the core suppression:
  • When An Arbiter walks past a containment unit, a black cloud like effect will appear on the door, as a Qliphoth Meltdown will appear on corresponding abnormality's containment room.

  • Fairy(50%): An Arbiter will hold out her hand as a glowing orb will appear, displaying its attack type with the color of the orb. She will then preform a swing like motion as a massive amount of Fairies spread and scatter across the area in front of her, dealing insane amounts of damage (220-300).

  • Pillar(50%): She will conjure up a pillar like object. This pillar will illuminate with the color that corresponds to the damage it will deal. After a few seconds, she will release the pillar as it will fly forward, dealing high amounts of damage (70-84) to any unlucky employees in the way, and setting off Qliphoth Meltdowns to the Containment units the pillar has struck.

  • After all meltdowns are removed, a 1 minute timer will start up. When that timer is over, An Arbiter will raise a White Orb and drop it on the floor, activating a pulse effect, reassigning her Special Qliphoth Meltdowns. She will always preform this ability at the start of each phase even if there are meltdowns present on the field.

    After a pulse is set off, 20 spikes will be scattered around the facility, appearing under your workers feet. This will cause any unlucky employees or clerks to receive high black damage(33-40).

Phase 1:
Special Qliphoth Meltdowns: Meltdowns of Gold and Dark Fog.

Meltdown of Gold(6):
Chance: 15%
60 Second Timer
Qliphoth Overload: N/A

These Meltdowns effect An Arbiter's abilities and her movement speed. When all Meltdowns are removed, she will start to sleep and remove all attack effects that would have been fired(such as a Pillar). After 30 (?) seconds, she will awaken and have a slower movement speed (-10% Movement Speed? Needs Testing) until another pulse effect reactivates the Special Meltdowns. When you fail to remove these meltdowns, Binah will heal 1 hp/sec for 60 seconds.

Meltdown of Dark Fog(6):
Chance: 15%
45 Second Timer
Qliphoth Overload: -10%

These Meltdowns effect the dark fog around An Arbiter, causing any employee around her to suffer from a -15 Justice debuff (lasts for 10 seconds when leaving the room) and Increasing her resistances to 0.2. Once all Meltdowns are removed, her resistances will change from 0.2 to 2.0 and the debuff will not be applied. After 30 seconds, the resistances will increase to 0.8 and stay like this until another pulse effect reactivates the Special Meltdowns. Nothing happens when you fail to remove these meltdowns.

Phase 2:
Special Qliphoth Meltdowns: Meltdown of Gold, Dark Fog, and Waves.

The Meltdown of Waves(6):
Chance: 15%
60 Second Timer
Qliphoth Overload: -5%

These Meltdowns controls the wave creatures that will appear in the facility. Clearing all will remove every wave creature. When they reach the end of the area they are traveling through, they will teleport to another area in the facility, similar to the Amber Dusk. They possess slow movement speed and decent black damage(17-20), along with a speed debuff of -20% when employees are passing through them. These are not removed when the meltdown timer runs out.

Phase 3:
In this phase, the ability to pause time has been deactivated. Special Qliphoth Meltdowns:The Meltdown of Gold, Dark Fog, Waves, and Pillar.

Meltdown of Pillar(7):
Chance: 20%
45 Second Timer
Qliphoth Overload: -20%

In this phase, the pillar attack has received an upgrade. If you thought one pillar was bad, she now has 8 pillars in her new upgraded attack. At the start of this phase and every pulse after will have 2 different outcomes:
  • (25%, will always happen at the start of the phase) There will be scattering of 7 Meltdown of Pillars around the facility and she will slowly conjure up 8 Pillars that will circle around her. If you fail to remove all of them, she will release all 8 Pillars activating a ton of regular Meltdowns and hitting any unlucky employees in the way. Removing all Meltdown of Pillars have the same effect as the Meltdown of Gold and Dark Fog, with weaker effects (0.8 resistance, no extra healing).

  • (75%) Normal scattering of the Meltdown of Dark Fog, Gold, and Waves across the facility. Can be a challenge since there are lots more Meltdowns then just having the Meltdown of Pillar.
The delay between removing all the meltdowns and the next pulse effect is extended from 1 minute to 1:15 minutes

It isn't really the Meltdowns or Pillar that are the problem, the problem is the lack of pause, preventing time to easily send employees to designated areas. At least you can change the game speed to 1x.

Extra info:
Similar to Gebura, Myo will say stuff about Binah.
I'd like to thank Sinvicta for unintentionally helping test these things.

Reward:
Binah [part 2]
"I never thought the day would come where we could defeat an Arbiter."
- Myo

Strategy
This Core Suppression is about dealing with the fire that has been stated as soon as the first pulse goes off.

It becomes apparent that the boss is really strait forward. All the player really has to do is work on abnormalities and watch the team attacking An Arbiter, that's all. However, even with this easy appearance of the boss, if you can't contain the fire you will burn with the facility, as it becomes an instant chaotic mess. Being able to remember the tells that she has and watching your surroundings are key to knowing what to do in most of the situations she puts you in.

What I recommend is to pause right at the start of the fight and organize the attack squad that will be in charge of dealing damage to An Arbiter. After assigning the squad, make sure that every abnormality has at least an assigned employee. This is to assure that you can work on every Meltdown and won't have to worry about not having enough staff. I recommend 2 to 4 employees per department, just to fit this requirement. I also see from a few people that they seem to miss a few Meltdowns, either because of the Abnormality or them not seeing it. Remember that missing 1 Meltdown can prolong the boss by a lot, and I mean a lot (Taking out something with 0.2 resistances and 4000 HP takes a really long time). You can check out Sinvicta's Binah Core video and see for yourself, even tho it is not a 100% accurate representation because Majority of the video is him pausing.

If you don't feel like making a squad, you can instead summon the Rabbit team on An Arbiter at the start of the boss. This will trap her in the department and be unable to leave the area until she kills them with an attack. By using this, you can fully concentrate on the Meltdowns without having to worry too much with An Arbiter, until Phase 3.

A tip to make sure that you have worked on all the Meltdowns is to look at An Arbiter. An Arbiter will say 1 line when you worked on all Meltdowns of X type and when every orb from those meltdowns reaches the abnormality:
What An Arbiter will say when you successfully remove all Meltdowns of X type:
  • "The sandman calls me." (Meltdown of Gold)
  • "I’m fading." (Meltdown of Dark Fog)
  • "The waves will rock the shore again." (Meltdown of Wave)
  • "Excellent." (Meltdown of Pillar)
What An Arbiter will say when you fail to remove 1 or more Meltdowns of X type
  • "You failed to bend my back." (Meltdown of Gold)
  • "You missed the opportunity." (Meltdown of Dark Fog)
  • "You cannot stop the torrent of this world alone." (Meltdown of Wave)
  • "Your immaturity is to blame." (Meltdown of Pillar)

Optional: Use Backward Clock on Phase 2, this speeds up the boss by a lot, allowing her to be open for attacks and passing through to Phase 3 instantly.


Dialog
  • Fairy:
    • "Disperse."
    • "Heed my words, Fairies.."
    • "Analyze. Compress. Expand."
    • (Finishing) "Do not dare to stand before me."

  • Pillar:
    1. "Condensing the Key.", "Focus", or "Open"
    2. "Wreak havoc.", "Come on out.", or "Crumble."

  • Making Special Meltdowns Gold, Dark, and Wave: "Rise.", "Collapse.", or "Resonate."

  • Making Meltdown of Pillars: "I’ll open the door if I must." or "Let us sink here together."
Hokma

"Please do not let time flow meaninglessly."
- Hokma/Chokhmah

Clear Condition: "Reach the Maximum Level of Qliphoth Meltdown + Meet Energy Quota"
Effect: "An anomaly with the flow of time itself is detected."

Chokhmah, prefers and pronounced Hokma, is the Sephirah for the Record Team. After completing all of the Briah Core Suppressions and Hokma's 4th Mission, the player will unlock his Core Suppression.

The effects are the following:
  • Starting effect: All artificial Meltdown immunity is removed from every department, except Record Team. The game speed is set and locked at 1x speed, and can not be changed. If the player attempts to pause the game, 1 agent in the facility will die or panic. This will increase by 1 per pause, until every agent is dead or panicking. The player will still be able to pause the game using the Escape key without any penalties.

  • The game speed will increase every Qliphoth Meltdown from levels 7 to 11 (Info: 1.5x speed, 1.7x speed, 1.9x speed, 2.1x speed, and 2.5x speed)

This is regarded as one of the hardest Sephirah Meltdowns (not including Keter). The Game expects the player by this point to not excessively utilize the Pause function and be able to clear days effortlessly and quickly. On top of that, it expects players to be familiar with at least 1 of the 3 Midnight Ordeals (Amber, Green and Violet) to the point that the player will not need to pause and be able to take them down under 1.5x to 2.0x speed. A super demanding core that requires the player to have a super high levels of familiarity with both Suppression and Working. Makes sense for being the hardest core in the game to calm down.

The basic strategy is simply to slow down and take your time with it, slowly inching your way up the Meltdowns and dealing with Ordeals as you go along.

Now about pausing the game. Due to the 50/50 risk of losing an employee from pausing the game, and it increasing per every following pause, it is best to limit usage of pausing to points were the loss of an employee(s) costs less then pausing the game at a given moment. There are points were you would want to pause the game in order to save a few employee lives over a single employee, especially if you haven't practiced managing your employees and suppressing Ordeals under higher speeds.


Reward
Keter
"You will be given harsh trials, and faded, saturated questions we could not answer."
- Abel 46:51

Keter (alternatively spelled Kether) is the Sephirah for the Architecture Team. From day 46 to day 49, the player(X) is tested for his management abilities and is faced with 4 "harsh trials," all in a similar format to a Sephirah Core Suppression. All four initial days(46-49) are unique but have 3 things in common:
  • The Ordeals of White will be the only Sin on these days.
  • Artificial Qliphoth Meltdown Immunity is removed from all departments, except Architecture Team.
  • The amount of Clerks is cut in half, 5 clerks per department.
The player is not allowed to activate a core suppression during these 5 days, as these days are considered a core suppression by the game.

This is what the game was preparing you for. By this point the player has a lot of experience, maybe even 200 hours on record, or you have reached here too early because you went past day 45 on accident. Either way, this is the grand finally, and prepared or not, you have reached the final week and challenge the game has.

Homework (day requirements):
  • Day 46: Free
  • Day 47: Must have all Asiyah Cores Completed (Malkut, Yesod, Hod, and Netzach).
  • Day 48: Must have all Briah Cores Completed (Chesed, Tiphereth, and Gebura).
  • Day 49: Must have all Atziluth Cores Completed (Hokma and Binah).
  • Day 50: Free
  • Epilogue cutscene: Must have all Abnormalities researched, with an exception of the DLC Abnormalities, Don't Touch Me, and Apocalypse Bird.

If you don't meat the requirements for the days or you lost all your employees due to panics and/or deaths, you will instantly receive the associated "Bad Ending" for each day (Day 47: A, Day 48: B, Day 49: C). After said bad ending, you will be kicked out and placed at the main menu, you are allowed to continue where you left off. However if you were kicked out for not having the required cores completed for the day, you will have to reset to day 1. For those people, just remember "If you’ve made it here once after such a long and hard time… You will surely come here again, no matter how long it takes." (Abel 46:47-48)

For those who did most of their homework and at least completed all the Core Suppressions, welcome to Hell, you are going to hate it here.
Ordeals of White
"They work in the Offices, Syndicates, and the Wings. Their tasks vary from banal things to something truly sublime."
- Dawn of White

The ordeals of White are split into 4 different entities, called Fixers. Each fixer will possess its own damage type marked by the name, E.g. Red Fixer will deal red damage. Each fixer also has their own unique abilities, strengths and weaknesses.

What appears in each Ordeal type:
  • Dawn: 1 Fixer. Cannot be Pale Fixer
  • Noon: 2 different Fixers, Cannot be Pale Fixer or the Fixer that appeared at DAWN
  • Dusk: All 4 Fixers
  • Midnight: The Claw

Red Fixer
(25% certain it is correct)
1000 HP
WAW

The red fixer will roam around in search of employees. Once it finds a target, it possess an assortment of attacks. The Fixer will preform 2 slices which deals 5-6 red damage. The fixer will use a hand gun, dealing 14-17 red damage. A charge up, lunge attack which deals 25-30 red damage. It will fire a laser forward, dealing 70-100 red damage to anything in its path.

On death, the Fixer will fire its laser in a diagonal direction and rotate it around the fixer.

Defenses: 0.0 Red; 0.5 White; 1.0 Black; 0.5 Pale

White Fixer
(Checking attack delays and time between attacks)
1000 HP
WAW

The White Fixer will wander around the facility. Once an employee is in the same area as the White Fixer she will will charge up a laser and fire it forward, 90° or 270°, dealing 10-12 damage, and leave a lingering cloud, dealing 5-6 damage every 2 seconds for 10 second (time needs to be tested). The Initial one is preformed after 12-15 seconds, afterwards every 19-21 seconds. Larger cuts are preformed after 40-45 seconds, afterwards every 55-60 seconds.

When the player reduces 30% of her HP, she will enter into a praying like motion, reflecting damage back at the employee or abnormality attacking her. She will stay like this for _ seconds and return to normal afterwards.

On Death, the weapon will crush the fixer, as the fixer will turn into smoke, dealing 12-15 damage to near by employees

Defenses: 0.5 Red; 0.0 White; 0.5 Black; 1.0 Pale

Black Fixer
(Should be correct)
1000 HP
WAW

The Black Fixer will wander around the facility. Once an employee is in the same area as the White Fixer she will preform a few different attacks. It will preform a regular attack with its hammer, dealing 8-16 Black damage. It will smash the hammer, similar to the Smiles special attack, Initially it deals 20-25 Black damaged, then 4-5 Black damage 4 times, last hit deals 5-7 Black damage.

After spending time in a hallway with Abnormality containment rooms it will raise its hammer, channeling it, dealing 10-12 damage every few seconds. After it finishes channeling, it will reduce the Qliphoth Counters of all nearby abnormalities(same hallway) by 1. Will initially be preformed after 29-31 seconds, afterwords every 50-60 seconds.

On death, the hook of the hammer will impale the fixer, activating the hammer once. This causes spreading of Qliphoth Meltdowns to all abnormalities in the department (remember Central is 2 different departments)

Defenses: 1.0 Red; 0.5 White; 0.0 Black; 0.5 Pale

Pale Fixer
(75% certain this one is correct)
1300 HP
WAW

Only appears on Dusk of White. The Pale Fixer will roam around in search of employees. Once it finds a target, it possess an assortment of attacks. When an employee is standing at close range, it will preform quick attacks with its knife, initially dealing 5-6 Pale damage and then 2-4 Pale damage 5 times every 0.5 seconds, last hit deals 10-12 pale damage. When an employee is standing at long range, it will fire a gun, dealing 8-9 continuous Pale damage every 0.5 seconds. After 12-15 seconds (afterwords every 17-19 seconds) It will open its suite case, as a large blade blue will quickly emerge from it, dealing 15-25 pale damage to anything in its way.

When the fixer can't find any employees after 25-35 seconds, it will enter its suite case. After 3-4 seconds it will teleport to a random employee in the facility.

On Death, the blade from the suit case will behead the fixer, dealing 50-70 pale damage to employees standing at close range to the fixer.

Defenses: 0.5 Red; 1.0 White; 0.5 Black; 0.0 Pale

The Claw
(95% certain this one is correct)
3000 HP
ALEPH

The Claw, more formally known as an Executioner, can only be found during White Midnight. It will wander around the facility. When employees are in the same area as the Claw, the Claw will either preform a medium attack dealing 15-25 Red damage or a double attack dealing 25-40 red damage, twice. After the initial 30 second cool down (40-45 seconds afterward), the claw will preform certain injections:
  • (60%) When it uses the Orange Serum, it will charge in a straight direction until it hits the end of the facility, dealing around 100 Red damage to anything in its path.

  • (40%) When using the Blue Serum, it will have a long cool down and highlight 8 random employees and/or clerks in the facility, marked with a blue circle around them. These circles can be removed by working on abnormalities. When the claw has activated its ability, it will teleport below the marked employees or clerks and perform a stab attack dealing 25-35 Black damage to the target. After reaching all the employees or clerks, it will enter a random area in the facility.

  • (it has taken 120 damage or more) When using the Green Serum, it will hold its hand out as a green glowing aura in its palm,healing 150 HP after 8-10 seconds.

By dealing 200 damage before activation, it will prevent the claw from using the Green or Blue injections and cause the claw to flop over, similar to the Scarecrow Searching for Wisdom's death animation, and will become groggy for 10-12 seconds.

After reducing the claws HP to 25%, the Claw will inject all 3 serums, known as the Tri-serum Cocktail. It will start by marking 6 random employees or clerks in the facility and will ready a dash attack. After 6-9 seconds, it will quickly move to every marked employee, dealing 60-65 pale damage to anything in its way and preform a slash attack, dealing 60-85 pale damage to the marked target. Once it reaches all marked targets, it dash to a random area in the facility, making it at max 7 Dashes and at minimum of 1 dash. As usual the Blue circles can be removed by working on abnormalities. After the first attack, it will have a 60-85 second cool down.

Defenses: 0.4 Red; 0.4 White; 0.4 Black; 0.4 Pale
Proving Oneself
"To know and manipulate all the secrets of the world; that is the privilege of the Head, the Eye, and the Claws. It is their honor and absolute power."

Clear Condition: "Suppress the Midnight of White + Meet Energy Quota"

The Trial starts off at the beginning, Ordeals. This day consists of nothing besides the Ordeals of White, so we will cover how to take them out.

The Fixer Trio: Red, White and Black.

Red Fixer you can distract with someone wearing Mimicry + the Weapon CENSORED. You can even lure them to an area where no employees are and slowly kill them while other employees are doing other things.

Black Fixer you should lure them outside of hallways with abnormalities and have them enter Elevators. Main Rooms and Sub Rooms so their Qliphoth Lower ability does not activate. Once he is outside of a Hallway with Abnormalities, you can slowly chip them down with someone equipped with the Armor Smile + the Weapon Mimicry.

White Fixer is the hardest one of the 3 to fight in my opinion. The main problem with the White Fixer is the large AoE it has, being able to cause a massive panic spiral to managers not prepared for it. The way to take care of them would be to have a few employees, wielding Pale damaging weapons, attack it and push the fixer into doing their reflecting damage attack. This comes with a risk of needing to focus on the White Fixer and timing the employees to stop attacking before the damage is reflected back at them. To minimize this risk, one could equip the employees with Pale resistant armor, to make the timing window a bit more manageable.

Pale Fixer

The Pale Fixer is another easy one to deal with. The main issue with this fixer is the surplus of Armor that has 1.5 Pale resistance. However, the Armor Twilight + its weapon, makes easy work of this fixer, assuming you use Pale Shields to increase the surviveability of your employee.

Dawn, Noon, and Dusk
Even though the fixers alone are not that powerful, their strength comes from that not just 1 fixer will appear each meltdown, but rather multiple. With Dawn having only 1, its relatively easy, but Dusk has all 4 at once. This is why the advice, rather than having the 1 by 1 approach, instead distracts the 3 easy to take care of fixers so one can focus on the bigger threat of all 3 Meltdowns, the White Fixer.

In Order of Priority:
  1. Black Fixer, this fixer lowers Qliphoth Counters, ofc it will have the highest priority
  2. White Fixer, if you kill all the clerks it won't attack. The issue mostly comes when it eventually finds an employee, as its AoE is so large that it covers almost half the facility.
  3. Pale Fixer, even tho it teleports to a random employee, one can easily distract it with a Pale resistant employee to prevent it from teleporting. The employee will distract it and wait for your kill squad to show up to finish it off.
  4. Red Fixer, red fixer gets stuck fighting indestructible wall

The Executioner
At Meltdown 8, we have a change in character, as Dawn through Dusk only consisted of Fixers from various places, Midnight releases a general Executioner from the Claw. The Claw's weakness similar to the other fixers is either to RUN AWAY(!) or overwhelm them with damage. One strat is of course riskier then the other, but is a lot faster.

Running away
Okay we are not going to be actually running away, but we will treat this fight like its Binah's Meltdown, spreading out employees across the facility and giving them each an abnormality to work on. This is to counter the Serum W and the Tri-Serum Cocktail. Of course, the claw has a trick up its sleave to counter this, and that being Serum R, allowing them to cross the facility and kill our trusty workers, this is where the Running Away comes into play, we shall use the elevators of Welfare, Disciplinary, Training, Safety and Information Teams to house the employees in order to dodge the attack. Its basically treating the attack as the Pillar Binah Fires. With these techniques, one should be able to counter all 3 of their attacks.

Damage Overwhelming
Just like how in strategy 1 we used Techniques acquired from Binah Meltdown to counter the Claw, I am going to also cover stuff acquired from Gebura Meltdown, that being the Advance strategy of sending the entire facility to attack the claw (Similar to Gebura Phase 4). This is the hardest one to pull off, but once you know how to guarantee 100% of its HP to be reduced, its a piece of cake.

To start things off one must actually wait until the Claw preforms the Serum W, as this attack can be negated by Overwhelming it with damage, giving us a necessary edge, making them groggy afterwards. Once they become groggy you have enough time to reduce their HP to 0.

Of course what I said about Gebura also applies here, if your entire facility can not shred Big Bird, who in this case actually has the same potential HP as the Claw, you are screwed going for this strat, as the Claw will get back up and instantly preform their Tri-Serum Cocktail, killing your entire facility with 1 attack.

Fatigue and Waiting

"We had no idea where to go, sailing the ocean without a map or any kind of guidance. Do you think it’ll be any better now? It won’t."

Clear Condition: "Reach Qliphoth Meltdown Level 6 + Meet Energy Quota"

Welcome, you have met your new friends, Ordeals of White. Get use to them cause now we introduce some old friends. This is the 2nd challenge in the Trials. On this day there will be the appearance of the Upper Layer Sephirot Bosses: Malkuth, Yesod, Hod, and Netzach.

The effects are the following:
  • The day starts off with the works being randomized every other Meltdown.

  • After Meltdown level 2, The UI will be pixelated and blured.

  • After Meltdown level 3, decrease all the employee's stats by -50. Can not go below the minimum of 10 on a stat.

  • After Meltdown level 4, When the player orders a work, you will not be able to cancel the work by clicking the containment room, selecting them and telling them to wait somewhere, pressing the Assembly Summons on the department, etc. Employees cannot be healed from any sources except at the start of each Qliphoth Meltdown and Army in Black.

All of this is a test to see how well you have farmed and understand your abnormalities. Placing the player in a very bad spot with having 4 effects being applied to your staff. This day can be the hardest to down right easy depending on how much you have farmed and increased your staff's stats. The other thing is the employee armor and weapons being of class to deal with the Fixers, you could definitely get away with having WAW to HE class equipment on Day 46 but Day 47 can be extremely hard without it being of grade (WAW and ALEPH).

For Malkuth's effect, just follow the same procedure, using abnormalities that don't care what work you preform to know what the works are.

For Meltdown level 4, having super high leveled employees negates the effect of Hod's ability. Having all employees at the Max of 130 in this day makes them be at 80. With Title bonuses it should be ~86 for the not targeted stat, and 90 for the targeted stat.

Lastly for the Netzach effect at Meltdown 5, it really shouldn't be a problem and you should have already dealt with the Noon of White on Meltdown 4, I hope you did. Even if you have to deal with a White Noon on Meltdown 5, it shouldn't be a problem since now you can deal with Army in Black, you should be able to. High expectations here.

Regret and Atonement

"We tried not to put trust in anyone, but we shamelessly woke up our colleagues who had fallen into eternal slumber when we needed them..."

Clear Condition: "Reach Qliphoth Meltdown Level 10 + Refine Target Energy Amount; or Neutralize the ‘Red Mist'"

This is the 3rd challenge in the Trials. On this day, there will be the appearance of the Middle Layer Sephirah Bosses: Tephereth, Chesed, and late as always, Gebura.

The effects are the following:
  • At the start of the day, 2 types of damage will be illuminated. Damage factor is unchanged.

  • After Meltdown level 4, Tiphereth's appearance changes (no new effect). Temporarily deactivates Chesed. The Red Mist appears at the top of the Disciplinary Team main room and will have 1800 HP. There are no noticeable differences with her Phases.

  • After Meltdown level 7, Tiphereth's appearance changes (no new effect). Chesed will boot up again, illuminating 3 types of damage every Qliphoth Meltdown.

There are 2 different paths to take on this day, either choosing the Qliphoth meltdown route or the kill Gebura route. Either way, they both lead to the same place, day 49. This day is nothing special and is one’s personal preference in choosing the path to go down.

For killing the Red Mist, you can follow the normal 2 paths, use employees or abnormalities, however I don't recommend using the shelter as it would be a bit too pricey and a huge risk of game over.

For dealing with Chesed’s route, you can follow the normal strategy, just remember to not engage in fighting the claw unless you really have to, like performing the Blue Injection. As for the other ordeals, pray for Dusk before Chesed comes online again.


Thought process
- Start of the day is the same as Chesed's core, so its easy to get to the meltdown required for Red Mist to spawn in.
-- Distracts Red Fixer to avoid it from going somewhere else, forgetting that the Red Fixer can attack behind it, causing a close call. At the same time, pushing meltdowns in order to either have red not illuminated or get rid of Chesed. Unfortunately the latter happened, but luckily it's a late Noon, so I didn't have to deal with the other fixers.

- During the Red Mist fight, I used a different method to suppress her, utilizing other strong gear as well. If one is doing this and wondering, why these specific combos and could I use a different combination? To answer that, the employee armor doesn't really matter as long as the general idea of CENSORED and Sound of a Star is used. You can even bring in other employees as long as you micro them properly.

- It basically goes the same as the previous Red Mist fight from then on out.

Freedom and Salvation
"I know that you are not certain of what lies ahead for you. The future you yearn for may never come. I can show a proper future to you instead, right before your eyes."

Clear Condition: "Reach Qliphoth Meltdown Level 10 + Refine Target Energy Amount; or Neutralize an ‘Arbiter’"

Welcome, don't mind the fire; It's not important. Please, sit down and enjoy this tea I brewed. This is the 4th challenge in the Trials. On this day, there will be the appearance of the Lower Layer Sephirah: Hokma and later, Binah.

The effects are the following:
  • At the start of the day, the game speed will be set and locked at 1x speed. If the player attempts to pause the game, 1 agent in the facility will die or panic. This will increase by 1 per pause, until every agent is dead or panicking(<- Bad ending). Remember that opening the pause menu, via the escape key, does not count toward the punishment.

  • After Meltdown level 4, An Arbiter appears at the Extraction Team main room and will have 2400 HP. No noticeable changes besides the ability to pause in Phase 3, but you will still pay the price for silence.

  • After Meltdown level 8: The game speed will be set and locked at 1.5x. Hokma will have an animation speed increase. An Arbiter will be idle forever, "can not take any damage", and all special overloads will be removed. Binah can be killed here, but since she isn't "ready to close", the day will not end.

  • After Meltdown level 9: The game speed will be set and locked at 2.5x.

"Remember how I said Hokma was about preventing a fire from ever starting, and Binah was about dealing with fires that have started? It turns out putting them together is exactly as painful as it sounds. Good luck!" TQ

Prepared or not, this day is very difficult. With the Arbiter spamming meltdowns and Hokma increasing the game speed and charging you for the Pausing of time, it is not a surprise that most people can't do this day. Depending on how the facility is built, it determines the path you take to clear the day, just like day 48.

By far the easiest way to beat this is to go for the Arbiter path. Because the Arbiter has 2400 HP, you actually can just beat her up, after removing the dangerous Meltdowns, without following her gimmick. The only issue will be micro-ing your employees around, but that shouldn't be too big of a problem since your attention will be focused on the Arbiter. If you think ahead and pick your abnormalities properly, you can spawn the rabbit team of Extraction and have them deal chip damage while you focus on high threat Meltdowns.

Its obvious why this path is recommended over Meltdown 10, as it requires 0 skill at all in order to beat + a free S rank you can show to your friends. So instead we will talk about the other path, Hokma's side. And oh boy, I learned some crazy things doing attempts of this that might put me closer to beating it with an S rank, which many guides I've read say is impossible (quite funny to read now). TQ says it's possible and there are many videos of people doing it. The main issues are the abnormalities you have selected and the Ordeals of White (always an issue). Of course Blue Star is an issue when it breaches, especially when there is an Ordeal that can instantly lower the QC of every abnormality in the hallway plus the Arbiter says "Hello." Honestly, that's probably what the developers wanted to happen when they created Blue Star and WhiteNight, which is bad game design imo. By picking a ton of low threat abnormalities, you already remove the main issue with going this route as Black Fixer and the Arbiter will be powerless to cause the fire. Basically you stop the fire before it can be set off. The 2nd issue is obviously the Pale Fixer, which you just want to look for as soon as possible. If you have good RNG, it will spawn near your employee who can handle it, which saves a lot of headache when doing this. Even better would be it spawning near the Arbiter, but that's quite rare to happen. Probably where most of the resets are going to occur. Lastly the Claw is a joke, he will get obliterated on Meltdown 8, leaving you to just push the meltdowns till you reach level 10. Obviously this being the RNG heavy path makes this the least viable option out of the 2 and I already said that Arbiter is just 10x faster then this, even if your employees have default EGO gear.
[Credits]
TeeQueue (TQ) of course for helping with strategies along with creating the "Abnormality cards" that i used for reference.
https://lparchive.org/Lobotomy-Corporation/

I used videos by ふるぬっこの森 (@fullnuko) before recording my own, will leave the link here anyway even though I removed their vods from this guide.

Other Guides and Resources
For those that think I have done a bad job at explaining strategies or are using way too advanced techniques, you can check out this other guide written by Sunset Sullivan
https://steamproxy-script.pipiskins.com/sharedfiles/filedetails/?id=2558274102

You can also check out the "Full-game strategy and tips" guide by dinges720
https://steamproxy-script.pipiskins.com/sharedfiles/filedetails/?id=2974535650

There is always the Lobotomy Corporation Wiki which should contain the most up to date information regarding the Sephirah Core Suppressions. Link[lobotomycorp.fandom.com]

That's kinda it
Guide Progress
Sephirah Core Suppression:
  • Make the openings to each layer be a bit "better".
  • Kether Core Suppressions (player feedback because I am too good at this game)
25 Comments
RoyalGuardian7 13 Nov, 2022 @ 6:15pm 
Is there any art of cheese guide?
Grim Xzag  [author] 21 Dec, 2021 @ 5:43pm 
I wish you all the luck
Kurotsubaki 21 Dec, 2021 @ 5:42pm 
i'm on hokma suppression
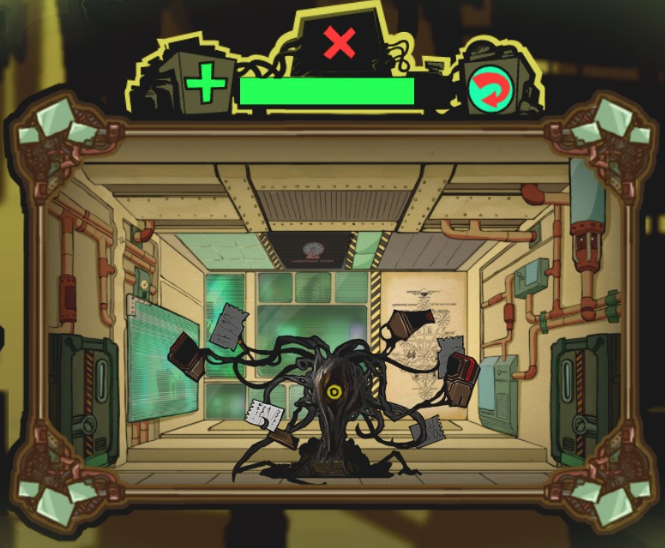
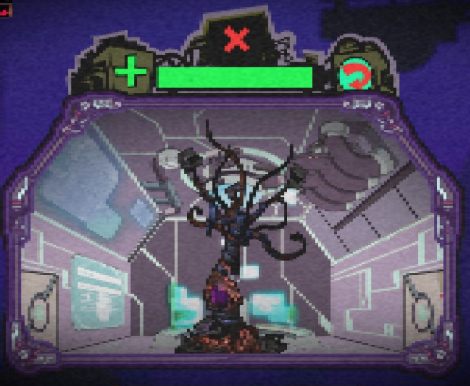
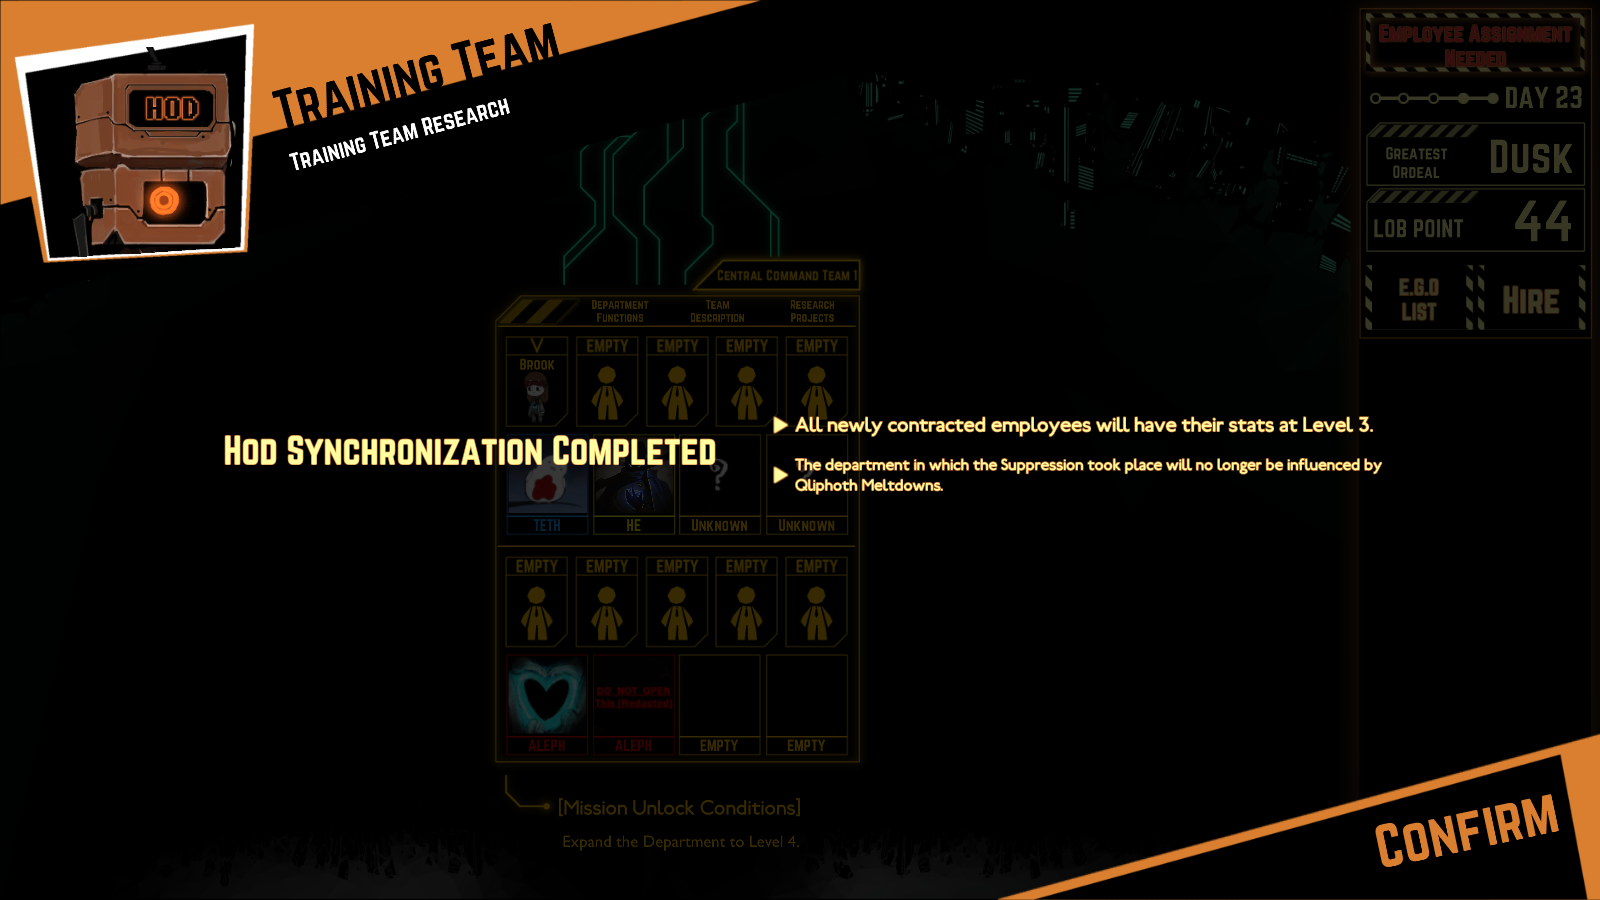
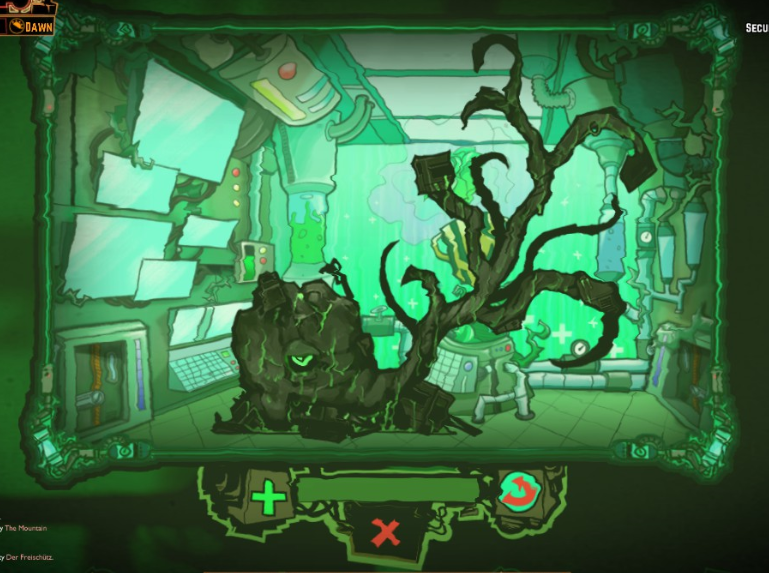
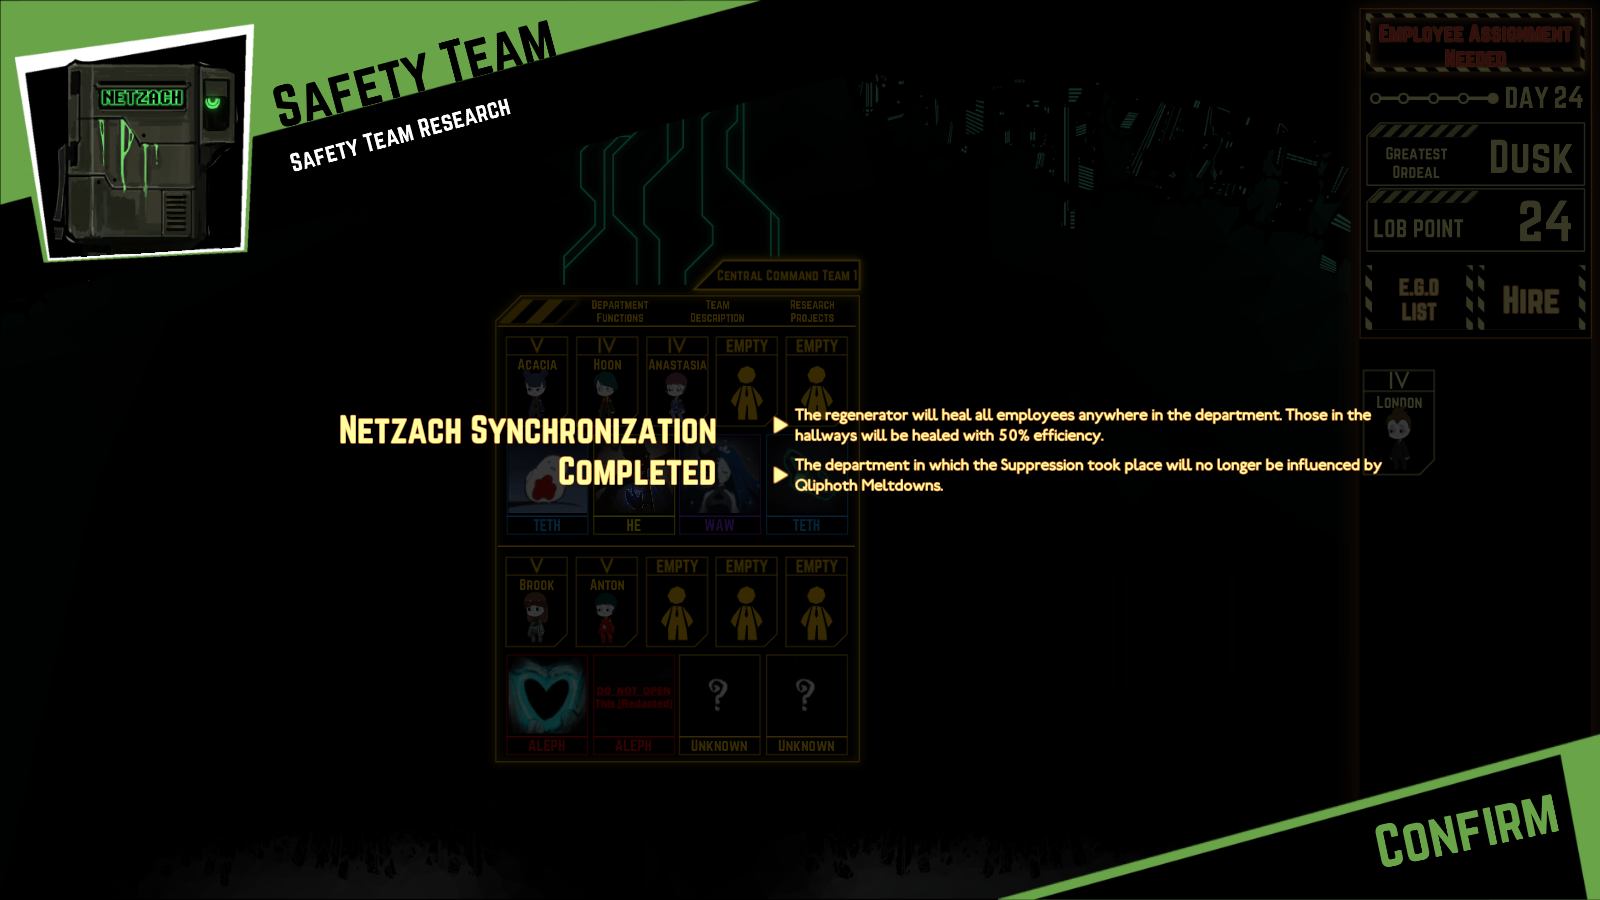
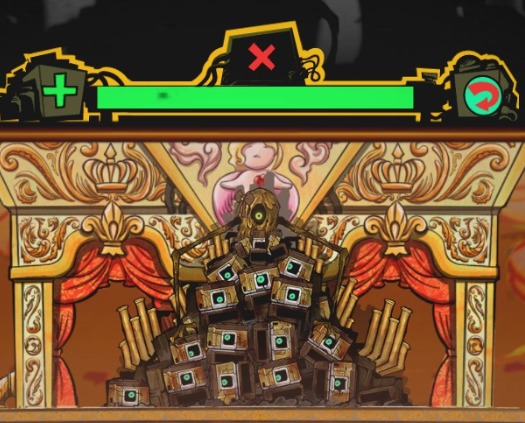
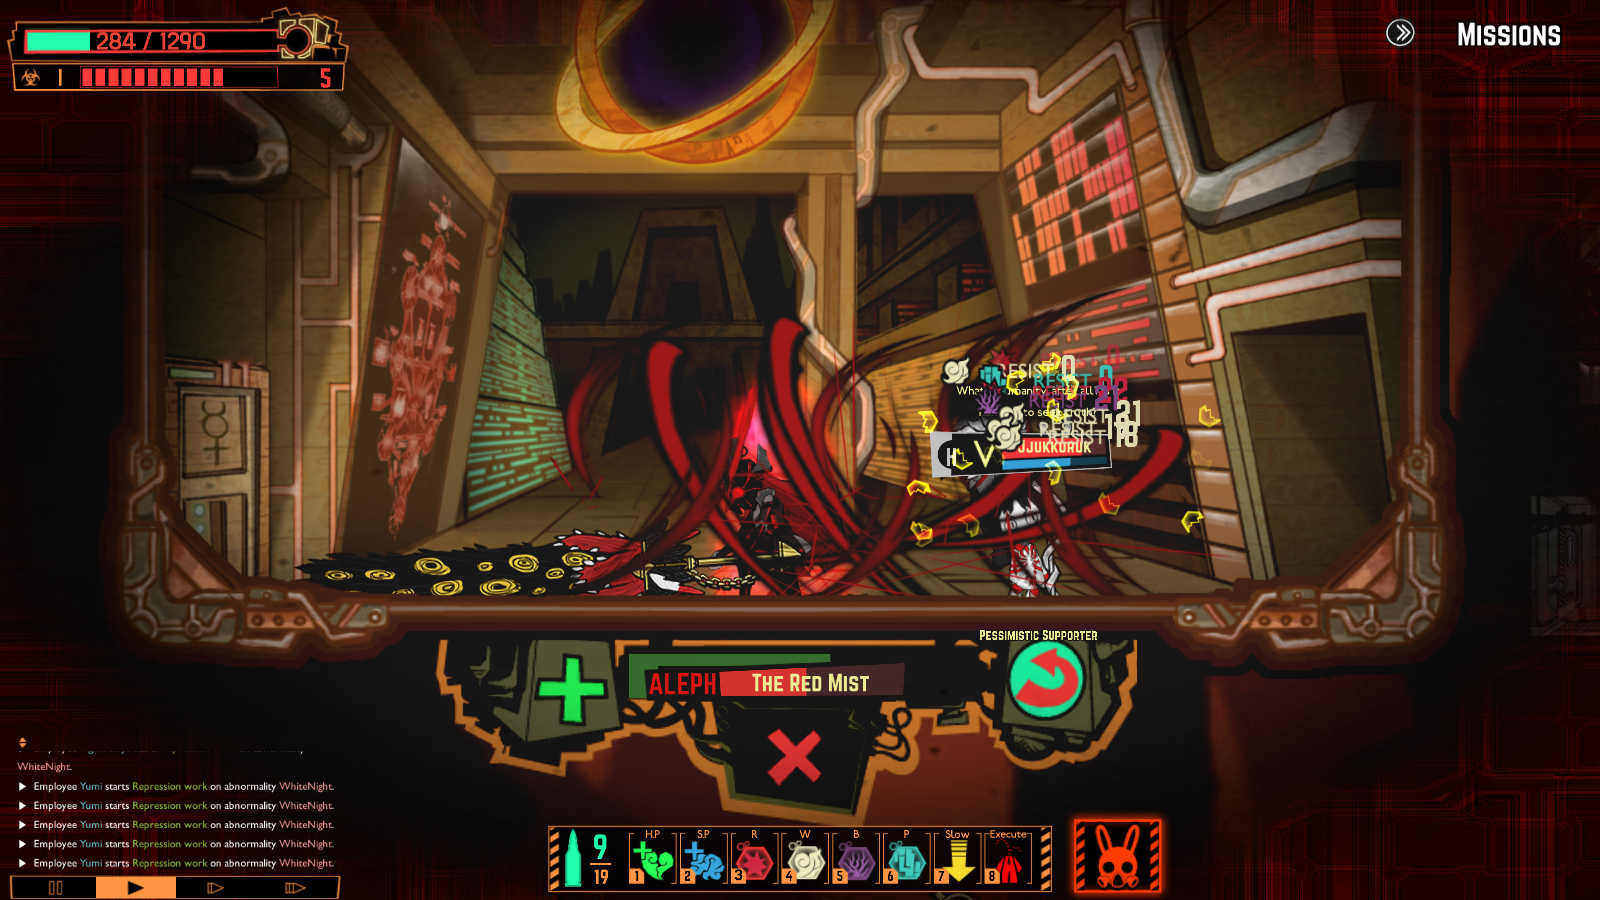
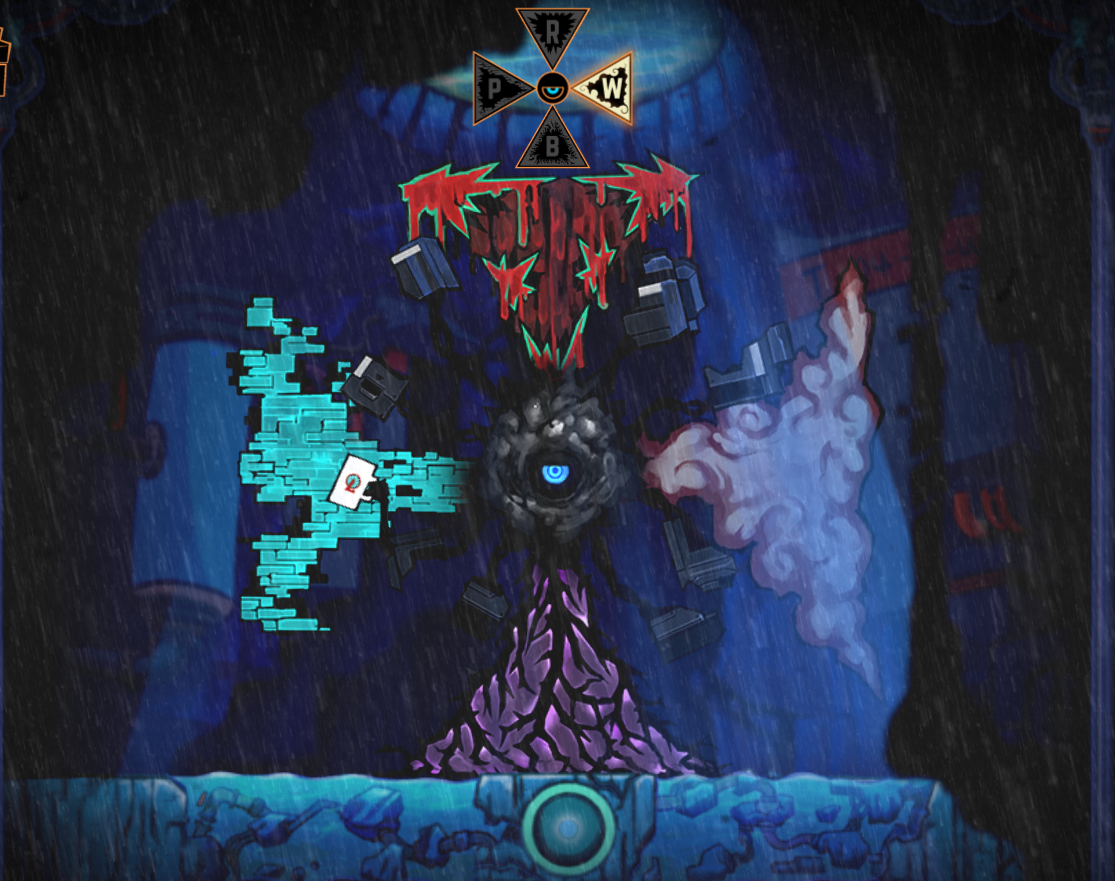
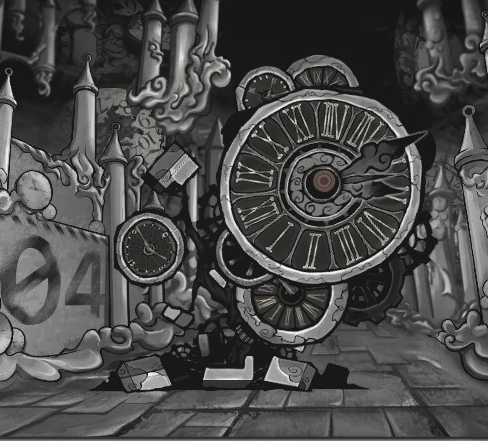
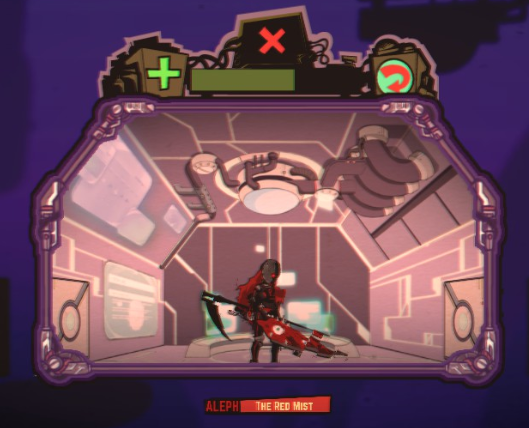
...with whitenight, 3 birds and thomas to hell...
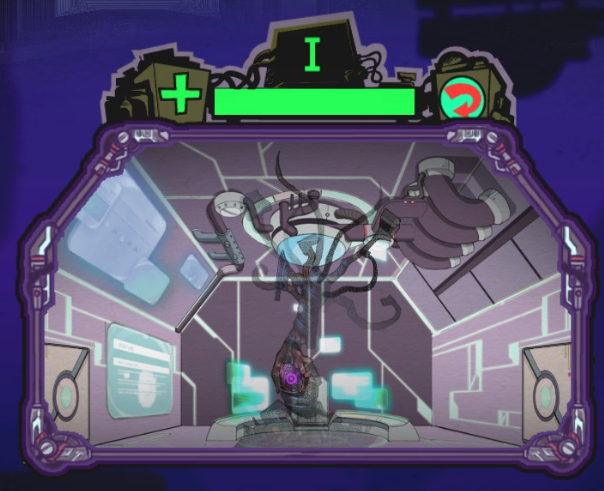
tried to just wrestle it to the midnight and finish, but haven't been able to because midnight will definitely killed all clerks and letting mountain, big bird and monk to escape which means high chance of apocalypse bird that can trigger meltdown. this meltdown will reduce your energy even if it didn't result in an escape and high chance of whitenight coming...
summary, absolute chaos
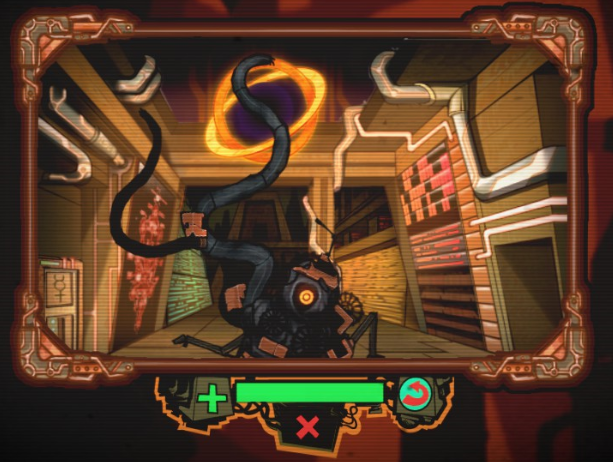
currently trying 2 methods. 1st is wrestle apocalypse bird on 1x speed and 2nd is trying to kill of all clerks 1st

wish me luck
Grim Xzag  [author] 12 Dec, 2021 @ 5:47pm 
Nothing but pain
Goldie910 12 Dec, 2021 @ 2:09pm 
pain
M200Chan 23 Jul, 2021 @ 10:17am 
A note for the Hokma suppression: You can pause the game without losses by opening your Settings page. This is only really good if you need to stop playing for some duration, but is still useful to know if you need to go AFK.
KirChad 16 May, 2021 @ 6:23am 
I think it's very important that you include for the Atziluth suppression that if you want to do both in the same run you have to expand the departments equally until the day 41 memory repository.
V12D 9 Mar, 2021 @ 3:34am 
Just wanted to say that the guide has been really helpful, I'm on the final days and very close to beating the game. Not looking forward to day 49 tho. Thanks man.
Grim Xzag  [author] 24 Dec, 2020 @ 10:53am 
just you
Air Raider 24 Dec, 2020 @ 5:34am 
Is it just me or red mist on day 48 randomly drops abnos counters to 0