Easy Red 2

Easy Red 2

140 ratings
Tips, Guide, and Easter Egg for Easy Red 2 (currently abandoned)
By ASIA and 1 collaborators
This guide will show you about tips and things you can do in Easy Red 2 + Easter Egg "Yay!". Since not all things you can do or mechanics in Easy Red 2 are shown in ingame tutorial, this guide will help you seeing them and try to apply them. This guide is made by Morning Asia, Sans, and Ostrich.
3
5
10
4
4
3
   
Award
Favorite
Favorited
Unfavorite
Casual Gamers Setting
Is that tank still alive?
Is that guy dead after I wasted 4 mags shooting him?
Where the heck is the crosshair?

Listen here you silly casual gamers (including me), there is a solution for all of this problem in order for me to ruin your realism immersion.
Go to the option/setting and activate:
Show crosshair.
Show hitmarker.
Show armour penetration.
Now you know if the AI is dead or not and where your gun is shooting.
Gamemodes
Currently there are 2 gamemode available for Easy Red 2, Operation and Push the Frontline.

Operation:
In this gamemode, one team will attack and the other will defend series of phases to won.

-) Phases and Cap Points
A mission will be divided into phases. Each phases have cap points (objectives) needed to be captured to progress to the next phase. Cap points needed to or can be captured will be indicated with cross swords icon on the screen and owned/captured cap points will be indicated as a flag icon.
Phases can also have more than one cap points needed to be captured to be won. When multiple cap points are available, defender can always retake captured cap points. If all phases are won, the attacker wins. The defender wins only when the attacker tickets are drained.

-) Tickets
Attacker will start with a certain amount of tickets that will be reduced on each squad or vehicles deployed. When ticket reaches 0, the attacker lose the match. Each phases won will give tickets for the attacker. Defender can check how many tickets the attacker have left by being in a cap point. Attacker can only see their tickets on the spawn menu.

Push the Frontline:
In this gamemode, both team will try to win series of phases. Both are attackers and will actively push each other back as the name suggest.

-) Phases and Cap Points
In this gamemode, the game will start on the middle phase. Both team will attack cap points of each phases. The team that wins a phase will push the other team backward one phase. The game is won when one team manage to push the other team to their last phase or have won more phases than the other team when (all phases in a mission x 2) phases have been won by any team.

-) There are not tickets in push the frontline gamemode.

Every base game campaign missions are Operation except for "Pushing Back" and "Japan Counterattack".
Extra Soldier Controls
Some of these controls can be seen from keybind setting as well. (note: the keybind settings have more than one page, you can press the arrow again to check more)
Here are some extra controls that might be overlooked:
1. Press B to bandage without opening inventory. Will work as long there is a bandage in inventory.
2. Hold Sprint while aiming to hold breath. Reducing weapon sway and zooming the sight.
3. Space on short obstacle/opened window to vault it.
4. C to prone or hold crouch key.
5. While prone or crouching, sprinting will make the character stand up.
6. Holding F on a wounded soldier then hover mouse on carry will allow dragging. Select other treatments to heal him based on asked treatment.
7. Press H to throw smoke grenade. Will work as long there is a smoke grenade in inventory.
8. Hold G to open radial menu for grenade types you have. Press G to just throw a basic grenade. Some other throwables that can be chosen: (Smoke, Dynamite, AT Grenade, TNT, Ammo Crate, AT Mine)
9. Mouse scroll wheel will change to secondary weapon. Scroll it again to change back to primary. You can also use change weapon key (2) to change to primary and secondary.
Example of secondary weapons (the rocket launcher and pistol)
10. M to open map. The game auto generate map.
11. F on windows and doors will open it.

12. Press 0 to change firemode of weapons. Mostly full auto and semi auto only, except BAR can go rapid or slow full auto. The gun will do a small movement when firemode successfully changed.
List of guns with firemode: (Thompson, Thompson M1928, BAR, Bren LMG, MP 40, MP 44, FG 42, MAB 38)

13. Hold R to open radial menu to reload with your chosen magazine or clip. Will be useful to select between drum and stick mag for example.
Pic of choosing reloads and rechambering is chosen method

14. When you only have empty gun and a bullet without the magazine for it, some gun can be rechambered. Pressing reload will take a fresh bullet of applicable caliber and reload just one bullet.
Pic of rechambering a bar

15. Press F on medic or mg to get 2 bandage or ammo crate deployed. Press ammo crate once to refill ammo and again to take it. It can be used 3 times.
16. There are pre-placed ammo crates/grenade crates/at crates scattered around the battle. Just press F on it to get the content and the crate will replenish it's content after a while.

17. Hold I (inventory key) to open radial menu of all options for quick inventory actions. Possible actions are= attach and detach gun attachments, wear and take off uniform/gear, and consume food or medicine.

18. Hold X (switch member key) to open radial menu to change squad member you control.

19. Press page up and page down to adjust your gun sight range. (zeroing)

20. Pick to secondary or primary. If you want to loot a gun in the inventory, clicking on it will give two option: take or take to right hand. Take will put your gun in secondary slot and replace whatever gun in there if you have one. Take to right hand will put your gun in primary slot and replace whatever gun in there if you have one. Pressing F on gun on the ground will do the take to right hand interaction.
This is also explained in inventory management section.

21. Liberating surrendered soldier. Get close to surrendering friendly soldier and press F when liberate option pops up. They will equip themself with a pistol and continue fighting.
Melee
This is the feature that exist in Easy Red that I always forgot it exist because I can't get close with the enemy without getting aimbotted for 5 second.

Just press "V" if you want to melee.
By default two melee hit will kill/wound someone by slapping from left to right. This however can be improved with bayonet that will do one hit kill/wound instead.
Bayonet can be attached to applicable guns or attached initially.
How to attach bayonet:
-Open inventory (I key)
-Click on a bayonet
-Select install attachment
-If there is an applicable gun, the bayonet will be attached there.
List of applicable guns: M1903 Springfield, Kar98k, Lee Enfield Mk 3, Lee Enfield Mk 4, Arisaka Type 38, M91 Carcano, M1 Garand, M1 Carbine, Landchester, Type 100, Type 99 LMG, FG 42, Winchester M12, Mosin M91/30, Mosin M38

There is also alternative way to attach bayonet: Hold I (inventory key) and hover on attach bayonet. This is called quick inventory actions and also explained in inventory management section.

Issuing charge command as squad leader will make all members attach bayonet if they have any.

Loadouts with bayonet:
-Japanese rifleman, medic, radioman, and marksman have bayonet attached on starting Arisaka Type 38
-) Soviet rifleman, medic, and marksman have bayonet attached on starting Mosins
-German paratrooper machinegunner has FG 42 bayonet in inventory
-Japanese squad leader has Type 100 bayonet in inventory
-American radioman has Winchester M12 bayonet in inventory
-British radioman has Landchester bayonet in inventory
-All rifle wielders have bayonet in inventory, except for medic and sniper
-Japanese machinegunner has bayonet attached on starting Type 99 LMG
Third Person View
This is a casual gamers feature that exist in Easy Red 2. I don't remember this feature too because I always get steamrolled by the AI every single match.
To enter the third person view just press "T".
Press Q and E (lean key) to change third person view side.

Listen here you silly person, third person view is not OP at all, except if you use vehicles.
Bipod
Q: Why can't I aim down sight the machinegun and the AT rifle?
A: Because you need a bipod to do it.

Bipod is an attachment that allow a gun to have lower recoil when deployed.
Position your gun right on a surface or go prone to the ground then the bipod will be deployed.
As stated above, some guns can't be aimed without bipod deployed, these guns are: MG 42, Browning 30 Cal, Boys AT Rifle, Panzerbuchse 39, PTRD 41, and Type 97 At Rifle.

List of guns with bipod attached: BAR, Browning 30 Cal, MG 42, FG 42, Bren LMG, DP 28, Type 99 LMG, Boys AT Rifle, Panzerbuchse 39, PTRD 41, Type 97 At Rifle, PIAT (not attached by default)
You can detach bipod by clicking on a gun and select detach attachment and attach it again by clicking on an attachment and select install attachment.

Some tips:
-Deploy bipod on fences by crouch first and walk toward the fence. When the bipod is deployed, now you can stand up and start firing. This way is to minimalize standing up while trying to deploy the bipod and get killed. The bipod will stay deployed after standing up.
Inventory Management
Press I to open inventory. Pressing F on body will open the body's inventory and player's inventory too. Looting body can also be done by getting close to the body and open inventory by pressing I.


Things you can do in inventory menu:
-Pack unpack magazine. Unpacking will get the bullets out from the magazine and you can refill it back to different magazine using the same bullet type or the same magazine.
-Take off and wear uniform. Highlighted uniform is currently worn. Helmet can sometimes comes off in battle when got shot, so you should rewear it. What if I loot flamethrower and unable to shoot? That means you don't have the backpack or the fuel. Loot the flamethrower fuel, flamethrower backpack then wear it, and the flamethrower hose then wield it to use a flamethrower.

-Look at health on the middle top colored soldier icon

-Consuming food and medicine to replenish health. Bandage only stop bleeding.

-Looting body. Upon seeing the body's inventory. Click on what you want and select take into inventory. Click take on right hand to switch currently wielded weapon to selected weapon. Click take to inventory on weapon to put it on secondary slot.
What if I loot weapon and unable to reload? That means you don't have the ammo for it. Loot the body of the gun owner and take all his ammo for it or just find ammo crate and refill from it.

-Installing and removing attachment. Some class (German paratrooper leader and machinegunner) will have unattached attachment in inventory.

-Manual usage of grenades. You can click grenades in inventory and select throw. Not recommended due to impracticality. You can also do this to ammo crate by selecting drop.

-Dropping item. It's done by selecting an item and select drop item. You can also double click the item when it's only your inventory opened.

-Weight. You gotta watch at the weight of your inventory on upper left. If inventory is overweight, the player will unable to run.

-You can also quick transfer between inventory by double clicking on the item. If you are double clicking when it's only your inventory opened, the item will be dropped (work as fast drop).

Quick Inventory Actions: Some actions can be done very quickly without opening inventory. These actions are= attach and detach gun attachments, wear and take off uniform/gear, and consume food or medicine.
The control is done by just holding (I) inventory key to open radial menu and put your mouse on selected action.
Calling and Operating Artillery
"Your artillery request has been denied sir, have a nice day while there are 20 enemies charging at you".
Why can't I call artillery strike? Either there are no artilleries available or no radioman left alive.
Friendly artillery is marked as blue square with circle at the middle. If you see this somewhere, there is an artillery usually on that direction and far away from the map.

Radioman is essential to make a call. If he dies, no call can be used. Radioman can't be a squad leader, so don't try become radioman to able to request things. As squad leader however, you can loot a radio and wear it on your back to allow requesting and calling.

As Radioman:
Upon receiving a request, press tab once to open the radio interface. Click the right number group that contain each current highlighted number to call an artillery correctly.

In case you got your hand on any artillery, you can shoot direct fire or wait for coordinate. When a radioman confirm a bombardment, there will be a shell icon on your screen. Face the artillery to the shell icon then look at the number under the shell icon. Raise the artillery to match the number on the sight to the number under the icon. This thing is also taught in ingame tutorial mission.
Shells
For the love of god don't use HE shell because it is crap in this game. HE shell sometimes doesn't cause significant damage and sometimes they don't cause any damage at all.

When entering a tank or artillery, you can look at top right list to see all the available shells or attack types. Select them by using up and arrow key or the mouse wheel. Click on the shell to confirm reload to that shell.
As stated above, HE shells are strictly for infantry and need to explode close to the target or within the blast radius in order to damage it. HE shells however deal no damage on vehicle sometimes, so don't use it.
AP shells are the main shells for tank vs tank battle. Every tank has different armor values on different parts of the tank. Aim your AP shells on weaker parts of enemy tank to deal effectively. Killing infantry with it is not recommended, since you need to score a direct hit on it, unless you like seeing infantry get thrown.
APHE shells are like AP shells, but they also deal blast like HE. Available on some vehicles.

Turret MG is the best way to deal with infantry while in a tank. Mg however can have the ammo go slightly to the left or the right of the tank sight and it's different on different tanks. Turret MG doesn't share with the cannon, so it will always be loaded and reload confirmation not needed.
Vehicles
Tanks
Tank controls:
-Press T to go third person if enabled
-Move forward and backward to move the tank
-Moving left and right will turn the tank left and right. You can also turn a tank while not moving.
-Press numbers on your keyboard to change seats or left and right arrow key.
(Any seats don't matter in driving a tank. As long there is a bot in the driver seat, player can drive the tank from any seat and the bot will not have any control on the driving.)

Turret seat controls:
-Use the mouse to aim the turret. Sometimes navigating where your turret is looking to and where your hull is heading to is hard, so you can look on bottom right compass. The turret on the compass tell where you are looking at and the shape under the turret tell where your hull is heading to. Being on third person will make it easier to keep this on track. Turret heading north while hull heading east in this image
-{(look at shells section) Use scroll wheel or up and down arrow key to change ammo types. Click to confirm reload turret then you can use the different shell. Turret mg doesn't need reload tho upon changing.}
-Left click to shoot and right click to aim.

Commander seat controls:
-Use the mouse to look around. Usually commander get the best view.
-Click on enemy to spot them.

About tank weakspots, see weakspots category

All tanks in game and where to find them:
American tanks:
-M8 Greyhound (Mission 4 Anzio)
-M3 Stuart
-M5 Stuart (Mission 5, 8, 9 Anzio; Mission 2 Kwajalein; Mission 4 Roi))
-M5 Stuart Flamethrower (Mission 2 Kwajalein)
-M8 Scott (Mission 2 Kwajalein; Mission 4 Roi)
-M4 Sherman (Mission 3 Anzio)
-M4 Sherman Flamethrower
-M4 Sherman Calliope (Mission 3 Anzio)
-M3 Lee (Mission 8 Anzio)
-M10 Wolverine (Mission 3 Anzio)
-M36 Jackson
-M7 Priest (Mission 9 Anzio; Mission 6 Kos)
-M12 GMC
-M3 Half-Track (Mission 4, 8 Anzio)
-M3 Half-Track AA (Mission 2 Kos)
-M3 Half-Track Hospital
-Willys Jeep (Mission 2, 4, 6 Kos)
-Willys Jeep with MG

German tanks:
-Sdkfz 232 Puma (Mission 4 Anzio; Mission 2, 6 Kos)
-Sdkfz 232 Puma Open-Topped (Mission 2 Anzio)
-Panzer III (Mission 5, 6, 8, 9 Anzio; Mission 2, 6 Kos; Mission 3, 6, 7 Stalingrad)
-Stug III (Mission 3, 5, 9 Anzio)
-Panzer IV E (Mission 3, 6, 7, 8 Stalingrad)
-Panzer IV G (Mission 3, 5, 6, 8, 9 Anzio; Mission 3, 6, 7 Stalingrad)
-Panzer IV H
-Panzer V Panther (Mission 3, 9 Anzio)
-Panzer VI Tiger I (Mission 3, 9 Anzio)
-Flakpanzer IV Wilberwind (Mission 2 Kos)
-Sturmpanzer I Bison
-Sdkfz 251 Half-Track (Mission 2, 4 Anzio; Mission 2 Kos)
-Opel Blitz Truck
-Opel Blitz Open-Topped
-Kubelwagen

Japanese tanks:
-Type 93 Armoured Car (Mission 1, 2 Kwajalein; Mission 3,4 Roi)
-Type 95 Ha-Go (Mission 2 Kwajalein; Mission 1,2,4 Roi)
-Type 97 Chi-Ha-Kai (Mission 2, 3, 4 Kwajalein)
-Type 4 Ke-Nu (Mission 4 Roi)
-Type 2 Ka-Mi (Mission 2 Kwajalein)
-Type 94 Truck (All Roi Missions)
-Type 95 Kurogane (All Kwajalein Missions)

British tanks:
-Daimler Armoured Car (Mission 5 Anzio)
-British M3 Stuart (Mission 6 Kos)
-British M5 Stuart (Mission 6, 9 Anzio)
-Cromwell (Mission 9 Anzio)
-British Sherman (Mission 6 Anzio)
-Sherman Firefly (Mission 3 Anzio)
-British Willys Jeep

Italian tanks:
-M13/40 (Mission 10 Anzio; Mission 2, 6 Kos)
-Semovente da 75/18 (Mission 1, 2, 6 Kos)
-Fiat 626 Truck

Soviet (Stalingrad DLC):
-BA 10 (Mission 5, 8 Stalingrad)
-BT 7 (Mission 2, 3, 6, 7, 8 Stalingrad)
-T34-76 (Mission 3, 7, 9 Stalingrad)
-T34-85
-KV 1 (Mission 3, 7, 9 Stalingrad)
-KV 2 (Mission 3, 7 Stalingrad)
-Su 76 (Mission 7 Stalingrad)
-Katyusha (Mission 3, 7 Stalingrad)
-Soviet M3 Half-Track
-Zis Truck (Mission 6 Stalingrad)
-Zis Truck with AA Gun (Mission 6 Stalingrad)

Planes:
Plane controls:
-Press T to go third person if enabled
-Move forward to increase throttle that will affect speed
-Move backward to decrease throttle or speed. Decreasing speed would be useful in turning and chasing an enemy in dog fight to gain more control of the plane, cause the plane move pretty fast on full throttle. Getting too slow can make your plane fall tho.
Picture of bombs HUD and throttle
-Space to drop bombs. There will be indicator HUD of how many bombs on the right. You can also see how many bombs by going third person and look at the underside of your plane for visible bomb models.
-Left click to shoot mg and right click to aim through the reflector sight
-Move the mouse around to turn the plane

When planes are on land, increase the throttle and it will fly after reaching certain speed.
Go toward the white plane icon on the map to refill bombs and mg. It can be put low in some maps, so be careful not to crash.

List of Planes:
-) P51 Mustang (American), 2 bombs, MG
-) F4F Wildcat (American), 2 bombs, MG
-) P38 Lightning (American), 2 bombs, AT Bullet MG, MG
-) MeBf109 (German),1 bomb, MG
-) Junker Ju87 Stuka (German), 4 bombs, MG, Tail Gunner
-) Junker Ju87 Stuka Auto Cannon (German), No bombs, Twin Autocannons, MG, Tail Gunner
-) BF110 (German), 2 bomb, AT Bullet MG, MG, Tail Gunner
-) Spitfire (British), 4 bombs, MG
-) Spitfire Auto Cannon (British), 2 bombs, AT Bullet MG, MG
-) Bristol Beaufighter (British), 2 bombs, AT Bullet MG, Twin Rockets, Tail Gunner
-) Zero (Japanese),1 bomb, MG
-) Zero Auto Cannon (Japanese), 1 bomb, Twin Autocannons, MG
-) IL-2 (Soviet), 6 bombs, AT Bullet MG, MG, Few Rockets, Tail Gunner

Thanks to Marco in his Easy Red 2 news https://steamproxy-script.pipiskins.com/app/1324780/allnews/
You can find the planes in:
-Shores of Nettuno (USA and Germany, first phase)
-Near Tor San Lorenzo (Germany, first phase)
-Near Acciarella (USA, first and last phases)
-Pushing Back (Germany, first phase)
-Anzio Express (Britain, first phase)
-Battle of Cisterna (Germany, last phases)
-Montecassino Point 445 (Germany and Britain, first phase)
-Kwajalein Beachhead (USA and Japan, first phase)
-Kwajalein Airport (USA and Japan, first phase)
-Japan Counter Attack (USA , first phase)
-Marmari Invasion (Germany , first phase)
Weapons List
All in game weapons sorted by nation:
American:
-M1903 Springfield (Scope) (Bayonet) (Bolt Action Rifle) (Caliber 30-06)
-M1 Garand (Scope) (Bayonet) (Semi Auto Rifle) (Caliber 30-06)
-M1 Carbine (Semi Auto RIfle) (Caliber 30-06)
-M1a1 Carbine (Semi Auto RIfle) (Caliber 30-06)
-M1 Carbine 1945 (Bayonet) (Semi Auto RIfle) (Caliber 30-06)
-Thompson M1a1 (Semi/Auto) (SMG) (Caliber .45 ACP)
-Thompson M1928 (Semi/Auto) (SMG) (Caliber .45 ACP) (50 rnds Drum/20 rnds Mag)
-Thompson M1928a1 (Semi/Auto) (SMG) (Caliber .45 ACP) (50 rnds Drum/20 rnds Mag)
-M3 Grease Gun (SMG) (Caliber .45 ACP)
-M1918 BAR (Semi/Auto) (Bipod) (LMG) (Caliber 30-06)
-M1918a2 BAR (Fast RPM/Slow RPM) (Bipod) (LMG) (Caliber 30-06)
-Browning 30 Cal (Bipod) (Medium Machine Gun) (Caliber 30-06)
-Winchester M12 (Bayonet) (Shotgun) (Caliber 12 Gauge)
-Bazooka (Rocket Launcher)
-M2 Flamethrower (Flamethrower)
-M1911 (Pistol) (Caliber .45 ACP)

German:
-Kar98k (Scope) (Bayonet) (Bolt Action Rifle) (Caliber 7.92mm)
-G 41 (Scope) (Semi Auto Rifle) (Caliber 7.92mm)
-G 43 (Scope) (Semi Auto Rifle) (Caliber 7.92mm)
-MP 28 (SMG) (Caliber 9mm)
-MP 40 (SMG) (Caliber 9mm)
-MP 44 (Semi/Auto) (Scope) (Assault Rifle) (Caliber 7.92mm)
-FG 42 (Semi/Auto) (Bipod) (Scope) (Bayonet) (LMG) (Caliber 7.92mm)
-MG 34 (Bipod) (Medium Machine Gun) (Caliber 7.92mm) (50 rnds Drum/200 rnds Belt)
-MG 42 (Bipod) (Medium Machine Gun) (Caliber 7.92mm) (50 rnds Drum/200 rnds Belt)
-Panzerbuchse 39 (Bipod) (One Shot Anti Tank Rifle) (Caliber 7.92 x 94mm)
-Panzerfaust (Rocket Launcher)
-Panzerschreck (Rocket Launcher)
-Flammenwerfer 35 (Flamethrower)
-Luger P08 (Pistol) (Caliber 9mm)
-Walther P38 (Pistol) (Caliber 9mm)
-C96 Mauser (Pistol) (Caliber 9mm)
-C96 Mauser with Stock (Pistol) (Caliber 9mm)

British:
-Lee Enfield MK 3 (Scope) (Bayonet) (Bolt Action Rifle) (Caliber .303)
-Lee Enfield MK 4 (Scope) (Bayonet) (Bolt Action Rifle) (Caliber .303)
-Sten MKII (SMG) (Caliber 9mm)
-Sten MKV (SMG) (Caliber 9mm)
-Landchester (Bayonet) (SMG) (Caliber 9mm)
-Bren LMG (Semi/Auto) (Bipod) (LMG) (Caliber .303)
-Boys AT Rifle (Bipod) (Bolt Action Anti Tank Rifle) (Caliber 14mm)
-PIAT (Bipod) (Rocket Launcher)
-Smith & Wesson Victory Model (Pistol) (Caliber .45 ACP)
-Smith & Wesson Victory Model Short (Pistol) (Caliber .45 ACP)

Japanese:
-Arisaka Type 38 (Scope) (Bayonet) (Bolt Action Rifle) (Caliber 6.5 x 50)
-Type 100 (Bipod) (Bayonet) (SMG) (Caliber 8 x 22)
-Type 99 LMG (Bipod) (Scope) (Bayonet) (LMG) (Caliber 6.5 x 50)
-Type 97 AT Rifle (Bipod) (Semi Auto Anti Tank Rifle) (Caliber 20mm)
-Type A Nambu (Pistol) (Caliber 8 x 22)

Italian:
-M91 Carcano (Bayonet) (Bolt Action Rifle) (Caliber 7.35mm)
-MAB 38 (Semi/Auto) (SMG) (Caliber 9mm)
-Breda 30 (Bipod) (LMG) (Caliber 7.35mm)
-M1934 Beretta (Pistol) (Caliber 9mm)

Soviet (Stalingrad DLC):
-Mosin Nagant 91/30 (Scope) (Bayonet) (Bolt Action Rifle) (Caliber 7.62x54)
-Mosin Nagant M38 (Bayonet) (Bolt Action Rifle) (Caliber 7.62x54)
-Obrez Pistol (Bolt Action Rifle) (Caliber 7.62x54)
-SVT 40 (Scope) (Semi Auto Rifle) (Caliber 7.62x54)
-PPSH 41 (Semi/Auto) (SMG) (Caliber 7.62x25) (71 rnds Drum/35 rnds Mag)
-DP 28 (Semi/Auto) (Bipod) (LMG) (Caliber 7.62x54)
-PTRD 41 (Bipod) (One Shot Anti Tank Rifle) (Caliber 14.5x114)
-TT33 (Pistol) (Caliber 7.62x25)

Australian:
-Owen Gun Mk1/43 (SMG) (Caliber 9mm)
-Owen Gun Mk1/43 Camo (SMG) (Caliber 9mm) (need Normandy DLC)

What if I loot weapon and unable to reload? That means you don't have the ammo for it. Loot the body of the gun owner and take all his ammo for it or just find ammo crate and refill from it.
What if I loot flamethrower and unable to shoot? That means you don't have the backpack or the fuel. Loot the flamethrower fuel, flamethrower backpack then wear it, and the flamethrower hose then wield it to use a flamethrower.

Video:
Here is a video I made about all weapons available in Easy Red 2 along with their firemodes, reloading choices, type of ammo used, and attachments.
https://youtu.be/RXcRdzUpYxs
Role / Class
Every faction has class/role such as:
1. Squad Leader
American Infantry and Flamethrower: Thompson M1a1, M1911, 1 Smoke, 1 Grenade
American Marine: Thompson M1a1, M1911, 1 Smoke, 2 Grenade
American AT: Thompson, M1911, 1 Smoke, 1 Grenade
American Tanker: M3 Grease Gun, 1 Grenade
German Wehrmacht, Flamethrower, and Afrika Korps: MP 40, Luger P08, 1 Smoke, 2 Grenade
German Waffen SS and Paratrooper: MP 44, Luger P08, 1 Smoke, 2 Grenade, Attachable Scope in Inventory
German Tanker: MP 40, 1 Grenade
British Infantry: Sten MKII, Smith & Wesson, 1 Smoke, 1 Grenade
British Paratrooper: Sten MKV, Smith & Wesson, 1 Smoke, 1 Grenade
British AT: Thompson M1928, Smith & Wesson, 1 Smoke, 1 Grenade
British Tanker: Sten MKII, 1 Grenade
Japanese Infantry and AT: Type 100, Type A Nambu, 1 Smoke, 1 Grenade
Japanese Tanker: Type 100, 1 Grenade
Italian Infantry and SS: MAB 38, Beretta M1934, 1 Smoke, 1 Grenade
Italian Tanker: MAB 38, 1 Grenade

Hold Tab to open command menu
List of commands:
-Follow (by default), all members will follow the squad leader
-Move and Hold, all members will go to selected point
-Attack Objective from Direction, all members will go to a point before reaching the objective to make them flank the objective
-Line Formation/Column Formation, all members will change formation while following
-Charge, all members will run straight to selected point as fast as possible
-Tank Support, requires radioman to approve. Tell tank to go to selected point
-Artillery Smoke/HE/APHE, requires radioman to approve. Tell artillery to shoot to selected point
-Spot, add marker to enemy units that last for sometimes

When killed, squad leader position will be passed to second highest rank (usually radioman-> machinegunner-> sniper-> rifleman) Squad leader position is indicated on top left of the screen.
Some squad leaders wear unique hats or helmets.

2. Radioman
American Infantry and AT: M1 Carbine, M1911, 1 Smoke, 1 Grenade
American Marine: Winchester M12 Shotgun, M1911, 1 Smoke, 1 Grenade, Attachable Bayonet in Inventory
German Wehrmacht and Afrika Korps: Kar98K, Luger P08, 1 Grenade, Attachable Bayonet in Inventory
German Paratrooper and Waffen SS: G43, Luger P08, 1 Smoke, 1 Grenade
British Infantry, AT, and Paratrooper: Lanchester, Smith & Wesson, 1 Smoke, 1 Grenade, Attachable Bayonet in Inventory
Japanese Infantry and At: Arisaka Type 38 Bayonet, 1 Smoke, 1 Grenade
Italian Infantry an SS: M91 Carcano, 1 Smoke, 1 Grenade, Attachable Bayonet in Inventory

{(look at calling artillery section)
Upon seeing radio request received, press tab to confirm a tank support or getting coordinates for artillery fire. A small mini game will appear for getting coordinates. Click the group of number with the number shown in the middle one by one and make no error. Error will cause the artillery fire to shift elsewhere.}
When being squad leader, you can call and confirm calls yourself.
Visible radio backpack can be seen on radioman's back.

3. Rifleman
American: M1 Garand, 1 Grenade, Attachable Bayonet in Inventory
German: Kar98k, 1 Grenade, Attachable Bayonet in Inventory
British: Lee Enfield MK 4, 1 Grenade, Attachable Bayonet in Inventory
Japanese: Arisaka Type 38 Bayonet, 1 Grenade
Italian: M91 Carcano, 1 Grenade, Attachable Bayonet in Inventory

4. Sapper
American: M3 Grease Gun, 1 TNT, 1 Dynamite, 2 AT Mine, 1 Grenade
German Paratrooper: G 43, Panzerfaust, 1 AT Grenade Bundle, 1 Grenade
German Waffen SS: MP 40, Panzerfaust, 1 AT Grenade Bundle, 1 Grenade
British Paratrooper: Lee Enfield MK 4, PIAT, 1 Dynamite, 1 TNT, 1 Grenade, Attachable Bayonet in Inventory

5. Sniper
American Infantry: M1903 Springfield Scoped, M1911, 1 Smoke, 1 Grenade
German Wehrmacht and Afrika Korps: Kar98k Scoped, Luger P08, 1 Smoke, 1 Grenade, Attachable Bayonet in Inventory
German Waffen SS and Paratrooper: G 43 Scoped, Luger P08, 1 Smoke, 1 Grenade
British Infantry: Lee Enfield MK 4 Scoped, Smith & Wesson, 1 Smoke, 1 Grenade, Attachable Bayonet in Inventory
Japanese Infantry: Arisaka Type 38 Scoped Bayonet, 1 Smoke,1 Grenade

Sniper have higher accuracy when controlled by bots.

6. Machinegunner
American Infantry: Browning 30 Cal, 1 Smoke, 1 Grenade, 1 Ammo Crate
American Marine: BAR, 1 Smoke, 1 Grenade, 1 Ammo Crate
German Wehrmacht, Afrika Korps, and Waffen SS: MG 42, 1 Smoke, 1 Grenade, 1 Ammo Crate
German Paratrooper: FG 42, 1 Smoke, 1 Grenade, Attachable Bayonet and Scope in Inventory, 1 Ammo Crate
British Infantry and Paratrooper: Bren LMG, 1 Smoke, 1 Grenade, 1 Ammo Crate
Japanese Infantry: Type 99 LMG Bayonet, 1 Smoke, 1 Grenade, 1 Ammo Crate
Italian Infantry and SS: Breda 30, 1 Smoke, 1 Grenade, 1 Ammo Crate

Deploy bipod by following the bipod section. Deploy ammo crate by holding G (grenade key) and select ammo crate. Each ammo crate can be used 3 times. Press F (interact key) once to take ammo and once again to take the crate again.
Pressing F once on friendly MG will drop ammo crate too from his inventory.

7. Medic
American: M1 Garand, 1 Grenade, Syringe, 2 Scissor Types, Attachable Bayonet in Inventory
German: Kar98k, 1 Grenade, Syringe, 2 Scissor Types, Attachable Bayonet in Inventory
British: Lee Enfield MK 4, 1 Grenade, Syringe, 2 Scissor Types, Attachable Bayonet in Inventory
Japanese: Arisaka Type 38 Bayonet, 1 Grenade, Syringe, 2 Scissor Types
Italian: M91 Carcano, 1 Grenade, Syringe, 2 Scissor Types, Attachable Bayonet in Inventory

Hold F on wounded units and choose correct treatment based on the marker above to get them back up. Doing it to wounded enemies will make them surrender.
Pressing F once on friendly medic will give you 2 bandages from his inventory.

8. At Unit
American AT: M1 Carbine, Bazooka, 1 Smoke, 1 Grenade
German Paratrooper AT: G 43, Panzerschreck, 1 Smoke, 1 Grenade, 1 AT Grenade Bundle
British AT (some maps): Lee Enfield MK 4, Boys AT Rifle, 1 Grenade, 1 Dynamite, Attachable Bayonet in Inventory
British AT: Lee Enfield MK 4, PIAT, 1 Grenade, 1 Dynamite, Attachable Bayonet in Inventory
Japanese AT: Type 97 AT Rifle, Type A Nambu, 1 Smoke, 1 Grenade

Deal against enemy tank

9. Flamethrower
American Flamethrower: M2 Flamethrower, M1911
German Flamethrower: Flammenwerfer 35

Can deal damage to lighter tanks
Battle tips
The battles in Easy red 2 are very beautiful and often epic, but staying dead in battle is very simple.
(I remind you that to put the AI ​​to maximum just adjust it in the settings).
When you are in combat always remember to stay focused and seek cover.
Never go in front of an allied soldier while he is shooting as he could easily hit you.
Easy Red 2 is not like other games, remember that you can also die with one or two hits.
Here are some combat situations:
when you are a sniper try to stay away and destroy important targets such as machine guns or soldiers with bazzoka.
If you are a doctor and he is injured, drag him to cover to treat him safely, but don't wait too long or he will bleed to death.
Try to give covering fire by shooting at enemies, you can use machine guns and even grenades to give cover fire for medics and companions.
Go around the enemy in case they have too much firepower, remember that the map is always very large
In Easy Red 2 you can often destroy the environment around you: trees, sandbags, barbed wire and much more.
Don't attack the enemies alone, wait for your companions!
You can often capture enemy weapons such as tanks, cannons and machine guns.
In Easy Red 2 you can steal ammunition, weapons, grenades, syringes and bandages from enemies, even from your teammates! Also if you steal a syringe you can medicate your bells!
Remember to collect their dog tags.
EASTER EGGS
The UFO
The UFO is located, in a mission: NEAR FROSINONE.
When the game starts use the cinematic camera and stop the time,after that go to a city in the coast of the map,after that you will find a tower very tall and above it you will find the UFO
Dog Tags
One of the newest addition to the game is dog tags. Some bots with special loadouts will specially spawn with a unique dog tag that once you collect it, you can play with their loadout, but they will not spawn again.
Most current dog tags wielder are actual figures in history that participate in the battle.
Playing special loadouts don't have to be done on first spawn. The special loadout will still be available if you haven't used it. You can only use special loadout once per battle.

They have characteristics that can help you identify them:
-They are lone wolf. They are not attached to a squad and operate independently.
-Some wear uniforms that are unique unlike the others.
-Some bring weapons other soldiers don't have in the mission.
-Some seem to be tougher than normal soldier. It seems more shots are needed to down them.

All dog tags wielder will always spawn on the same mission and phase everytime.
Press F on them to open inventory that automatically collect the dog tag too.
Dog tags wielder after dying, will show HUD on your screen of where they die. The indicator is a yellow dog tag.
Here are the list of known dog tags wielder and where to find them:

US Marines (playable on all Kwajalein missions)
-) Arnold J Gresser: Kwajalein Mission 1 (Kwajalein Beachead), carry m1 garand with radio backpack. Phase 4, the AA gun position with tower and T-shaped trench line, before the airfield.
-) Richard Sorenson: Kwajalein Mission 2 (Kwajalein Airport), carry m3 grease gun. Phase 3, the huts complex.
-) Robert McCard: Kwajalein Mission 4 (Japan Counter Attack), carry unique Browning 30 Cal among the marines. Phase 2 after start phase for American, machinegun on a desk with barbed wires around it.

Japanese (playable on all Kwajalein missions)
-) Monzo Akiyama: Kwajalein Mission 1 (Kwajalein Beachhead), carry type 100 and type A Nambu, wearing tank crew uniform and helmet. Phase 2, 2 huts, 1 tower, and camo net.
-) Yamagata Masaji: Kwajalein Mission 2 (Kwajalein Airport), carry type 97 at rifle and type A Nambu and wear pith helmet with tank uniform. Phase 4, AA guns position with trenches and huts after tank repair depot.
-) Tarokichi Aso: Kwajalein Mission 3 (North of Kwajalein), carry type 100 and type A Nambu and wear pith helmet. Phase 3, 2 concrete AA gun positions.
-) Kenzo Tsuyuki: Kwajalein Mission 4 (Japan Counter Attack), carry type 99 lmg, type A Nambu, and wear pith helmet with Japanese uniform. Phase 1 after start phase for American, tank repair depot with two huts and one AT gun.

German (playable on all Anzio missions except Mission 10:Fiume Liri)
-) Heinrich Flugelman: Anzio Mission 1 (Shore of Nettuno), carry fg42 scoped with bayonet and wear fallchirmjager uniform with feldmutze. Phase 2, the at gun position in intial town.
-) Ludwig Heilmann: Anzio Mission 4 (Toward the Apennines), carry fg42 and luger with Wehrmacht uniform and officer hat. Phase 5, across the field with church, ruined building, and mg position from the bushy entrance.
-) Maximillian Becker: Anzio Mission 7 (Near Frosinone), carry mp 40, syringe, and luger with officer hat. Phase 3, after the trench line with lone house and the first long road to the objective.
-) Hermann Barnbeck: Anzio Misssion 9 (Casssino City), carry mp44 and luger wear wehrmacht uniform. Phase 6, the ruined portion of the city with river in the middle.
-) Sven Hassel: Anzio Mission 11 (Monte Cassino Point 445), carry mg42 and wear tank uniform with Wehrmacht helmet. Phase 4, in front of entrance to monte cassino abbey ruin with some craters.
-) Julius Schlegel: Anzio Mission 11 (Monte Cassino Point 445), carry mp40 and luger with officer hat. Phase 3, a house with AA gun and a short trench line.

British (playable on all British Anzio missions)
-) Alphonse Juin: Anzio Mission 1 (Shore of Nettuno), carry revolver and wear British uniform with beret. Phase 5, first phase entering the second town.
-) Lorne Maclaine Campbell: Anzio Misssion 2 (Near Tor San Lorenzo). carry sten mk2 and revolver. Phase 2, with tent and at gun position with two houses.
-) Alan Whicker: Anzio Mission 6 (Anzio Express), carry lee enfield and m1911. Phase 3, after capturing the hill will lone house, there is a trench line to capture.
-) William Sidney: Anzio Mission 6 (Anzio Express), carry Thompson and revolver wear British uniform with beret. Phase 4, after capturing the trench with at and aa gun before crossing the field.
-) George Allan Mitchell: Anzio Mission 9 (Cassino City), carry lee enfield and revolver. Phase 2, 2 ruins with tank fixing depot and a short trench line.
-) Kamal Ram: Anzio Mission 9 (Cassino City), carry lee enfield and revolver, wear British uniform. Phase 5, the city entrance.

American (playable on all American Anzio missions)
-) Thomas George Prince: Anzio Mission 3 (Near Acciarrela), carry scoped springfield, radio, and m1911 and wear British helmet with US uniform. Phase 3, the 3 ruined buildings with trench line.
-) Chester Cruikshank: Anzio Mission 4 (Toward the Apennines), carry m1a1 thompson and revolver. Phase 3, the position near the mountain castle with mg and some redoubts.
-) Audie Murphy: Anzio Mission 8 (Battle of Cisterna), carry m1a1 Thompson and m1911. Phase 1, 3 houses, a ruin, and AT gun position at the end of a road.

Italian Waffen SS (playable on Anzio Mission 10:Fiume Liri)
-) Pietro Manelli: Anzio Mission 10 (Fiume Liri), carry Mab38, m1934 pistol, and wear Italian SS uniform. Phase 2, the tents with a line of trench.

Polish 2nd Corps (playable on all Polish Anzio missions)
-) Emil Czech: Anzio Mission 9 (Cassino City), carry lee enfield and revolver. Phase 1, the lone house with fence across the field with lone church nearby.

All dog tags are already listed. Other dog tags can be seen on "Dog Tags Part 2" Section
Dog Tags Part 2
Part 2 of dog tags list

Italian (playable on all Kos missions)
-) Dante Zucchelli: Kos Mission 1 (Marmari Invasion).
-) Felice Reggio: Kos Mission 3 (Kos Airport)
-) Francesco De Giovanni: Kos Mission 5 (Mount Dikeos), carrry Breda30 and wear Italian helmet with Italian uniform. Phase 6, inside the town before the hill church.

British Kos (currently not playable)
-) James G. G. Gray: Kos Mission 4 (Kardamaina)
-) WIlliam Patrick Reilly: Kos Mission 6 (Kos Harbour), carry lee enfield and wear British uniform. Phase 5, the phase with two cap points with flak88 each. It's the phase after entering the last town.

German Kos (playable on all Kos missions)
-) Sylvester von Saldern: Kos Mission 2 (Road to Mastihari), carry mp40 with luger and wear German officer hat with Gerrman uniform. Phase 2, after near the beach cap point

German Stalingrad (playable on all Stalingrad missions)
-) Erwin Konig: Stalingrad Mission 1 (Volga River Crossing), carry scoped kar98k with luger and wear feldmutze with German uniform. Phase 4, the ruined street after the first hill with flaks and 2 bunkers.
-) Hermann Barnbeck: Stalingrad Mission 2 (City Push), carry ppsh 41 and wear officer cap with German uniform.
-) Adolf Baumm: Stalingrad Mission 6 (German Advance), carry scoped g41 and wear officer cap with German uniform.

Soviet (playable on all Stalingrad missions)
-) Vasily Zaitsev: Stalingrad Mission 1 (Volga River Crossing), carry scoped mosin and wear pilotka with Soviet uniform. Phase 1, the boat landing but he is already on the shore trenches.
-) Vasily Kvachandiratze: Stalingrad Mission 2 (City Push), carry scoped svt40 with mosin obrez and wear Soviet helmet with Soviet amoeba uniform. Phase 2, the ruined trenches.
-) Yakov Pavlov: Stalingrad Mission 2 (City Push), carry ppsh41 with ptrd41 and wear ushanka with Soviet uniform.
-) Mikhail Panikakha: Stalingrad Misson 3 (Towards the Industrial Area)
-) Ivan Kharchenko: Stalingrad Mission 5 (Red October Factory), carry ppsh41 with mosin obrez and wear Soviet officer hat with Soviet NKVD uniform. Phase 2, the second village with flak gun before the entering the factory.
-) Maksim Passar: Stalingrad Mission 8 (Near Krasny Pakar), carry scoped mosin with mp40 and wear pilotka with Soviet uniform. Phase 1, the battle to the first hill.

Disabling Tanks and Weakspots
There are many ways to disable a tank.
1. The use of armor piercing shells. These shells are usually available on tank turrets or anti tank guns.
2. Rocket launchers such as bazooka, piat, panzerschreck, and panzerfaust or anti tank rifle like type 97 at rifle, boys at rifle, ptrd41, or panzerbuchse 39.
3. Anti tank grenades and explosives. As infantry hold grenade key (G) to open a radial menu and hover your mouse on the preferred grenade type. The current anti tank grenades and explosives are TNT, Dynamite, At mine, Molotov Cocktail, and Grenade bundle.
TNT and dynamite throw range is short and will explode after a while that deal big damage in huge area, but their fuse is long so time it right. Throw it near the enemy and make sure the enemy doesn't escape.
At mine will have short throw range and will not explode unless something drive on it.
Grenade bundle is thrown further than TNT and dynamite and will explode after sometime.
Molotov Cocktail is thrown further like the bundle and will explode on impact into area of flame. It can damage infantry and light tanks.
4. Plane bombs, With a plane you can dive toward enemy tank marked on your screen. Align the sight on the tank while diving, then drop a bomb to destroy it (space key).

Weakspots:
Tanks are made of many different parts. Damage on certain parts can be bigger than on other certain parts. It's best to not shoot on the front hull, instead aim for the back that can cause enemy tank to burn and possible to get destroyed in one shot.
If aiming to the back is not possible, aiming for the side would work. If you hit the side slightly around the back parts, it can cause the tank to burn too and destroyed in one shot.
If back and side is not an option, aim for the turret front. It usually has thinner armor and can kill enemy crews in it. Killing crew can give a bit of delay on enemy turret.
Angle of penetration also matter. 90 degree or straight to it is the best.
The bigger the angle, the thicker the armor of the vehicle will be than it suppose to be. You can check on penetration value of each weapon to any vehicle in shooting range. It will be shown as a pop up, like the second image of this section below.

You can experiment on penetration in training range due to the pop up penetration value upon aiming on tank. Here you can see the angle affect the penetration.
Multiplayer
Multiplayer allows playing campaigns and custom campaigns in PVP or PVE either private or public server.
In this image, I will tell what each option does on the left from top to bottom.
1. A text bar and find by name is used to find specific public server or private server. To see more about private server, look at Creating a Match section.
2. Server list to see all available public servers and join them. On this image, the server has plenty of icons. From the left to right, here it goes.
-Kos Marmari Invasion is the campaign and what mission is currently being played
-Then there is the server name and the server location in the bracket [Eng]
-PVP or PVE depends on which team the players allow to join. To see more about PVE or PVP, look at Creating a Match section.
-AI icon denotes if there is ai or not.
-Aim icon denotes if crosshair is allowed or not.
-The other aim icon tells if hitmarker is allowed or not.
-TPS Camera means if Third Person Camera is allowed or not (accessed by T key by default)
-Then the nations currently playing and current players and limit.
3. Create match is to create your own public or private server.
4, Quick match is to randomly join you to any available server.
5. Refresh is to refresh the server list.

Creating a Match:
Here is the display of all settings available.

On the right is mission selections from respective campaign. Here you can select all missions you want to be available in the rotation based on the order of what you click. If you allow map voting, the order will be ignored and after a mission end, all player will vote for next mission from all selected missions.
I will tell all available settings in the middle bar from top to bottom.
1. Server name
2. Difficulty and max ai units. In multiplayer you can set max ai units to none (no bots)
3. Tickets multiplier is to increase the amount of ticket the attacker gets on start for balance reasons.
4. Max invader and defender players. Max numbers are 10. You can set one side to 0 to make the server PVE. Otherwise, it's PVP when players can fill both team.
5. Private match. A private match will not appear on server list. You need to tell the specific server name to your players and they will use the search bar and find your server through exact same name.
6. Map voting is the same as mentioned on mission selections. "If you allow map voting, the order will be ignored and after a mission end, all player will vote for next mission from all selected missions."
Example of map vote on end of a match.
7. TPS Camera or Third Person Camera is allowed or not.
8. Allow crosshair or not when you allow it on your own settings.
9. Allow hitmarker or not when you allow it on your own settings.
10. Then info on how many missions available in the rotation or possible vote candidates.
11. Start the game

Some extra controls in multiplayer game:
-M (map key) to open player list and scoreboard (also for opening map)
-Enter to open chat menu and chat

Scoreboard informations:
-Aim icon is players killed
-Skull icon is dead count
-Star icon is bots killed
-Connection icon is ping
Spectator Mode
When on spawn menu, you can see a camera icon on bottom left. Click it to enter spectator mode.
-WASD to move the camera around
-Hold right click and move the mouse to turn the camera
-Mouse scroll wheel to make camera movement faster or slower
-X to show and hide the GUI
-E to move camera up and Q down
-Ctrl+Mouse Scroll Wheel to zoom
-Hold left shift like sprinting to move camera faster
-Pause and play button on bottom left
-Set speed slider next to pause button
-Green screen button on bottom right to add green screen
-Green screen distance is to apply where the green screen appear from the camera position
-Set time slider on bottom most right. You can make night mission day and day mission night
Achievements
Achievement guide based on how I get my achievements. Since I achieved many while the achievement is first implemented, some unlock in this guide can perhaps no longer work.
What a Runner! - I achieve this by just sprinting. Hold shift to sprint by default. Could be achieved naturally by playing the game and sprint.

Impignorate - I achieve this by killing the first teammate I see. Can be achieved naturally by accidental friendly fire.

Gobbledygook - I achieve this by going to a surrendering enemy then melee him once without bayonet and he will say "I am hurt" in his language. Healing enemy will also make him say "Thank you" in his language then surrender.

Freeze! - Have 10 enemy surrender. Can be achieved across playthroughs. Enemy surrender when it is suppressed and while inside a capture point your team just captured. You can also heal a wounded enemy and he will surrender.

Wasteful Gunner - I achieve this by shooting both primary and secondary until run out of ammo. Check inventory with I key to see how many ammo you have left.

A Clear Path - I don't remember exactly how I get it, but just try destroying a tank with rocket launcher, at rifle, or throwable explosive (dynamite, at grenade bundle, at mine, and TNT). It's recommended to turn on vehicle damage indicator in setting to know if it's destroyed or just damaged. Without the setting, you can know something is destroyed if you see smoke or fire coming out.

Scrumptious - Open inventory with I key. Click on canned tuna then press consume to restore health.

Ding! - Just shoot 100 enemies on the helmet. Can be achieved across playthroughs. Can be achieved naturally. You can also make a custom mission then put the unarmed training loadout as your enemy. Just let them spawn and shoot their helmets.

Flatline - Throw a grenade to your feet then stay inside the blast. You can also crouch then with pistol, shoot your visible thigh until you die.

Deadly Sniper - Kill 50 enemies as sniper. Not sure if it can be achieved across playthroughs.

Radio Boy - When you see radio request received notification as radioman, press tab to open the radio radial menu. Follow the radio section in this guide to confirm a request and you get it.

Another Chance - When your tank get disabled (smoking or burning and someone say "let's get out now" for American), exit the vehicle with F key then run away to the ! mark on the map.

Last Fight - Empty your primary then switch to pistol and kill 10 enemies. Check inventory to see how many ammo for your primary left. You can also make a custom mission then put the unarmed training loadout as your enemy that will just stand still helplessly in front of you.

I'm a Chad - Kill 250 enemies. Can be achieved across playthroughs.

Granate! - I achieve this by spawning as Germans, then open menu esc key then select respawn to make the character I control surrender. I possess another in the squad then surrender near the previous guy and do it again until I have the third all nearby each other. As the fourth guy, throw a grenade to that 3 friendly surrendering Germans then you get the achievement. Can be achieved naturally by playing tho or you can also push surrendering Germans near each other than grenade them all war crime style.

Emmetropia - Just use sniper and shoot someone very far away. I suggest Battle of Cisterna mission, since the engagement there is very long range. I suspect I might have achieved it with tank machinegun shooting enemy far away, not sure if it works. Let me know.

Cavalry is Here - I am not sure how I get this one. But in current version, there is radio call for tank support called by infantry. Just go to a marked location (explosion icon) with your tank then kill things there until the mark is gone.

I'm a Rat - Just loot any dead bodies you see until you get it. Can be achieved naturally. Press F on dead body to loot.

Battlefield's Conquest - Use artillery or at cannons and destroy tanks with the ap shells. Cisterna is recommended as the Germans, since many artilleries can be found here against US tanks.

Camp & Dump - Spawn in then stand still not moving at all until the game is won and don't die. You can make custom mission with 100% chance to win or you can find mission with balanced slanted toward your team.

Medic Boy - Press F on 20 knocked out soldier to revive them. Knocked out soldiers will lay on the ground still moving and have medic icon on them.

Dog Tag Collector - Follow the dog tag section of this guide then collect 20 dog tags.

Smokephobia - Be radioman and hold tab to open radio menu. Select smoke 5 times.

A Day Survival - Win all Anzio levels without dying. You need to pick the team that is more favored in a mission. Here is a list of how to play each missions without dying in my way based on balance of each mission.
Nettuno: Become American on low bot amount. Just stay at the back (deserting) with a sniper rifle and kill some guys if possible. Find high ground.
Tor san lorenzo: the same as British sniper. Low bot.
Acciarrela: Become first phase panzer IV and find high ground and snipe enemy tanks. You can steal more ap shells from at gun or just go to the tank repair depot. Doubled bots.
Appenine: Become German Sniper and get to phase 2 hill. It's the deadzone for the American. Doubled bot for more unfairness.
Pushing back: become German panzer III and just be careful and snipe enemy tanks. Low bot
Casteli Romani: Become British stuart and be careful of enemy tanks. low bot
Frosinone: Become american sniper and stay back. Avoid phase 1. The whole map is nightmare for German. You can light the map by going to spectate mode and turn to day. Doubled bot for even more unfairness to the Germans.
Cissterna: German panzer III and deal all incoming enemy and tanks from behind a house in phase 1. Be careful of tanks. Doubled bots (most bots gonna become squishy infantry)
Cassino City: Become German panzer iii. Snipe tanks and find high ground. Doubled bots, since most will be squishy infantry. Unfair for Poland.
Monte cassino: Become German sniper. Stay back on hills. Avoid phase 1 and phase 2 will become deadzone for any attackers on doubled bots.

In all these mission, you can also just be afk or away from the battlefield while inside the team that is favored in the mission.
There is also a method I am not sure if it works or not, but you can set up a multiplayer game with all Anzio missions then set bots to none. There will be some dog tags soldier to face you, but one guy is not that hard. When you spawn, you gonna spawn with friendly bots while enemy has none other than some dog tags character.

Flying Ace - Destroy or kill the pilot of 5 enemy plane while using a plane in one life. Best played on Kwajalein Mission 2 "Kwajalein Airport" as Japan. The American mustang has some sight alignment problem.

Watch for the Blast - Play Kwajalein campaign Mission 2 of Roi Namur. Capture phase 2 and explosion should happen that give you the achievement.
Gallery (Units, Tanks, Planes)
Just gallery of various units, tanks, and planes of various nations in game.
Units:

American Infantry: Available on (Mission 1,3,4,7,8 Anzio)
Weapons: M1903 Springfield Scoped, M1 Garand, M1 Carbine, Thompson, M3 Grease Gun, Browning 30 Cal, Bazooka, M2 Flamethrower, M1911


British Infantry: Available on (Mission 2,5,6,9,10,11 Anzio; Mission 5,6 Kos)
Weapons: Lee Enfield MK 4, Lee Enfield MK 4 Scoped, Sten MkII, Lanchester, Thompson M1928, Bren LMG, Boys AT Rifle, PIAT, Smith & Wesson


German Wehrmacht: Available on (Mission 1,2,4,5,6,7,11 Anzio; Mission 2,3,4,5 Kos)
Weapons: Kar98k, Kar98k Scoped, MP40, MG42, Flammenwerfer 35, Luger P08


British Paratrooper: Available on (Mission 10 Anzio; Mission 3 Kos)
Weapons: Lee Enfield MK 4, Sten MkII, Lanchester, Bren LMG, PIAT, Smith & Wesson

German Fallschirmjager: Available on (Mission 2,3,6,7,8,9,11 Anzio; Mission 1,2 Kos)
Weapons: Kar98k, G43, G43 Scoped, STG44, FG42, Panzerfaust, Panzerschreck, Luger P08


Italian Waffen SS: Available on (Mission 1,10 Anzio)
Weapons: M91 Carcano, MAB38, Breda 30, M1934 Beretta

German Waffen SS: Available on (Mission 11 Anzio; Mission 6 Kos)
Weapons: Kar98k, G43, MP40, STG44, Panzerfaust, Luger P08


American Marine: Available on (All Kwajalein Missions)
Weapons: M1 Garand, M1 Carbine, Thompson, BAR, M12 Winchester Shotgun, Bazooka, M1911


Japanese Infantry: Available on (All Kwajalein Missions)
Weapons: Arisaka Type38 Bayonet, Arisaka Type38 Scoped Bayonet, Type 100, Type 99 LMG Bayonet, Type 97 AT Rifle, Type A Nambu


Italian Infantry: Available on (Mission 1,2,3,4,5,6 Kos)
Weapons: M91 Carcano, Mab38, Breda 30, Boys AT Rifle, M1934 Beretta


Australian Infantry: Available on (Mission 9 Anzio)
Weapons: Lee Enfield MK4, Lee Enfield MK 4 Scoped, Lanchester, Thompson M1928, Bren LMG, Smith & Wesson
Videos
Here where I will post videos I made about ER 2

Complete Weapon List:
https://youtu.be/RXcRdzUpYxs
Here I will list firemodes, ammo type, reloading choices, attachments, zeroing, along with the animation like usual gun showcase. I also list some controls that can be done to the gun. I made complete time stamps as well in the youtube post.
33 Comments
AAchao 14 Jul @ 12:15am 
I can't find Robert Mccard in Counter Attack!
Dung Salad 8 Jun @ 5:30am 
This is great and all, but the crosshairs don’t even line up with the actual sight on whatever scope you’re using, it’s always to the left. Its fucking ghetto
Panzer Tobruk 19 Nov, 2023 @ 8:02am 
Camp & Dump doesn't work. I spanned for the germans in Frosinone scenario, easy settings, low bots. I did absolutely nothing, I was not even near the computer. Game ended in victory for the germans. And still I received no achiev. :steamsad:
HyenArachnid 8 Oct, 2023 @ 1:37pm 
Finally a legible guide on how to get the achievements. Stellar!! :btd6thumbsup:
Pvt. Barry [MM] 3 Sep, 2023 @ 2:40pm 
This is the best and most comprehensive guide to ant game I have ever seen!
kalnon 2 Jun, 2023 @ 3:06am 
Extremely well done manual. Literally covers everything I need to know in one guide, thank you.
Galahad 24 Apr, 2023 @ 9:39am 
Kos Mission 3 (Kos Airport) (Felice Reggio) Italian soldier carrying MAB38 and wearing Italian bustina cap. Defending the first point in the town Antimachia.
Galahad 24 Apr, 2023 @ 9:20am 
Kos Mission 4 (Kardamaina) (James G. G. Gray) a British soldier on the Italian side, spawning on 3rd Phase near the beach, carrying sten gun.
jrandiny  [author] 12 Apr, 2023 @ 1:03am 
To VT, yes. HE shells used to be ineffective, now the explosive power is good to kill infantry. I will change the section

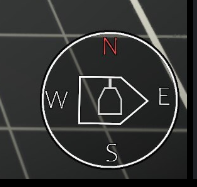
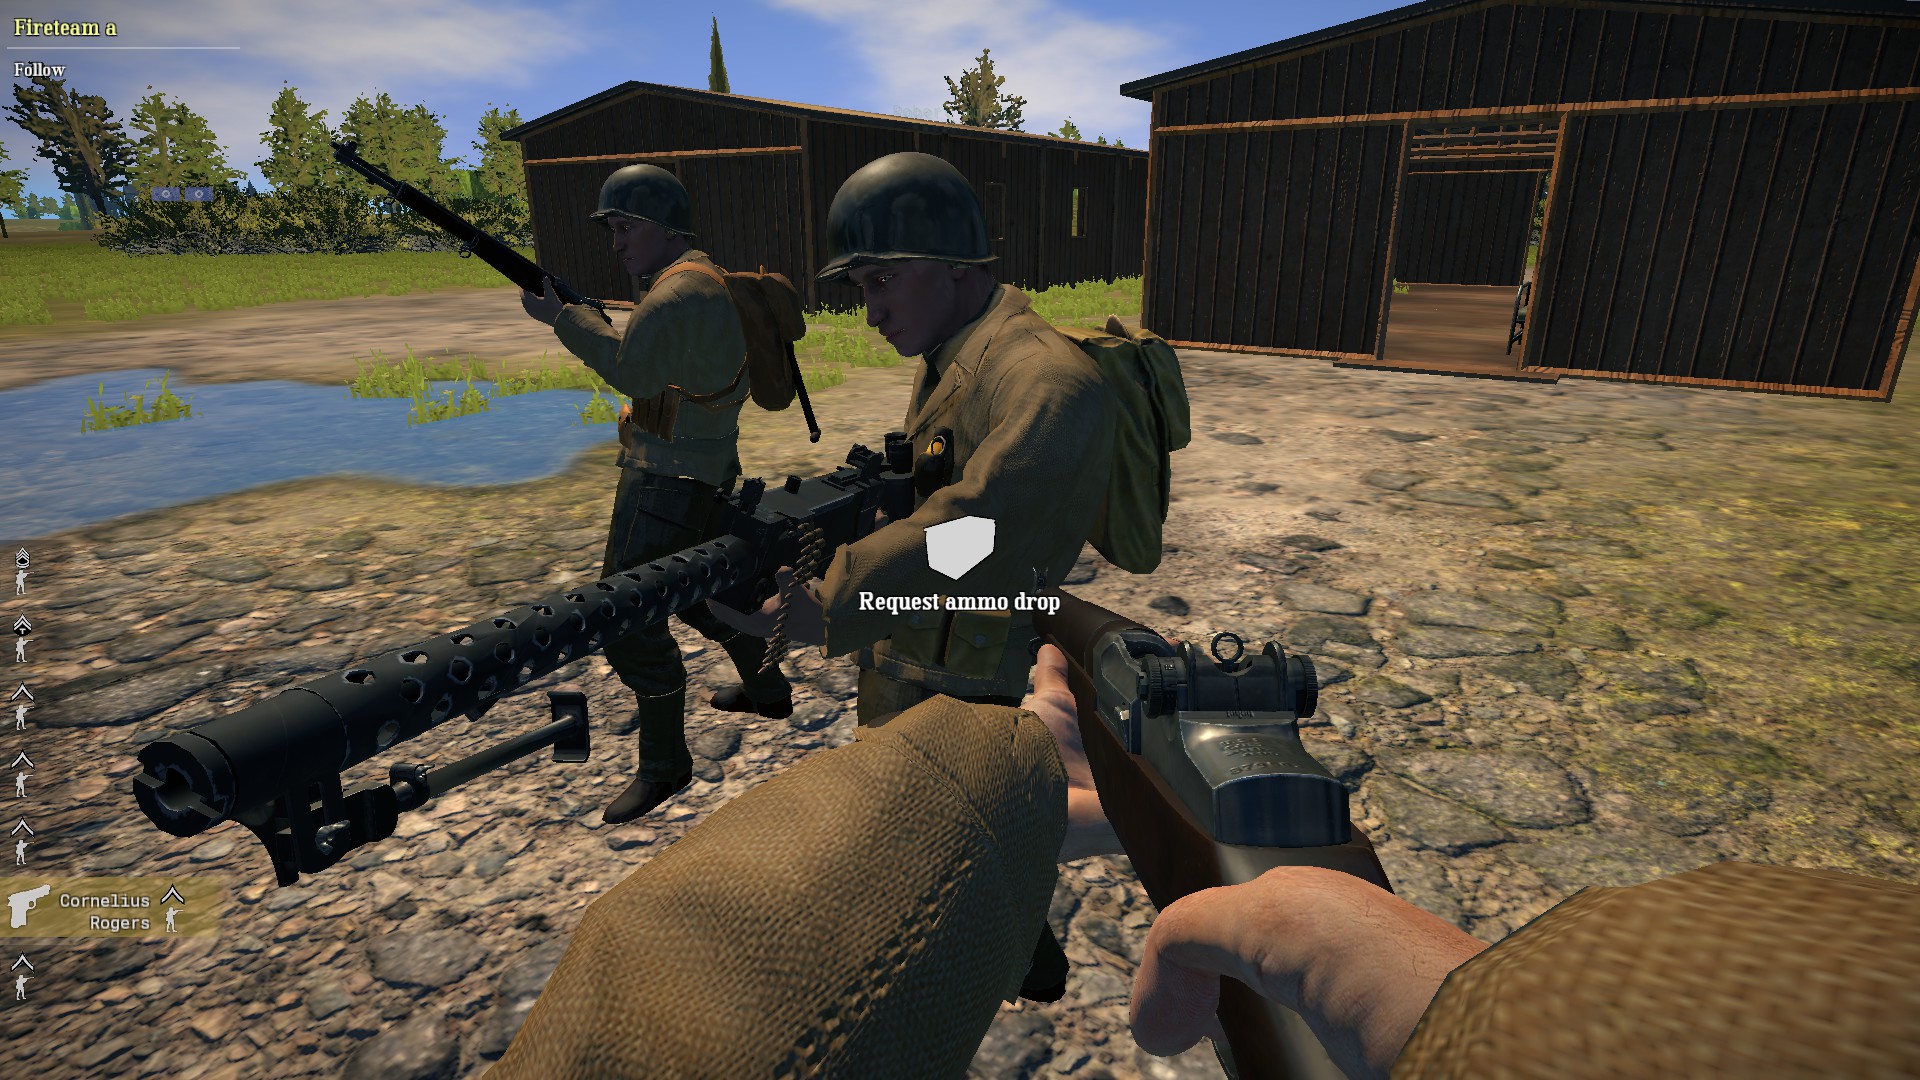
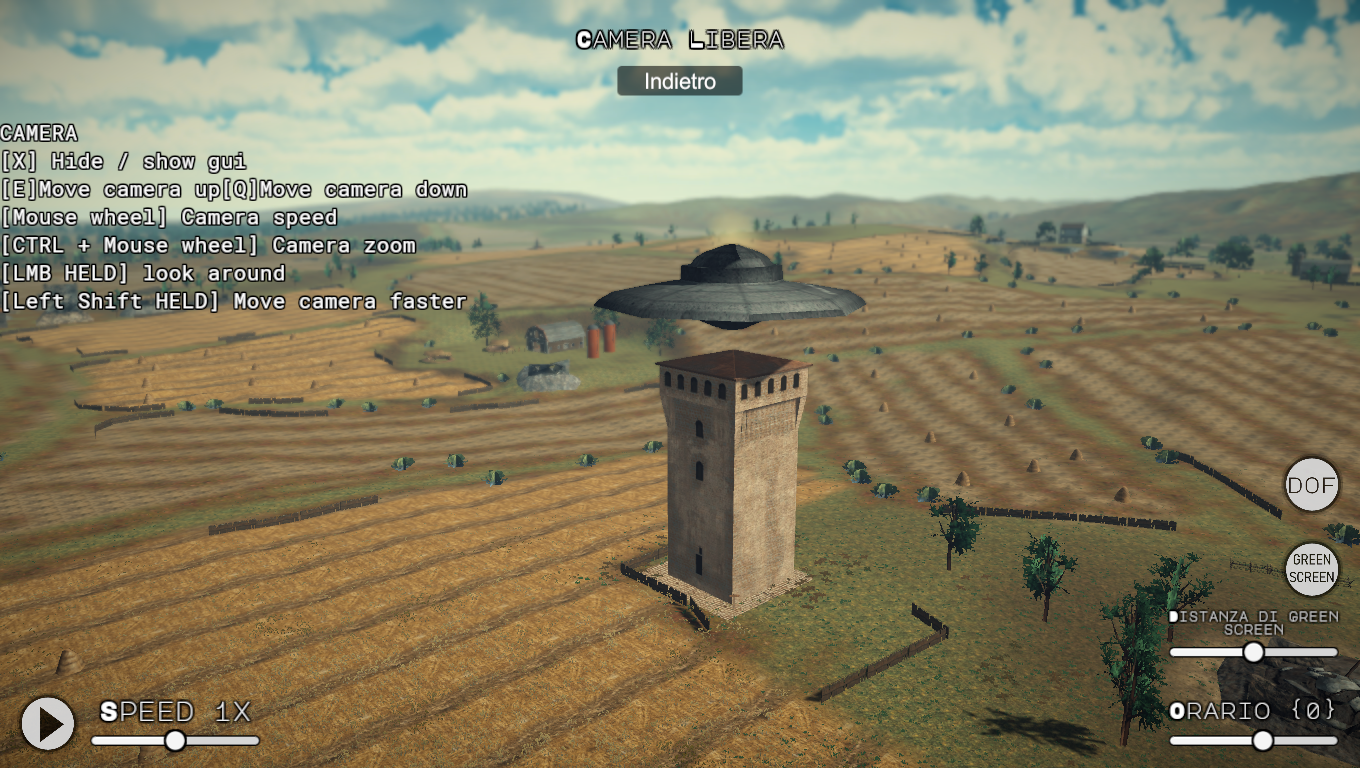
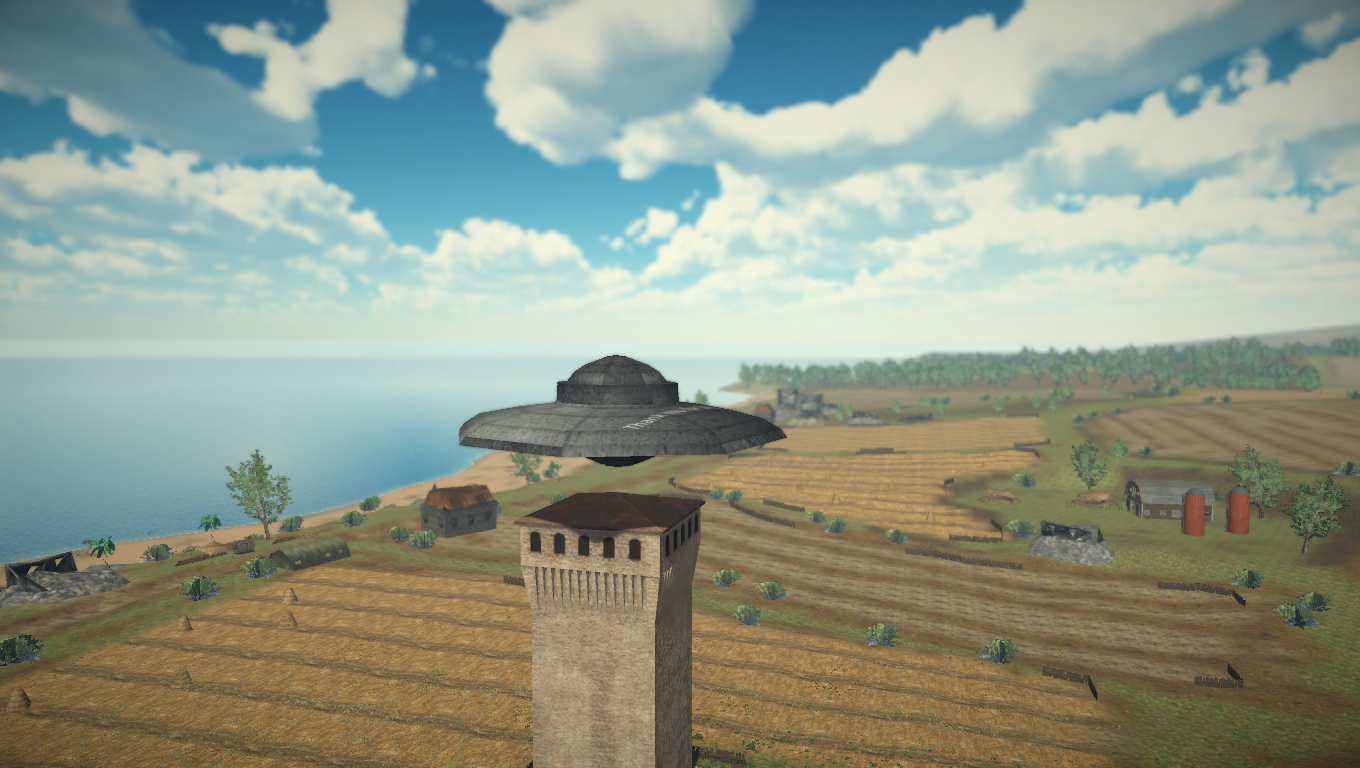
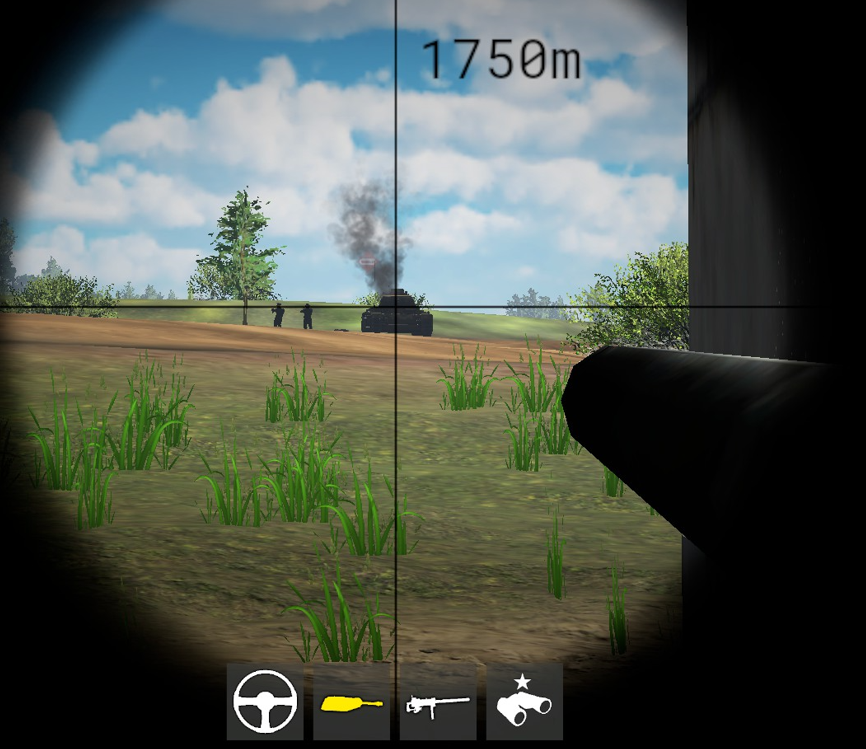
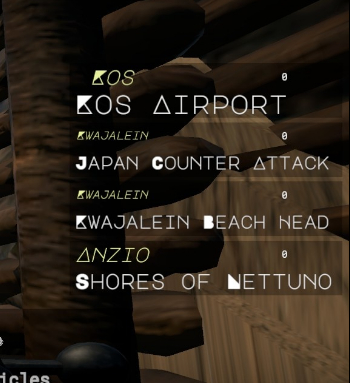
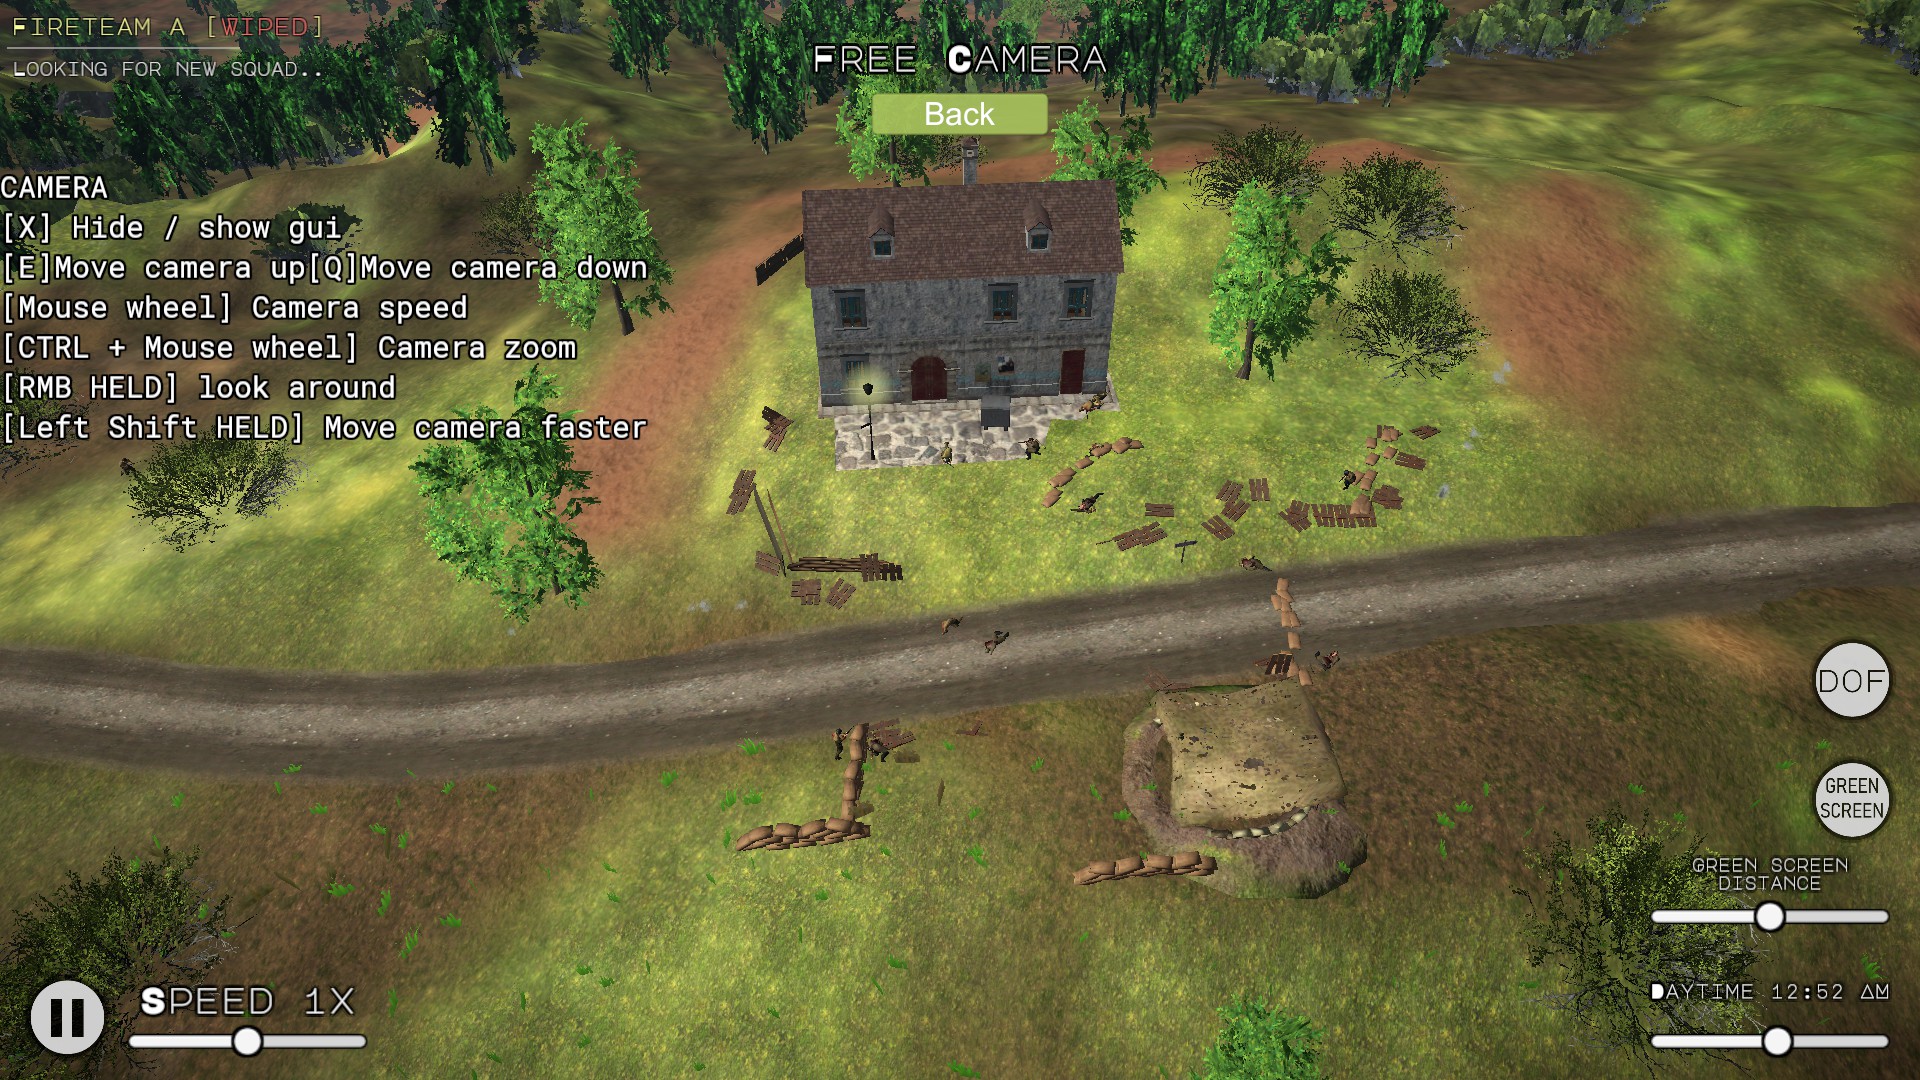
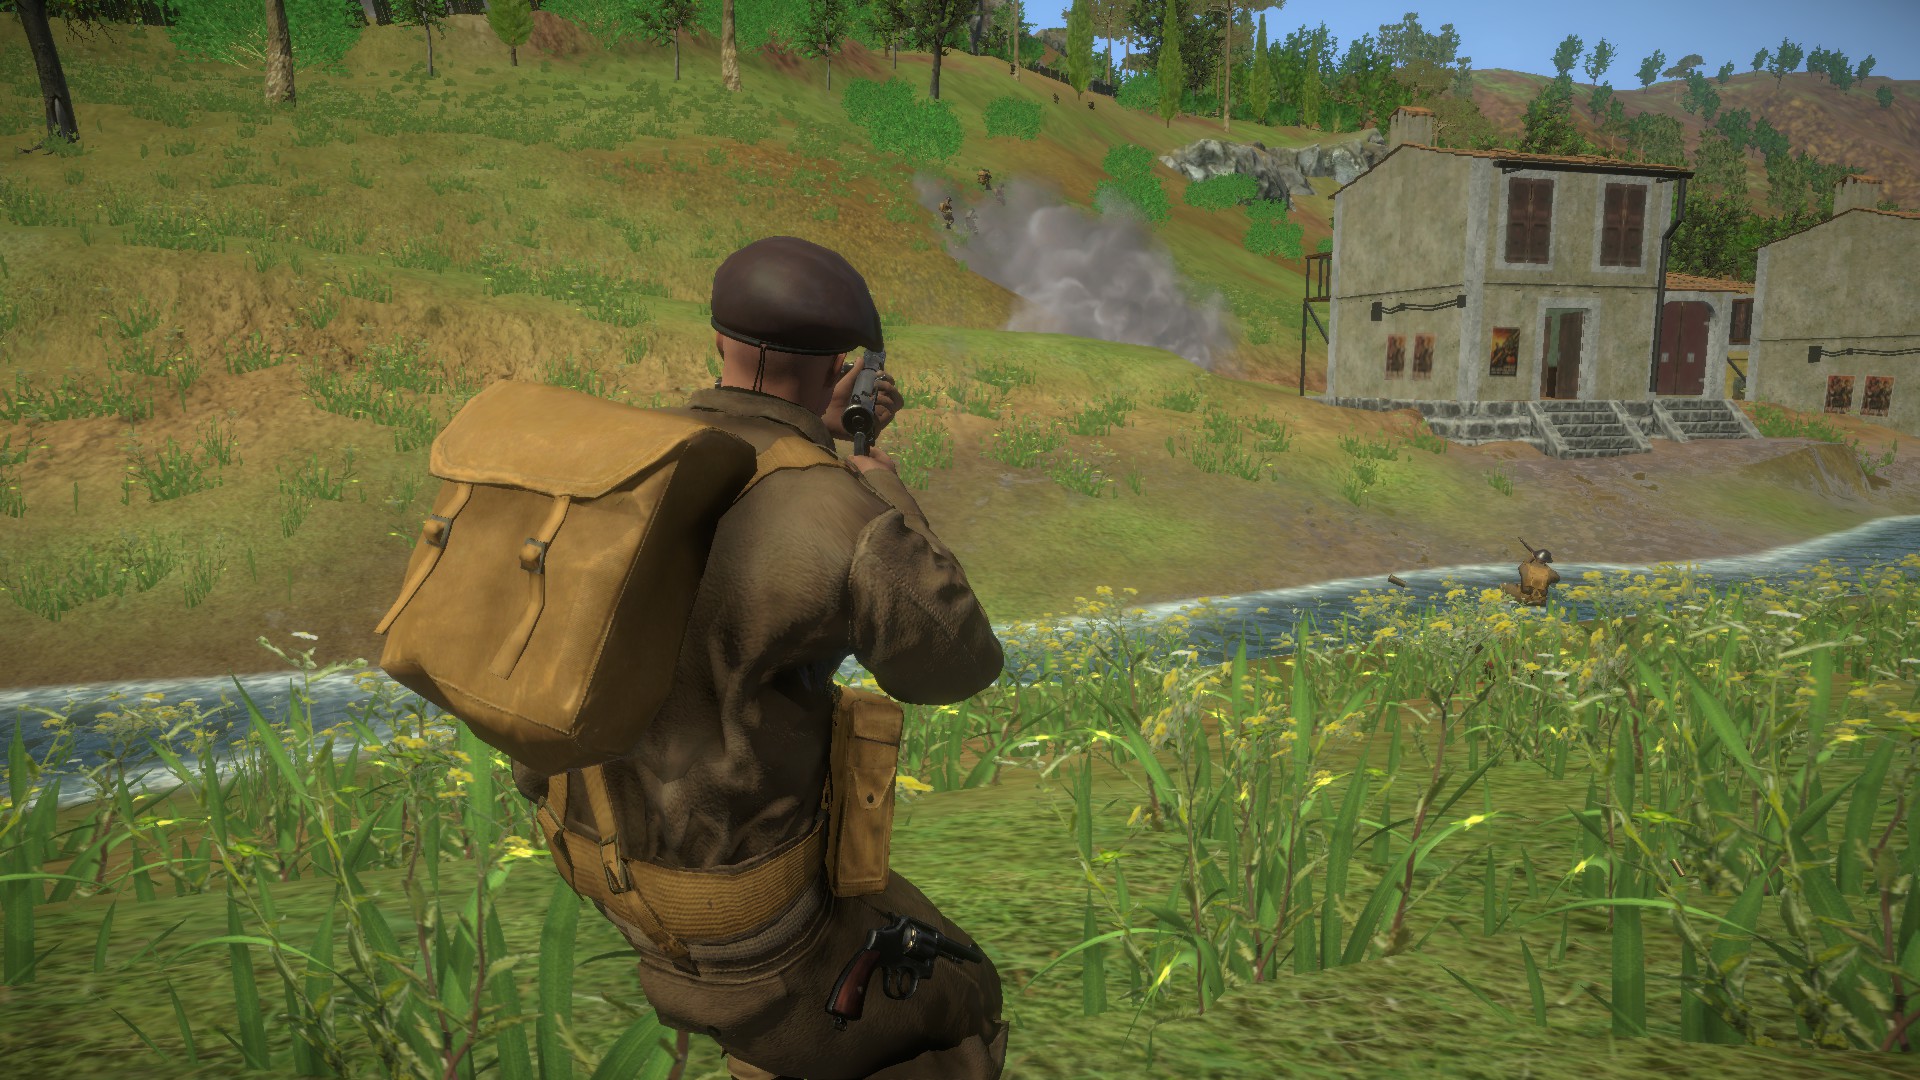
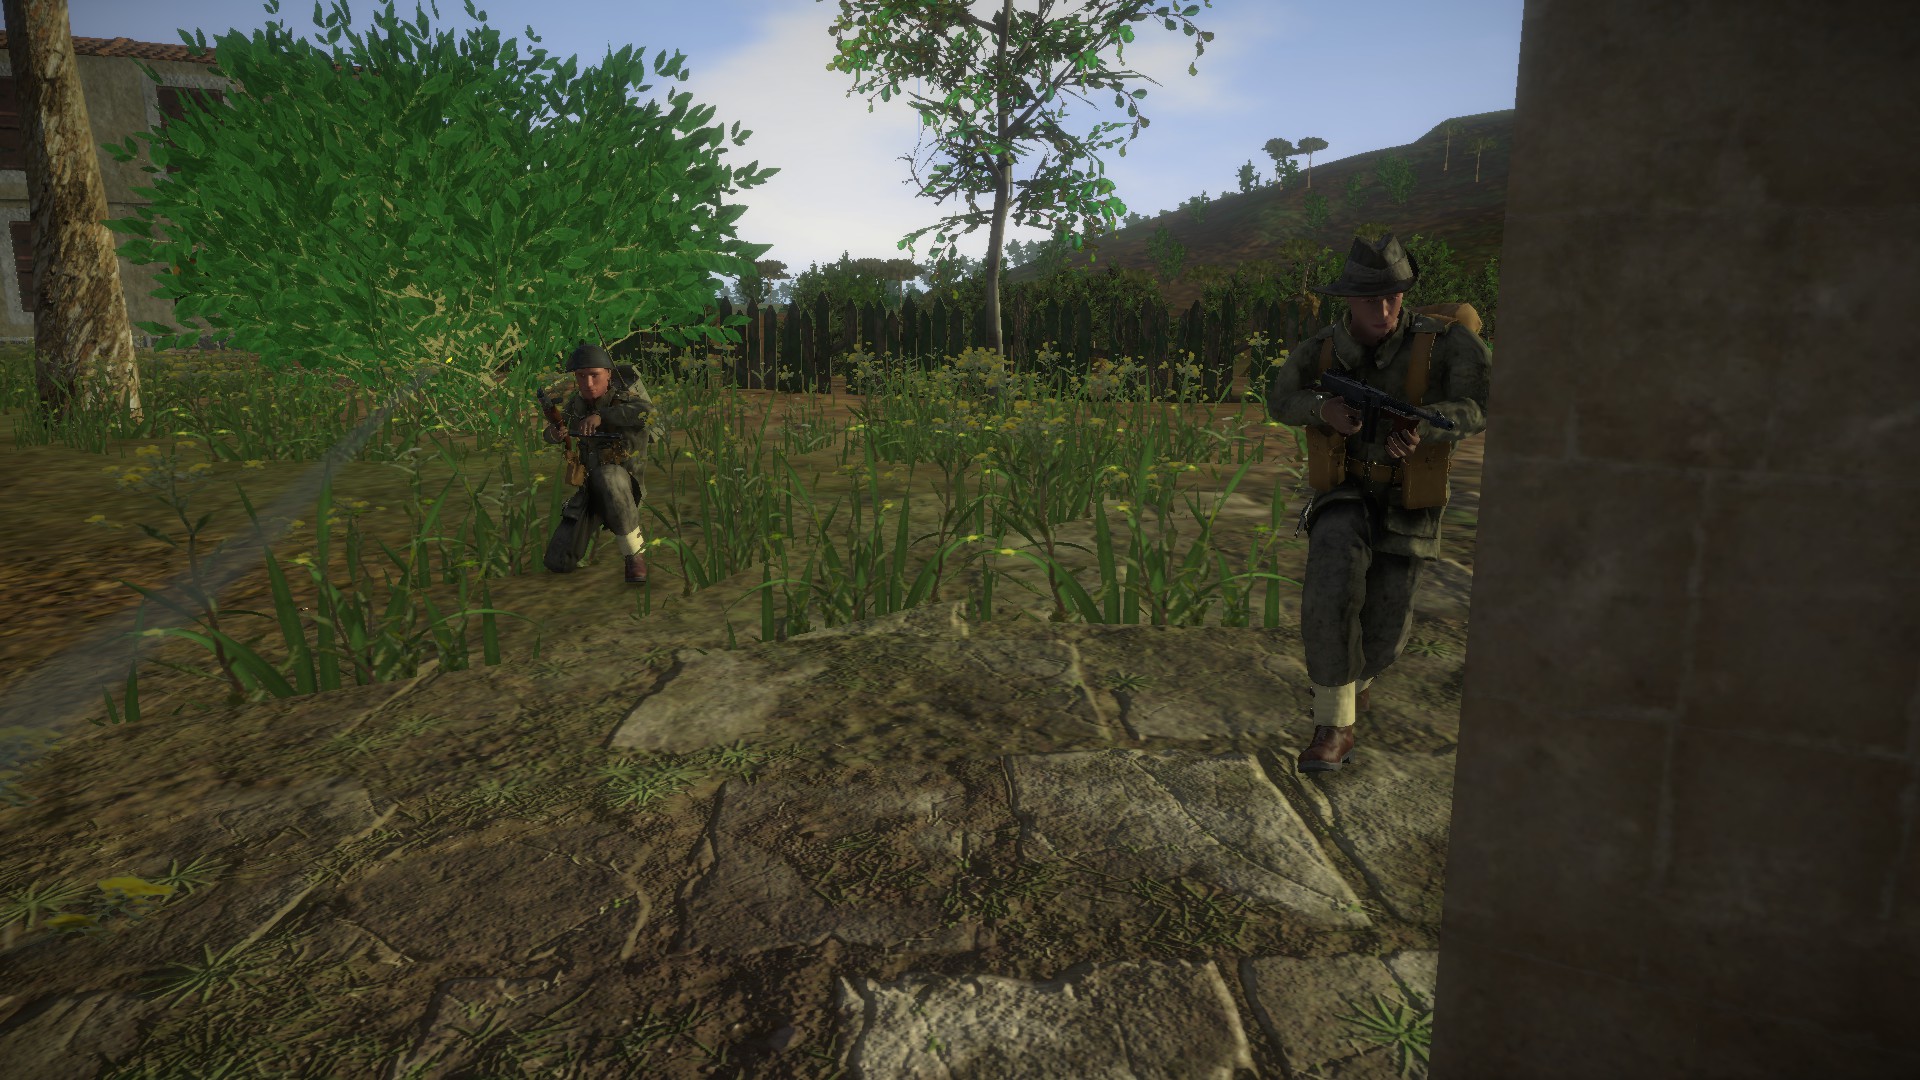
To Frog. It must be Near Frosinone Mission of Anzio. Then use spectator camera and go to tor san lorenzo location.

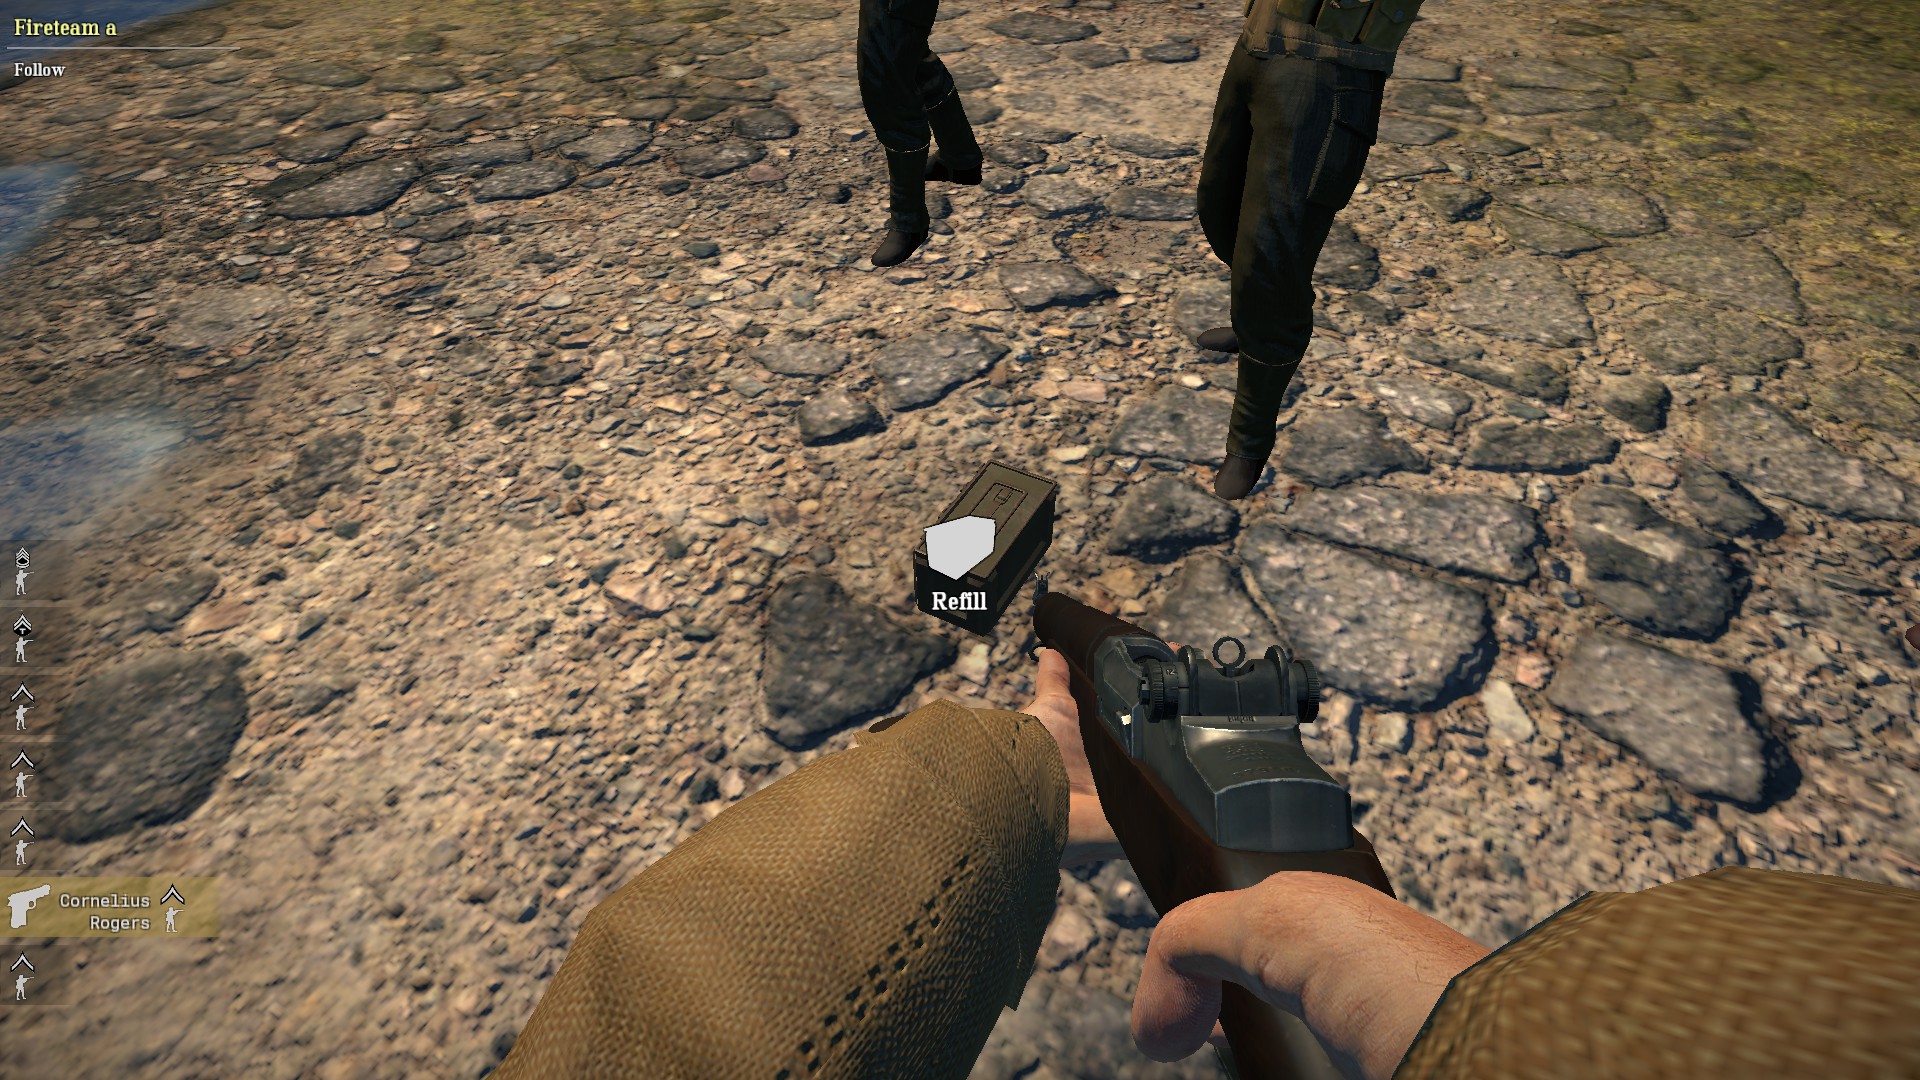
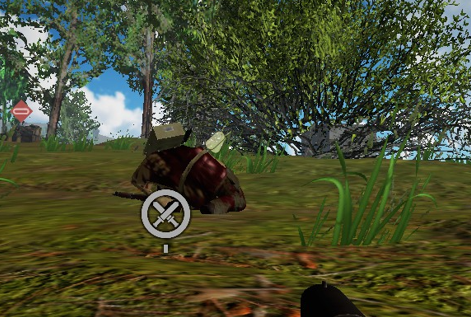
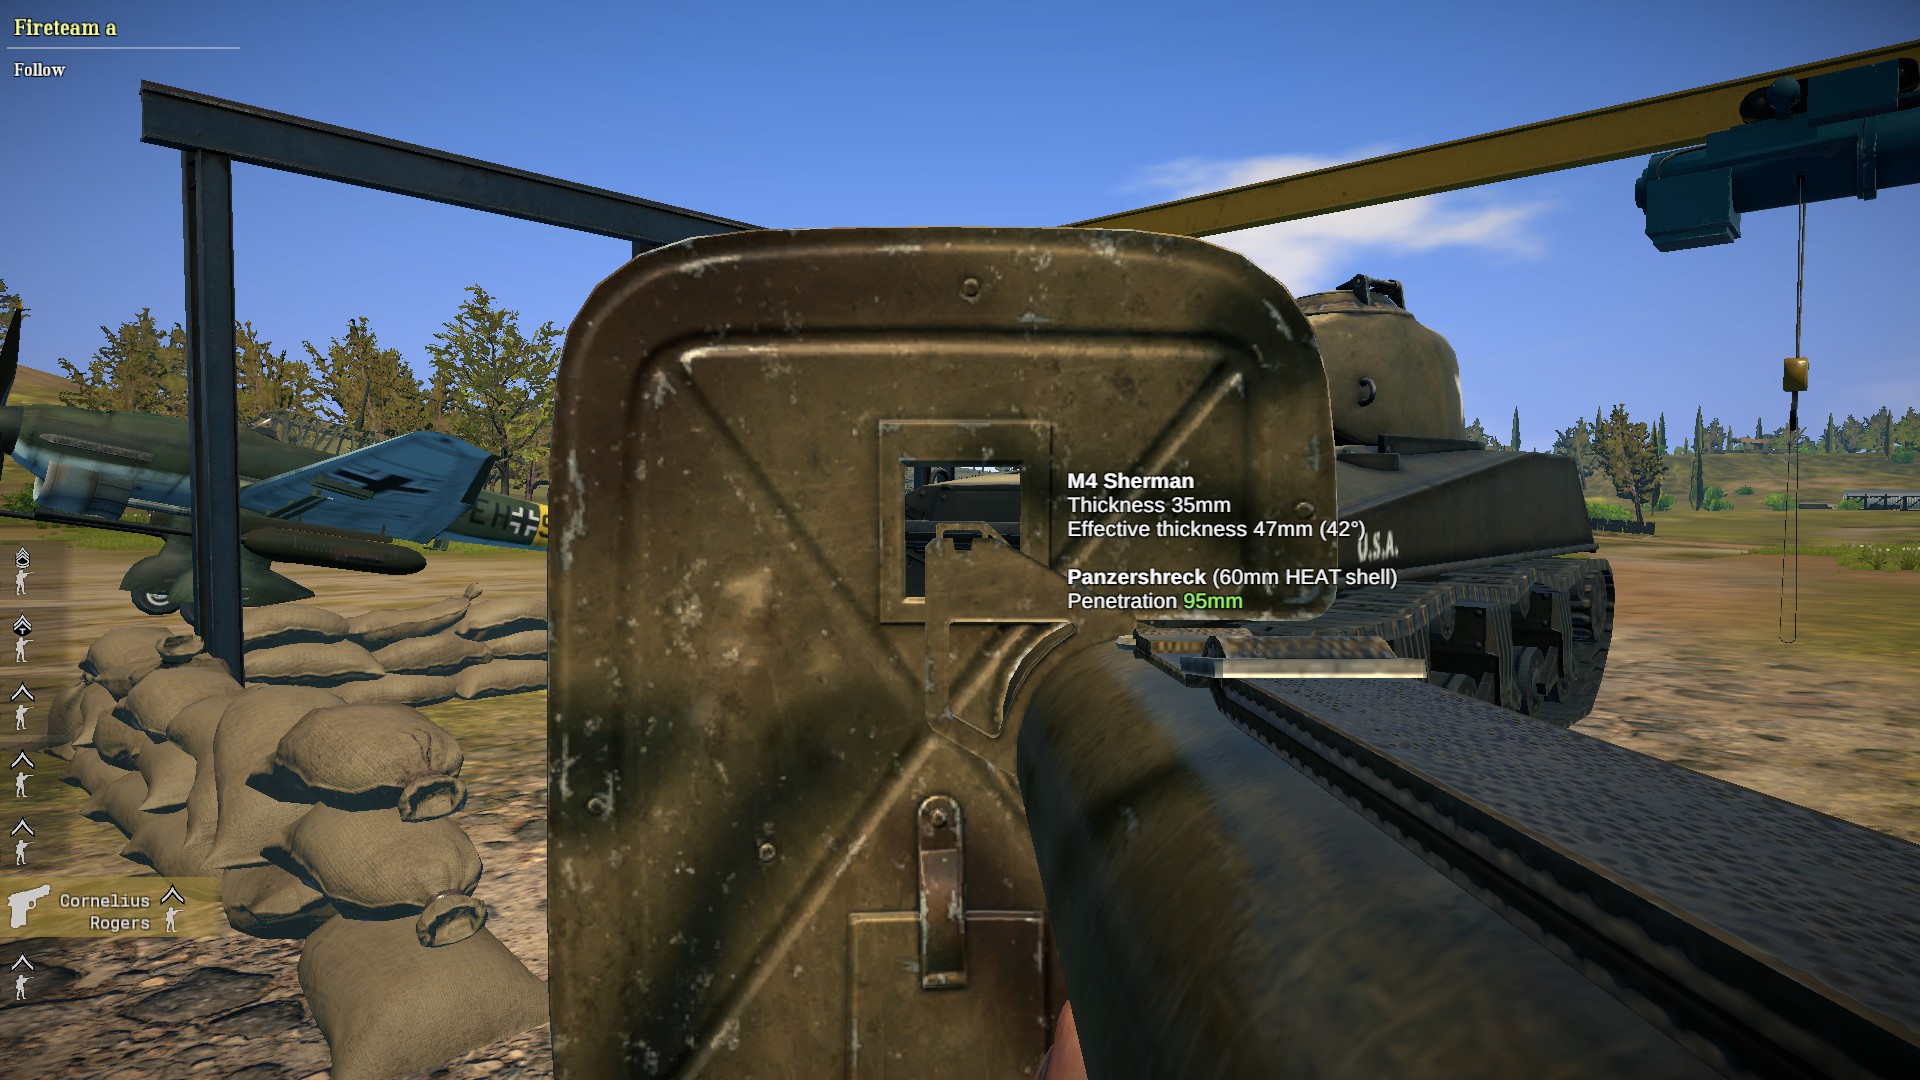
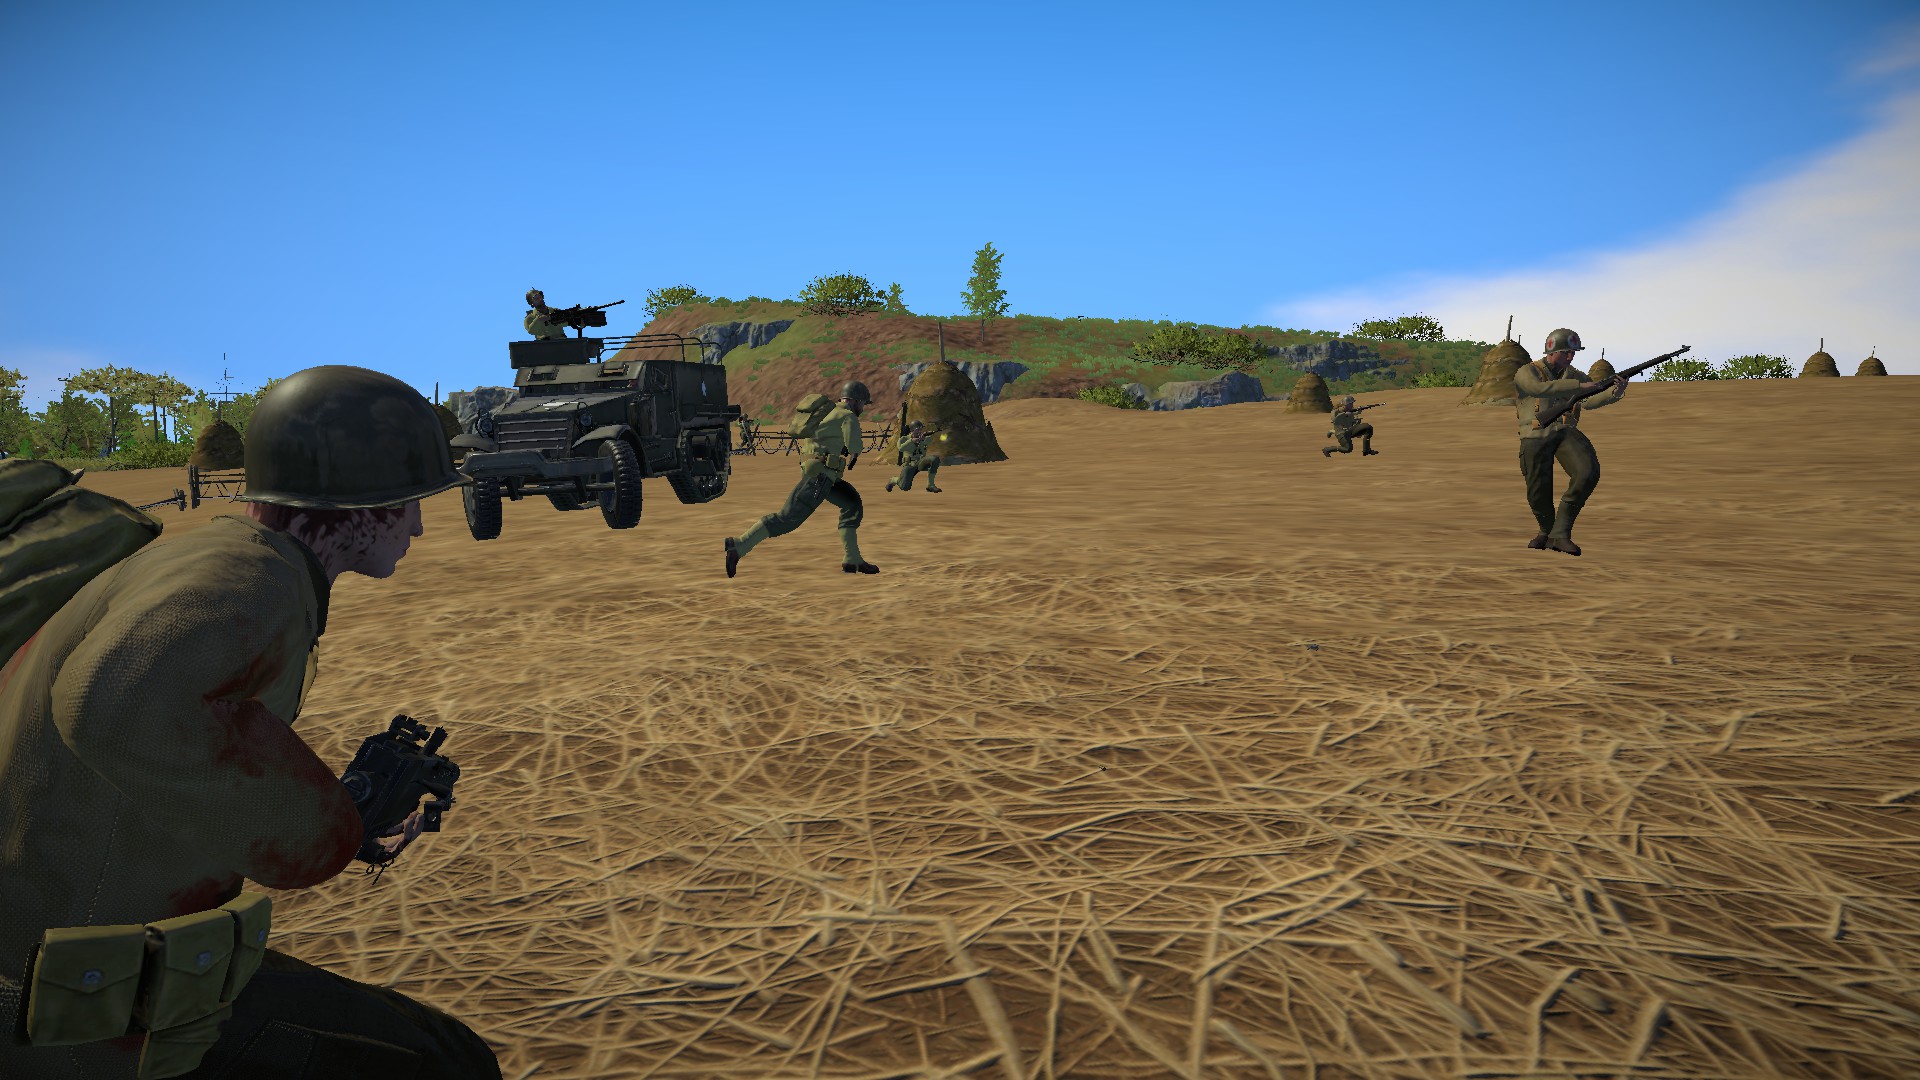
To Harry. Yes seems like it. Both seem to not have hitbox. AT mines don't even need to be run over by tank track, as long it's under the tank, it will blow
HarryZ 26 Feb, 2023 @ 10:08am 
Seems like AFV´s don´t have hit boxes/damage models for tracks and guns. So can´t damage/destroy them seperately. Is that right?