Team Fortress 2

Team Fortress 2

44 ratings
Complete Guide For Beginners | 2025
By Arderon
A complete guide for beginners (and not so beginners) TF players. Collected everything a beginner needs to know.

I hope you enjoyed my guide. Please like it and share it if it's not too much difficult for you. You'll help me a lot :)
2
   
Award
Favorite
Favorited
Unfavorite
Beginning
First, I would like to explain: The fact is that despite the current situation, new players continue to come to the game who do not know much and still poorly understand the mechanics of the game. There are already many guides for them, but they are all incomplete, unsaid, there is too little information everywhere, or there is too much of it, and usually they explain one thing. And I decided to do a lot of work to help new players. I decided to compile all the necessary information for novice players, about how and when to play a certain class, about the usefulness of classes, about the mistakes of novice players that I myself encountered when I started playing.
I hope I succeeded, in any case it’s up to you, I really hope for your feedback, thank you for reading this preface. Enjoy watching!
Attack Classes
So, there are a total of 9 classes in the game, each with its own unique mechanics, each with its own goal that it must cope with. All 9 classes are divided into subgroups. The first category includes attack classes that are capable of inflicting the main damage in a team and have maneuverability to varying degrees.

Scout

The Scout has the fastest movement speed of the nine mercenaries, the ability to double jump, captures objectives and pushes payloads at double the regular speed, and deals a consistent amount of damage from short to medium range. These attributes make him great for quickly completing objectives, such as capturing Control Points, and optimal for one-on-one battles when timed correctly. However, his maximum base health of 125 makes direct confrontations against some mercenaries difficult and risky. Optimal combat involves circle strafing or weapon heckling, techniques that help the Scout avoid and simultaneously put out as much damage as possible.

The Scout is armed with a scattergun, a pistol and a bat, making him an excellent class for both aggressive face-to-face combat and going behind the lines.
The Scattergun is good weapon for medium and close ranges; it is the Scout's main weapon. It deals from 30 to 100 damage, has 6 shots in the clip and 32 in reserve. The damage of (almost) all weapons depends on the distance to the enemy.

The pistol is used as a secondary weapon, most often used as a finishing tool, deals from 8 to 25 damage, has 12 loaded cartridges and 36 in reserve.

And a melee weapon - a baseball bat, which you can unexpectedly take out and finish off the enemy, deals 35 damage.

Soldier

Equipped with his rocket launcher and 200 health points, the Soldier is suitable for both defense and offense, so it is a great class for beginners to master all the basic skills of the game. The Soldier has a very low movement speed, which can be compensated by jumping on his own rockets (we will talk about how to make such a jump later). The Soldier is one of the most powerful classes in the game. Well balanced and with both survivability and mobility, the Soldier is considered one of the most flexible classes in the game. His health pool is second only to the Heavy, and his wide arsenal of weapons allows him to carry the equipment best suited to a given situation. (For example, storm boots, which reduce the damage from their own rockets, which gives the Soldier greater maneuverability when jumping on rockets)

The Soldier is armed with a rocket launcher, shotgun and shovel, making him an incredibly powerful class in the game, rivaled only by the Demoman and the Heavy.

The Rocket Launcher is the Soldier's primary weapon at all ranges. The splash damage from rocket explosions can hit multiple enemies at once. The missiles cause serious damage and can throw the enemy into the air. It deals from 40 to 110 damage, has 4 charged missiles and 20 in reserve.

The shotgun is a secondary weapon for medium and close ranges, useful for finishing off enemies. Deals from 15 to 90 damage, like the Scout, it has 6 rounds in the clip and 32 in reserve. It is used not only by the Soldier, but also by some other classes, and since its statistics are the same for all of them, I will tell its characteristics in detail only here.

And the melee weapon is a shovel, which you can unexpectedly take out when meeting close and finish off the enemy with it. Deals damage standard for almost all melee weapons in the game - 65 damage points.

Pyro

Using a flamethrower, the Pyro can, as the name implies, set enemies on fire, reducing their health to nothing, and finish them off with subsequent afterburn damage. Due to the flamethrower's short range, the Pyro is weak at long range and relies more on ambushes and surprise to catch enemies off guard.

Although the Pyro is considered an offensive class, it is versatile and has a number of unique abilities. Using compressed air (right mouse button by default), the Pyro can deflect projectiles, extinguish burning allies, knock back a Medic and his patient (this works even on Über-Charged enemies), knock enemies into the air, and even jump on a deflected missile.

Another important role of the Arsonist is to search for spies (the so-called spychek); when touched, the flame will ignite and expose both the invisible and cloaked spy. On defense, the Pyro can protect the Engineer's buildings from spies by removing bugs from the Engineer's buildings using certain unlockable weapons (Homewrecker and Neon Annihilator), and set fire to friendly Sniper's arrows, which can set the victim on fire if they hit. And using Flame Jump, the Pyro can get to places that cannot be reached by normal means.


The Flamethrower is the Pyro's main weapon, effective at close range. The weapon itself is very powerful and can easily deal with enemies due to high fire damage and afterburning. It has 200 units of fuel, and consumes 20 units per zilch for compressed air.

Still the same shotgun.

And an axe, a melee weapon that, like everyone else, serves for finishing close.


Defense Classes
Demoman

A Scottish explosives specialist, the Demoman (or Demo) is one of the most important members of the team, with 175 health. Although his weapon is ineffective at long ranges, the Demoman is quite dangerous and can emerge victorious from almost any situation. He is a true master of explosives, excelling at dealing with enemies at medium and close ranges. Armed with a grenade launcher and a sticky launcher, the Demoman uses his skills and one eye to send his opponents straight to the skies, often piecemeal. If the enemy manages to get close, he will, unfortunately for his kidneys, discover that the demolitionist is not bad in close combat either - after all, he has a wide selection of appropriate weapons available to him.

Demoman can effectively deal with enemy buildings: a couple of grenades thrown at an unexpected angle, and turrets that had not noticed him are scattered into pieces. Sticky bombs are an excellent way to clear an area or prevent the enemy from approaching important objects: trolleys, control points, intelligence data; you can also use bombs to mine passages and not give enemies even a chance to get through.


The Demoman's main weapon is a grenade launcher, which has high damage (100 damage for a direct hit, as well as splash) and can easily destroy anyone if you know how to use it correctly. This item itself has unusual mechanics - its projectiles fly in a parabola, making it useful at all distances. Has 4 loaded grenades and 16 in reserve.

The sticky launcher as an additional weapon is no less powerful a device than the grenade launcher, and sometimes can be used as the main one, covering enemies with sticky from head to toe. Deals from 30 to 100 damage per sticky stick; up to 8 of these can be placed at a time.

The melee weapon is a bottle of booze, which apparently has, unfortunately, already run out.

Heavy

The strongest class in the game, with as much as 300 units of health, it is problematic to move him, even explosions almost cannot throw him back, a real Russian giant from Siberia. With the largest amount of health and an impressive gun, he is certainly a force to be reckoned with. His firepower is great, he is able to stop an avalanche of enemies by pouring lead rain on them from his machine gun. However, when the gun is in full swing, the machine gunner becomes slow as a snail, turning into one big target for any enemy - be it a Sniper sitting far enough away, or a Spy sneaking up insidiously from behind. Being an excellent partner for the Medic, replenishing ammo and health from the engineer's dispenser, and simply supporting any comrade with fire - the Heavy (or Heavy), once again confirming the name of the game, fully demonstrates its best qualities in the team.


The Heavy's main weapon is the minigun itself, which has a high rate of fire. The weapon itself must first be untwisted in order to be ready to fire in advance. Heavy emerges victorious in those battles where he spins the minigun as quickly as possible. Damage - from 15 to 90 units per shot, a total of 200 cartridges in stock.

Still the same shotgun, which, if desired, can be replaced with a portable first aid kit (Sandwich or Banana), which can be shared with your teammates.

Melee weapons are fists.

Engineer

His specialty is not fighting in the vanguard, but supporting his team with the help of buildings. The Sentrygun, an automated cannon, will take aim itself and shoot the enemy who inadvertently thrusts itself into its range of action. The Dispenser will restore health, metal, and ammo to teammates. Teleport will instantly transport friends from one place on the map to another, giving them the opportunity to engage in battle literally seconds after revival.

All this does not give rest to the enemies, who constantly try to destroy these very buildings in various ways. A good engineer always has a supply of metal and, by banging on broken buildings with a wrench is able to repair them. Well, if the situation requires it, then the same wrench, or a good old shotgun, or a few more weighty arguments will help prove that messing with an engineer is more expensive.

As the team advances on the battlefield, the engineer can and should move his structures to ensure that they continue to be useful. But with such a load, you are almost defenseless, and if you are killed, the structure you are carrying will be lost, so allies should cover and protect the engineer who decides to change the location of the building.


The Engineer's main weapon is a shotgun. He only needs it for defense, since the class itself is not initially considered an attacker.

Secondary weapon - a pistol. An excellent weapon for finishing off an enemy, as well as for finding spies nearby. The same damage as the Scout, but there are already 200 rounds in stock.

Melee weapon - a wrench, which not only helps to upgrade or repair buildings, but can also teach a scoundrel a lesson.

PDA of the building - a kind of remote control that helps you choose the building you want to put up, and their price, which you will have to pay for the construction.

PDA of destruction - allows you to manually destroy your buildings.

Support Сlasses
Medic

The Medic's main weapon is the Medigun. While it is activated on a teammate, that teammate receives an additional bonus of up to 150% of their maximum health. After the Medic stops healing, the health will slowly decrease to the maximum health of the patient's class. This effect is called overhealing.

As you heal, the ÜberCharge bar on your screen will gradually fill up to 100%, and the faster the more injured the patient is. The Medi Gun will begin to sparkle when fully charged, signaling that it is ready. Activating the ÜberCharge will grant the Medic and their patient complete invulnerability for 8 seconds.

The Medic is able to regenerate their health over time; the longer the Medic stays out of combat, the faster their health will regenerate. When injured, the Medic will regenerate their health at a rate of 3 per second, increasing to 6 per second over the next 10 seconds. If you equip the Bloodsucker, the regeneration rate will decrease from 3-6 to 1-4.

The Medic's primary weapon is a syringe gun. He needs it exclusively for defense, since the Medic is absolutely useless in attack, he deals little damage and is completely dependent on the patient. This is an exclusively support class.

The secondary (but not in importance) weapon is the Medigun. Allows you to heal allies and activate an uber-charge. Different med-guns have their own uber-charge effects.

The melee weapon is the medical saw.


Sniper


On the battlefield, the Sniper's main role is to take out strategically important enemy targets using his sniper rifle and aiming precisely at the head, instantly killing any enemy. Extremely effective in long-range combat and rather weak in close combat. That is why it is convenient for the Sniper to lie down on some hill or cover, from where he can easily dispatch enemies to the next world. The Sniper does not like to appear on the front lines, as he is a weak class in close confrontations.


The Sniper's main weapon is a Sniper Rifle, which allows you to kill enemies from afar. The rifle itself has a certain charge, which, when accumulated, significantly increases damage.

Additional weapon - SMG. Usually this weapon is used in case of detection as a defense, since the sniper rifle will not be able to fully protect the player.

Close combat weapon - Kukri.

Spy

The Spy prefers to wear stylish suits, wield sharp knives, and rely on stealth and surprise to help his team. With the ability to disappear completely or fake his own death, the Spy can fool any enemy. His disguise kit allows him to adopt the appearance of any class to sneak into enemy territory and then pick off the unsuspecting bastards.

The Spy is the best counter to the enemy Engineer. Sapping buildings and backstabbing the Engineer is the Spy's favorite tactic. The building that is sapped begins to slowly be destroyed. The sapper can only be removed by an Engineer or Pyro with a certain weapon. Other favorite targets for the Spy include the Heavy, Medic, and Sniper.

The Spy's main weapon is the Revolver. A powerful weapon for close range, it deals 20 to 60 damage, has 6 rounds in the clip and 24 in reserve.

Melee weapon - Knife, which allows you to instantly kill an enemy with a blow to the back.

He can also become invisible and steal the enemy's appearance, deceiving enemies.


Training

Training is a single player game mode where players can learn the basics of combat against various classes. This mode is designed for inexperienced players and covers the intricacies of gameplay and teamwork in a "safe" environment. Each class has a number of individual scenarios.

Training is currently available for the Soldier, Demoman, Spy, and Engineer.

Basic Training

Basic Training consists of 2 sections: Target Training and Dustbowl Training.

Target Training


This is where the player is introduced to the basics of the game. You are told about the controls, the intricacies of playing as a Soldier, Demolitionist, Spy and Engineer are explained.

All newbies are advised to familiarize themselves with it.

Training on Dustbowl


After the player completes training for a soldier, the player is given the opportunity to start training on Dustbowl, where he will get acquainted with the main characteristics of the Capture Control Point game mode. In the first round, the player is taught the basics of playing on maps with the Capture Control Point mode. In the second round, the player is given a medic as an ally, and is explained who a medic is and why he is needed. In the final round, the player is given an engineer as an ally, explaining how he can help the team and how strong he is in the fight against the enemy. After capturing the last control point, the player is given a "certificate" and is returned to the main menu. After successfully completing the soldier training, the demolition man training is unlocked.

Playing with bots


A bot (or BOT) is a computer-controlled player on the server. There are two types of bots in Team Fortress 2: AI bots and dummy bots. AI bots have high-quality AI code to emulate the player's actions in the game, and they can be used without cheats. Dummy bots have no AI, but can be used for testing. Dummy bots require cheats to be enabled on the server, which will prevent players from earning achievements.

How to practice rocket jumping?


To perform the simplest jump, you need to: aim down, jump and crouch at the same time, and then immediately shoot a rocket at your feet.

For certain classes, rocket jumping is simply necessary, as it helps you be more maneuverable and helps you play on the element of surprise in case of meeting an enemy.

There are various maps and community servers where you can do exactly this.

MGE

MGE is a community game mode designed for one-on-one duels between specific classes. It can be a good training ground.

The goal of MGE is to simulate a one-on-one duel. Two players spawn in an arena, which is usually a major area of ​​the map where the fight is taking place (such as the second control point in Badlands). The player who gets 20 kills wins. You can start a duel by typing !add in chat and making a choice. If no one starts the fight, you will be forced to wait until an opponent joins you. When the duel ends, any players in the arena will be added to play with those who played previously. Different arenas have different class restrictions, but the classes common to all arenas are Soldier, Demoman, Scout, and Sniper. This mod will help you hone your skills in playing a particular class.

Game Modes
Basic Maps

This refers to the maps that are easiest for new players to understand.

2Fort (Capture the Flag)


Granary (Capture/Defend Point)


Well (Capture control Points)


Dustbowl (Capture Control/Defend Point)


Game Modes

Arena

Arena maps are designed to keep all classes in Team Fortress 2 useful while still forcing players to simply fight each other. While other game modes require teamwork, Arena focuses players on the specific actions and decisions made during each encounter. You only get one shot, and if you die, you can only continue playing the map in the next round. Maps of this mode contain the prefix "arena_".

Capture the Flag

In Capture the Flag, the goal of the Red and Blue teams is to capture enemy intel and deliver it to their base. Victory is awarded when a team successfully completes the required number of intel captures (three by default).


Maps of this mode usually have a symmetrical type of structure, and the intel cases are located in the most secluded place of the base. To pick up the intel case, the player just needs to touch it. Having captured the intel, the player must bring it to their base in a special capture zone (marked with black and yellow lines on the floor) to successfully deliver it. All players of the team that completed the capture receive a bonus in the form of a ten-second crit boost (damage increased by 3 times). Maps of this mode contain the prefix "ctf_".

Capture Control Points

The maps of the Capture Control Points mode are divided into two main subtypes.

A control point is a round platform with a glow and a hologram of the team's colors in the middle (neutral points have a white glow and a hologram with a question mark). To capture a point belonging to the enemy team, you just need to stand on it and wait until the capture indicator fills with your team's color. The more players capture the point, the faster the capture goes, but there is a speed limit for this. Scouts, as well as soldiers and demolitionists using the Painkiller, capture the point twice as fast. The capture will not occur if there are players from both teams on the point. If all the players capturing the point were killed or left the point before the final capture, the capture progress will not be reset immediately, but will decrease gradually. If the round timer ends and the capture progress has not yet reset, overtime will be activated and the round will not end until the point is captured or the capture progress is reset.


In Symmetrical Control Point Domination, both teams start with two control points under their control, and the center point is unowned. The team that captures all the points wins. If neither team manages to capture all the points within the allotted time, the game will automatically end in a draw. Control points located closer to a team's base are captured significantly faster than others.

Control Point Domination maps are symmetrical. Both teams start with no control points, and all points are initially neutral. The team that captures all the control points wins. On traditional Capture/Defend maps, a draw will be declared if neither team captures all control points before time runs out. Once a team captures all three points, they win, regardless of the enemy team's progress in capturing any other point.

Capture/Defend maps are asymmetrical. The Red Team starts the round with all points under their control. The Blue Team wins if they capture all of the Red Team's points. Points can only be captured in the order specified (but there are exception maps, such as Gravel Pit). The Red Team wins if they do not allow all of their points to be captured within the allotted time. Points captured by the Blue Team cannot be recaptured by the Red Team. Maps in this mode have the "cp_" prefix.

King of the Hill


King of the Hill is similar in style to Arena. The focus here is on a control point located in the center of the map that does not belong to any of the teams and is locked at the start of the round. Teams must reach the point and capture it when it becomes available for capture. Once one team captures the point, a three-minute countdown is started for that team. If the opposing team manages to recapture the point, the countdown will start for them, while the countdown for the opposing team will be paused. A team will win after the three minutes allotted for holding the point are up and when the enemy team's process of capturing the point is exhausted. Maps of this mode contain the prefix "koth_".

Payload


On Payload maps, the Blue Team must escort a minecart with a bomb through several checkpoints towards the Red base within the allotted time. The minecart moves if there are Blue players near it; the more players there are, the faster it moves (maximum speed is achieved when there are 3 players near it). If a Red player is near the minecart, it stops, regardless of how many Blue players are near it at the moment. If the cart is not escorted by Blue Team players within 30 seconds, it will slowly roll backwards until it reaches the last checkpoint crossed, the Blue Team base, the top of the slope (on some maps), or where a Blue player touches it, resetting the timer. The cart acts as a level 1 dispenser for the Blue Team (and cloaked enemy Spies), slowly healing players and refilling their ammo. Players in front of the cart will not be able to refill their ammo from the cart.


PayloadRace


Unlike the Payload mode, on the Payload Race maps both teams have a cart; here it doesn't matter which team plays the attacking position and which one plays the defensive role - it turns out that both teams play both of these roles. Teams have to escort the cart through enemy territory, while preventing the enemy from doing the same. Like in Escort mode, team players must push their cart while being close to it, and the more players there are, the faster it moves, while players from the enemy team can stop it from moving.


Attack Tactics
Scout


Scout is good in single combat on one. Wandering and lone enemies (such as Spies or other scouts) are good targets for the Scout, but if you are spotted, you are unlikely to survive for long. Instead of going straight for the kill, try to outsmart your enemies and ambush them by attacking them from above, behind, or elsewhere. The key to this is to remain undetected, or you will be in trouble.

The Scout's speed is useful for avoiding backstabs and headshots; however, your jump trajectory is quite predictable, which can be exploited by enemy snipers. Use double jumps to move erratically in the air to avoid being hit, but be aware that many snipers will wait for you to jump a second time, after which your trajectory will be predictable and easier to hit.

The Scout is at its best on large maps with plenty of room to move around. And narrow and stuffy maps restrict his movements, so try to avoid various narrow places, try not to play on such maps as a Scout, otherwise you will become an easy target for enemies.

Soldier

While your rocket launcher does a lot of damage at close range, you can also take a lot of damage if you rely solely on your weapon (especially in one-on-one battles when shooting at point-blank range). It is advisable to use your shotgun or a melee weapon if there is only one enemy left to finish off.

Like the Heavy, the Soldier is a very dangerous class in combat. Newcomers to the Soldier will find it much easier to learn than other classes due to the rocket launcher's significant damage at any range.

Offensively, the Soldier is the best class for assaulting an area. You can easily destroy an enemy turret at long range. You can also sneak behind enemy lines with your rocket jump and catch your enemies off guard.

Pyro

Pyros wear fireproof suits and cannot be set on fire, but they still take damage when in contact with flame particles. The shotgun may be more useful in some cases when fighting an enemy Pyro.

Compressed air can reflect enemy projectiles, returning them back to the enemy and amplifying them with mini-crits. Also, with the help of air, you can extinguish allies. Use compressed air more often.

Try to check allies for a spy more often to save the lives of you and your teammates.
Defense Tactics
Demoman

Demoman has no weapon hitscan, Therefore, his playstyle and shooting are different from other classes, use this feature wisely.

No Demoman weapon loses its killing power at long ranges. In fact, the only other weapon in the game that has such properties is the sniper rifle. This in turn means that the Demoman is especially deadly at long range, which he can use to his advantage. For example, a soldier has similar initial damage and higher health at close range, but at long ranges, the damage he does decreases to almost half of the standard, while the Demoman's damage remains the same. Therefore, the ideal situation for a Demoman to fight a soldier is at long range.

Sticky bombs can travel huge distances if you hold the fire button for a long time before firing. You can use this to your advantage, especially if you need to take out an enemy from afar.

Heavy

Remember about alt fire. By holding down the right mouse button, you can spin the machine gun idle. This will allow you to be ready to shoot without wasting ammo and save time. But it is even better if you jump out when coming out from behind a corner to attack an enemy. The enemy, not expecting this, will be confused, which will allow you to win a few decisive seconds.

Do not forget that you also have fists and a shotgun, because when you have them in your hands, it will be much more difficult for snipers to hit you due to the lack of slowdown during shooting, which is inherent in the machine gun.

Even though you have a lot of health, do not forget that a sniper or spy can destroy all your health with one shot/hit.

Engineer

If you intend to build a turret, then it is worth placing a dispenser in advance. It is preferable to place it in places where there are boxes with ammo or health, or behind some kind of cover, so that this area becomes a kind of safe zone for your allies. By the way, about them, you can ask them not to take ammo, promising a dispenser in return.

Many engineers fall into a psychological trap: they often have to sit out at the base, surrounded by their buildings, far from the events. This can lead to a false sense of security. Remember: spies do not sleep. The situation can change at any moment. And now your team is already sitting on the defensive. Be vigilant.

Also, many newbie engineers use the wrong tactics for building buildings, which at first glance may seem like a reliable plan: position yourself in the middle of the playing field, put a dispenser in the back, and a turret in front (the so-called "turtle engineer"). In fact, the nest of such an engineer is very easy to demolish, never do this.

And finally, become an engineer only when you think that the team needs an engineer at the moment. Consider the number of players in your team, the composition of both teams, the type of map, the time left, the team does not always need an engineer.
Support Tactics
Medic

Never stop moving! The Medic is a primary target for enemy spies and snipers. Constantly jump, crouch, and move sideways, making yourself a difficult target.

Constantly turn around. Since you don't need to look at your patient once you start healing, look in all directions. You may spot a spy or a hidden enemy. before the patient notices it.

If you have a stored ÜberCharge and you are in a situation where you can be killed quickly, activate it. It is better to survive and maybe give an ÜberCharge to a nearby buddy than to die with a full charge.

No need treat a person who is already being treated by another medic (called double-healing). This will not increase the speed of healing, but will only decrease the rate of accumulation of the uber-charge.

Sniper

An attentive enemy may notice the laser mark of your sight, and if this happens, the element of surprise, which is so important for a sniper, will be lost. To avoid such incidents, you should aim at objects located near your target, where it will be difficult for the enemy to see the mark, and only when you are 100% ready to fire should you move the sight to the enemy. (See the picture on the right.)

The sniper is characterized as a support class, some even consider it a defensive class, but despite this, the effectiveness of a sniper in attack is also high. For example, on maps like Dustbowl, Snipers are indispensable in destroying engineers, their Turrets, enemy snipers, demolition men who mine the area, and, of course, "medic" pairs -machine gunner". Don't be afraid to use a sniper on offense and on tighter maps like 2Fort if the enemy prefers to hide in their file room.

If you only see the enemy's body, try waiting for the sniper rifle to be fully charged - in most cases, such a powerful shot will be enough, and your comrades will always be able to finish off the enemy you wounded if necessary.

Spy

Don't let yourself be seen or heard.
Players can be extremely paranoid (especially if they've already been backstabbed), checking everyone in their line of sight regardless of your behavior. Wait for your teammates to distract him and then strike when he does. when the enemy least expects it.
Keep in mind that the sounds of breaking stealth and backstabbing can be quite loud, especially if you use Dead Ringer. Knowledgeable opponents will most likely hear you and react to it. Use gunshot sounds with battlefield, and come out of stealth around corners and walls to mask your sounds.
Try to avoid being seen by others while you do your job. Be aware of which players can see you coming out of stealth, backstabbing or plant a bug. If you are spotted, you have two choices: hide and run, or fight back with your revolver. Always ask yourself: "Will that player be able to see/hear me kill/plant a building/come out of stealth? Did he react to it somehow?" If "yes" - run to another part of the map until you are stop searching; if "no" - continue doing your job.
Try to assess the situation before you come out of invisibility.

Camouflage only when you are invisible, if you are behind enemy lines. This will prevent your enemies from seeing the smoke that appears when you camouflage.

Always work with your team. Despite your unique abilities to kill with one blow to the back, become invisible and disguise yourself as an enemy, you are still not immortal, and working together with your team will increase your effectiveness as a spy.
Free to Play and Premium Accounts
There are two types of accounts in Team Fortress 2 - free and premium.

Free

A free account is available to all players who have downloaded the game on Steam. Free accounts only have 50 free inventory slots and a limited number of blueprints for forging. In addition, players can only trade items that were obtained through trades and randomly obtained tools. Players with a free account cannot use any kind of chat in Freeplay (but can on community servers). Free accounts also have restrictions on random item drops - players can only receive "standard" items, such as unique weapons and Paint Cans.

Premium

A Premium account is an account with a copy of Team Fortress 2 purchased before June 23, 2011, or if a player with a free account:

Purchased a retail or digital copy of The Orange Box;
Activated the game by purchasing it from the Mann Co. (online) store.

A Premium account has no restrictions on receiving and storing items or playing the game. Players who purchased Team Fortress 2 or activated a copy of The Orange Box were rewarded with an all-class accessory, the Proof of Purchase.

Comparison

Free version
Premium version
50-slot backpack
300-slot backpack (can be expanded to 3000)
Standard items (weapons, boxes and paints) drop
Standard, rare and accessories
Limited forging blueprints
All blueprints
Exchange with restrictions
Exchange without restrictions
Gifts can only be accepted
You can give and accept
Chat (Access to all types of in-game communication is limited, including character lines).
No restrictions (Exception: Word filter).

How Not to Lose Your Items?
Important warning:

As the game progresses, your inventory will be replenished with items (boxes, guns, and even hats). And if your account does not have the "premium" status, then it will have only one inventory page. This is very little, over time the page will fill up. During this time, you may get important things that you can only get once. For example, things for achievements (Cursed Metal, hats of Halloween bosses, etc.). I wanted to warn you that if possible, you do not delete things from your inventory due to lack of slots, especially items received for achievements. The fact is that the probability of returning them will be extremely small, there is a chance that you will lose them forever. Therefore, if you currently do not have money to purchase a premium version of the account, then try to delete boxes, duplicate weapons, or use duplicate weapons in forging.


How not to lose things when exchanging or how not to be deceived.

After purchasing in the Mann. Ko store and acquiring premium status, you have the opportunity to freely exchange things. However, in this path there are a lot of scammers, the so-called "scammers", who deceive people every day, receiving their things, and sometimes accounts. In order not to get caught, you need to know the rules, the most important rule that you must follow first of all is "Trust, but verify".

Often scammers like to throw links to various sites. Try to check them for lice as much as possible, sometimes the sites may not be real and will differ slightly from the original name (for example, there will be a different domain, or the name will be spelled incorrectly, etc.). And before going to this site (if you have decided, of course), I advise you to use, for example, the antivirus site "Virus Total" [www.virustotal.com], which checks sites and exe files at once through a bunch of different antiviruses. It will be much safer. [/quote]

If the other side of the exchange starts asking you to log in to some site, then feel free to send it far away.
How to Trade?
In-game trading is a system that allows players to trade weapons, accessories, tools, etc. with other users.

How trading works:
https://youtu.be/ZT3j8pb_KyU


There are many ways to trade, but most often people use trading sites. There are sites where you trade exclusively with bots, and there are those where you sell and buy things from people (just like on the market).

Everything has its pros and cons.

Trade Sites with Bots.

These are sites where you can quickly sell or exchange items to bots, which in turn also sell items.

The principle of operation is simple - 1. You log in to the site from your Steam account; 2. select the items you want to buy; 3. Pay for the purchase with items (sometimes money) and accept the exchange.

It seems that's all. This is the ideal way to buy/sell items, but not everything is so smooth. The thing is that in turn, the sites will take a commission. Somewhere it is more, somewhere less, but the more expensive the item, the more you will have to pay and sometimes you can buy an item at a very unfavorable price. Another snag is that not all the items you need may be in stock. This applies to any site that is focused on exchange.

+Quick purchase
-Unfavorable prices
-Shortage of some items

Whether to use these sites or not is your choice, but just in case I ask you to be extremely careful: check the price tags on the sites and compare them with their real price, as well as with competing sites, so as not to overpay too much. From the sites for exchange with bots, I can present several of the most popular, and also tell you about some pitfalls.

1. TF2Mart

One of the oldest TF2 item exchange sites. It is famous for its (relative) honesty and more or less favorable prices (of course, there are exceptions). The downsides include an outdated design, as well as the fact that the site does not take into account some nuances in your items (for example, spells), but it does count paints, kill streaks, etc.

In my opinion, the best site for exchanging with bots.

2. TF Trade

The most advertised site at the moment. It has an excellent, convenient design, it is possible to sell things to people at your own price, but it has its own peculiarities, everything is not so rosy. And... That's where the advantages of this site end. It has a wide range of products, but absolutely strange prices, especially for expensive items. In general. Therefore, I would advise you to buy items here wisely, since you can easily go broke, although this applies to all similar trading sites. Also a good site, but there are shortcomings.

3. Quicksell.store

Another one. Absolutely the same situation as with TF Trade, but here the items are mostly at an inflated price. And also be careful when selling items, since sometimes they can be sold at the old price, and they will of course sell at the current one.

4. Scrap.TF

A very ambiguous site. On the one hand, it is very beautiful, works well, there are perks in the form of item giveaways and weapon exchanges for scrap metal, a quick way to buy keys. But I would not recommend buying other items here. The thing is that they are sold at a very strange rate. For example, on the site, items of an unusual type are often bought cheaply (much lower than their real price), and sold at an inflated price. It would be fine if the difference was in a couple of keys, but in reality, almost all items of unusual quality (unusual type, strange type, top grade, old school) are sold two or three times more expensive than their real price. Therefore, it is unprofitable.

5. ManncoTrade

And finally, the worst exchange site with bots. This is literally some kind of scam, your items here are worth pennies, and the prices for things on the site are inflated to unprecedented heights. There have also been cases when this site deceived people for money. Therefore, I categorically do not recommend using this site.

Trade Sites with Real People.


The most efficient and profitable way today is trading with real people. Previously, there were many similar sites in TF2, but at the moment the largest is Backpack.tf. On it you can find out all the most accurate, up-to-date prices for almost any item, you can sell and buy items from players and bots. This is the best way to buy or sell things. But this site has a drawback - Waiting. You can sell your thing for months, there is a chance that it will not be bought at all. Therefore, selling items here is not easy, constant competition can push you out of the market.


Mann vs. Machines

Mann vs. Machine (abbreviated MvM) is a co-op game mode released in the update of the same name. In this mode, a team of up to six players must stop robots from planting a bomb in one of the Mann Co. buildings. Players can purchase upgrades for their weapons and character abilities (such as resistance to various types of damage, increased movement speed and health regeneration) using an in-game currency called credits, which can be obtained by destroying robots. All purchased upgrades will be available for the rest of the game, unless the player personally drops them at an Upgrade Station. If a player leaves the game for any reason, provided that they reconnect, all their upgrades and savings will be saved.


Trailer

https://www.youtube.com/watch?v=C4cfo0f88Ug

Introductory video

https://www.youtube.com/watch?v=eQX3M6t1LlY

There are two subtypes of the game mode: Training and P2P. No different in difficulty, in P2P players can receive rewards for successfully completing a mission, and for completing all missions of the mission, the rewards received can be even more valuable, which include Botkiller weapons, Australium, and the rarest Golden Frying Pan. To play P2P version of this gamemode, a player must have a Mission Ticket in their backpack. One ticket is allocated for one mission in P2P ver, which will disappear from the player's backpack only if the mission is successfully completed. Players can also increase the number of items dropped for the entire team upon winning P2P by first using a Team Bonus Coupon.

Mann vs. Machine currently has five difficulty levels: Normal, Medium, Hard, Expert, and Nightmare.

Mechanics


A team of mercenaries is attacked by computer-controlled robots, and they must prevent the robots from delivering a bomb to the base (somewhat repeating the principle of the gameplay of the Escort mode, as well as the portable bomb, reminiscent of intel). Each destroyed robot drops credits in the form of dropped "money" of varying sizes. When a player picks up one of these piles of "money", they are awarded equally to all players. At any time in the game, players can purchase upgrades at the Upgrade Station for credits. There, you can also increase the level of the current upgrade. Purchased upgrades remain even after switching to another class (you cannot change classes during a wave), but they will only be available for the class for which they were purchased. Players can optionally "return" their credits and restore upgrades between waves to switch to a different weapon, class, or optimize for a specific wave.

If a team loses, the game restarts from the beginning of the wave. The number of restarts is unlimited. Players can also vote for a complete map reset.

Robots

Most robots are based on mercenaries armed with the appropriate class weapons. There are also special robots with special abilities and/or weapons.


While the robot is carrying the bomb, it loses half of its movement speed. The robot carrying the bomb also receives boosts, each time more powerful. The graph on the screen shows the time until the next boost. Boosts are activated by the carrier with taunts, accompanied by sound. There are three types of boosts in total, which are cumulative.

Upgrades
For each wave, you are given money, which can be used to buy upgrades. You can upgrade your character or weapon.


In addition, players can fill their flask (if equipped) with one of the bonuses: personal uber-charge, five seconds of guaranteed crits, ammo replenishment, or teleportation to base. Engineers also have access to the bonus of instantly upgrading all their buildings.

A flask can be used up to three times and can only be filled with the same bonus. Note that if you try to buy another bonus, the flask will switch to this bonus.

Gameplay

All players belong to the defender team (called MANNCO) and wear the Red uniform, while the robots have the Blue colors, including their effect particles and names in the kill feed. The game is played by fighting off enemy waves, each of which has a preset number of enemies. Different support classes will spawn until the wave is complete.

The game can be started if there are at least three players on the server. If at least one player declares that they are ready, a 150-second countdown will begin. Each additional player who declares themselves ready will decrease this time, up to a maximum of 60 seconds. If all players are ready, the wave will begin in ten seconds. Regardless of the situation, once the countdown is over, the robots will begin their invasion. The countdown will not be extended if new players join the server.

I will make a more detailed guide to "MANN vs. MACHINE" in the future.
Community Servers
There are unofficial Team Fortress 2 servers that may have custom server settings. (Custom maps, plugins, mods, custom models, etc.)

You can connect to any server through the server browser or through the developer console. To enter the browser you need to:

1. You need to go to the main menu and click on the "Find a game" button


2. In the game search menu, you need to click on "Community Servers"


3. That's it, now we can find the servers we need, add them to favorites so as not to forget, etc.

Steam Workshop
The Steam Workshop is a system of internal storage and external web pages that makes it easy to store, organize, sort, rate, and upload additional content for your game or application. The Steam Workshop is where the community makes tons of mods, models, textures, patches, maps, and other content. In other words, it's a page for mods and suggested items or maps to add to the game.


In TF2, this system works like this:

1. There is a vote to add an item to the game (you can influence whether a certain item is added).

2. There is a downloadable map that you can download, install and play. (I have already talked about how to do this)
About Donations


Donation is not necessary in this game at all. The only thing you need to buy is any item in the Mann Co. store so that your account gets the "premium" status. I recommend buying a Backpack Expander (so that you have as many slots as possible), or a stamp if you want to support the creator of your favorite map. I also do not advise you to buy anything else here at all (due to the unfavorable price), the same items can be purchased on third-party sites much cheaper.

Game Settings
Settings
In addition to the usual settings, where you can set a comfortable mouse sensitivity, reassign keys, etc., there are also additional settings:


Additional settings can help you customize the game for yourself in more detail, making it more convenient.

Recommended additional settings:

  • Quick weapon change.
  • Play sounds when hitting and killing an enemy.
  • Display damage to the enemy above him and add this damage into one number.
  • Play a sound when the sniper rifle is fully charged.
  • Disable automatic aiming after a shot on a sniper.
  • Automatic healing with one click on a comrade, not by holding down the left mouse button.
  • Automatic call of wounded comrades at a certain amount of health.
  • Minimalistic interface (optional)
  • Display of the player model next to health instead of a 2D image (if you have problems with frames per second, on the contrary, turn it off)
  • Display of delay in numbers.
  • Reduced weapon models (optional)

Setting up an Internet connection

This is a very complex, long stage, so if you are experiencing problems with the connection and latency, I advise you to watch this video:

To make these changes, enable the console in Settings - Keyboard - Additional - Enable developer console (by default on Ё)
If you are too lazy to watch, here are the settings -

For normal internet:
cl_cmdrate 66
cl_updaterate 66
cl_interp 0
cl_interp_ratio 1
rate 66000

For weak internet:
cl_cmdrate 33
cl_updaterate 33
cl_interp 0.1
cl_interp_ratio 2
rate 33000

Optimizing the game for weak computers

TF2 often starts to freeze, glitch, etc. due to the huge amount of content and terrible optimization. To fix this problem, you first need to lower the graphics settings, but if this does not help, you can refer to my old guide on optimizing the game for weak computers (or find videos on this issue on the Internet):

Non-standard interface


The standard interface is a bit outdated, it is incomprehensible, not very convenient, and many players put replacements for it. If the standard or minimalistic interfaces do not suit you, there are several sites that specialize in this topic.

HudsTF [huds.tf]
Gamebanana [gamebanana.com]

There is also a site that allows you to create your own interface based on the most popular non-standard hud - ToonHUD

ToonHUD [toonhud.com]
About Hackers and Bots
Cheaters... A serious problem in the game. There are many of them, but they can be fought!

If you see a cheater in your team, start a vote to block this player.

Yes, there are few cheaters in the game now, since Valve has banned most of them, but you can never be sure that they won't come back, which means you need to be prepared and know what to do if they do.

Voting is an in-game feature added in the Hatless Update (April 14, 2011 Update). It allows all players to actively participate in deciding issues on the server, such as choosing the next map, disconnecting (in common parlance: kicking) a player, and some other aspects. After all the votes have been collected, the system makes a decision based on the majority of votes. A player can start a vote by pressing the button in the main menu (next to the "Continue Game" button). After pressing, a voting panel will appear in the center of the screen. Players can select the subject of the vote and additional options.

It's easy to find out if a player is a cheater or not. First of all, pay attention to the chat, where people will most often ask you to check and kick out some player who may be a cheater.
Secondly, cheaters most often behave very suspiciously (very fast, often kill, sometimes spin, spam messages, too often deal critical hits, lag strangely, but hit the target accurately (usually in the head), etc.). It is also worth mentioning that in TF there are no cheats for flying, shooting through walls and invulnerability, so do not blame other players for this in vain. And definitely, when you see a vote, do not immediately vote for, without even looking at who and for what they are trying to kick out. It often happens that an innocent player is kicked out, confusing him with a cheater, or even more, the cheater himself or the bot starts voting against an innocent player.

Killing a cheater alone will not be particularly difficult (for this you just need to react quickly and make a shot in time), but when there are a lot of cheaters and they walk in crowds, then do not even try to stop them - it is useless. Better run, and even better leave the server, since the chances that all the cheaters will be kicked out are extremely small.

Ending
Thank you very much for reading this guide. I hope I was able to help you.
I would also like to receive your feedback, leave comments, rate the guide and add to favorites (if you liked it), and you can also reward this guide for my efforts if you want.

You can also suggest tips yourself, so that I can add them to this guide. Of course, with the mention of your name.


https://steamproxy-script.pipiskins.com/tradeoffer/new/?partner=216816030&token=LZ7z4jVB
11 Comments
I hate teleporters 18 Jan @ 8:56pm 
While Civil servant suggests buying keys, which is a decent option for obtaining premium, the best option, that loses the least value from mannco store to market is actually the tour of duty ticket, in both % value and flat value lost on purchase. However, you should only buy 1 in mannco store, and from there only buy from market or external sites to match market prices if you need more.
Civil Servant 13 Jan @ 7:25pm 
As someone with over 4,000 hours in the game, I recommend the best way to start as a new player is to purchase a key from the Mann Co. Store for $2.49. This not only upgrades your account to premium (cheaper than the standard upgrade option) but also gives you something useful in return.

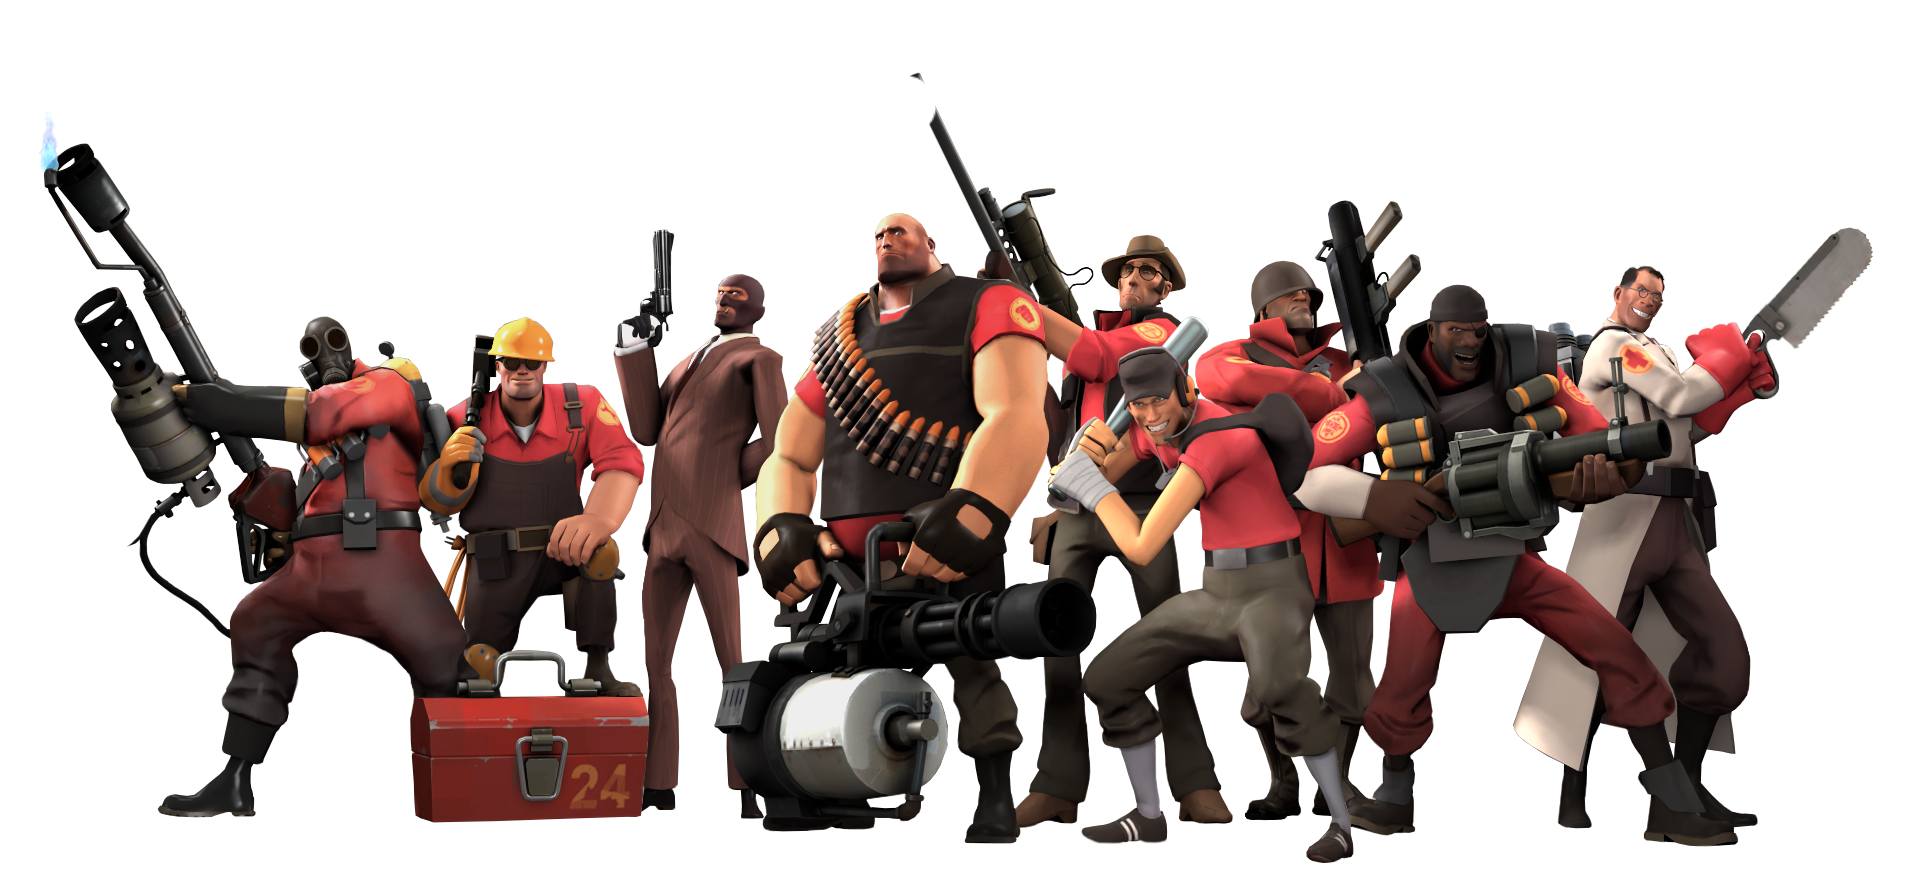
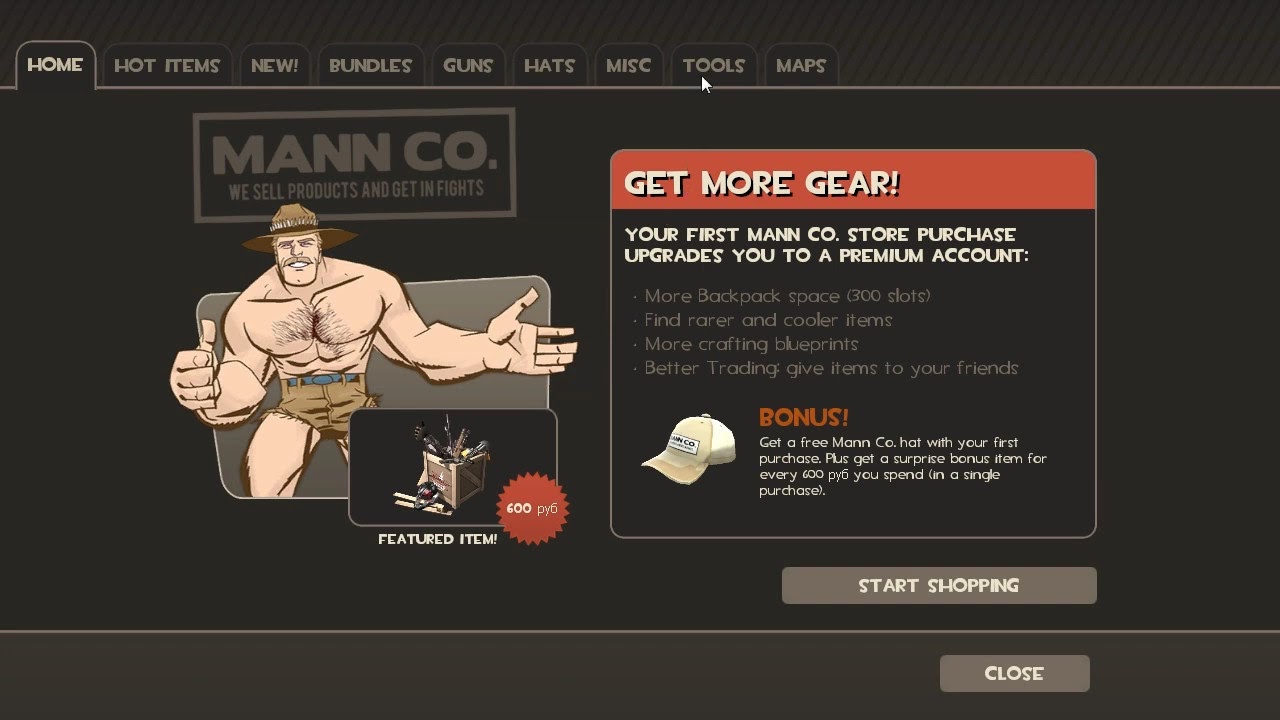
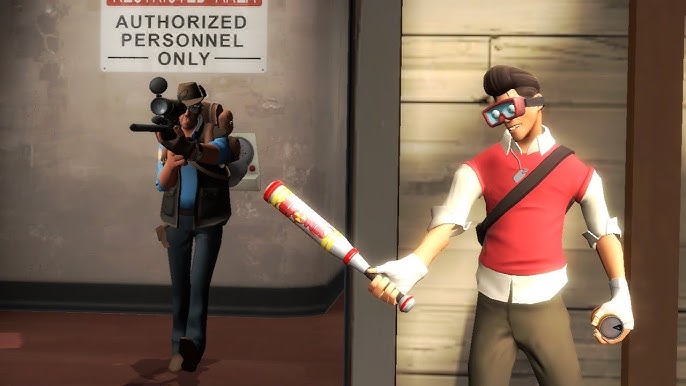
Once you have your key, head over to scrap.tf, where you can trade your key for pure metal using a bot. After obtaining metal, you can browse their weapon trading section. Use the autobuy feature to acquire weapons you don't have if it’s available, or manually purchase one of each weapon. From there feel free to use the rest of your metal to buy hats and cosmetics. Use backpack.tf for pricing.

I only trust backpack.tf and scrap.tf if I am trading for items. Sometimes I use marketplace.tf or mannco.store to buy items for cash like MVM tickets.:cozybethesda:
Tomatitos 13 Jan @ 3:22pm 
Ty, I contacted support already
Arderon  [author] 13 Jan @ 2:23am 
It is better to contact Technical Support with such a question, but
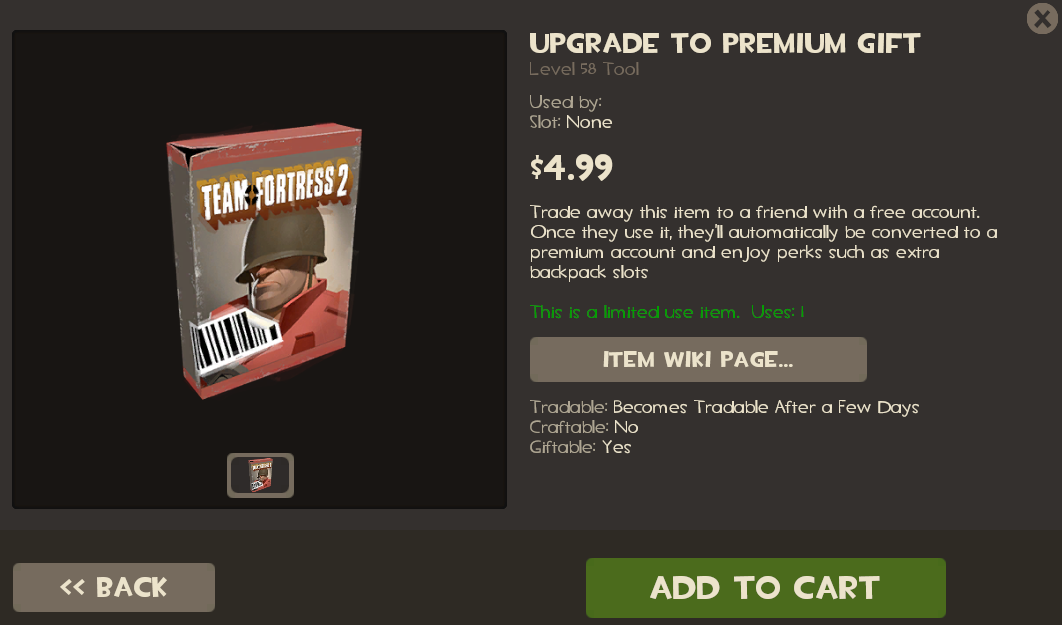
If you received Premium recently, then wait a little longer.
Tomatitos 12 Jan @ 9:12pm 
bro, i have premium and i cant use any type of chat yet.... I can acces to competive and all of that but not access the chat. Anyone can help?
Pisyun 12 Jan @ 1:25am 
ЭХЕЕЙ
i9 12 Jan @ 1:24am 
THANKS
ДОРОГА СКОРБИ 12 Jan @ 1:23am 
nice work bro
пока 12 Jan @ 1:22am 
yeah
Namikazeee 11 Jan @ 9:45pm 
Very Awesome! :steamthis: