Paranormal Cleanup

Paranormal Cleanup

Not enough ratings
Paranormal Cleanup General Extensive Guide
By MetalHeadKendra
This guide is meant to help anyone who is struggling with this game or just needs a little more information ♥
2
3
   
Award
Favorite
Favorited
Unfavorite
Intro
ㅤI wanted to make a guide for people struggling with this game. Hopefully this will be of use to you and your friends!
ㅤThis is also my first guide, so I hope it does well!
ㅤI would appreciate any comments, feedback, or changes I need to make to this guide to keep it updated for this game.
ㅤIf you have any survival tips and tricks for this game, please let me know and I will include them in this guide with your credit!
ㅤㅤㅤThanks everyone! ♥

Works with: Build 1.2.0zz
Last updated: 7/14/2025
ㅤ7/14 + Added guide for Missing Posters (I made this one! Please check it out!)
ㅤ7/13 + Added information for the new Summer Camp map
ㅤ6/13 + Updates sections for the new perks and prestiging
ㅤ6/3 + Updated sections for the Old Lady furniture mechanic (no longer blocks pathways)
ㅤ5/30 + Added hard mode info for 1.0 release
ㅤ5/28 + Added banish info for final maps, plus changed content for 0.5.0f
ㅤ5/4 ~ Edited sections for 0.4.0z release (removed beta warnings and content involving "always active" mechanics)
ㅤ4/29 + Added beta content for 31 Walnut
ㅤ4/27 + Added beta content for 47 Stafford
ㅤ4/23 + Added a mini-guide for earning money

This guide was made with the knowledge I gained playing it solo. I am in no way, shape or form, connected to the development of this game or the developer. You have bug reports or problems with the game, you should contact the developer ManicMice, or join the ManicMice Games Community Discord Server[discord.gg] to report bugs and ask for help! (I'm part of the server as well, the community is very friendly to help!)
Game Requirements
While these are not actually required, you will have a tough time getting far in this game without having these options.
  • Quiet Environment:
    ㅤㅤThis game relies heavily on sound, you will fail if you cannot hear the game well.
  • Headphones:
    ㅤㅤIt will be much easier to hear the entity's location with headphones / surround sound.
  • Brighter Screen:
    ㅤㅤThe game can be very dark and might need a brighter screen to see things in the dark.
How the Game Works
ㅤYou play as an employee hired by a mysterious (and incredibly rude) business owner. The jobs you perform involve cleaning various houses and locations, but the catch? They're haunted, and the entities inside aren't very friendly. You must finish all of your assigned tasks at each location and get out alive. If you do, you'll be rewarded with payment and experience points, both of which you can use on perks and tool upgrades.

Choosing a location
ㅤThere are currently 6 maps to choose from, and each has a different entity, difficulty, and number of objectives to complete. Choose carefully! (See below for more information on each map within this guide)
ㅤIf you are a beginner or don't quite have the hang of the game, I suggest playing Granny's House until you feel more confident to take on other challenges!

Gather your equipment
ㅤOnce you choose a map and load in, you can gather your tools from the starting tool shed. All the tools you need will be provided for each job. Each tool has an unlimited number of uses, so you won't need more than one in your inventory; though it's different for certain tools you find on the map themselves! (See below for more information about equipment within this guide)

Start cleaning
ㅤOnce you open the doors to the tool shed, the game begins. You must enter the location and start searching for the areas that need to be cleaned. Clean them as you go, but beware the entities lurking just around the corner.
ㅤScattered along the map are also different things you can collect. There's some loose bills that you are free to pocket for yourselves, as well as collectibles for extra money and experience. There will also be keys you can collect to open doors to certain rooms, which will remain locked until you use the key on them.

The Entity
ㅤEach map has a different entity haunting the location, and each one may have a different power or tactic to find you. They will instigate a hunt from time to time. Keep your eyes and ears out, avoid them by hiding in cabinets throughout the map, and always carry a Medkit in case they catch you!

The power went out
ㅤThe homes and buildings you visit somehow still have electricity, so you can use the lights within the house to see where you're going if you don't have a flashlight. You can also open the garage doors too. But be warned, not only will the entity sometimes break those lightbulbs, but the power can go out too. You won't be able to use the lights or garage doors then. Look around to find the power breaker and flip the switch to turn the power back on. When you do, you'll be rewarded with a nice EXP boost.

Banishment
ㅤIf the entity is proving too difficult, you can exorcise them so you can clean in peace. There will be five objects scattered along the map that you must find and burn in order to banish the entity. Once you do that, the entity will no longer appear and you are free to clean without any dangers lurking around the corner. More information on specific banishment processes can be found below in this guide.

Finish the job
ㅤOnce you finish cleaning, head back to the tool shed in once piece. Once you are back at the vehicle you started in, the job is officially complete. From there, you'll be greeted by your employer and some information about the job you completed. You get paid for how well you do on the job; the more you clean, the better your payout.

Money and Levels
ㅤYou can spend your hard-earned money on upgrades and perks for the next cleaning jobs. Though some of those perks and upgrades will require a higher level, which you can get with more experience from each job.
Equipment
Provided
ㅤThese tools are provided to you for free upon entering a map that requires them.
  • Flashlight: Used to light up the direction you are looking at.
    ㅤㅤ○ Not required to complete objectives, only helps to see in the dark areas.
  • Dustpan: Used to clean up Trash Piles.
  • Plunger: Used to clean clogged Toilets.
  • Sponge: Used to clean Ectoplasm.
  • Paint Roller: Used to cover Satanic Symbols.
    ㅤㅤ○ Only on specific maps
On-Site
ㅤThese tools are only found randomly within the map, unless you equip a perk that gives you one to start.
  • Crowbars: Used to break boards to open access to areas or shortcuts.
    ㅤㅤ○ Only two crowbars will spawn somewhere on the map.
  • Medkits: Can heal yourself when downed.
    ㅤㅤ○ One-time use only, consumed upon use.
    ㅤㅤ○ LIMITED AMOUNT; There will only be a handful of these on the map, use wisely.
  • Energy Drinks: Will replenish your stamina and give a short speed buff.
    ㅤㅤ○ One-time use only, consumed upon use.
    ㅤㅤ○ LIMITED AMOUNT; There will only be a handful of these on the map, use wisely.
Special:
  • UV Lamp: Will light up areas and reveal nearby inactive ectoplasm.
    ㅤㅤ○ Holdable item - Cannot be put in inventory / tool slots
    ㅤㅤ○ Provides no use for Hard Mode
    ㅤㅤ○ Only two lamps will be provided for the mission
  • Vacuum Cleaner (Suck It Up Perk): Can clean Trash Piles quickly.
    ㅤㅤ○ Upgrade to the Dustpan tool; cannot be upgraded
    ㅤㅤ○ Not recommended after fully upgrading the Dustpan
    ㅤㅤ○ Will be in your inventory upon starting the mission
  • Large Flashlight (Floodlight Perk): Shines brighter than the average flashlight.
    ㅤㅤ○ Upgrade to the Flashlight tool; cannot be upgraded
    ㅤㅤ○ Not recommended after fully upgrading the Flashlight
    ㅤㅤ○ Will be in your inventory upon starting the mission
Perks & Upgrades
Cleaner Perks
ㅤThese perks can be used in-game to aid certain objectives. You can equip 3 perks, or 5 after a Prestige Promotion. Some perks can be upgraded to better ranks for better effects. Some perks can only be unlocked via purchasing other perks in a skill-tree formation.
  • Ability Perk: Passive perks that are always active.
  • Cleaning Perk: Activated upon cleaning actions.
  • Utility Perk: Various effects, see each perk for more information.
Perk Name
Type
Description
Ranks
Endurance Enhancer
Ability Perk
Increases your stamina
• Up to 10 ranks
• +10% each rank
Rapid Recoup
Ability Perk
Increases stamina recovery
• Up to 10 ranks
• +10% each rank
Stronk
Utility Perk
Increases throwing distance
• Up to 10 ranks
• +20% each rank
Long Arms
Utility Perk
Increases reach distance
• Up to 5 ranks
• +10% each rank
Caffeine Rush
Ability Perk
Energy Drinks will also increase your movement speed
• Up to 10 ranks
• +15% speed and +1 second per rank
Ghostly Gait
Ability Perk
You gain unlimited stamina, but have 30% slower sprint speed
• Up to 3 ranks
• -10% speed decrease per rank
Dusty Dash
Ability Perk
Increases your sprint speed, but reduces your stamina
• Up to 5 ranks
• +5% speed & -10% stamina each rank
Cleanup Quickstep
Cleaning Perk
Increase movement speed after progressing an objective
• Up to 5
• +10% & +2 seconds per rank
Panic Pro
Cleaning Perk
Clean faster when an entity is nearby
• Up to 5
• +30% per rank
Eagle Eye
Utility Perk
All items around you get highlighted
None
Janitors Insight
Utility Perk
Sense the main power switch when the power goes out
None
Spidey Sense
Utility Perk
Sense the entity's location when it starts hunting
• Up to 5 ranks
• +4 Seconds each rank
Swift Savior
Utility Perk
Use Medkits 10% faster
• Up to 10 ranks
• +10% each rank
Caffeine Junkie
Utility Perk
Start with an Energy Drink equipped
None
Floodlight
Utility Perk
Start with a Large Flashlight, which shines brighter than a normal Flashlight
None
Bodylight
Utility Perk
An always-active flashlight that does not take an inventory slot
None
Break and Enter
Utility Perk
Start with a crowbar equipped
None
Suck It Up
Utility Perk
Start with a Vacuum Cleaner equipped, which cleans Trash Piles much faster than a Dustpan
None
Field Medic
Utility Perk
Start with a Medkit equipped
None
Salesman
Utility Perk
Get more money for job completion progress
• Up to 5
• +20% each rank

PERK COMBOS:
Ghostly Gait + Dusty Dash
ㅤㅤWhen fully upgraded, you will have infinite stamina and sprint 15% faster.
Spidey Sense + Panic Pro
ㅤㅤSee and use the entity's location to clean quickly

Equipment Upgrades
ㅤThese upgrades can be used to make tools more effective. Upgrades are permanent once purchased and will always apply to every tool you use. Some upgrades are locked until you reach a certain level.
Tool Upgrade
Upgrade Levels
Description
Dustpan
15
Clean trash piles faster
Flashlight
10
Increase flashlight brightness, range, and cone
Plunger
20
Unclog toilets faster
Sponge
20
Clean ectoplasm faster
Paint Roller
20
Paint over Satanic Symbols faster
Crowbar
3
Break wood planks faster

Prestige Promotions
ㅤAt level 50 and onward, you gain the ability to Prestige your character. This does a few things:
  • All equipment upgrades, perks, money, and player level will completely RESET.
  • You will be able to gain cosmetics only attainable from prestiging.
  • Challenge yourself as much as you'd like to forever grind upgrades and prestige levels.
ㅤYou can obtain Overflow EXP to prestige twice at once. To do this, you need a total of 62,114 EXP to prestige twice. Any overflow EXP you have will be taken to the next prestige level.
ㅤPrestige Promotions can be found by interacting with the laptop in the changing room area. There you can also find the Outfit Catalog to purchase different outfits and what's required to unlock them.
Objectives
ㅤEach map has various objectives to complete.
Trash Piles
ㅤLooks like a pile of junk on the ground. Has a visible swarm of flies buzzing around it that you can also hear.
ㅤUse the Dustpan or Vacuum Cleaner to clean these up. The trash piles will disappear once cleaned, and a Garbage Bag will spawn in their place.
Garbage Bags
ㅤLooks like a standard black garbage bag that has been filled and tied up. Has a visible swarm of flies buzzing around it that you can also hear.
ㅤYou don't need a tool to clean these, simply pick them up and take them to the large garbage bin outside of the tool shed.
ㅤYou will normally find these after cleaning Trash Piles, but some maps have garbage bags on them.
Toilets
ㅤToilets are usually found in bathrooms, sometimes in basements. Has a visible swarm of flies buzzing around it that you can also hear.
ㅤUse the plunger to unclog the toilet. The flies will disappear, indicating the toilet is completed (there will still be a brown stain in and around the toilet that you cannot clean).
Moldy Pizzas
ㅤAn empty cardboard box of moldy pizza. Has a visible swarm of flies buzzing around it that you can also hear.
ㅤYou don't need a tool to clean these, simply interact with the box to clean it. Will disappear once cleaned.
Satanic Symbols
ㅤMarkings made with a red ink, then outlined with a circle. Will be found on walls or floors, can also be found on fences, paintings, and possibly on garbage dumpsters.
ㅤUse the Paint Roller to clean these. Once completed, the symbol will be partially marked out with a white cross.
ㅤNotice: If you start the process to paint over the symbol and stop mid-way through, it will be difficult to tell if the symbol has been completed.
Ectoplasm
ㅤGlowing white markings that look like hand prints or hand smudges. Will only be visible when the entity is active or when using the UV Lamp.
ㅤIt is easier to spot these markings in the dark. Can be on most surfaces like walls, furniture, screens, mirrors, fences, doors, cabinets, and garage doors.
ㅤUse the Sponge to clean the markings. Will disappear once cleaned.
Collectibles & Banishing
Collectibles
ㅤEach map has 20 scattered collectibles throughout the area. Each map has a different collectible type. They can be obtained every time you start a map, and they will be found in the same locations every time.
ㅤThese collectibles don't provide any special benefits for the map, but each one collected will reward you with money and EXP.
  • 358 Bridle Street (Granny's House): 20 Stuffed Bunny Plushies (Guide)
  • 47 Stafford Lane (Whispering Studio): 20 Whispering Paintings (Guide)
  • 31 Walnut Street (Ritual Row): 20 Cultist Masks (Masculine) (Guide)
  • 22 Willow Lane (Butcher's Nest): 20 Bones (Guide)
  • 92 Lawrence Drive (The Quiet): 20 Cultist Masks (Feminine) (Guide)
  • Burcksley Mountain Lake (Summer Camp): 20 Missing Person Posters (Guide)
If you're having trouble finding the collectibles, check out the guides made by awesome users to help you find them!

Banishing The Entity
ㅤBanish the entity and be free from danger. It will also make all ectoplasm visible without the use of a hunt or UV Lamp.

358 Bridle Street (Granny's House): Burn 5 Haunted Toys
ㅤ5 Toys will be scattered across the map. They have a red aura around them.
ㅤThe five toys are a cube building block, a triangular roof building block, a plane, a truck, and a train.
ㅤThey can be burned at the fireplace on the first floor near the backyard glass doors.
ㅤThrow all 5 Toys into the fire and the Old Lady will be banished.
Notice: Some toys might be hidden beneath furniture and will only be revealed once the entity has moved the furniture.

47 Stafford Lane (Whispering Studio): Burn 5 Haunted Easels
ㅤThere will be 5 Easels in the artist's studio behind the house. They have a red aura, red circle on the ground around them, and there will be bloody words on the easels like "Pain" and "Help".
ㅤTo burn them, you must locate 5 candles around the map and bring one to each of the easels, setting it within the circle around the easel.
ㅤThen you must look for 5 cans of gasoline, they look like bright red jerrycans. Carry them to the studio and throw one at each easel with a candle, and it will be engulfed in flames.
ㅤDo this to all five easels and the Artist will be banished.
Notice: Once you burn all 5 easels and leave the building, you will not be able to re-enter for a period of time as the flames consume the entire studio. If you complete your objectives before leaving, you will save time rather than waiting for the flames to burn out.

31 Walnut Street (Ritual Row): Burn 5 Cursed Hearts
ㅤFirst, you must locate 5 daggers. They look like a standard knife with a red handle, and will be scattered around the map. Bring them to the ritual site pentagram in the back of the shop.
ㅤOnce the daggers are placed, the pentagram reveals an underground passageway, leading to a statue holding fire.
ㅤThere will also be 5 Hearts scattered across the map. They look like normal human hearts with a red aura.
ㅤBring all 5 Hearts to the statue in the underground shop, and burn them, then the Cultist will be banished.

22 Willow Lane (Butcher's Nest): Burn 5 Murder Weapons
ㅤBefore starting the banishment process, you must unlock the door for the Torture Chamber. The chamber will have the furnace that lets you burn the items.
ㅤLook around the houses for yellow sticky notes. There will be four in total, and each one will have a number on them with their code placement.
ㅤㅤㅤ• Ex; "_ _ 0 _" Meaning 0 is the third lock number,
ㅤOnce you have all the numbers, you can unlock the Torture Chamber door, which is in the basement under the left house.
ㅤNext, you will need to locate all 5 Murder Weapons and bring them to the Torture Chamber and burn them. They consist of a machete, hand saw, curved knife, hammer, and a butcher's knife. Throw them into the furnace and the Butcher will be banished.

92 Lawrence Drive (The Quiet): Burn 5 Satanic Bibles
ㅤLocate 5 Satanic Bibles around the map. They look like large books with a pentagram on the cover.
ㅤBring them to the burning altar, which is located in the underground tunnel. You can access it from the two-story house basement with a crowbar, or from the abandoned house basement. Note that the tunnel is a one-way and dropping down to the altar means you cannot return to the two-story house unless you leave the abandoned house outside and jump the fence (also a one-way).
ㅤThrow all five Satanic Bibles into the altar fire to banish the Cultist.

Burcksley Mountain Lake (Summer Camp): Burn 5 Wooden Pentagrams
ㅤScattered along the map are 5 pentagrams (five-pointed stars) made of twigs bound with rope. Simply bring all 5 to the lit campfire in the middle of the camp and toss them in to burn them and banish the Wendigo.
358 Bridle Street (Granny's House)
ㅤA single, large house with garage, basement, attic, and small yard around the house. The second floor and attic are connected with two entrances. One of the entities abilities will move furniture of the entire home around, causing some confusion with the layout, and making escape much more difficult when spotted.
  • Difficulty: ★☆☆☆☆
  • Entity: Old Lady
  • 100% Cleaning Reward: 500 EXP + $1,650
  • Keys: 5
    • Front Door (Always found in the mailbox or under doormat)
    • Basement
    • Attic
    • Garage
    • Master Bedroom
  • Objectives:
    1. 10 Trash Piles
    2. 10 Trash Bags
    3. 10 Moldy Pizzas
    4. 3 Toilets
    5. 20 Ectoplasm
Old Lady
ㅤAn elderly woman with little to no hair, even appearing bald from a distance. She wears a long white nightgown that reaches down to her feet. When she walks, she limps as if she has a bad foot, but she still possesses great speed.
Sounds: Raspy moaning / breathing
Active: Will hunt at random intervals for a short time. Entity will be invisible and harmless when not hunting.
Ability 1: Lockdown
ㅤWhen the Old Lady begins her hunt, the front door will close and remain sealed until her hunt is over, trapping you in the house. The garage door and sliding glass doors are your only way out of the house during her hunt.
Ability 2: Poltergeist.
ㅤDuring one of her hunts, the Old Lady will move furniture around the entire house. This will make the layout a little different and routes may be longer when attempting to escape the entity. Once the furniture has been moved in the house, it will stay that way until the map is over.
ㅤSome objectives may be unattainable until the house furniture has moved. For example, in the upstairs room with a bed, cabinet, and storage shelves, the bed will flip upside down and hang from the ceiling, revealing anything underneath it. On some runs, banishment items may be under the bed and cannot be reached until the furniture moves.

Kendra's Notes
ㅤ• With how simple this map is and the ability to banish the entity, this map makes it the easiest to complete. This map can be good for grinding money and EXP.
ㅤ• If you are missing some ectoplasm locations, they can sometimes spawn outside on the front porch along the columns (vertical posts holding up the roof of the porch).
ㅤ• Some of the toys for banishment can be found outside in the back yard, or side of the house.
ㅤ• If the entity starts hunting while you're outside, you can't enter the front door since it gets locked. But the two sliding glass doors in the back can still be used to enter and exit the house.
47 Stafford Lane (Whispering Studio)
ㅤA large two story house with many rooms. There is also a garage and small art studio in the backyard. The house and studio are connected through the large basement. There is also a small pool in the backyard between the studio and garage that might contain objectives.
  • Difficulty: ★★☆☆☆
  • Entity: The Artist
  • 100% Cleaning Reward: 550 EXP + $1,750
  • Keys: 3
    • Garage
    • Basement
    • Master Bedroom
  • Objectives:
    1. 12 Trash Piles
    2. 12 Trash Bags
    3. 15 Moldy Pizzas
    4. 4 Toilets
    5. 20 Ectoplasm
The Artist
ㅤA shadowy woman with wild hair in all directions. She wears a long white dress splattered with either paint or blood. Or both. Her teeth are pointed sharp and her eyes glow bright red. She does not walk and her feet do not touch the ground; instead she floats a few inches above the floor beneath her.
Sounds: Raspy growling / hissing
Active: Will hunt at random intervals for a short time. Entity will be invisible and harmless when not hunting.
Ability: Destruction
ㅤDuring one of her hunts, the Artist will suddenly destroy things.
ㅤWindows: She will destroy all windows, making them open and exposing your location to the entity if she sees you through one.
ㅤLight bulbs: All light bulbs will burst, meaning you will no longer be able to use light switches to see in the dark. Everything else with electricity will work fine if the breaker is active, such as garage doors and televisions.

Kendra's Notes
ㅤ• This map is almost as simple as the first. The house is a bit larger and there's more to explore outside, along with smaller buildings.
ㅤ• The only way into the studio in the backyard behind the house is either through the basement (requires a key), or the entrance blocked by planks (requires a crowbar). It's highly recommended to break the planks; if the Artist spawns in the basement, you'll be trapped.
31 Walnut Street (Ritual Row)
ㅤWalnut Street actually has three linear buildings to go through, as well as an alleyway behind them. Starting with the left, there's a garage with office space a floor above it, a shop in the middle of the three buildings, and on the right a two story house. Each building is separate from one another, but are accessed by the road in the front of the buildings, and the twisting alleyways in the back. Most of the alleyway is boarded off and can be dangerous to traverse without a crowbar.
  • Difficulty: ★★★★☆
  • Entity: The Cultist (Masculine)
  • 100% Cleaning Reward: 800 EXP + $2,450
  • Keys: 3
    • Garage
    • Master Bedroom
    • Shop
  • Objectives:
    1. 5 Trash Piles
    2. 15 Trash Bags (10 Bags are already scattered on the map, not needing trash piles)
    3. 10 Moldy Pizzas
    4. 5 Toilets
    5. 15 Ectoplasm
    6. 15 Satanic Symbols
The Cultist (Masculine)
ㅤThe Cultist wears a white collared shirt with a dark vest and tie. He also sports slacks and dress shoes. He has very short hair, and his face is covered with a smiling white mask, covered in blood splatters. The eyeholes in the mask show his bright red, glowing eyes. He is not always visible, and instead teleports from spot to spot within the map. His teleports are in short bursts, anywhere from a few feet, to a few yards (meters). While traveling, he is invisible, and can only be seen when he has temporarily stopped. Regardless of where he is on the map, he will always face the player.
Sounds: Distorted speech / talking
Active: Will hunt at random intervals for a long time. Entity will be invisible and harmless when not hunting.
Ability: Clone.
ㅤAt some point, the entity will create a clone of itself. The clone will look identical to the entity, though it will be partially translucent and more like a shadow. The clone can teleport short distances, just as the entity does, and will search for players. Once it finds and kills a player, the clone will then de-spawn.

Kendra's Notes
ㅤ• If you wind up cornered by the entity and the clone, run into the clone. This way, you can get rid of the clone instead of dying and leaving it spawned in.
ㅤ• Perhaps the most dangerous area is the shop (middle building). There is plenty to clean inside but no cabinets to hide in, and being the center of the map, the Cultist traverses through it often. If you see the Cultist nearby, your best chance is to run to the garage's cabinet or through the alleyway to find a place to hide. So when inside the shop, conserve your stamina as much as possible to use it in case you need to run.
ㅤ• The alleyway can be dangerous if the Cultist's clone is spawned. They both can trap you in a corner you can't escape. If the clone is spawned, take great caution when in the alleyway.
22 Willow Lane (Butcher's Nest)
ㅤWhile it looks like a single home, 22 Willow Lane is actually a conjoined house. Most of the two homes are separate, though they are connected through the attic, basement, master bedroom, and garage via locked doors. The interiors are very similar, with the layouts and rooms almost identical, and the furniture almost the same but positioned differently. It can be easy to get confused in the layout of either home, and will take some time to learn.
  • Difficulty: ★★★★★
  • Entity: The Butcher
  • 100% Cleaning Reward: 1,100 EXP + $3,450
  • Keys: 4
    • Garage
    • Master Bedroom
    • Attic
    • Basement
  • Objectives:
    1. 20 Trash Piles
    2. 20 Trash Bags
    3. 20 Moldy Pizzas
    4. 5 Toilets
    5. 20 Ectoplasm
    6. 30 Satanic Symbols
The Butcher
ㅤA large, bulky man wearing a blood-stained apron and bandana to cover the lower half of his face. His head has no hair, and his eyes glow with crimson. With a gravelly voice, his breathing comes out as growls and his roar can be heard from anywhere across the two homes. When he slays his victims, it's always accompanied with a malevolent chuckle. In his hand, he always carries a large cleaver, stained liberally with blood.
Sounds: Heavy breathing / growling
Active: Will hunt at random intervals for a long time. Entity will be invisible and harmless when not hunting.
Ability 1: Lockdown
ㅤWhen the Butcher begins his hunt, several doors will close and remain sealed shut until his hunt is over, trapping you in the house. All doors leading outside will shut, this includes the front doors and back doors. The garage doors will remain open and your only way to escape the house during a hunt.
Ability 2: Sprint Burst
ㅤDuring a random hunt, the Butcher will have a sprint ability. He will have infinite sprint for a small duration of time and will be constantly running around the map. Once his sprinting is done, he will revert back to his walking mode.

Kendra's Notes
ㅤ• When the butcher is sprinting, it's best to just hide in a cabinet or tool shed until he is done running.
ㅤ• I've had the Butcher kill me a few times entering the garage from the closed garage doors. He couldn't see me while they were closed, but he can still walk through the doors.
ㅤ• The left house is difficult to walk around on the bottom floor without a crowbar, so either come equipped with one or search for one before trying to walk around it.
92 Lawrence Drive (The Quiet)
ㅤThree buildings at the end of a cul-de-sac. Some objectives can be found outside around the homes. The house on the right is a one-story simple home with a garden shed in the backyard. The house on the left is a two-story home with a garage and basement. And the final house at the end of the street is the abandoned house, technically only a one story house with a basement. The abandoned house is only accessible through the basement tunnel, entered from the two-story home. The basement of the two story house and the abandoned house are connected with one another via a mined-out tunnel, though it is a one-way, blocked by boards, and also contains the burning area for banishment.
  • Difficulty: ★★★☆☆
  • Entity: The Cultist (Feminine)
  • 100% Cleaning Reward: 1,150 EXP + $3,500
  • Keys: 3
    • Basement
    • Garage
    • Garden Shed
  • Objectives:
    1. 15 Trash Piles
    2. 15 Trash Bags
    3. 20 Moldy Pizzas
    4. 3 Toilets
    5. 30 Ectoplasm
    6. 30 Satanic Symbols
The Cultist (Feminine)
ㅤShe has the appearance of a woman wearing an old-fashioned colonial dress, with her hair pulled back into a bun. Her face is covered with a bloody, white mask, sporting eyebrows and lipstick painted on it. The eye holes in the mask show her bright red, glowing eyes. Like the Cultist (Masculine), she will always face the player as she does short teleports around the map.
Sounds: Distorted speech / talking
Active: Will hunt at random intervals for a long time. Entity will be invisible and harmless when not hunting.
Ability: Currently none yet

Kendra's Notes
ㅤ• This is the best map to grind for money. The entity is a little easier to deal with since the map is more spacious and open, allowing plenty of chances to run and cut line of sight. Try to conserve stamina when out in the open in case she spots you.
Burcksley Mountain Lake (Summer Camp)
ㅤCabins for children deep in the woods. In the center of it all is the campfire, still lit and burning. It is surrounded with log benches and foliage. In another ring around the campfire are the buildings. There are seven cabins with bunk beds and many cabinets inside. There is a yellow building for the bathrooms with all eight toilets to clean inside, separated in half for boys and girls. To the left of the entrance is the lake, which has a storage shed and the lake house. To the right of the entrance is the lookout tower, standing several stories in the air. And going straight through camp to the back is the main lodge, which has a second floor. There is also a tool shed and back yard area that can only be accessed through the back door in the kitchen.
  • Difficulty: ★★★☆☆
  • Entity: Wendigo
  • 100% Cleaning Reward: 950 EXP + $2,750
  • Keys: 3
    • Main Lodge
    • Lookout Tower
    • Lake House
  • Objectives:
    1. 10 Trash Piles
    2. 10 Trash Bags
    3. 8 Toilets
    4. 30 Moldy Pizzas
    5. 15 Ectoplasm
    6. 15 Satanic Symbols
Wendigo
ㅤNeither man nor animal, but a mix of both. The Wendigo is thought to be a creature of folklore that stalks the forests, once a human transformed into a beast after devouring its prey. It has the largeness of a bear and is covered by mostly black fur. Patches of bone or rib can be seen under the fur. It has large arms and its fingers are like sharp claws. It has a cervine skull for a head, adorned with long, curved antlers and red, glowing eyesockets. Though this particular skull has Hanging from its back and waist, it carries the skulls of its victims, some still fresh with blood.
Sounds: Animal-like growling / snarling
Active: Will hunt at random intervals for a long time. Entity will be invisible and harmless when not hunting.
Ability: Currently none yet

Kendra's Notes
ㅤ• A crowbar is required to 100% this map, as many places are blocked off, including the women's restroom which has four toilets in it.
ㅤ• The restroom is one large building that has all 8 toilets, 4 in each side. You can do all toilets in a quick sweep and open an inventory slot for another item.
ㅤ• There is plenty of hiding spots in this map, and tons of cabinets to hide in. There are also good corners and crevices to hide in.
ㅤ• Key and item placements can be tricky, make sure to check most surfaces. I've found items on the beds in the cabins, tables in the cafeteria, and once struggled to find a key which was on the log benches by the water's edge of the lake.
ㅤ• Strangely, you can walk along the kayaks in the water of the Lake House, though they lead nowhere. But you can look across the water and see glowing lights in the distance...
How to Survive
Hiding in Cabinets
ㅤCabinets have specific ways to protect you, but they are not foolproof. When an entity spots a player, they will open a cabinet depending on what happens next.
If the entity spots you
ㅤIf you run into a cabinet and the entity spots you going into the cabinet, more than likely the entity will open the cabinet and kill you. This isn't guaranteed, however, as very rarely the entity might open a different cabinet or wander away.
If you break line of sight
ㅤWhen you get spotted, your best chance is to run to a cabinet, but one the entity doesn't see you enter. Breaking their line of sight doesn't stop them from pursuing you, but you have a better chance in a cabinet they haven't seen, rather than trying to outrun them. The entity will usually open a cabinet nearby to look for a player, before they return to their wandering phase and eventually leave the area.
If you weren't spotted but the entity is nearby
ㅤThis doesn't always happen, so it's pretty uncommon, but sometimes you just get unlucky. If you hide in a cabinet when the entity is nearby but doesn't see you at all, they will still sometimes open a random cabinet, but more specifically, the one you're in. It seems like the entity knows your general location all the time, so this might happen from time to time.

Three Warning System
ㅤWhen hunting or active, the entity has three warnings surrounding it that you need to familiarize yourself with.
1 - Heartbeat
ㅤWhen the entity is nearby in your vicinity, you can hear a constant heartbeat sound. It's your first warning to know the entity is near, but not very close.
ㅤYou can keep cleaning, but keep listening in case you start to hear the next warning. If you're in an open area the entity can spot you from far away, be prepared to run.
2- Entity Sounds
ㅤEach entity has a unique sound they are constantly emitting. When you hear their sound, it's a sign they are starting to get close to your location. The louder the sound, the closer they are.
ㅤYou can risk continuing to clean, but you should get ready to head to your nearest cabinet if the sound gets louder, or your screen shakes.
3 - Screen Shake
ㅤIf your character's viewpoint start to shake like crazy, it's the final warning system letting you know the entity is extremely close to you, within a few feet or literally on the other side of a wall.
ㅤThis is when you need to immediately run to the nearest cabinet, or find a route to run away without being spotted by the entity.

Always carry a Medkit
ㅤIf you get caught by the entity and you don't have a Medkit, it's game over and your run will end. When you have a Medkit, you'll be knocked down and can use the Medkit to revive yourself. When you do, you should instantly go find another Medkit.

When you're downed
ㅤYou have an unlimited amount of time to revive yourself when downed (so long as you have a Medkit in your inventory). You can crawl away to a safer location, or to find another Medkit.

Power isn't necessary
ㅤIf you're able to, carry a flashlight so you don't have to worry about the power going out. The only thing it's useful for is opening garage doors for more access to outside, but even then, it's not a big deal compared to the time and risk of constantly going to the power breaker to turn it on.
ㅤUsing the "Eagle Eye" perk can also massively help out with this tactic, as it makes things in the dark much more obvious.

Use stamina sparingly
ㅤStamina is great for getting across the map quickly, but you have a limit. It's best to walk around the house and conserve your stamina in case you need it to outrun the entity or run to the nearest cabinet.

Don't get greedy
ㅤIf you're working on a task and the entity is too close to you, don't try to finish the task first and risk being spotted. You can come back to the task later to finish it once the entity is away. You have unlimited use of your cleaning tools, but you have a limited number of Medkits.

Going AFK
ㅤIf you have to step away from your computer mid-game, the best choice is to run back to the starting tool shed and shut the doors. You will be completely safe in there (unless the game glitches, lol).
ㅤIf you can't make it outside, find a cabinet and hide in it. While you should be mostly safe, the entity will still randomly search cabinets, so it's a gamble.

Break all boards
ㅤThere will be boarded-up pathways around each map. It's smart to clear them as soon as possible so you have more options in case you need to run away. Plus, breaking each board gives you some EXP.
Hard Mode
ㅤHard Mode is what the game used to feature during Early Access. It features a fun, challenging take on the game that requires patience and skill. It's highly recommended that you upgrade your tools and perks before attempting Hard Mode on some of the later maps.

Hard Mode Differences

#1) - The Entity is ALWAYS ACTIVE
ㅤㅤㅤThe entity will always be active in a never-ending hunt. Even after killing a player, the entity will resume it's wandering mode. This also means that all ectoplasm will always be visible without the use of a UV light.

#2) - You CANNOT Banish the Entity
ㅤㅤㅤThe entity cannot be banished or removed from game play at all.

#3) - Rewards are DOUBLED
ㅤㅤㅤEXP and money gained from completing the map are far greater, but so are the dangers.
Tips & Tricks
Memorize the map
ㅤCabinets, boarded pathways, house layouts, collectibles. They all stay the same, no matter how many times you start the map. The only thing that changes around are objectives and keys. If you learn the map well, you can easily evade the entity by outrunning, or getting to the perfect cabinet.

Entities can go anywhere
ㅤEntities can walk through closed doors, garage doors, and boarded up areas. Anywhere you can walk, they can also get to. While entities cannot see you through closed doors, they can still walk through them.

Poltergeist activity
ㅤMost of the time, the doors you open and the lights you turn on will stay that way. However, the location you're at is technically haunted, so sometimes things change.
ㅤㅤㅤ• Doors can randomly open or close
ㅤㅤㅤ• Lights can flicker on or off
ㅤㅤㅤ• Random footsteps throughout the building
ㅤㅤㅤ• Windows can break (allowing the entity to see you through them)
ㅤㅤㅤ• Lightbulbs can randomly burst, making them permanently unusable for the duration of the map.
ㅤWhile this isn't a super important detail, it can be helpful to remember. While you are outrunning the entity, a door you thought was open could be shut and make it harder for you to escape the hunt. If you don't have a flashlight, the darkened room from a burst light bulb could make it difficult for you to progress. Keep these things in mind when traversing the maps.

"Suck It Up" & "Floodlight"
ㅤThese two perks give you a flashlight and vacuum cleaner which work extremely well if your current equipment is not as upgraded. However, at the later upgraded stages of those items, it's better to consider switching to more effective perks since you can just use the items provided which work just as well.
ㅤAnother technique you can consider is having the items with you on multiplayer missions, and giving the tools to a teammate with less upgraded tools so they can clean faster alongside you.

EXP from boards and power
ㅤNot only do boards hinder your ability to run through the map, but they give off a little bit of EXP every board you break. So it's worth it to break them, even if you know the map well enough to avoid them.
ㅤSame thing with the power breaker. If you get comfortable enough to work in the dark or with a flashlight, you can still turn the power breaker on for a good EXP boost, and it can happen several times in a map. The "Janitors Insight" perk can help you locate the power breaker if you're aiming for XP, it will be highlighted when the power goes out.

Don't use UV Lamps on Hard Mode
ㅤWhen playing any map on Hard Mode, the use of the UV Lamps are completely useless. Ectoplasm will always be active and shown while entities are active, and on Hard Mode, the entities will always be active.

If you have some suggestions or tips & tricks, please comment and let me know so I can add them in! ♥
Guide for Grinding Money
The "Salesman" Perk
ㅤThe "Salesman" Perk will increase your money gain for your completed jobs. While it's expensive to upgrade, it's worth it in the end. Fully upgrading the perk will allow you to earn twice the amount of a completed job.

Easy Guide
Map
Money Gain
Salesman
358 Bridle Street
$1,650
$3,300

Recommended Perks: Salesman, Eagle Eye, Rapid Recoup, Endurance Enhancer

ㅤThis map provides the easiest and quickest way to make a small amount of money each play through. It's also easy to memorize the bunny collectibles around the map for extra money gain.
ㅤWhen the entity is active, you can either attempt to clean ectoplasm safely, or hide in a cabinet until her hunt is finished.
ㅤFor a quicker time, you can ignore the banishment option and ectoplasm to complete the other tasks and leave to grind again.

Risky but Profitable Guide
Map
Money Gain
Salesman
92 Lawrence Drive
$3,500
$7,000

Recommended Perks: Salesman, Endurance Enhancer, and either Rapid Recoup or Eagle Eye.

ㅤThis map provides the best money gain, though it's because of how many objectives you must complete. The map is pretty open and spacious, allowing plenty of room to run, which is why I recommend sprinting perks.
ㅤYou can either attempt to complete most of the map near 100%, or even decide to stop around 50% and you will still make a greater profit than the other maps. I do not recommend spending large amounts of time to try to find one last thing to clean, leave at 95% rather than risk dying and losing it all for a few extra bucks.
ㅤI have personally played this map more than any other and know it very well. I can always complete around 90% with one or no deaths. The Cultist (Female) is easy to outrun and hide from, there's a lot of ways to get away from her.
9 Comments
MetalHeadKendra  [author] 14 Jul @ 3:20pm 
I made a guide for the missing poster locations!:
https://steamproxy-script.pipiskins.com/sharedfiles/filedetails/?id=3525965583
MetalHeadKendra  [author] 18 Jun @ 12:36am 
@SuperSloBro --
Yeaaah, the game is not perfect by any means. I know I've accidentally thrown a few trash bags out of bounds and ruined a 100% run a few times 😅
But thank you so much for the kind words! I'm really happy to know my many trial and errors are helping others.

@skamvi --
It's not going to be easy, but I'm sure with enough experience, you could totally do it! I'd imagine memorizing all possible key spawn locations can help with that. And fully upgraded perks if you haven't done that yet.
SuperSloBro 17 Jun @ 8:06pm 
Also, it's easy to get kinda dicked over by the game

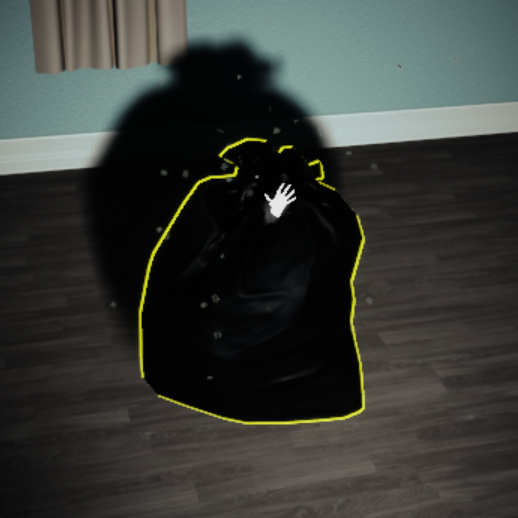
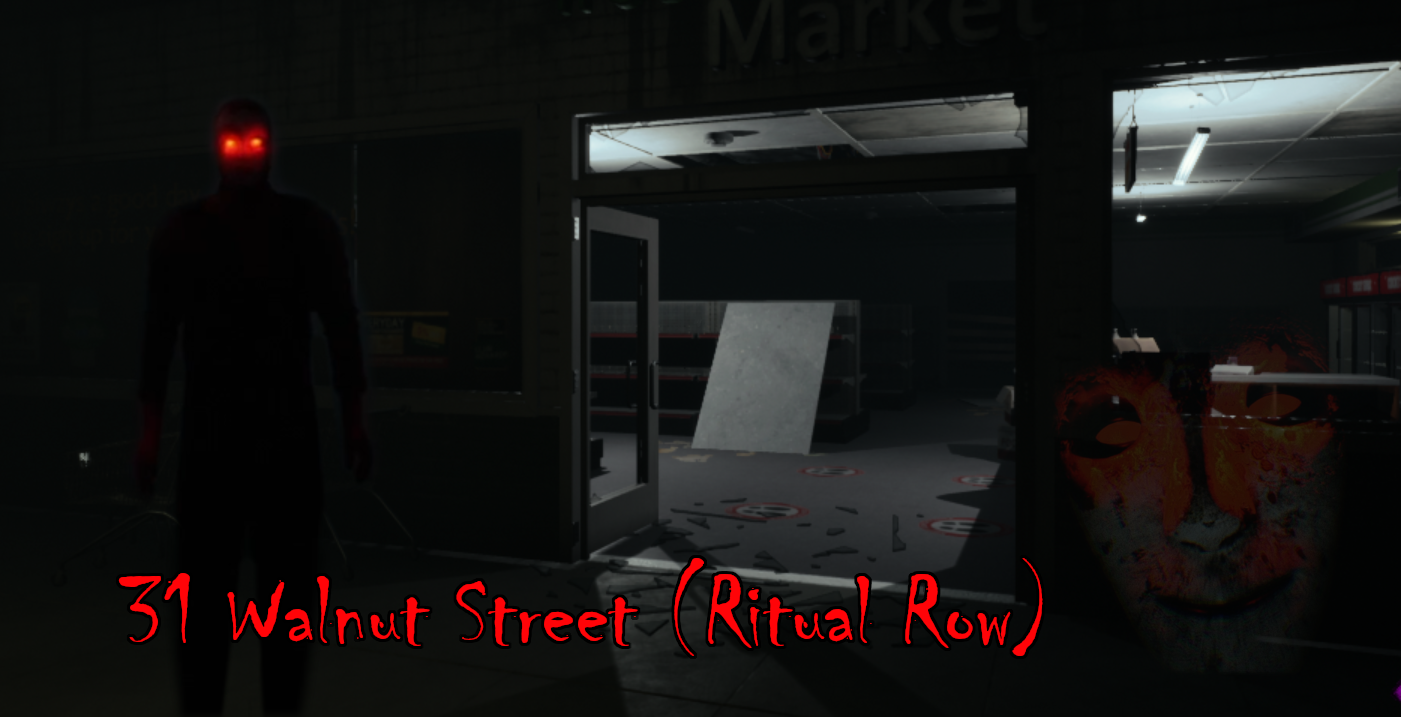
I was able to jump on the car in the alleys of the third level (Ritual Row) and get out of bounds

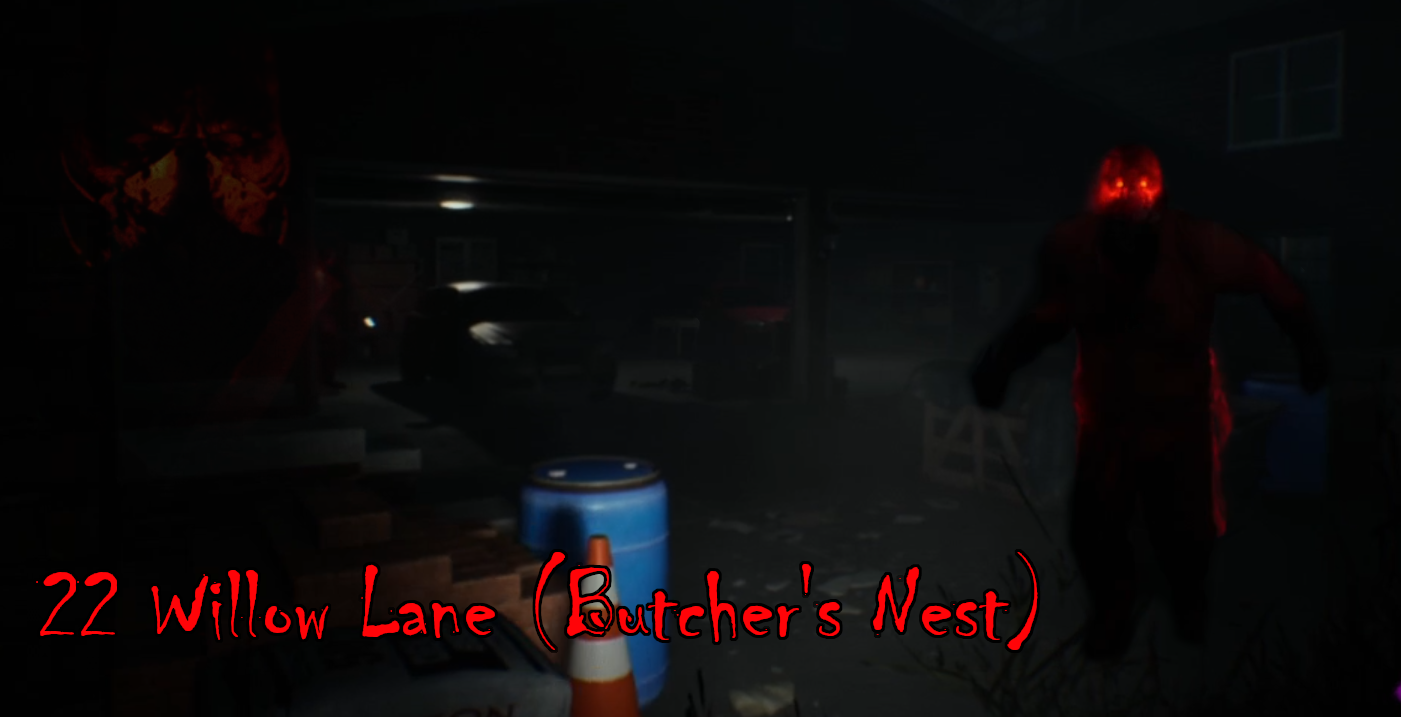
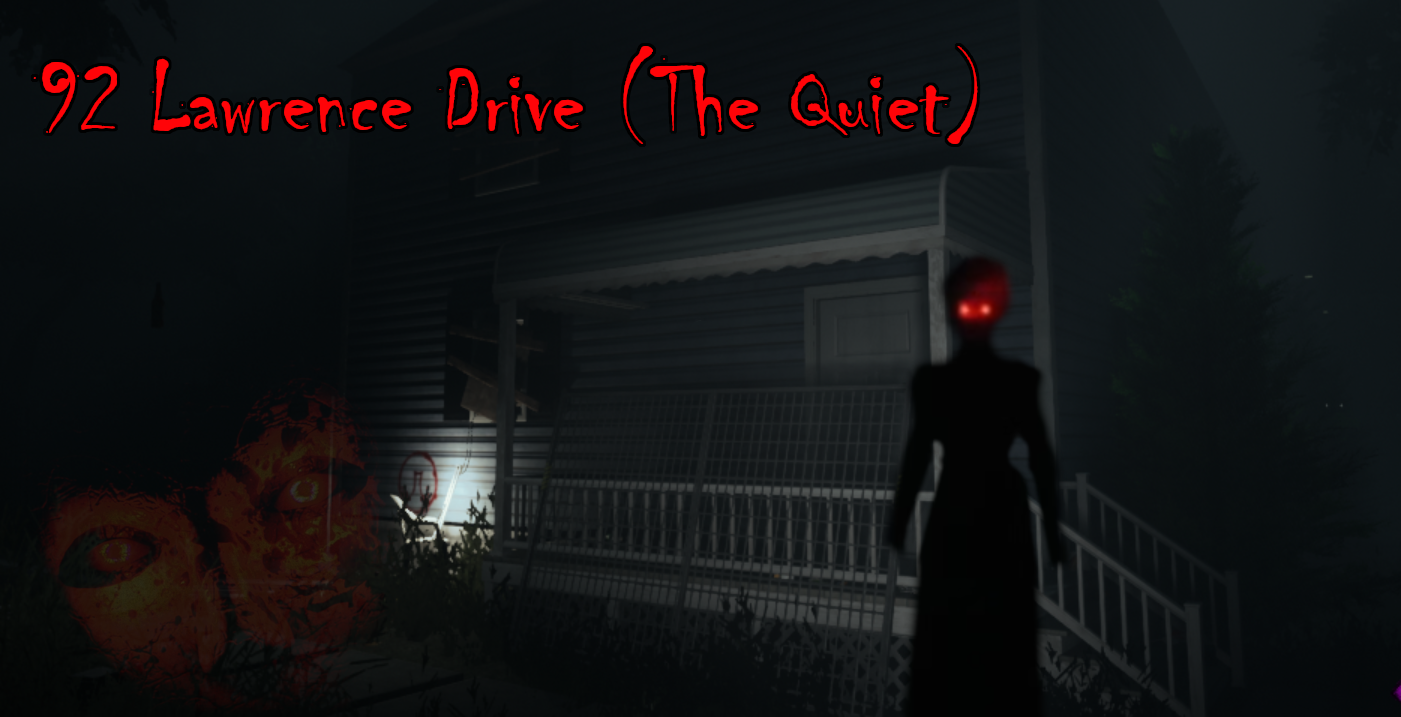
AND i was able to throw a trash bag from behind the blocked off house in The Quiet and got it stuck so I couldn't get 100% on the map (I thought it looped around to the front of the house and I could pick it up there).

Anyway, just don't be a dumbass and walk yourself from the back to the front and you'll be fine.
SuperSloBro 17 Jun @ 7:55pm 
A really great guide! Props to you and @wolvesfeather_ttv for making this thing possible!

If it wasn't for this, I'd be totally lost lol
skamvi 17 Jun @ 12:54pm 
@MetalHeadKendra, Pretty sure Ill need help from another player to do it, even with great book spawns and key spawns, (all keys on first floor of left house and 2 books in the left and right houses each) 1 person just cant get to all 3 houses in time even with all the movement perks, 1 person has to go to the end house right away and the other has to search the first 2 houses
MetalHeadKendra  [author] 16 Jun @ 8:30pm 
@skamvi --
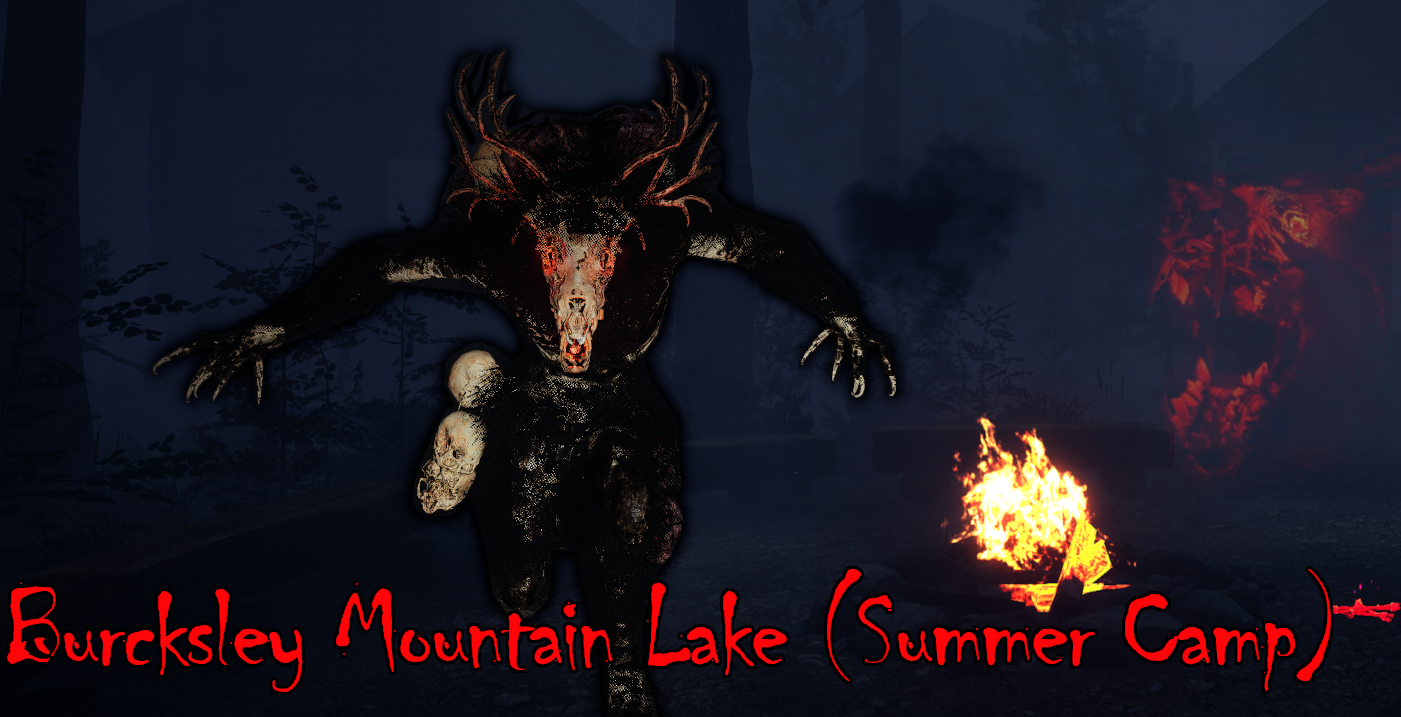
Thank you! I also still agree, the map is wide and open and has many places to run and hide from the Cultist. I wish you luck in your attempts to banish the entity, you can do it! :3
skamvi 16 Jun @ 12:12pm 
good Guide! The Quiet is still one of the best places to grind for money cause of how easy it is to find all the books and burn them, I haven't been able to do it yet but Ive gotten close to getting all the books before the Cultist is even able to Hunt lol
MetalHeadKendra  [author] 14 Apr @ 6:56am 
@Wolvesfeather_ttv --
Oh, thank you so much! I've added it ♥
I was going to make one for the cultist masks on both maps, but the dev confirmed that one mask on 92 Lawrence Drive is currently bugged. So I was waiting for the update before I thought about that. But thank you so much for working hard on your guide!
Wolvesfeather_ttv 13 Apr @ 9:27pm 
I just made a 31 Walnut Street (Ritual Row): 20 Cultist Masks (Masculine) guide if you're interested in linking it! (also feel free to delete this comment <3)