DELTARUNE

DELTARUNE

964 ratings
DELTARUNE Guide - All Missables, Easter Eggs, References, & More!
By Llamakazi
I couldn't find a good spot online for "Missables in Chapter Order" anywhere yet, so here's my best shot at being that source! There's a LOT of hidden stuff in DELTARUNE (so I might not catch it all) but if you see something I missed, then feel free to let me know and I'll add it! Enjoy!
48
11
50
7
5
5
2
2
2
   
Award
Favorite
Favorited
Unfavorite
Introduction


Heya! I didn't see a guide posted for what I was looking for, so I thought I'd get the ball rolling here so we can help each other out.

Note: There will absolutely be SPOILERs in here, although I will try to do my best to avoid you accidentally seeing one! Anything worth hiding for the sake of discovery will be located behind spoiler tags like this one right here.

Current Guide Status:
  • Chapters 1-4 Full Blind Pacifist Playthroughs done!
  • Chapters 1-4 Pacifist Completionist (hopefully) Playthroughs done!
  • Searching for more Easter Eggs & References (ongoing)
  • Maybe "Weird Route" specifics (low priority)
I'll be checking in with the comments section on a regular basis, to add more information that I find (or is reported to me, and subsequently confirmed).

This guide also focuses mostly on the Pacifist/Recruitment Route, that is, sparing enemies and recruiting them as much as humanly possible, while avoiding any particularly "weird" routes (for now...)

If you are so inclined, you can hit the Favorite & Like buttons up top to easily come back here and consult this guide in the future. It also helps with overall visibility! Cheers!


Missables In Order - Chapter 1
THE DARK WORLD
1. TOPCHEF and getting infinite SpinCake healing items
Talk to TOPCHEF in the Field area, then grab a piece of the Broken Cake, a Key ITEM.


Later, in the Bake Sale area, speak with Malius and choose to "fix an item". The Broken Cake will be repaired and you'll get a TopCake in return (restores 160 HP to entire team)


Instead of using it, return it to TOPCHEF to get infinite SpinCake ITEMs (restores 80 HP to the entire team) You can return to get another if you used it, and you can get this even in future Chapters!


2. The White Ribbon
In the "Maze of Death" in the Field area, make sure you pick up the unique White Ribbon as it'll be used for something early on in Chapter 2.


3. The Money Hole
To the left of Seam's Shop, Jigsaw Joe will offer to sell you a tutorial for 50 D$. Feel free to refuse, as some shenanigans will ensue and you'll eventually get in without paying a dime!

After perusing some tutorials at your leisure (from the Puzzle Guys turned Tutorial Guys) throw some money into the hole. Doing this will pay off a little later in Castle Town!


Say no more!


4. The Original   Starwalker
Talk to the original   Starwalker at least once in the Forest, and they will show up as a recurring character in ALL later chapters! (i.e. they have appearances in Chapter 2, 3, & 4; so that means showing up in 5, 6, & 7 are also extremely likely)

The 1st required encounter can be found in the Forest room with the bell chase (after the Bake Sale door and before the Castle door). After ringing the bell, walk all the way back to the left in that same room to find the Starwalker.


The 2nd optional encounter can be found in the area to the right after exiting the Castle jail cells, at the very end of the room.


5. The Hidden Egg
Find and retrieve the hidden Egg. Walk between the Starwalker room and the next darkening room until you find a secret room (2% or 1/50 chance) with the Egg found behind a tree.


Room 1 (Back and forth)


Room 2 (Back and forth)


Room 3 (Egg Get!)


6. The Bed Inspector
Check all of the beds in F3's Bedroom within the Card Castle to officially change Kris' Title to a "LV1 Bed Inspector"


7. IronShackle & The Moss Enjoyer
When your team is imprisoned, be sure to pick up the IronShackle, since it is unique and used for something later!

Also eat the moss in the corner! You'll get some moss in your room in Chapter 2 (this becomes a recurring joke)


8. RTFM (Relinquishing The Flippin' Manual)
If you keep the Manual that you get from Ralsei after the dummy tutorial fight, then it'll disappear from your inventory in Chapter 2, but it'll show up in Kris' room in Castle Town on top of the drawers next to the bed.

If you try throwing away the Manual, then It takes 2 attempts to fully get rid of it, if Ralsei is in your party. In Chapter 2, there will be a Trash Can on top of the drawers next to your bed instead (in case you want to throw away any further Manuals, of course)

If you do end up throwing it away, you can use the extra space for healing items if you attempt the next missable...
Missables In Order - Chapter 1 (Part 2)
9. Jevil (Chapter 1 Superboss)
Complete the Jevil Superboss fight & get the Dark Crystal (need 3 Broken Key ITEMs hidden throughout Chapter 1's Dark World)

You can find the entrance to where Jevil is located in the same elevator you took to get from the B1 Prison to the 1st Floor.


Broken Key A can be found to the left of the Field Warp Door, in Seam's Shop. You'll get it by talking to Seam AFTER speaking with Jevil for the first time within the Card Castle.


Broken Key B can be found just after the Bake Sale Warp Door, to the east. Southwest of the rotating dancers, there's a small hidden path that'll take you to the chest with the key.


Broken Key C can be found to the right of Field Warp Door. Once you reach a fork in the path, make sure that you go north! The puzzle solution and order is: Diamond, Heart, Club, & Spade


Have Malius repair the Broken Key parts, then take it to the same place in the Card Castle where you first spoke with Jevil. Bring as many healing items as you can carry, and have at it!


Note: if you DON'T want to bang your head against the wall fighting each Chapter's respective Superboss, then you can still do it retroactively later. Winning against each causes the hole in the cliff to the left of Castle Town to contain their items, which you can pick up in another Chapter.


10. Shop Items
Seam's Shop and his ITEMs will stick around for Chapter 2, but the Bake Sale and Rouxls Kaard's Shop in the Card Castle will NOT.

If you're a weirdo about having one of each item (like me) then make sure you've got one of each of the ITEMs that will no longer be accessible BEFORE fighting the King and ending the Chapter.


Seam's Shop (just to the left of the Field Warp Door)


Rouxls Kaard's Shop (pronounced "Rules Card")

Pick up some Choco Diamonds and Hearts Donuts from the Bake Sale while you can! Their variable healing is actually not bad (+80 HP Choco Diamonds for Kris, and +80 HP Hearts Donuts for Susie)

Luckily, in Chapter 2 you will gain the ability to store items at SAVE points, so you can start hoarding to your heart's content!


THE LIGHT WORLD
  1. Drink the hot chocolate given to you in QC's Diner

  2. Check the sink in Rudy's room in the Hospital (a recurring joke per chapter)

  3. Find out about Papyrus from Sans

  4. Place the Egg in Asgore's fridge (you can't take it to Chapter 2)

  5. Give Asgore's flowers to Toriel to get a increasing "Floral scent" when checking your kitchen's trashcan (a recurring joke for future chapters) If you keep the Bouquet they'll just disappear when you get to Chapter 2.

  6. Find and talk to Onion at the Lake. Be nice if you want him to stick around in future chapters! If you scare him off, or don't talk to him, then you'll get some alternative scenes at the lake in later chapters instead.

  7. Talk to Noelle about Susie to get some LightCandy (recovers 120 HP) in Chapter 2!


Missables In Order - Chapter 2
THE DARK WORLD - CASTLE TOWN
  1. Hug the Ralsei Dummy before going to the Old Classroom (the one in the Light World just east of the closet doors) and talk to Susie & Ralsei afterwards (who saw you do it)

  2. After putting all the junk off the floor on your head in the Light World, head south toward the classrooms to eavesdrop on Toriel & Alphys talking. Afterwards, try calling Toriel on your phone!

  3. Do all the fights in the Dojo

  4. Learn about FUSEing ITEMs with Malius in the Bakery. Make some DD-Burgers (2x Darkburger) and Silver Cards (2x Amber Card) You can get the ingredients from Seam's Shop in town.

    The TwinRibbon ingredients are a White Ribbon (from the Maze of Death in Chapter 1) and a Pink Ribbon (upcoming in Chapter 2)

    The SpikeBand comes from an IronShackle (from the Castle Prison in Chapter 1) and a GlowWrist (upcoming in Chapter 2)

    The TensionBow ingredients can be found later in Chapter 2! Don't worry about the TwistedSwd (for now...)


THE DARK WORLD - CYBER WORLD
1. Nubert & Nubert's Treasure
Everybody loves Nubert! You can find him behind the APPLE Puzzle, which is in the room just before the Arcade Fight with Queen (look in the northeast)

As a reward for getting past "Nubert's forcefield" you can "borrow his treasure forever" (i.e. the FiberScarf WEAPON for Ralsei)


2. Recruit the Hacker
Find 3 Blue Checksmarks to officially recruit the Hacker. They are all very close by, can't miss 'em if you're exploring well enough!


3. ReviveMint & Ragger2
After the Cyber Fields - Music Shop SAVE Point, the 2nd screen after that will have 3 Virovirokun enemies shooting at you. Bait the one at the bottom to shoot the Chest icon to reveal a ReviveMint (if you have them shoot the Key first, you'll miss the Chest)


You can't buy these!

After the 3rd screen, you'll go up several rotating teacups in a row. Hit all 70 arrows to get the Ragger2 WEAPON for Ralsei! If you don't get all 70, you'll miss it!


All of those teacup skills we've trained for...


4. Stealing from Noelle
Noelle's Silver Watch armor is unique; you can unequip it, then keep it for your regular team! She won't be around as long as your usual crew, so it's (probably) better off with your team instead! (still stealing though)


You can also try equipping her with all of your other WEAPONs (that she can't equip) for some bonus dialogue!

If you steal Noelle's Silver Watch, then later after returning to the Light World if you check Kris' STAT option in the menu, their ARMOR will now be a Wristwatch instead of Bandage.


5. The "Weird Route" AKA The "SnowGrave Route"
*** IGNORE THIS SECTION IF YOU INTEND TO STAY PACIFIST! ***
Similar to Undertale's Genocide Route, the "Weird Route" AKA "Snowgrave Route" involves hunting down enemies for the express purpose of "getting stronger", as well as fighting some battles and performing some actions that are not for the faint of heart.

The Route officially starts after Noelle joins Kris in Cyber City. Backtrack and defeat every single enemy you find with Noelle's IceShock spell. After each fight, Noelle specifically will "become stronger", and the enemies will be frozen solid, both in battle AND in the overworld.

Once you reach the Addison who offers to sell "party shoes", tell him "we're something else" to have him offer to sell a FreezeRing. If they don't, you haven't frozen enough enemies yet. The price will always be $1 more than you have.

Force Noelle to get the ring from the Addison by choosing the "Get it" dialogue every single time. The screen will fade to black and you'll hear a freeze effect in the background, implying that Noelle froze the Addison and took the FreezeRing.

You will be given more opportunities to bail on this route, but you must choose "Proceed" every single time to continue. After enough enemies have been frozen, they will now start running away from you, instead of towards you.

Before you encounter and fight Berdly, Noelle must have frozen every single enemy possible. If you use the Dog Dumpster (where you encounter the Annoying Dog, see #7) you'll be told how many more encounters remain (e.g. "3 LEFT"). If you've frozen them all, then you'll be able to purchase the ThornRing from the same dumpster. Make sure it's equipped, then continue on and fight Berdly.

Berdly will sense a major threat, and will be significantly harder than on the normal route. Noelle will have a new spell, SnowGrave, due to equipping the ThornRing, but her health will also be constantly draining. It costs 100% TP, and the description for it simply says "Fatal".

Have Noelle attempt to cast SnowGrave on Berdly, but she'll deny knowing it. Keep trying to cast it, until she finally relents. At this point the "Weird Route" AKA "SnowGrave Route" is completely locked in, and there is no return to the normal route.

*** IGNORE THIS SECTION IF YOU INTEND TO STAY PACIFIST! ***


6. Pink Ribbon
There's a unique Pink Ribbon found in an alley just southwest of the first Addison you encounter which is also right after finishing Annoying Mouse Room 1. It blends in well, but it is indeed a traversable path! It's also used in a Fuse Items recipe, so be sure to grab it.


7. Bounce Blade
There's a unique Bounce Blade WEAPON for Kris in the very south of the 2nd Addison area (where you buy the Kris Tea & Noelle Tea). It's ATK is low, but it increases DEF!

Missables In Order - Chapter 2 (Part 2)
8. Knockable Door, Annoying Dog, Moss Finder, & Hidden Egg
These are all in the same area; in a highway room with extremely fast yellow cars, just after the 2nd Addison area, and right before Annoying Mouse Room 2. Stop the yellow cars, then travel as far southwest as you can on that same highway to find this alleyway.


Door knocking practice for the Light World


Annoying Dog encounter after this screen! (one time only)

About the Moss; you might want to hold off on eating it with Noelle, as you can return here later with Susie & Ralsei to eat the Moss with them instead! This is currently the only way to get the "Moss Most" Title later on in Chapter 4, as eating it with Noelle doesn't seem to count.


Kris becomes a "Moss Finder" & Noelle becomes "Moss Neutral"!

Unlike in Chapter 1, there's actually a hint on the wall here this time letting you know "there is a room between". Constantly walk between the dumpster room and the previous one and hope you roll the random chance correctly!


Same 5% (1/20) chance walking between the 2 rooms above, just like in Chapter 1.


9. Recruit the Tiny Car
Hit less than 3 cars while driving Queen's car to recruit the Tiny Car (hidden recruit)


If you can't manage to avoid the cars, try hitting both arrow keys at the same time (left and right; not sure this is possible on a controller) to enable bumper car mode! This'll make it so they bounce right off of you.


Wooo! Bumper Cars!


10. Spamton Angel
During the fight with Spamton in the alley after the car sequence, he'll mention "[Press F1 For] HELP" (I believe this is R3 instead if using a controller, or on a console)


Would've been wild if Toby pulled an Alt+F4 joke on us

Surprisingly, this is not bait! It will actually summon a small Spamton Angel that heals you for 50% HP one time only! (not during an attack, though) Use it just to see what happens!


11. Giving the Carnival Game Gift to Someone
If you give the Carnival Game Gift to:
  • Susie, then you'll see the Susie Plushie later in her Castle Town room!
  • Ralsei, then you'll see the Ralsei Plushie later in his Castle Town room! (Not until Chapter 4, though)
  • Noelle, then you'll get some backstory for when Kris & Noelle were little kids, but the Noelle Plushie (presumably) will seemingly be thrown off screen (and discarded...?)
  • Berdly, then you'll see the Berdly Plushie version immediately on his head (incl. nipples!) and some fun dialogue from the team. He'll also follow the party (for one room only)


BONUS: If you have recruited the original   Starwalker in Chapter 1, then they will also   join! (for one room only)


If you chose to give the Carnival Game Gift to Berdly, then you'll have a ridiculously full squad of 6 (for one room only)


Kris' Leadership abilities are now reaching unprecedented levels... (for one room only)


12. Tasque Manager
There's some fairly minor missable dialogue for the Tasque Manager; this is mainly for those of you who are curious what happens if you answer all of her questions correctly, since it's not required to progress.

If you say "Yes" when she asks if you'd like to do some managing, the answers to her questions are:

Q: "Which painting's name is first alphabetically?" A: Left
Q: "Which painting's name is third alphabetically?" A: Bottom
Q: "Which painting is fourth?" A: Left


This will make her instantly SPAREable during the fight, and you'll get some unique dialogue to boot!

Additionally, if you have the Devilsknife or Jevilstail equipped (from defeating Jevil in Chapter 1) you'll also get unique dialogue from her for that as well.


*Insert some famous quote about chaos vs. order here*


13. ReviveDust
In the "giant lake of acid" area in Queen's Mansion, while riding the Swan Boat with Ralsei, you'll be blocked by a Giant Hand and enter some puzzle rooms with house switches in them.

In the northwest corner of the first room, there'll be some Wirewires that will attack you. Deal with them, then a Chest will appear with a ReviveDust inside! This is the ONLY source of this ITEM in the entire game (so far) so don't miss it!


Made from ground up ReviveMints perhaps?


14. Stealing from Noelle (again, sort of)
In the room Queen had set up for Noelle, there's a couple of statues you can steal for Kris & Susie's Castle Town rooms. Grab them as soon as you can!


(Yoink!)


(Yoink! x2)


15. Backtracking Bonuses & Giant Toilet
Backtrack when you get all 3 team members back in Queen's Mansion (after getting to the Mansion Cafe Shop) ALL the way back to the City after the Trash Zone Warp Door for a Giant Toilet. Wowee!


Ayup, that's an Earthbound reference alright!

While you're here, if you haven't eaten the Moss in the alleyway south of the yellow car highway yet, you'll get some bonus dialogue that you were (probably) saving it for Susie!

You can now also get Ralsei Tea and Susie Tea in the 2nd Addison area, which means you can have all 4 kinds of Tea "flavors" at this point. This is not a huge deal, since they all become RottenTea in the next chapter, but you'll get some fun little interactions depending on who consumes each respective Tea!

Missables In Order - Chapter 2 (Part 3)
16. Shop Items
The Cafe Shop offerings will be gone at the end of the Chapter, so buy everything you can, and try to get as many copies of armors and items that you want. Spamton's Shop will also be gone, either because of his quest, or by ending the Chapter (luckily his items are terrible, so maybe grab one copy each then go ahead and bail or finish the quest)


Ahh, good 'ol ButJuice...


If you're fast, pick 'em when they're cheap!


17. Recruiting Everyone for Castle Town
Before fighting Queen and ending the Dark World part of the Chapter, make sure you've recruited everyone before moving on! There are 10 normal recruits in total, as well as several hidden recruits.


Not pictured here: Mauswheel (but they are also cool & important)

Hidden (Non-Combat) Recruit 1: Nubert (see #1) only shows up if you've spoken with him and recruited ALL possible enemies.

Hidden (Non-Combat) Recruit 2: The Hacker (see #2) only shows up in town if you've collected all 3 Blue Checksmarks.

Hidden (Non-Combat) Recruit 3: The Tiny Car (see #8) is NOT in the SAVE menu, you must manually check Castle Town later. You'll find them east of Ralsei's Tutorial Dummy.


18. The Basement & Spamton NEO (Chapter 2 Superboss)
You'll meet Spamton on the critical path, shortly after riding in a car with Queen. He'll mention to meet him in the Trash Zone afterwards; you'll gain access to go back there once you're in the Queen's Mansion hub with a Warp Door.

Head to the Trash Zone via Warp Door, then move left as far as you can. There is a hole in the north wall, with a door at the end. Inside you'll find Spamton and his Shop! Most of his stuff is relatively worthless, except for the Keygen. Speak with him, and he'll spell out exactly what he wants you to do:


Finally a straight sentence out of this guy...

Later in the southeastern most part of Queen's Mansion, the Hacker should be there. Watch him closely; once he changes from a Mouse Pointer to a Hand Cursor, that'll be your hidden switch!


Follow the path that opened until you reach the Basement. You'll encounter mostly empty chests and several (potentially lethal) hazards.


The teacup ride in particular can wreck you if you're not careful!

For a missable little Easter Egg, wait near the blue faces that lunge when you try to pass by. In their passive state, eventually they'll turn into a creepy grin.


Just safely observe them for a little while...

Eventually. you'll find the EmptyDisk, which you can take back to Spamton without incident. Head back and give it to him, which will close his Shop permanently (not a huge loss)

Then, put the disk back where you got it (as ordered):


...and get ready for the Superboss for this Chapter, Spamton NEO!


Not as bad as Jevil in Chapter 1, but still worth being prepared...

Note: if you DON'T want to bang your head against the wall fighting each Chapter's respective Superboss, then you can still do it retroactively later. Winning against each causes the hole in the cliff to the left of Castle Town to contain their items, which you can just pick up later in another Chapter.

After defeating Spamton NEO, warp back to the Trash Zone for some faceless Addisons that give additional backstory to what happened with Spamton.

Bonus Tip (after winning): if you waited until near the end of Chapter 2 (after the Acid Pool ride & Rouxls Kaard fight) and hugged Ralsei, you'll get an extra hug from Ralsei after this fight!


THE LIGHT WORLD
  1. Release the Wet-Nosed Bandits from prison by telling Undyne about the Dark World

  2. Talk to Undyne, then give the box of chocolates to Alphys OR sell them to Sans for $5 in Light World money (USE the chocolates in front of him)

  3. Place the hidden Egg (from the Dark World) in the basket of eggs in Sans' Store

  4. Talk to Temmie in your School's classroom to confirm how many Eggs you've found (should be 2 so far, if you're following along)

  5. Talk to Noelle & Rudy in the hospital again. Don't forget the sink! ("That's Sink 2, Rudy 0")

  6. Talk to Sans

  7. Talk to Onion at the lake

  8. Talk to Mettaton at Napstablook's House, and remember to fulfill their request "tomorrow" (more details in Chapter 3)


THE DARK WORLD - RETURNING TO CASTLE TOWN
  1. Do 2 more additional fights in the Dojo:
    "Tasque Manager Says" (available if Tasque Manager was recruited)
    "Ch2 All Stars" (available if enough enemies were recruited)

  2. Get another SpinCake from Top Chef if you used one up. This is your last chance to keep one, since (as of writing) Top Chef will NOT give you a SpinCake in Chapter 3 & 4.


Missables In Order - Chapter 3
THE DARK WORLD
1. Couch for Sleeping (& Walking)
Right as the Chapter starts, Kris & Susie wake up on the Dark World version of the couch they fell asleep on. Check it to get a little joke about a sleeping couch! Note: If you have beaten Chapter 3 before, then it will also have a shortcut skipping the Chapter's intro.

If you leave to the right and the couch goes offscreen (near the SAVE point) then afterwards quickly head left to check on it—you'll catch it walking away!


(The couch is walking, too.)

Technically speaking, this is a missable if you wanted to hear that joke (or use that shortcut!)


2. The Original   Starwalker (TV Edition)
If you've recruited the original   Starwalker all the way back in Chapter 1, then they'll be on the left side of the Stage (where you entered) after briefly running around backstage (i.e. just before Round 1 starts)

Be sure to say hello!


They'll show up all around Chapter 3, so keep an eye out!


3. Round 1 - The Legend of Tenna
Once Round 1 officially starts, you'll be in a Legend of Zelda-like video game world! (the "Board Game Game Board") You'll be tasked with "entering the Pyramid and facing the Final Challenge". In order to do that, you'll need to find 3 Keys and a Mooncloud Stone.


Seems legally distinct to me! (Nintendo please don't sue)

Everyone has to do this, but the thing that will differentiate you is how many POINTs you get when you finally finish Round 1. The possible ranks you can get (in order from highest to lowest) are:
  • T-Rank - Unlocks the T-Room (The "T" Hallway next to the A-Room)
  • S-Rank - Unlocks the S-Room (Changing Room and a door to the Sword Game)
  • A-Rank - Unlocks the A-Room (Arcade Room)
  • B-Rank - Unlocks the B-Room (Ball Machine/Gacha Room)
  • C-Rank - Unlocks the C-Room (Cooler Room)
  • Z-Rank - Unlocks the Z-Room (Different Changing Room and a manhole shortcut to the Sword Game)
The reason these ranks count as a missable is that when you enter the Green Room (in-between rounds) there will be doors that are only accessible if you gain certain ranks!

To get the maximum T-Rank (which unlocks the "T" Hallway next to the A-Room, as well as every door rank below it except for the Z-Room) you'll need to perform well in battles (low turns, no damage, high TP), gather many POINTs (1500+), and get a high Chef Score (from the Physical Challenge)

T-Rank Strategy:
  • Drink from the Oasis (in front of Lanino and Elnina) 8 times total, in order to fight them early, otherwise you'll need to wait until later after Lancer clogs the Oasis to fight them. If you aren't happy with the battle results, you can easily restart and try again.

  • There are 5 Keys total, but you only need 3 to progress. If you bring the 2 extra Keys to the end, you'll get a Secret Bonus during the Score Tally!

  • During the Physical Challenge, only focus on feeding the Special Guests (Lanino and Elnina, not the Shadowguys) If you do it right, the 4th time you feed a Special Guest, the game will end immediately and you'll get a T-Rank for your trouble.


You don't need T for everything, just do as well as you can!

If you don't care about T-Rank (which is reasonable, there's only some extra minor dialogue and a goofy room) then there is a Pippins south of the Green Room that will sell you an S-Rank for 1500 POINTs. You can easily have Susie farm up infinite POINTs on Board 1 so that you don't have to bother with any of the rankings!


Who says you can't just buy your way to success?

To get lowest score for Z-Rank (which unlocks a unique alternative route that leads you to the special Sword Game as well) basically you'll need to intentionally throw/sandbag yourself to do as badly as possible.

Recommended Desert Board Scenes that you could potentially miss:
  • When Ralsei reveals his ability to turn into a Block, don't do anything! Folks will start getting awkward, then it will cut to a commercial break ("Why didn't you push him?")

  • When Susie gains the ability to throw things, wait until she throws Ralsei into the middle pond area

  • When you have placed the 3 Keys & Mooncloud Stone to unlock the door, wait in that room for a bit until Tenna says "You will never find the even smaller pyramid!". Then, go inside and head south!


4. A-Door is for ARCADE
You can replay a Physical Challenge for fun here! You can also unlock an unused/bonus Physical Challenge for 500 POINTs.


Oh? Tell me more...

Inside you'll find the unique Arcade Game Susiezilla! You can't play this normally via the story, you can only access and play it here by paying 500 POINTs.


5. B-Door is for BALL MACHINE (Emptying the Gacha)
The Green Room's Gashapon (Gacha) Machine (B-Rank or higher in any round is required) has some unique Gold Rewards which can be exhausted/completely emptied out! Before finishing the Chapter, you'll probably want to clean it out if you are collecting things.


RNGsus is the true final boss...

Regular Rewards:
  • 50 POINTs
  • 100 POINTs
  • 200 POINTs
  • TVSlop (+80 HP)
  • TVDinner (+100 HP)
  • DeluxeDinner (+140 HP)
  • GingerGuard (ARMOR, +3 DEF, you can buy these in the Green Room for 111 PTs)
  • Fortune (12 different fortunes are available, it's just text though)
  • Lancer (goes into your Key Items for a while; don't forget to squish him! You can get more than one!)
  • White Dog (unique, shows up in your POWER menu under Kris, after the "Magic" stat, there will also occasionally be a "Dog" stat. Also comes with a free DogDollar!)
  • Glowshard (sells for $250 this Chapter)
  • GOLDEN TENNA STATUE (unique, goes in your Castle Town room)
Gold Rewards (all are unique, i.e. there is only 1 available):
  • ExecBuffet (+100 HP to Party)
  • TensionMax (+100% TP)
  • TennaTie (ARMOR, +5 DEF, -2 MAG)
  • BlueRibbon (ARMOR, +1 DEF, +1 MAG, +12.5% healing effectiveness including items)
  • ReviveMint (Revive downed ally to 100% HP)

Completely emptying out the Gold Rewards will output the message "NO MORE GOLD", so you'll know when you're done.

Once you've cleared out the machine of the Rewards you want, you can trigger a hidden secret that will DESTROY the machine, so make sure you've gotten everything out (or saved) first before trying it.

Note: B-Door will still be here at the end of the Chapter, so you may want to wait until then.

To trigger the secret: insert exactly 1225 POINTs, then check the machine slot.
Missables In Order - Chapter 3 (Part 2)
6. C-Door is for COOLER
Inside is a Watercooler and 2 Zappers enjoying said Watercooler. As soon as you check the Watercooler, you'll immediately get into a fight! This one may actually be easier to FIGHT them to get under 50% HP, then Pacify them when they become TIRED. Recruit them for the strongest(?) ally yet!


What a menacing aura...

After the fight, check the crater underneath where it was for 200 POINTs! The Zapper on the right will tell you how many times you've drank from the Oasis on Board 1.


7. S-Door (or Z-Door) is for Sword Game (Zword Game?)
Taking either the S-Door or the Z-Door will eventually take you to a backroom where you can play an alternative version of the Board you just played, but with only Kris, a Sword, and enemies to fight.


Still looks legally distinct to me (Nintendo please don't sue)

The Board 1 version of the Sword Game will eventually reward you with the Ice Key. You will need this for later if you intend to get some unique equipment, which helps in the fight against this Chapter's Superboss.


8. Round 2 - KODAKODA ISLAND
Same as in Round 1, you can get anywhere from T-Rank to Z-Rank after this Board is complete. If you missed the highest or lowest rankings on Board 1, then now is your chance to get it!


Echoes of "Link's Awakening"... maybe a little "Startropics" too?

In this Round, you'll need 3 Photos, as well as reuniting 2 Lovers to unveil the Rainbow Bridge.

Progress as normal, and do as well (or as badly) as you'd like! For bonus POINTs, take a photo of Lancer to count as an Extra Photo; then eat the Moss underground (east of the waterfall) for even more bonus POINTs at the end.


Also check out the secret room to the left of this screen! (use the tunnel)

If you want to farm POINTs relatively easily here, you can take pictures of the Shadowguys that pop out of the trees south of the Rainbow Bridge for +10 POINTs each repeatedly (exit and enter screen)

Another good spot is south of the starting screen, where there is a single river running through the middle flanked by trees on both sides. A Shadowguy with rabbit ears will appear worth +25 POINTs! If you can get a photo easily, this is your best place to farm infinite POINTs.

Before re-uniting Lanino & Elnina, and after getting the raft, there's a few optional places to visit:
  • Pippins Island & Tropic of Love
    At the first fork in the river, take the eastern path after getting the raft.

  • The Lawnmower Minigame
    On the path to "Lost Lover Island", instead take the path out to the sea/ocean area and head west.

  • "A Leftover Area"
    Susie will wonder "what's in THERE?" and Tenna will comment that this place is "just a leftover". You can't do anything with it now, but you will eventually later.

  • Far North
    If Tenna is with you, he'll stop you from going further. You'll have to come back here later...
When re-uniting Lanino and Elnina (and Rouxls...) at the Rainbow Bridge, Tenna will depart, and you can now explore the board without him peering over your shoulder.


Since he can't prevent you from visiting the Far North part of the map anymore (beyond the sea) You can get some bonus dialogue if you visit that icy area with Susie and Ralsei.

When you're done exploring, cross the rainbow bridge for the rhythm Physical Challenge! One tip I can suggest is that if you're using a controller, try using left on the D-pad and the B Button to make it a little easier to track.


Ralsei changes the lyrics mid-song, but kind of hard to see while you're playing!


9. Last Chance for A & C Rooms
In case you didn't mess with either room after Round 1 (see #3 & #5): visit the ABC-Rank Rewards room after Round 2, then enter both the A-Rank & C-Rank doors. B-Rank will still stick around even until the end of the chapter.

For the Arcade Room: speak to the Pippins at the end of the hall and pay 500 POINTs to unlock Susiezilla! This is your LAST CHANCE to do it. Play it just one time to see what it's like, then feel free to move on.


If you refuse, then you'll need some ice for that burn...

Playing Susiezilla at any point after Round 1 or 2, will also cause (spoilers for the 2nd to last fight of the Chapter) the mini-game to show up during the Boss Fight with Tenna. This is also the only way to get one more hidden Starwalker appearance! (he'll be helping Kris with the rope in the background instead of Ralsei)


10. The Sword Game (Part 2)
Take either the S-Door or the Z-Door once again to visit the backroom where you can play an alternative version of Board 2, the same as before, with Kris, a Sword, and some enemies to fight.

After gaining Level 2, and the ability to destroy the yellow plants, take the raft up the waterfall (the one to the right of the starting screen) to get out of the landlocked area.

For some special dialogue, head back to where the Tropic of Love was in Board 2, chop down one of the trees with your Sword, then find and speak to Tenna.

Afterwards, head north as far as you can go, until you encounter the door that requires the Ice Key from the Board 1 version of the Sword Game to open.


This Dungeon is fairly straightforward, keep destroying enemies to level up and progress until you find a White Cloak that casts Ice Magic when you attack with your sword. There are also several rooms with text hints in them.


A hint to a certain "Weird Route" in Chapter 2...?


This will come in handy very shortly...


If the White Cloak pauses, then choose a different path until it follows.

This Board 2 version of the Sword Game will eventually reward you with the Shelter Key. You will need this for the 3rd part of the Sword Game if you intend to get some unique equipment, as well as getting a leg up for fighting this Chapter's Superboss.
Missables In Order - Chapter 3 (Part 3)
11. Quiz Maze Room - Hidden Doors
Once you've officially reached TV World after escaping from Tenna, eventually you'll encounter the Quiz Maze Room (only TV monitors and rapid fire quizzes are here)

It looks relatively non-descript, but there are actually 2 Hidden Doors that can be found in this room. The 1st Hidden Door can be found in the very southwest of the room. Interact with the GREEN screen to open the secret path (i.e. the background of the screen is fully green)


Hopefully the green color still stands out if you have some colorblindness!


Keep an eye out for the other one as well!

This 1st hidden door room is the BONUS ZONE! Run through and enjoy all the dialogue (& more if you have the Dealmaker or Puppet Scarf from defeating Spamton NEO in Chapter 2)


Yeahhhh this is hard to explain, go experience it for yourself!

The 2nd hidden door can be found in the very southeast of the Quiz Maze Room. Inside you'll find a... moral choice?


...between Love and Hate. Feel free to choose whatever!

Note: if you have not been a Pacifist and you have chosen violence more often than not, then you cannot choose, as "the choice was made long ago" for Hate.


12. Goulden Son 1, 2, & 3
Right after the Quiz Maze Room, you'll encounter a very short "stealth" sequence. Afterwards, you'll enter the backroom where the Cooking Show took place (complete with a SAVE point)

Before moving forward, backpedal into the "stealth" room to see Goulden Son offering to give you a shortcut back to the other side.


Sometimes our wishes do come true!

Keep going back and forth between both sides of the room, and tell the Goulden Sons of each other, until Goulden Son renames themselves as Goulden Son 3 for Goulden Son 2. Congratulations!


13. The Rouxls Kaard Recurrence & The Annoying Dog
During the fight with Rouxls Kaard in the Cooking Show room at the end of TV World, Lancer uses the LANCER Card so you can LANCER! When the ACT roulette starts, wait a minute or so until you see a certain Annoying Dog appear instead of the Lancer icon... INTERACT with that button instead!


Wait during this LANCER roulette for about a minute... then commence DOG


14. The Hidden Egg
Near the end of TV World, just before you get back to the Green Room, there's a room with a single spotlight that you want to intentionally get caught by.


Get caught on purpose, then choose "Cheater" and "Nowhere". You'll be taken to a backroom with a single puzzle game in it.


To get the block pictured above so you can solve the puzzle, you need to re-visit an earlier puzzle in TV World (the one you need a Lancer Controller to solve) and throw the block from the puzzle over to the EXACT location pictured with Susie.


After pushing the block onto the pad (be careful not to push it the wrong way) you'll unlock another room with a Bibliox in it. Speak with them inside the video game over and over again (and follow their instructions) until you eventually end up with a TripTicket in your Key Items.


The item description leads us to the next part...

Use the Warp Door to Goulden Sam, head right to the door just before the first Stealth Zone, and fight the Ribbick hidden in a Trash Can. Choose ACT, hover over the CroakOnX option, then hold LEFT.


Just a bit more hidden than the Chapter 1 & 2 Eggs, eh...?

In the new area you've warped(?) to, the northernmost room will contain the Tree, the Man, and the Egg.

When you speak to him, make sure you say that you will NOT forget him, BOTH times that he asks. When he asks if you want to meet him again, make sure you say YES. The rest of the dialogue choices don't seem to matter. You'll get the Egg at the end!


Make absolutely sure that you say NO to this.


15. The Sword Game (Part 3) & The Shadow Mantle
In the now mostly abandoned Green Room at the end of TV World, visit the backroom one last time, where you can play the 3rd & Final Round of the Sword Game. Find the Sword...


...and then kill the in-game versions of Susie and Ralsei to Level Up and continue progressing.


Keep an eye on Kris when you do this...

You'll eventually reach another Dungeon; which is a little more difficult than the last one. Find your way through, until you reach the final room with the Shadow Mandle Holder.


Any kind of Turbo button is very handy here, to get a lot of hits in quickly.

Once you've defeated the Dungeon's Final Boss, you'll enter a room with a Chest in the back! Unfortunately, the video game version of Kris (VG Kris?) is too short to reach it.

Exit to the right and then... you can either have VG Kris leave the room, OR have VG Kris take a stab at OG Kris to gain the "Sheath" Title. Walk into the game as OG Kris (from where VG Kris left) to get the ShadowMantle!


This ARMOR is very strong, it'll be helpful for the very near future...

When Susie comes to check up on OG Kris, you can hold left to bring VG Kris back onscreen... If you try attacking Susie with VG Kris' Sword, then OG Kris will pull Susie out of the way! (a bonus scene, highly recommended)

Either way, Susie will give Kris a FlatSoda and say "stop making us wait already".
Missables In Order - Chapter 3 (Part 4)
16. Leveling Up Susie's UltraHeal
Susie's UltraHeal ability cost starts at 90% TP, and heals for an extremely small amount (the current formula is Magic * 1.5 + 5), HOWEVER, using it during Chapter 3 will "level it up"!

Using it 5 times (the maximum for now) will reduce the TP cost from 90% to 85%, and heal for +5 more HP. It isn't much right now, but(!) progress from Chapter 3 carries over into Chapter 4, and Susie's healing will actually become usable and on par with the healing that Ralsei can do, as well. It's handy to start making progress now while you have a bit of a breather.


17. Recruiting Everyone for Castle Town
Before fighting the Final Boss of the Chapter, make sure you've recruited everyone before moving on! There are 8 normal recruits in total. You can confirm in the Green Room after you complete TV World.


Easy confirmation for you here right before the Finale!


18. The Roaring Knight (Chapter 3 Superboss)
Everyone will encounter the Roaring Knight at the end of Chapter 3, the difference (since you're here) is that while you can lose the fight and still progress, actually "defeating" the Roaring Knight is the genuine Superboss fight for Chapter 3.


Note: if you DON'T want to bang your head against the wall fighting each Chapter's respective Superboss, then you can still do it retroactively later. Winning against each causes the hole in the cliff to the left of Castle Town to contain their items, which you can just pick up later in another Chapter.

If you have the ShadowMantle from completing all versions of the Sword Game, then whomever you've equipped it on will take significantly reduced damage from the Roaring Knight. They are still extremely deadly however, so it merely gives you a leg up, rather than winning you the fight outright.

A Few Tips & Tricks:
  • Save after defeating Tenna so you can easily retry the fight.

  • If you have a completed Chapter 3 SAVE file, you can also retry the fight immediately if you lose.

  • Bring all of the Revive ITEMs you have, since Susie & Ralsei can be taken to -999 HP by the "SWOON" effect. That will be the only way to get them back in enough time. Note that Kris can only be knocked "DOWN" to -80 HP!

  • Kris can HoldBreath, which speeds up your SOUL to dodge attacks. You only need to do this ONCE and it will apply for the rest of the battle.

  • Susie and her Rude Buster is your best damage. Kris and Ralsei should be feeding her as much TP as possible, so that you can Rude Buster every turn. Also hit your INTERACT key just before Rude Buster hits for extra damage (total of 140-150 or so)

  • Turn ON Simplified FX in the options to see and dodge the attacks a little better.

  • You only need to drop the Knight's HP below 80% (e.g. deal more than 1460 damage) and survive for 2-3 turns to win. Attack when "its guard is down" to end the fight immediately.

When you "defeat" the Roaring Knight, you'll get a ShadowCrystal in your Key Items, as well as a BlackShard (+16 ATK, +damage to Dark/Star enemies, can be equipped by Kris) added to your WEAPONs. The rest of the Chapter will play out like normal from here (Also, great job! I knew you could do it!)


Missables In Order - Chapter 4
THE LIGHT WORLD
  1. Reluctantly "borrow" $5 from Asriel's drawer in Kris' room (or not, if you don't want to)

  2. Check Kris' bed to have Susie give Kris the "Susie prize"

  3. Check the bloodstain in Kris' room to have Susie help Kris clean it up (Vinegar and hot water!)

  4. At Church, while watching the services, you'll have 2 sets of 2 options. First, have Kris watch the service instead of sleeping through it. After a while, Susie will ask Kris if they brought anything; choose to "Look in pocket for fun" instead of "Let's pay attention".

    Here, our ITEM hoarding will pay off! You'll get a comment from Susie for everything you've collected (both in your Dark World's Inventory and also Storage)

    If you have a default SAVE file for Chapter 4, or your inventory meets some very specific criteria, you'll also get an Ancient Chocolate from Asriel's old clothes (which turns into an AncientSweet in the Dark World) I honestly wouldn't recommend trying to chase this one, but I thought I'd mention it...!

  5. At Church, after the service has concluded, give Alphys some 25% red, 75% yellow juice, OR drink it in front of her for the "Extra Savage Kris Route" AKA "JuiceGrave Route" (Note: probably not an actual route, but it sure feels like it)

  6. Check in with Temmie at School to see how many Eggs you've collected so far

  7. Check in with Rudy (and the sink) again at the Hospital

  8. Buy "the usual special" from QC's Diner for $5 to get a special scene with Kris & Susie
    (Note: This one's only possible if you "reluctantly borrowed" $5 from Asriel OR sold Undyne's chocolates to Sans for $5 back in Chapter 2)

  9. Check in with Burgerpants

  10. Talk to Sans & indulge in his sign shenanigans (sign-anigans?)

  11. Talk to Deputy Napstablook about Undyne being missing

  12. Give Tenna to Mettaton at Napstablook's House (visit Castle Town first before handing him over)

  13. Check the Lake and wait for Onion. Susie will eventually chime in and say "your weird friend is busy today" (this triggers something later)


THE DARK WORLD - CASTLE TOWN
  1. Fight Lanino and Elnina in the Dojo

  2. Talk to Seam about the Shadow Crystals & the Roaring Knight

  3. Fuse another TwinRibbon if you got a WhiteRibbon & PinkRibbon from Ramb in Chapter 3 for getting S-Rank in Round 1 & 2.

  4. Check in with King in the Prison (/w bonus Tenna appearance)

  5. Go into Susie or Kris' room for a special scene

  6. Go into Ralsei's room for a special scene


THE LIGHT WORLD - NOELLE'S HOUSE
  1. Delay/stall before walking into Noelle's House for a while (after talking to her at the gate) for some bonus dialogue (not important, but it is funny)

  2. Take a Holiday Pencil from Noelle's homework desk in her room (can be equipped in the Light World, in the Dark World it becomes the JingleBlade) This is also the only way to see the description for the Light World version of the BlackShard if you got it in Chapter 3.

  3. Talk to Berdly after Susie throws Noelle's phone away

  4. When you are running around the vents, observe and listen to Asgore in the bathroom, then again by following him to Noelle's parents bedroom

  5. Observe "Kris" in the kitchen; then get caught intentionally for some additional scenes, especially when you re-visit the kitchen afterwards.

  6. Listen to all of Susie & Noelle's dialogue when in the basement (don't move 'til you get it all, there will be 3 instances of not moving) Trigger the stereo for more dialogue!

  7. Listen to all of Susie & Noelle's dialogue when in the closet with "Kris" before touching the Guitar


THE LIGHT WORLD - RAINING
  1. Check in with Burgerpants one more time to see how his date went

  2. Check the lake to find the Striped Bird telling you "Don't wait" if you've tried looking for Onion earlier with Susie


THE DARK WORLD - DARK SANCTUARY
1. A Hidden Chest
In the room with the Blue Switches that light up the room so you can see, there is a Hidden Chest in the very northwest of the room next to the "you could probably climb this" wall! Activate it in the dark and then...


(It contains... some kind of strangely slippery gloves! They're labeled, "gloves that make you worse at climbing"... You didn't take these.)

Wait, hang on... This isn't actually important after all! Moving on...!


2. The Old Man (in & out of combat)
When you meet the Old Man, he'll walk slowly toward the left to leave the first room. If you actually wait for him, then everyone will leave (including him!)

Afterwards, you'll get into a fight or two. Be sure to use him in your ACT menu for some funny battle shenanigans!


You used Old Man.


3. +1 Max HP & The Candy Bowl
When navigating a darkened area with the Old Man while looking for the way to his Study, he'll ask you to choose a direction to search. Choose "Further Left" for a funny scene and whopping +1 Max HP (for Kris only)


There's nothing over there, is there...?


(Your Max HP increased by 1.)

If you follow choose to follow Susie, you'll find a Candy Bowl that says "please take one". Grab one to get a Darker Candy (Note: all Dark Candy from Chapter 1 is now upgraded, just like this one)


If your inventory is full and you try to take one, you'll get some delicious flavor text! If you try to take more than one, the bowl will fall over, and Susie will eat it off of the ground. Also speak with Ralsei to have him "help out"...!


4. The Donation Fountain
After the Study, you'll encounter this Donation Fountain.


Heed the message, and toss in some D$! (only in increments of 10) Tossing in any amount of money will reveal a hidden path behind the waterfall. Tossing in certain amounts will pay off later.

Here are the items you'll eventually get in return, and the D$ amounts required:
  • Darker Candy (Less than $100)
  • Scarlixir ($100 - $500)
  • ReviveMint ($500 - $2000)
  • BitterTear ($2000 - $9990)
  • GoldWidow (UNIQUE ARMOR - Greater than or equal to $10000)

The GoldWidow in particular is extremely good ARMOR, so farm up a little cash or sell some goods to make up the difference.
Missables In Order - Chapter 4 (Part 2)
5. Ladder for Ralsei's Room, MysticBand, AbsorbAx, & Telescope
In a room with 2 Pianos (Green & Blue), you'll be able to shift some Bookcases (also Blue & Green) around in order to progress.

Be sure to talk to Susie and tell her "Yes" to have her "mark" a Ladder to take later for Ralsei's room! (Can't actually see it in the room yet, presumably in the next Chapter)


Yoink!

There are some optional bookcase configurations you can set up to get some unique equipment, most notably the MysticBand (+4 MAG) and the AbsorbAx (Susie Only, +8 ATK, restores +10% max HP on attack).


The MysticBand room (and an interesting scene)


Path to the AbsorbAx (that is also where I would store my Axe)


Path to the Telescope (observe!)


6. Couch Cushion for Ralsei's Room & ReviveMint
In another room with another Piano & Bookshelf Puzzle, you can grab a Couch (sorry, actually it's just the Cushion) for Ralsei's room, and an optional ReviveMint!


7. Scarlixir in the dark
There's a Scarlixir in a Chest hidden in the darkness of another Puzzle Room. You'll get a hint at there being one off to the left before you can find it. You'll need to run off of the lit path in the upper left hand side of the map, and you'll find it.


If you finish the Puzzle Room early, it will be gone forever! (actually that's fine, you can just buy these)


8. Jackenstein Room & Leveling Up Susie's Heal
After the Jackenstein fight and gaining the ability to climb, be warned that the room you test out your newfound climbing ability will no longer be accessible after you leave! Be sure to grab the Chest off to the right of the middle of the room for 500 Dark Dollars.


Not a huge deal if you miss this one, but included anyway!

At the beginning of the Dark Sanctuary, Susie's Heal became unusable after Ralsei dismisses her. After reaching the end of the Jackenstein room, Susie regains her confidence to use it again and it becomes OKHeal!

OKHeal's HP restored formula is: [Susie's Magic Stat * 5 + 15 HP] (not half bad actually!)


Thanks for the reminder Susie!

Similar to Chapter 3, using it in battle (up to 15 times) will increase it's effectiveness! The maximum you can increase it this time is another +30 extra HP, and -5% TP cost.

It's still pretty expensive in TP cost, but don't dismiss this outright just yet! It'll actually come in handy for the next missable...


9. Hammer of Justice (Chapter 4 Superboss)
After you get the ClaimbClaws from Jackenstein (momma mia!) you can now finally follow up on that "Magic Axe" plaque above the fireplace in the Old Man's Study.


The 3 Locations that you need to assemble the tune for the Golden Piano are here:


Location 1: Hidden doorway & climbing spot (of bells) behind the Donation Waterfall


Location 2: Climbing spot where you first met the Old Man


Location 3: Climbing spot where you encountered the darkness, after the 1st SAVE point

Additional Note for Location 3: there is a unique battle and recruit at the top, Miss Mizzle, plus, Susie can also steal from her (via ACT -> Embezzle) a BitterTear ITEM (recovers ALL HP)!


Where'd the Embezzling come from anyway?

After assembling all the pieces to be able to play on the Golden Piano, you can find it just to the north of the Old Man's Study, at the very top of a short climb.


Play the tune! (you can take your time)

Afterwards, head through the (now opened) Fireplace in the Old Man's Study, and prepare yourself! This is definitely a friendly fight, so don't worry about losing. Susie will just ask the Old Man for a rematch afterwards.


The bells ring in justice... (injustice?)

Note: if you DON'T want to bang your head against the wall fighting each Chapter's respective Superboss, then you can still do it retroactively later. Winning against each causes the hole in the cliff to the left of Castle Town to contain their items, which you can just pick up later in another Chapter.

A Few Tips & Tricks:
  • This is a solo fight with Susie ONLY! (with Kris helping, kind of)

  • Susie cannot use ANY ITEMs, as he will just take them away from you. Try using one just to see what he does, then treat the ITEM command as a write off!

  • The fight progresses as you impress the Old Man (you'll see stars above his head) Using Rude Buster OR OKHeal will do it. For an extra advantage, Boost Susie's OKHeal by "leveling it up" in other battles before starting the fight.

  • FIGHT grants more TP than DEFEND (especially if it's a critical) so that is highly recommended to finish the fight faster.

  • If you DON'T use Rude Buster/OKHeal, then you'll see several very strong attacks that he wouldn't otherwise use. You can intentionally avoid using Susie's abilities in order to see the attacks, then try again.

  • AbsorbAx still works here, but it is capped at restoring only +2 HP when using the FIGHT command. Still, every little bit counts!

  • The Attack stat doesn't really matter for this fight, so use equipment that stacks as much Defense and Magic on Susie as you possibly can.

If you defeat him on the first try, you'll get some unique dialogue for your efforts. If you defeat him in a rematch, then you'll get some unique dialogue for that too. It's not a huge deal either way, but thought it was worth mentioning!

After winning, you'll get the JusticeAxe (+12 ATK) for Susie, and another ShadowCrystal. Susie's OKHeal also now becomes BetterHeal, and she permanently gains +4 MAG! Equipping the axe also changes Susie's Title to "Axe of Justice".
Missables In Order - Chapter 4 (Part 3)
10. TensionGem
On the critical path forward, you'll encounter a Chest just out of reach. Intentionally hold position in the image below, then allow it to drop you down to find a TensionGem.


11. PowerBand
Just to the east of the Chest with the TensionGem in the previous missable is a timed climbing room with a PowerBand (+4 ATK) at the top.


If you're having trouble, heed the little guy's advice and take advantage of the speed boost you get from charging a jump!


THE LIGHT WORLD - CHURCH
  1. Find the Light World version of Jackenstein in the closet

  2. Play the Piano and listen to Susie's story


THE DARK WORLD - 2ND SANCTUARY
12. ReviveMint
In the room with the Piano Puzzle that destroys the bookcases (very apropos for Susie's Dark World) be sure to destroy absolutely EVERYTHING! A hidden chest will be revealed with a ReviveMint inside.


Nice fakeout with the camera centering on the bookcase


13. Donation Fountain (Part 2)
Just south of the 2nd SAVE Point in the 2nd Sanctuary, you'll find the flipside to the Donation Fountain from the 1st Dark Sanctuary.


Redeem your prize depending on your donation from earlier!

Regarding who "and another" is in the above image: the extra number is simply how many Hidden Eggs you have accumulated in each Chapter. The current maximum is 3, exactly one for each Hidden Egg in each Chapter so far.

As a reminder, you should get one of the following:
  • Darker Candy (Less than $100)
  • Scarlixir ($100 - $500)
  • ReviveMint ($500 - $2000)
  • BitterTear ($2000 - $9990)
  • GoldWidow (UNIQUE ARMOR - Greater than or equal to $10000)


14. Hidden Egg
To the right of the "Love Finds Its Way To The Girl" prophecy will be doorway to an extremely long hallway full of Stained Glass Windows. Look for a window that looks slightly off (like an Egg...) in the image below, then enter it.


Read the peculiar book in the upper left corner, for some additional hints at Deltarune's backstory.


Get a hint from the Organikk at the end of the hallway, just past the ROOTS prophecy, that there is something "in between". This is very similar to the other hints we've gotten about the Egg Room being hidden in between 2 places.

Unlike the previous Egg Rooms in Chapter 1 & 2, walk in between this secret room and the Stained Glass Hallway exactly 8 times to find this Chapter's hidden Egg Room.


Enter the door with the Tree on it, then shuffle around in the darkness hitting your INTERACT button.

If you're having trouble figuring this one out on your own, here's how to find the Egg, and your way around the darkness: You should be able to find the Tree in the bottom left, and the Man just behind it, as well as a Sink at the very top of the room. There is a Canvas in the upper right, and an Art Club Person in the bottom right.


A rough image of the overall layout of the Egg room and its boundaries.

Once the Man points at something, try to leave and you will be blocked by a Canvas at the door. Have Kris draw, and you will pick up an Egg from a nearby easel. Check to see that the Man behind the tree is now gone, as well as some new dialogue from the Sink.


15. Sacred Moss
At the very end of the same long hallway with 100+ stained glass windows (the one that contains the Hidden Egg) you can find some Sacred Moss to consume. We're 4/4 so far, so go for it!


We're basically Moss eating experts at this point. Don't miss it!


16. The Original   Starwalker
In the next area, chasing after Susie, confirm that the original   Starwalker is still here!


Close one, I thought we'd lost him for a second there...


THE DARK WORLD - 3ND SANCTUARY
17. Princess Ribbon
When running through all of the area where you are actively avoiding bullets, head east behind a bookcase for a hidden timed climbing puzzle. It'll be difficult, but at the end will be a useful PrincessRBN (ARMOR, +4 DEF, +2 ATK)


Just behind here!


18. Hidden Path for more Prophecy Lore (and a fight)
In the room where you are avoiding the "dark fuzzy enemies" (I don't actually know if they have an official name) try hugging the right wall during the gauntlet in order to find a hidden path with 2 additional Prophecy walls behind it! (plus an NPC and a fight too I suppose)


You'll see the path during the run, but hugging the wall saves you from backtracking a bit!


19. Waferguard Chest
Just after the "dark fuzzy enemies" room will be a "sun & moon" room that becomes dark and must be navigated via sound echolocation. At the first fork in the path, head northwest all the way until you reach another room with a Waferguard ARMOR within a Chest that must be revealed by echolocation.

This is not a huge deal, since you could buy Waferguard ARMOR from the Old Man's Study for 900 D$, but it'll still save you a couple bucks!


This room here; head north, and watch out for the enemies!
Missables In Order - Chapter 4 (Part 4)
20. Recruiting Everyone for Castle Town
Before fighting the Final Boss of the Chapter, make sure you've recruited everyone before moving on! There are 8 total recruits in Chapter 4. You can confirm with the bell here just before moving onto the final area.


If you missed anyone, it's probably Miss Mizzle. Go back and get her!

When you are climbing towards the Finale, after Jackenstein falls from the tower, you'll see everyone you've recruited help sling your team all the way to the top!


Couldn't resist fitting in one more original   Starwalker sighting... I'll miss him...


21. CLAIMBING (Climbing) Race with the Annoying Dog
...yep! Backtrack to the Old Man's Study during the 3rd Sanctuary (use the flames as a shortcut) and enter the same door you opened with the Giant Organ Piano (Note: this is the same door you used previously to exit the 1st Dark Sanctuary)

Inside that door, you'll find 2 pillars and the Annoying Dog... Race him to the top for a Treasure Chest!


We meet again, my old nemesis...

Once you reach the top the Annoying Dog will always win, but that's okay, since he only wanted a Dog Bone (just out of sight), not the Chest!

Open it up for your hard won prize, a DogDollar! Hooray...!


22. Backtracking Bonus Bonanza
Elsewhere in the original Dark Sanctuary (after sealing the 2nd Sanctuary) but before the 3rd Sanctuary, you can backtrack through all of the old areas. Most of it is the same, but now there's a LOT of new NPCs you can talk to (since they have awakened)

Some of the more notable ones are: re-visiting Jackenstein's room from the original entrance north of the Green Diamond & Blue Circle Piano Puzzle Room (YOU'RE TAKING TOO LONG)


Be sure to tell a bunch of jokes first!

Susie teaching Ralsei about "noobs" in the Green Triangle & Pink Triangle Piano Puzzle Room (this one only happens if you DON'T tell Ralsei to "Park your butt, mister")

A Balthizard in the room where you first met the Old Man that fully recovers your TP! (... But, because you're out of battle, it doesn't matter.)


23. Titan Spawn & The Titan (Final Boss)
The Titan Spawn cannot be spared by any means. That leaves Purification via ACT OR killing them with FIGHT. If you have the BlackShard on Kris from "defeating" the Roaring Knight in Chapter 3, it makes this fight much easier and faster.


It's your call...

If you defeat them with FIGHT, then your party will get stronger (i.e. more max HP) but if you've been a Pacifist up until now, you may not want to do this. Kris' POWER menu will have a new stat that shows up either as "Slain: 2" or "Purify: 2" depending on how you decide to finish the battle.

There is a missable for The Titan, but you will normally not see it unless you lose several times in a row. If you do, then Chests will spawn before the fight with a Scarlixir & Rhapsotea in them, presumably to give you a leg up to win the fight.

You can lose intentionally a few times just to get some freebies, if you are so inclined.

Directly after your team manages to defeat The Titan; Susie will shatter a part of the prophecy that we can't see. After she does that, return to the entrance to the room and interact with it. You'll see some additional text, a quiet sound effect, and (seemingly) something that may trigger in a later Chapter.


Another hand pressed against yours...

When you speak with Ralsei, it should probably go without saying (especially given the primarily Pacifist & "Recruit Everyone" nature of this guide) but I recommend that you say "It's okay not to smile" instead of "Good. Keep smiling".

Not only is this the significantly nicer thing you could say to him, it ALSO seems to change something for the future!


THE LIGHT WORLD - THE PLACE WHERE IT RAINED
  1. Check Gerson's Gravestone one more time

  2. Check the Shelter Door one more time

  3. Wait at the usual spot at the Lake to talk to Susie


24. Returning to Castle Town Post-Credits & Mike's Room
After rolling credits on Chapter 4, reload your game to see a cutscene with a ray of light appearing in front of the door to the 3rd Sanctuary. This is a way for you to return to Castle Town! Most of the town is a little cordoned off, but there's still a few things for you to do here, for instance...

There will be a room in the TV STUDIO building called Mike's Room. If you remember, Spamton mentioned him a few times in Chapter 2, and Tenna mentioned him a few times in Chapter 3.

The room is locked, but luckily the room's code will simply be pasted in a note next to the door. How convenient! If you came here earlier in Chapter 4, then there will be no note.

Bonus: You can 100% get in early in Chapter 4 if you managed to guess the correct code! Hint: look at the letters on your phone's numberpad... Solution: 6453 (MIKE)


Prepare your peripherals and accessories...!

Note: If you haven't recruited enough in Chapter 3, then you won't be able to enter Mike's Room.

This entire section is completely optional, but I very highly recommend it. Mikes (and Michaels) everywhere will thank you! (probably not)


Easter Eggs & References - Ch. 1 & 2
I will be periodically adding to this list over time (there's a LOT of these), so check back every now and again for some more!

Want to turn the spoilers off without hovering your mouse? Tapping a spoiler on mobile (tablets & phones) will keep it revealed. If you want to keep them revealed on a PC, then first install Stylus for Chrome[chromewebstore.google.com] or Stylus for Firefox[addons.mozilla.org].

Afterwards, download this style that reveals all spoilers automatically[userstyles.world]. Just hit "Install" then "Install style", and you're all done! Also note that you can toggle it off and on.


Chapter 1 - Easter Eggs & References
The Questions asked of you during the Introduction Survey at the start of the game are most likely a reference to the Earthbound starting questions ("Favorite food", "Coolest thing", etc.)

Not spoiler tagged on purpose because this happens so early!


Regarding some early background music in the Dark World: several of the songs in both Chapter 1 & 2 were directly inspired by Secret of Evermore, the only game created by SquareSoft designers in North America, back before they merged and became SquareEnix.

It's considered a cult classic these days, but back then, some folks considered it a disappointment that it wasn't enough like the Secret of Mana series (not me though; I loved it!)

Fun Fact: The composer for Secret of Evermore was Jeremy Soule, most known for composing the Skyrim OST!

Anyway! Here's the proof—Toby's guest Famitsu article chatting about Evermore:
https://www.famitsu.com/news/202210/31280711.html

...and 2 example songs from both that make the connection absolutely undeniable:
Secret of Evermore OST - Quicksand Fields

Deltarune Chapter 1 OST - Cliffs

Is Toby's Annoying Dog also inspired by the dog companion from Secret of Evermore? I have no idea! (but I'd like to think so)


Every mention of "gun's" (yes the apostrophe is intentional) in Chapter 1 is a sly reference to: Barkley, Shut Up and Jam: Gaiden, which is a freeware role-playing video game developed by Tales of Game's Studios (that apostrophe is also intentional)

It is jokingly presented as an official sequel to both Barkley Shut Up and Jam! and the movie Space Jam. It features traditional JRPG-styled battles and dungeons! If you haven't already played, it's actually really good, and highly recommended (and it's free!)

You can get it here: https://archive.org/details/BarkleyShutUpAndJamGaiden


Regarding a certain red checker piece that may or may not be wearing a crown: the sound effects that play when it grows & shrinks are 100% sourced from the same ones that play when Mario grows & shrinks via Mushroom Powerup in Super Mario Bros.

Regarding some moss at the tail end of Chapter 1: the line "(Even the moss drinks water.)" is a reference to a memorable mistranslation in the classic SNES JRPG Illusion of Gaia! (not as popular as the others, but I liked it)

The Main Character (Will) is locked in prison, and after a guard gives him some bread, the guard then tells him "Even moss drinks water." What the hell does he mean by that?

It was a pretty awful translation, because as it turns out, he was SUPPOSED to say "Suck moss if you want water." Yep; that makes way more sense. Whoops!


The fanfare that plays when someone "joins the party": Also related to the last reference, in the SNES RPG Illusion of Gaia, the fanfare that plays is exceptionally reminiscent of the same fanfare that plays whenever you accomplish key items & tasks, right down to the slow roll text and how it's length is completely drawn out!

***Examples forthcoming***


About the Finale before returning to the Light World: saying goodbye to everyone before leaving is also a callback to the same bit in Earthbound—you can traverse the entire game after defeating the final boss and almost everyone has unique post-game dialogue for you as a result!


Chapter 2 - Easter Eggs & References
About Sweet Cap'n Cakes (Sweet, Cap'n, and K_K): when they are introduced, they have quite a few sly references to Homestar Runner, specifically the segment "Sweet Cuppin' Cakes". *Images for this and more are coming!* (I love me some Homestar Runner references)

At the start of the Dark World and also the Final Boss: the Arcade game AND the Giga Queen fight are both basically like playing the NES version of Punch-Out!!, if you've never played that before (at this point, that is quite likely)


Same animations, controls, and timing - bet they had some fun re-creating that one!

Also at the beginning of the Arcade game AND the Giga Queen when you hear "Round 1 - FIGHT"; that "FIGHT" sound effect is 100% sourced from when you start a Round in the Mortal Kombat series.


About this Chapter's Superboss fight: when your heart turns Yellow and you gain the ability to shoot, the Charge Shot sound effects are 100% sourced from when you charge your shots in the Mega Man X series.
Easter Eggs & References - Ch. 3 & 4
Chapter 3 - Easter Eggs & References
Regarding the 3-letter names you can choose for Kris before Round 1 starts, the following names have special dialogue for each:

Special Dialogue 1: KRI
Special Dialogue 2: KRS
Special Dialogue 3: ASS, PEE, POO, TIT, BUT, BUM
Special Dialogue 4: RAL, SUS
Special Dialogue 5: FUC, FUX, FU*K, FCK (currently not possible unless game code is modified)
Special Dialogue 6: AAA
Special Dialogue 7: ウソダ
Special Dialogue 8: クソス
Special Dialogue 9: ソソソ
Special Dialogue 10: アソア

Also, when Tenna says "Your NAMES please!!!", or when you finish entering your name, you'll hear "Ok desu ka?" which translates to "Is it okay?" or "Is it alright?"

This is another soundbite directly from Earthbound & Mother 3, that also plays when inputting names at the beginning of those games. It is voiced by Shigesato Itoi, the "father of the Mother series" (i.e. Earthbound outside of Japan)


During Round 1, an ITEM gives Susie a new ability: the Power Croissant is a callback to the "powerful bracelet" croissant sold by Muffet in Undertale's Hotland area! (which itself is a reference to Zelda 1's Power Bracelet)

Susie will test it out in that same screen by throwing some pots around. After she runs out, she'll throw Ralsei! Most of the time, there will be water in the middle of the screen, and that's where she'll throw him (cue sinking Ralsei Plush in the upper right corner)

However, if you've drained the Oasis by drinking from it 8 times, the water in the middle will turn into quicksand instead!


Adding a "do not submerge" tag to the official Ralsei Plush would be fun[www.fangamer.com]

The quicksand version of these shenanigans is a reference to an old Toby Fox Tweet:


Any further information about where this all came from is beyond my paygrade!


In the "exclusive changing room for S-Rank players only", regarding the background music that plays: It is an extremely close rendition and callback to the track Zombie Paper from Earthbound! Listen to them both and compare!

Earthbound (Zombie Paper): https://archive.org/details/earthbound-mother-2-the-original-soundtrack/093.+Zombie+Paper.flac

DELTARUNE (Dump):
Wins the prize for the "most Earthbound sounding song in DELTARUNE"


In the "exclusive changing room for S-Rank players only", regarding one of the NPCs: after Round 2 has concluded, the a small Rabbick says "Dustin' makes me feel good..."


"Bustin' makes me feel good" is a lyric from the Ghostbusters Theme Song, HOWEVER, this is most likely a reference to the Neil Cicierega classic remix Bustin' instead!

Editor's Note: I have no idea how the original song goes anymore because of this remix...


Regarding the "Saber10" weapon: You can get this for free in the S-rank room, or bought for 80 POINTs from the Vending Machine in the Red Carpet Room.

It's description says: "A saber made of 10 cactus needles. Fortunately, can deal more than 10 damage."

This is a reference to the Final Fantasy series, specifically the Cactuar (cactus-like enemies) that use a move called "1000 Needles", which does exactly 1000 damage!


During the fight with Rouxls Kaard near the end of TV World: After Lancer uses the Lancer Card so you can LANCER, wait during the ACT roulette for the Lancer Icon to become the Annoying Dog Icon.

Interacting with that button instead will trigger an Easter Egg with the Annoying Dog, which results in a splash screen mirroring how Super Smash Bros. characters are introduced!


Editor's Note: he doesn't actually help you in any way (but it is funny)


Regarding one of the rooms during the chase for the Hidden Egg: In Mancountry, the Flying Aces are likely a callback to Earthbound's Flying Men, which can be found within the realm of Magicant.

Full Details Here: https://wikibound.info/wiki/Flying_Man


Chapter 4 - Easter Eggs & References
At the start of the Chapter in the Light World, while exploring Noelle's House, you can examine several of the boxes in the Living Room closet. After checking a few of them, Noelle will ask you what you're doing.

Susie responds with "I mean... gotta admit this room is kinda sus... especially that vent." Noelle replies "Haha, nice reference, Susie!" Susie has no idea what she's talking about since she says "Huh? ...reference?" afterwards.


"Sus until proven innocent."

This is, of course, a reference to the Among Us game, which popularized the social deduction genre (and the shorthand slang "sus", short for "suspicious")

Later, the Among Us crew spotted the reference and Toby had a little fun responding to that:


About a certain elder gentleman encountered early in Chapter 4's Dark World: The "I'm old!" joke when using the Old Man in battle is from Arn's Winter Quest, Toby's first romhack of Earthbound, released way back in 2006 (I too, am now old, just mentioning that year)


And yes, this enemy's name was Starman Senior (as opposed to Junior, Super, and Deluxe)


Chatting in the Study: when you ask the Old Man "What are you doing", he'll ask Susie to help proofread it for him. She'll say "... Hey, all you've written is 'The'!!"

This one's ripped straight from Spongebob Squarepants, in an episode about procrastination:


And to be fair, it is a very lovely looking "The"!


Just before fighting a certain Halloween themed mini-boss: "... YOU SUDN'T COME HERE..." is a sly reference to Half-Life: Full Life Consequences, a Machinima series animated with Garry's Mod from way back in 2009.

Find the quote at about 2 minutes and 23 seconds into the video! 02:23


Regarding a certain room in Castle Town: after finishing the fight with the 3 Mikes, the primary Mike (played by a Pippins) will go on a full on "Pepe Silvia" conspiracy theory rant ala "It's Always Sunny In Philadelphia":

Now will you settle down and have another cup of coffee?
Bonus Videos
Full Blind Playthroughs of DELTARUNE (i.e. first initial playthroughs) as well as some Compilations (and more) thrown together for fun!

Please check 'em out if you are so inclined, or could just use some references for your own playthroughs. Note: There should be Video Chapters for each and every single one of these videos, so feel free to hop around if you're looking for something specific!


Compliations & Supercuts
Title/Rank: LV4 Splat Librarian

Title/Rank: LV4 Starwalker   Chronicler

Title/Rank: LV4 Explosion Connoisseur

Title/Rank: LV4 Moss Maniac

Title/Rank: LV4 Shell Seeker

Title/Rank: LV4 Canine Crusader


Full Blind Playthroughs


Superboss Fights & Music [Extended]


Ambiance & Music [Extended]
***REMOVED DUE TO COPYRIGHT STRIKES***
I'm truly sorry if you enjoyed these! I really liked how they had turned out, but "c'est la vie".

I would rather not lose my Channel over this, nor do I have the time to argue with the claimant about Fair Use Copyright Law, and whether the videos I had uploaded count as transformative works (*cough* they do) so I have taken them down.

You'll have to enjoy DELTARUNE ambience & music through other means (or anyone uploading who has avoided the Copyright Strike gauntlet online)
Credits & Outro

Once you see this YouTube thumbnail pattern, you CANNOT unsee it everywhere...

Image sourced from Toby here: https://toby.fangamer.com/newsletters/release-day/


Potential True Ending Spoilers:

Kris, Susie, and Ralsei were actually the backup plan all along...

Image Source: https://bsky.app/profile/anomegaguy.bsky.social/post/3lrze7cc7q22o


Spot anything I missed, or found something you would like to add? Have the images broken (again...?) or have you found any issues? If so, then please add a constructive comment or feedback, and I'll look into it when I get the chance!

Major credits for additional details, guidance, and information in this guide:
  • A good amount of the Deltarune Wiki[deltarune.wiki]
    (Note: I do not recommend the Fandom version of the Wiki for any reason! Always go to the independent version mentioned here instead. I also recommend installing https://getindie.wiki/ to support high quality independent wikis)

  • Everyone contributing in the comments! Check 'em out!

Want more? Then please check out my other:
  • Guides
  • Mods
  • Games[llamakazi.itch.io]
  • Videos (Note: Subscribing is currently the best way to support me, and it's free!)

Please do not copy without my permission! (I'm talking to you, random data scraping blogs online) If you'd like to support my work directly by buying me a coffee I'd greatly appreciate it!
https://ko-fi.com/llamakazi

Also if you can, please help out with this guide's overall visibility by hitting the Favorite & Like buttons up top - Cheers!


144 Comments
Billy M.T. 15 hours ago 
Here the tips which actually got me through the Roaring Knight, what with my stunted reaction time and everything:

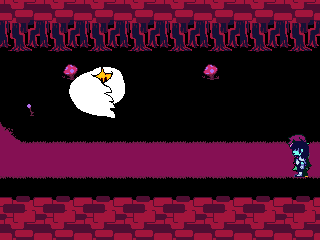
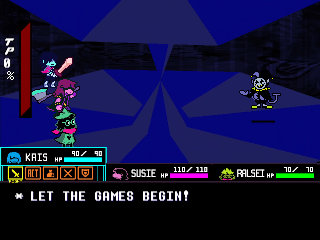
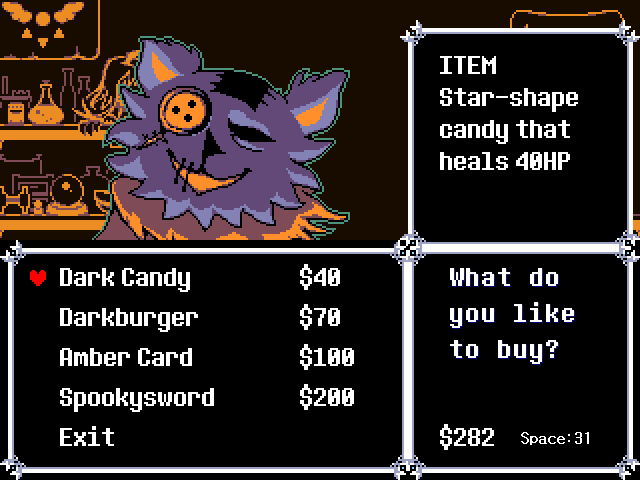
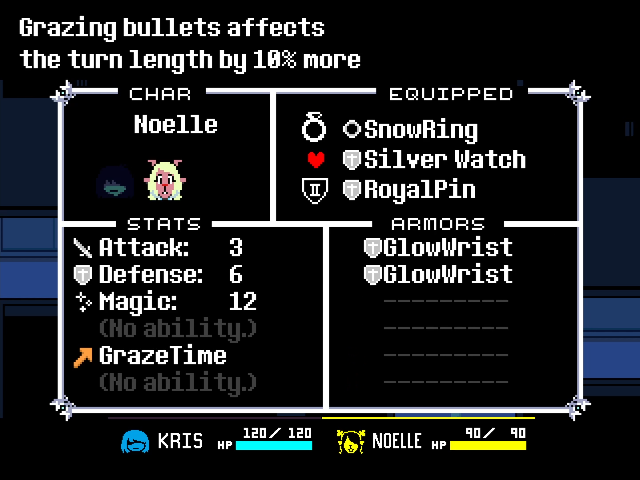
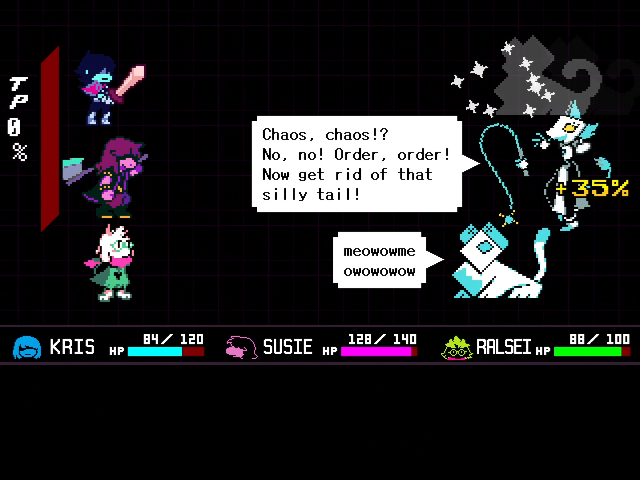
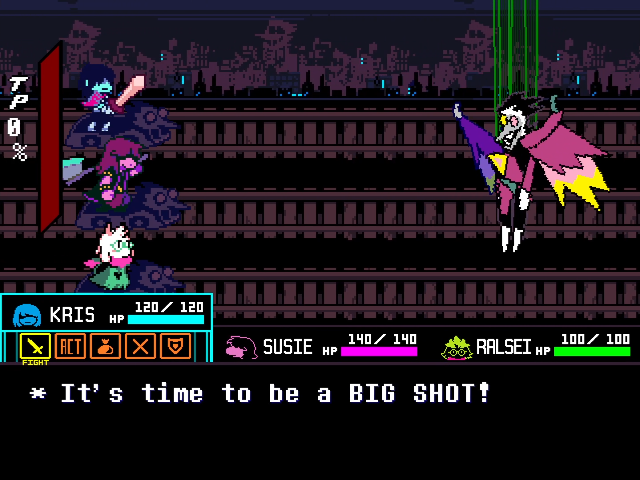
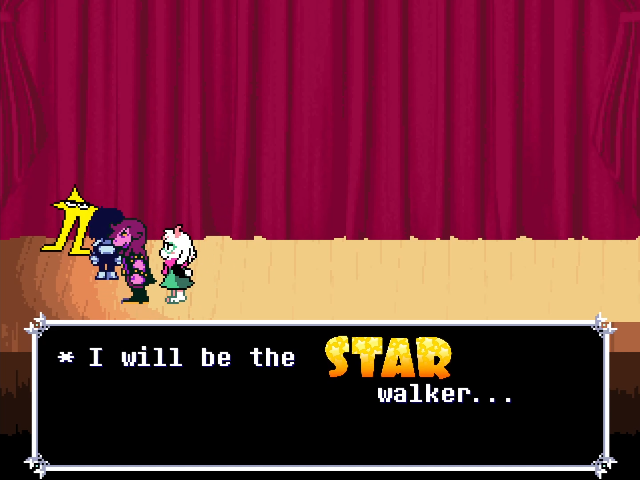
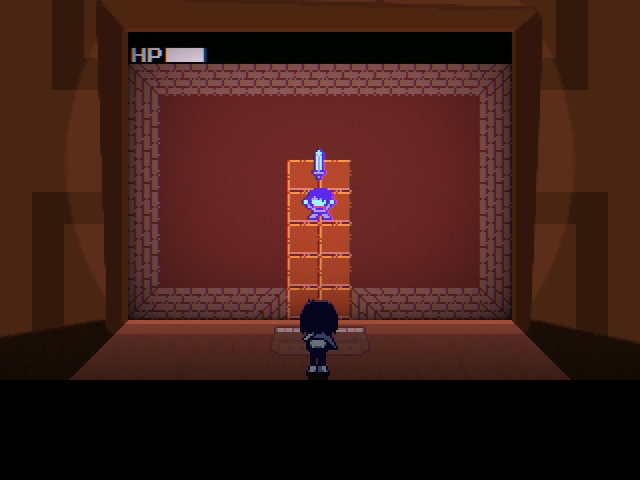
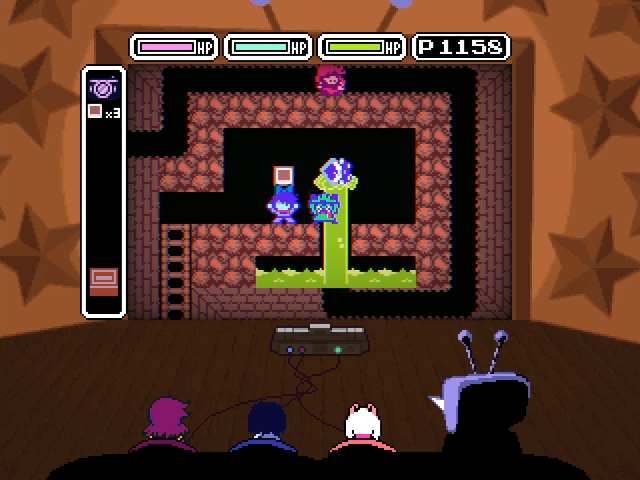
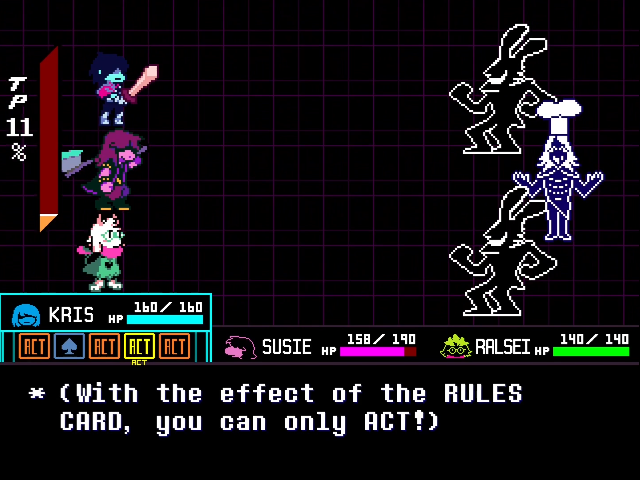
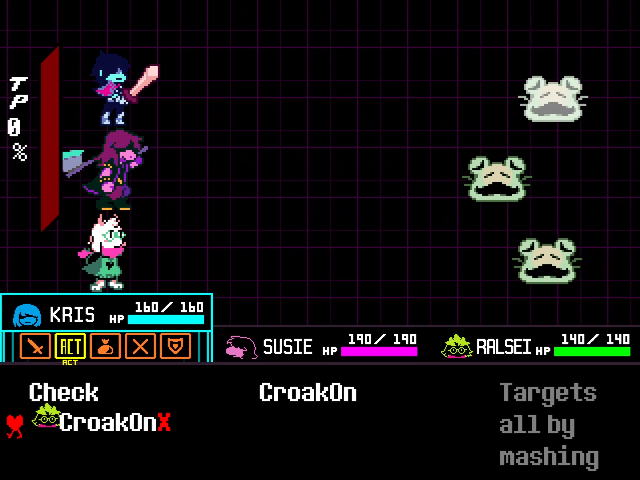
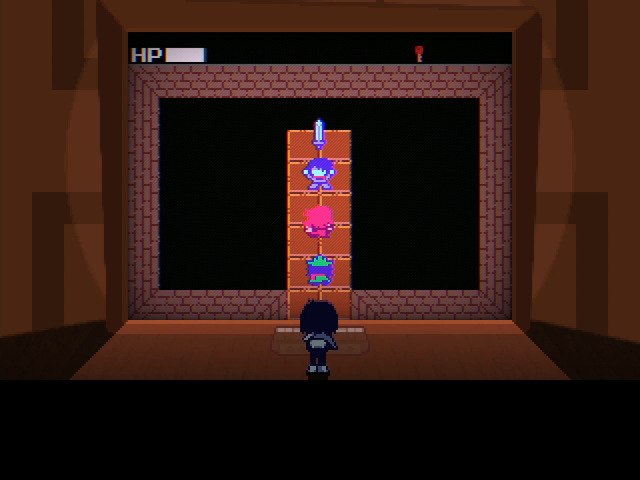
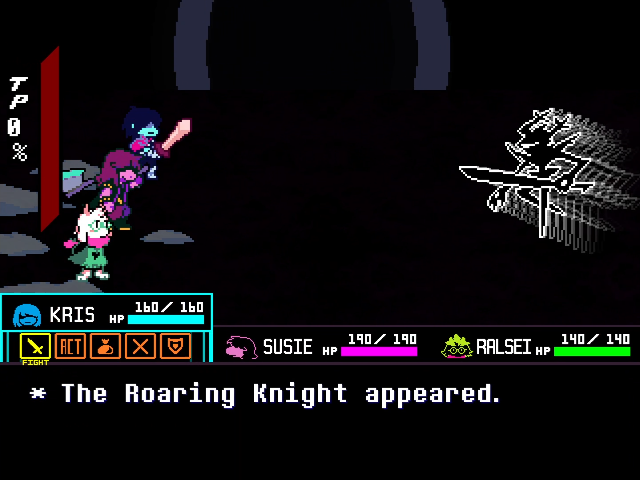
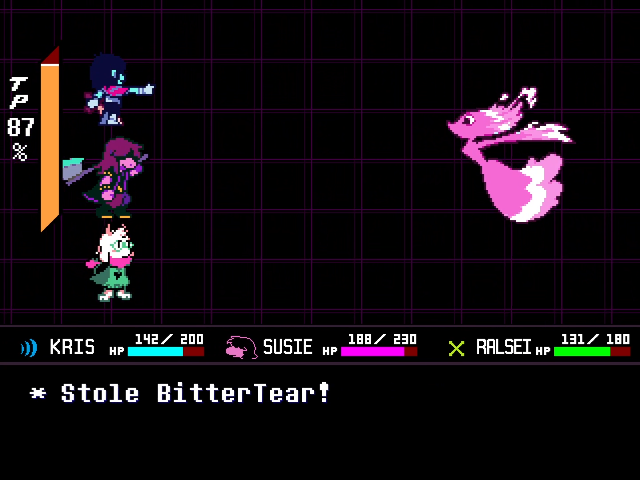
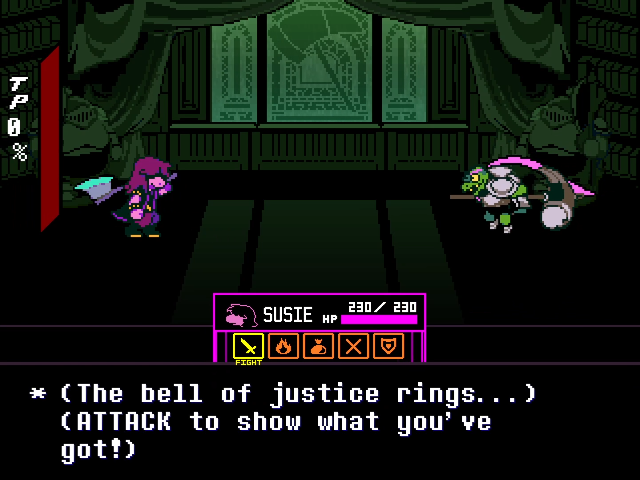
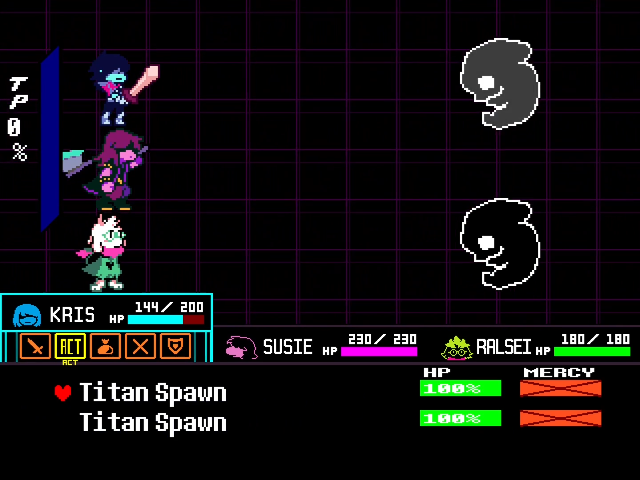
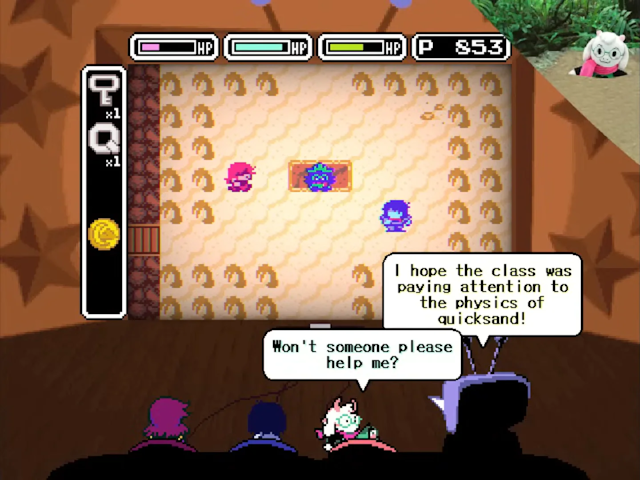
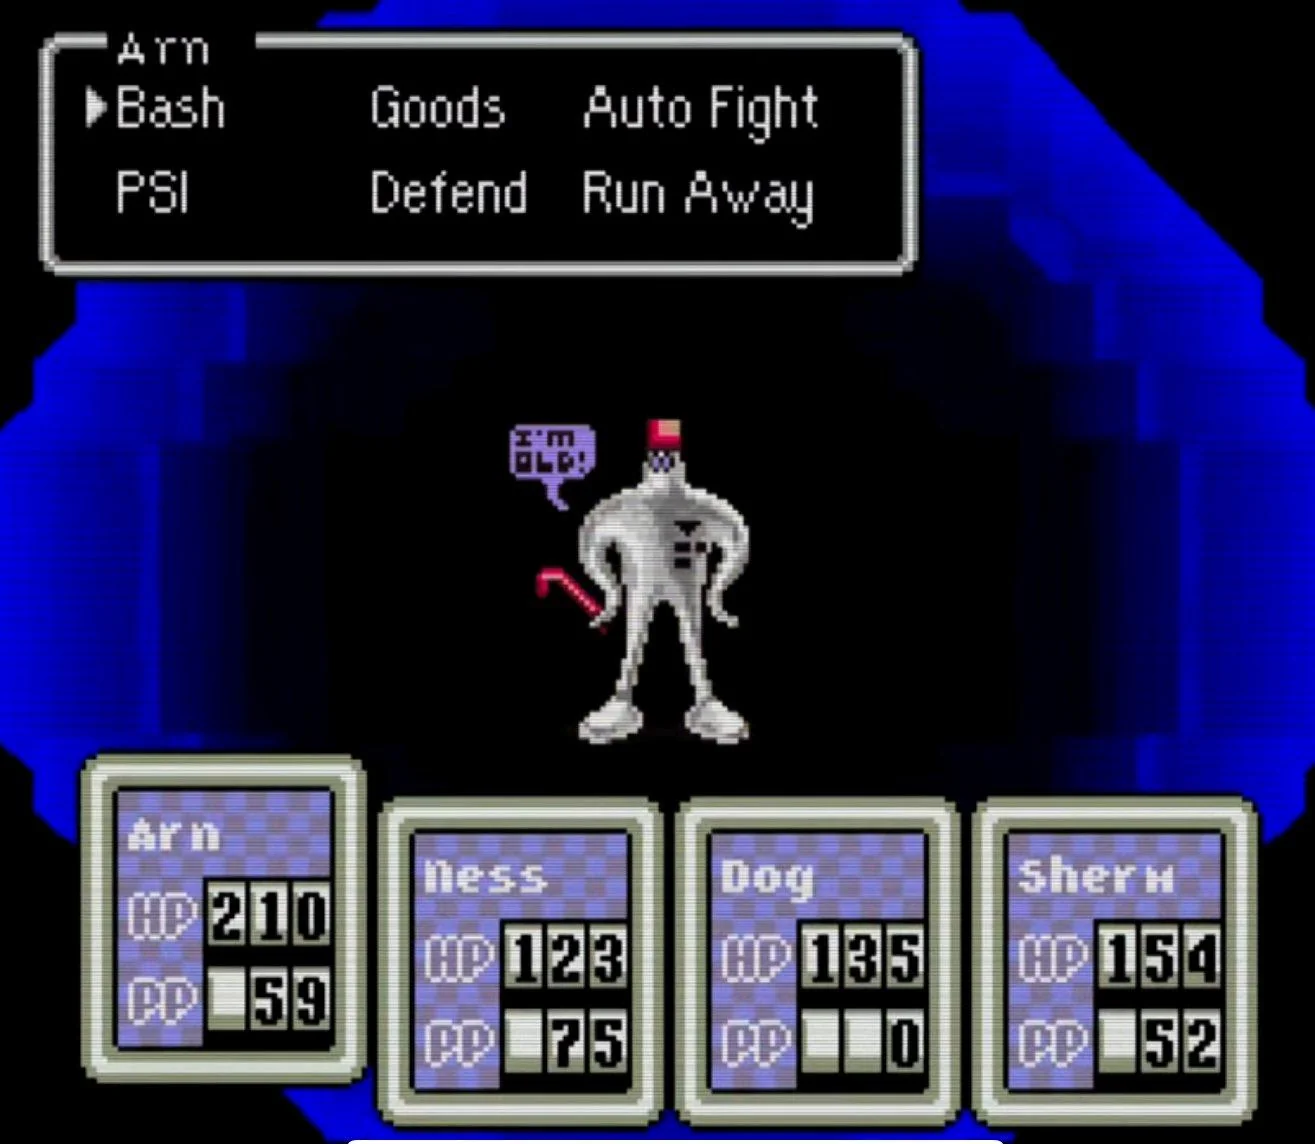
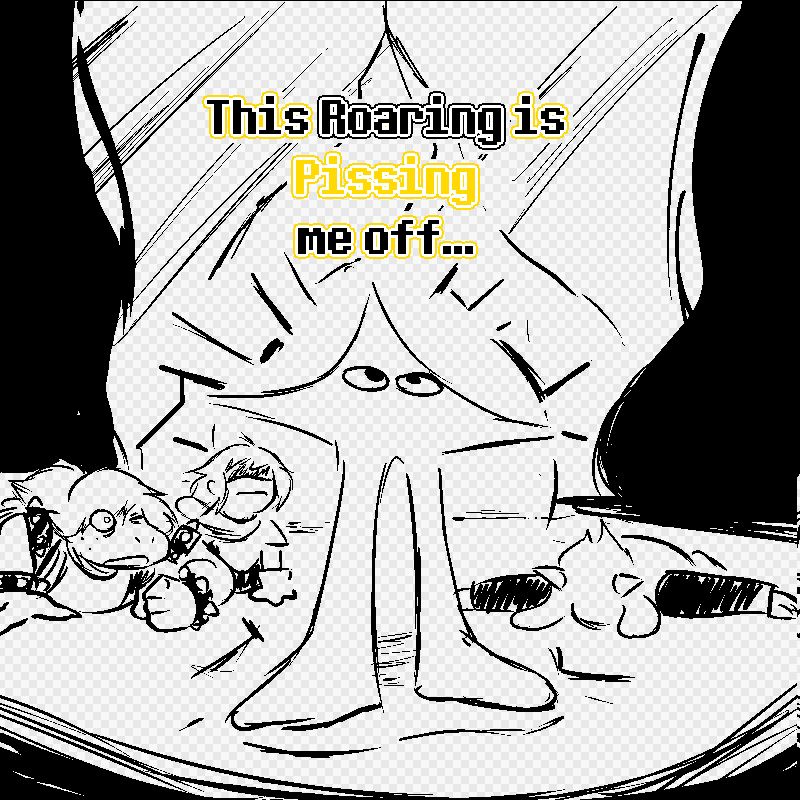
- Got the Devilsknife back in Ch.1? You're golden. Its -10% cost for Rude Buster will be VITAL here
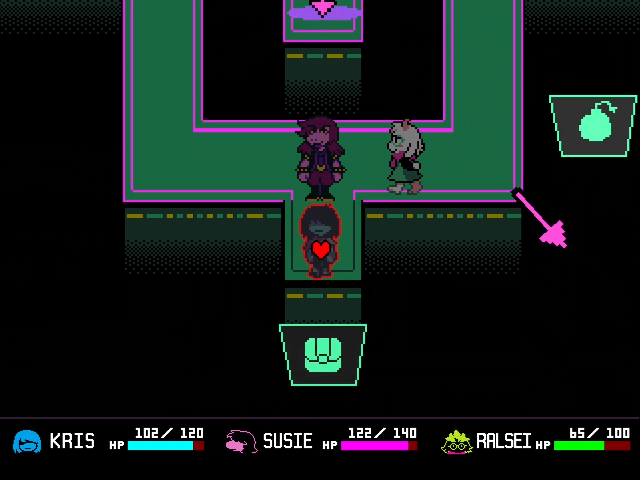
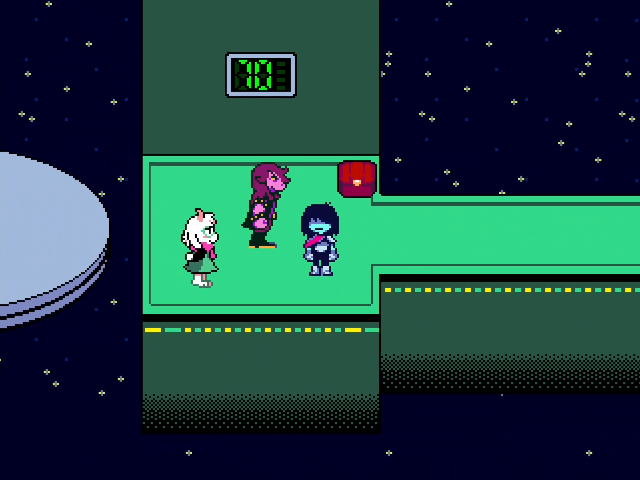
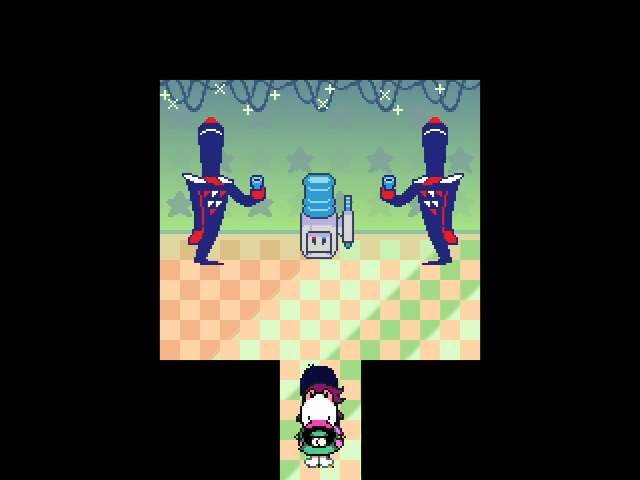
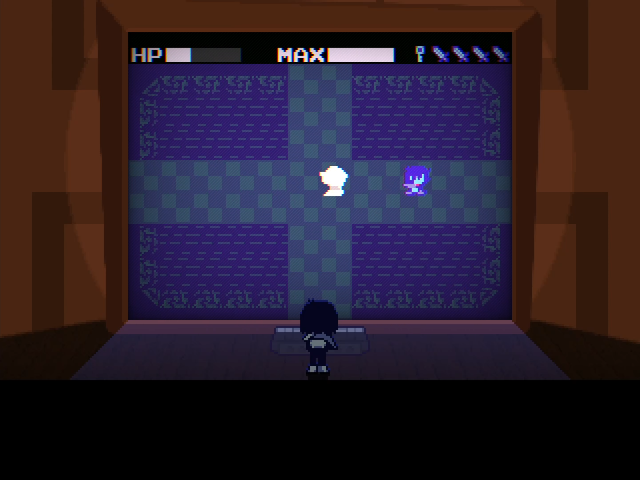
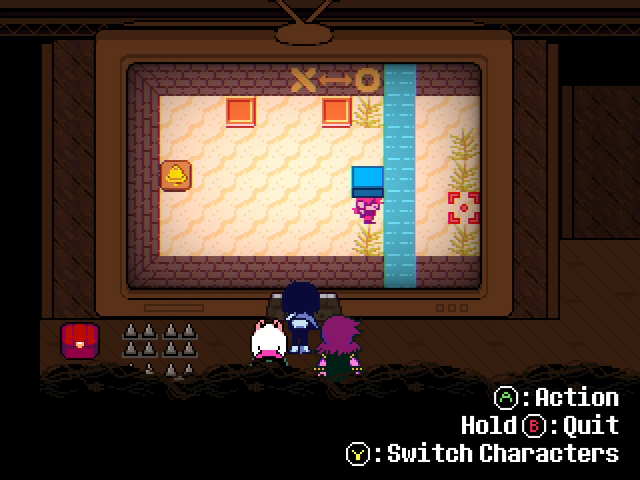
- The red-and-black slashes can be dodged 9 out of 10 times by moving diagonally only. If you so much as try to move in a straight line anywhere, you're risking your neck
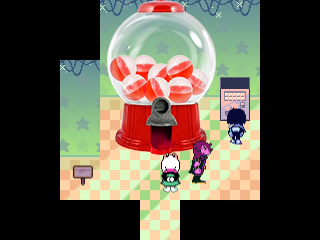
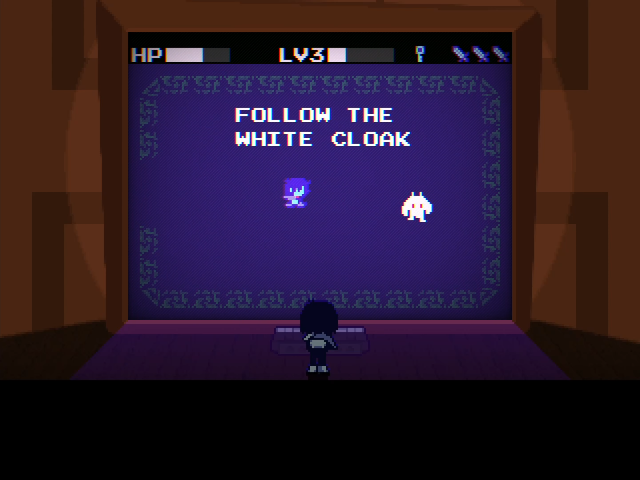
- Both the initial and the final attacks involving the star(?)-shaped projectiles' explosions can be entirely avoided by moving TOWARDS the center of one of them, from either side in the horizontal
- And most of all, DON'T attack using Kris. Let him be the one using Items or Guarding for TP. As the next chapter will outright tell you, Kris will be sandbagging the hell out of his damage output on purpose
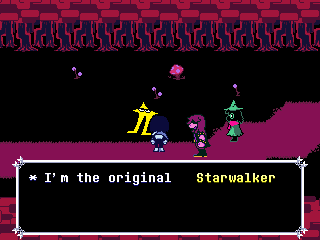
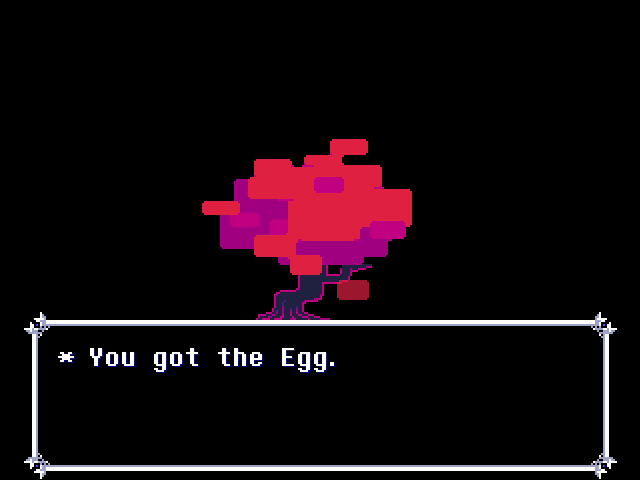
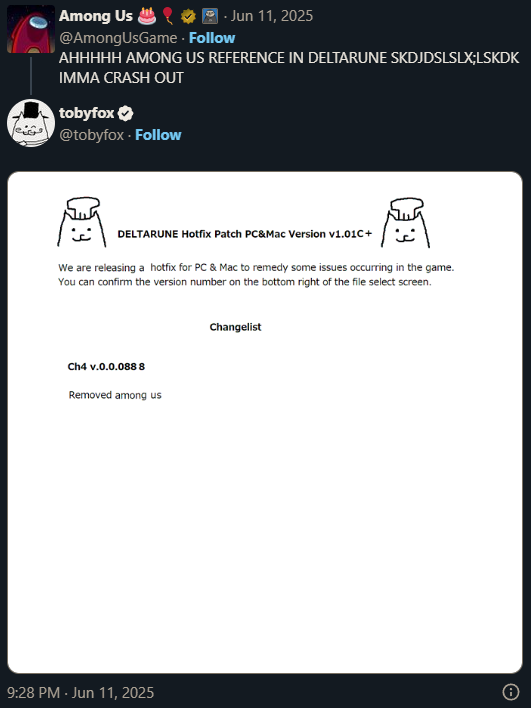
Roaring Knight 18 hours ago 
People in chapter 7 when they realise they forgot to give Joe $D 1 so they can’t fight him and get the best ending
Texus 18 hours ago 
With how much you can miss and one would be the car which I kind of care about in other chases, I do hope that doesn't ruin me a scene that will possibly exist later, or the game checks if you had beaten the knight before and let's you insta win or whatever later. I got him twice now and actually being weaker on my other try much faster.
leakysoul 22 Jul @ 3:47am 
oh by it i mean her computer monitor oops i typed way too fast aaah
leakysoul 22 Jul @ 3:45am 
A fun easter egg I don't see talked about enough is in Noelle's room, on one of the three or so rotating backgrounds described through interacting with it repeatedly. One of the backgrounds is described as having "... a small green puppet dog thing." This is a reference to Girl from invader Zim, and by being in Noelle's room, its a double reference to the Siivagunner rip "Field of Hopes and Dreams (PAL Version)"! The rip is a mashup of the Deltarune track and ANTONYMPH by Vylet Pony, with visual elements made to riff on the music video for ANTONYMPH as well, INCLUDING Noelle in a Gir Hoodie! :steamhappy::steamhappy:
tomtee 20 Jul @ 10:05am 
@Llamakazi Thanks for your hard work!
Llamakazi  [author] 19 Jul @ 3:01pm 
@Salehcool6
I dunno about glitches; definitely falls under the speedrunning category that I usually don't mess with (also they could fix it in the future, and I want to keep this evergreen as possible!) I'll think about it!

@tomtee
Maybe FRIEND stuff under Easter Eggs? They are technically missable, but I don't know if people are clamoring for them. I'll think about how I'd do it!

@Minx
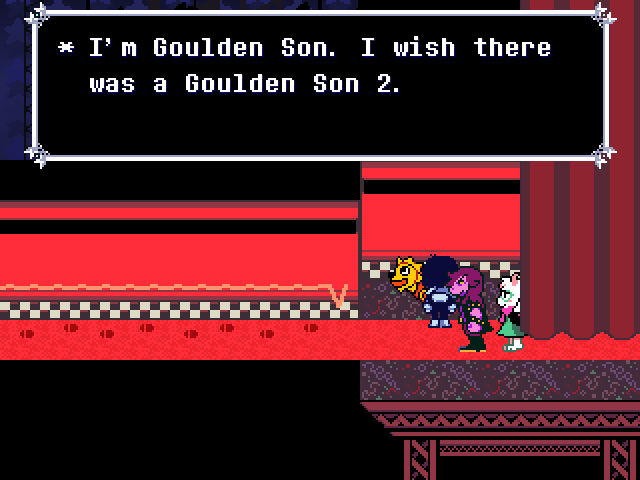
Goulden Sam saga mentioned and added, thanks!
Llamakazi  [author] 19 Jul @ 2:58pm 
@Voidlordv
Holy macaroni! :ufoshock: Very good stuff; give me some time and I'll check and confirm everything you've mentioned (it might take a while, bear with me y'all)

@Zanedotmidi
Hmm maybe; I was already hesitant to mention it in Chapter 4 since it's so intensely specific, but I'll figure something out :steamthumbsup:

@Maridia
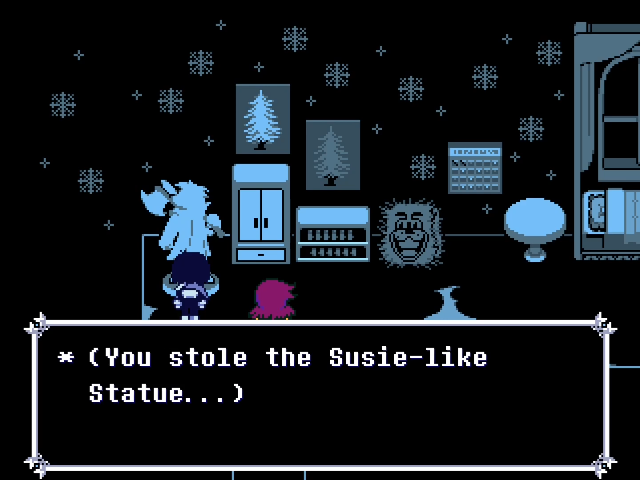
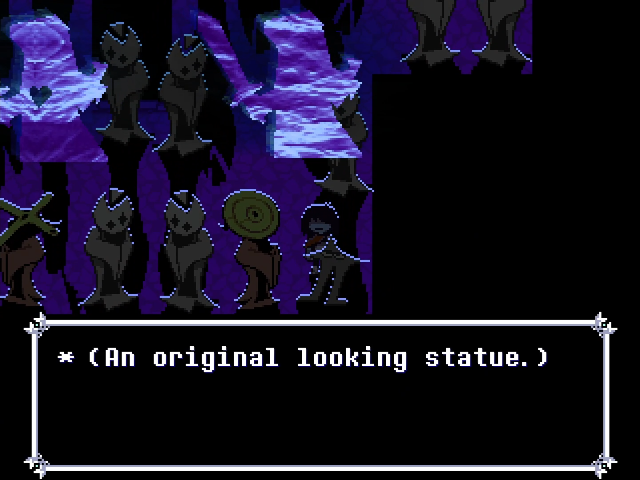
That is funny and missable! I'll mention it, thank you!
Llamakazi  [author] 19 Jul @ 1:20pm 
Just got back from vacation—I've got some comments to catch up on; stand by!