Invisible, Inc.

Invisible, Inc.

184 ratings
Invisible Inc. Beginners Guide
By BSM
A guide detailng how to play the game and what everything is. This will help new players jump into the game quickly, and answer any questions about elements of the game.
   
Award
Favorite
Favorited
Unfavorite
Welcome!
Welcome!

This guide will tell you about the gameplay elements in Invisible Inc. The in-game tutorial which automatically plays when you first start up the game should give you a pretty good idea of how to begin, but does little to explain in detail, and skips over a lot of important points entirely. You should probably go there first, but if you're curious about something not covered, or want something explained in more detail, this is the place to look.

Also note I won't cover every single little thing in this guide. If you want infomation on a particular item, program or agent, I recommend you check the Wiki, [http://invisibleinc.wikia.com/wiki/Invisible,_Inc._Wiki] or one of the other Steam guides.

Working With Your Agents: AP
AP (Action Points) are one of the most fundermental and basic elements of the game. Agents use AP in order to move around the level. Certain actions also require AP, while others do not.

The base level of AP is 8 - provided your agent has no augments effecting this or additional points in the speed stat (I'll explain this stuff later), your get 8 AP to play with each time you begin a new turn.

Decker, in a room with 2 AP remaining.

In this image, Decker has already been moved around so that he has only 2 AP remaining, as shown by the indicator above his head. This means he can move 2 more spaces in any direction, as each movement requireds 1 AP. You can see from the pattern on the ground the avalible places to which he can move.

Agents can also move diagonally, although this works a little different. The first diagonal movement an agent makes in their turn costs 2 AP, while the second diagonal move only costs 1 AP. The third costs 2 AP again, the fourth 1 AP and so on. This makes moving diagonally slightly more efficient then moving in stright lines.

If you want to know what any given agents max AP is, then try clicking their portait in the lower left corner of the screen. This will bring up a box which looks like so:

Decker's - currently rather empty and boring - infomation screen.

Here you can see what augments the agent has installed, their inventory, and their stats. Towards the top left you can also see 'MAX AP'. This is a liitle deceiving, as agents can actually exceed their max AP in certain situations, but this is the amount of AP you'll get when beginning a new turn.

Each agent has their own AP pool, so can move without effecting the others. If you have multiple agents (you get to pick 2 when beginning a game, so most of the time you will have), then you can swap between them at will by left clicking on them or their icon above the agent portrait. You can, if you wish, leave an agent with AP remaining, move another agent, then go back to the first and finish using their AP.

Typical first move gameplay. Decker has 1 AP remaining, Internationale is selected and has 3 AP. As she is selected the game shows where she can move to.

If you have an agent selected and hover over the tile where you want them to move, the indicator over their head will change to show how much AP they will have remaining once they reach their destination. This is useful for helping calculate whether they will have enough AP left to do what you need.
Working With Your Agents: Guard Vision Cones & Guard AI
Decker stood near a guard with an impressive field of view...

Moving around is all well and good, until you stumble into a guard and get shot. It's time for moving part II - moving with steath...

Above you can see a room with a guard in it. The "Status: Stationary" label means the guard isn't going to move of his own accord. The striped area represents the area he can see, which forms a cone from the direction he is facing. Note the tiles in his vision are differ from each other however:


Watched: the dark red tiles - stepping into one of these will cause the guard to spot your agent. He will draw his weapon and enter 'overwatch'. Even if you get away he'll continue hunting for you until the level is finished.


Noticed: the light red tiles - the guard will notice your agent, but not be sure. A '?' indicator will appear in the place where he last saw you and he will move to investigate. If he finds nothing he'll return to his orignal position/patrol, meaning getting noticed can be potentally useful in luring a guard from their post for a short time. Guards will also move to investigate in some other situations, such as if they see a door randomly opening or closing.


Hidden: the yellow tiles - behind cover. The guard cannot see you and nothing will happen.


Now is also as good a time as any to explain some basic guard AI. Guards have multiple states which they will change between. If an agent can see a guard you will get an option to observe that guard for 1 AP. This will show the guards state and where they will move, if anywhere.


Stationary: Not moving unless you give them a reason too.

Patrolling: Moving continually back and forth between two points. Time your movements well and you can often slip by unseen.

Investigating: The guard is moving to a tile marked with a '?'. If they find nothing they will then return to their post or patrol. A guard will investigate upon entering a level (to reach their post), if an agent enters the light red part of their vision cone, or if they see a door open/close.

Preparing to hunt: The guard is stationary but will begin hunting on their next turn. A guard will be preparing to hunt after waking up from being knocked out.

Hunting: Moving around randomly from room to room in search of your agents. They may also be moving toward a '!' tile. This is the most dangeous stance and will occur if they see you, a certain event triggers or they wake up after being knocked out (though they will be 'Preparing to hunt' for 1 turn).

Overwatch: When a guard is pointing their gun at an agent. The agent has 1 AP to get out of sight (by KO'ing the guard, closing a door or moving behind cover) before they are shot.

Note that guards will call over other nearby guards if they spot you causing guards to converge on your last known location. Guards will also break down doors if they strongly suspect an agent to be in the room beyond, preventing the door from ever being closed again.

At addition, whenever a guard arrives at a '?' or '!' location they will look left and right, potentually spotting agents behind cover.
What Mission Should I Pick?
So you've finished the first manditory mission and upgraded your agents. But what mission to tackle next? There are 4 main factors:

  1. What level of security does it have?
  2. How far away is it?
  3. What type of mission is it?
  4. What corporations territory is it in?

The world map.


These are all important things to concider, and it's up to you to decide what you want and whether its better then the other options.

Points 1 and 2 on this list are the easiest to explain.

First, as time progresses, all missions will get harder. A missions difficulty is represented by a numbered shield. The higher the number, the tougher the security you can expect. Obviously, you should try and take the lower number missions if you can.

Second, you have to consider how far away the mission is. In the standard game mode, you only have 72 hours of in game time. By choosing missons closer to your current location, you'll be able to do more of them, and maybe become better prepared for the finale.
What Mission Should I Pick: Mission Types
There are multiple types of mission in the game, which will determine the objective and what rewards you are likely to gain.

Executive Terminals: The type of mission you had to begin to start off with. The level contains an executive terminal you can hack for a 'Site List' item. Get this to the exit to unlock more options for missions. As more options will also appear on their own as time proceeds, you really don't have too much point to go to these. Every mission apart from the first of this type will also let you unlock an additional mission out of a choice of four though - meaning if you really want a particular mission type, and it isn't avalible, you will likely be able to get it from here.

Getting the site list will casue patrol routes to change.

Security Dispatch: Contains a secure locker hidden away behind a level 1 security door and a laser grid. Reach it to pick up a high level item, usually level III of some kind (e.g. clocking rig III). You often need to level up an agents stats to use it though, and it may not be an item you like. You can always sell it for a decent sum if you really don't want the item though.

Picking up the item will call a guard to investigate the secure locker.

Nanofab Vestibule: Contains a special nanofab selling a much wider choice of items then usual. There will almost always be something useful if you can afford it.

Accessing the machine will cause several devices to reboot, potentually including the machine itself.

Server Farm: Like the Nanofab Vestibule but for server terminals, i.e. a wide range of programs for Incognita - if you have the credits.

Accessing the machine will cause several devices to reboot, potentually including the machine itself.

Financial Suite Contains a large room with a finacial executive. He'll have a decent amount of credits on him, and pinning him down for a duration of 5 turns will give you a 'Vault Access Card'. This will however give time for the alarm level to rise, and an agent must be near the executive for the duration.

On the 3rd turn the exec is pinned down, an enforcer will spawn in hunting stance and heading for the location of the executive's body.

Vault: Contains otherwise useless items you can sell for a lot of money. Also contains a valut door you need a keycard to open, behind which is the equivilent of 4 safes worth of credits.

A guard will be directed towards the first display case you open (or the vault terminal).

Cybernetics Lab: Contains 2 machines which can be used for 1 of 2 functions each. Either installing 1 predetermined free augment, or adding an extra augment slot (to a max of 4 per agent(except sharp)). There is a chance their will be a vault door you need a keycard to open, behind which are 2 more mahcines.

Choosing to add an extra augment slot will knock that agent out for 2 turns.

Detention Center: Contains a jail. Hack the termal then bring an agent there to unlock the cells and get another agent. They will start with their default augment, but no items, meaning you will need to get equipment for them.

The jail contains a guard stationary and looking at the door, meaning you'll likely need to knock him out (or lure him) in order to enter the room.
What Mission Should I Pick?: The Corporations
There are 4 corporations in the game (5 if you count Omni, who only appear in the final mission). Each corp have their own special kind of additional security. Note that the corps distictions will become more noticable (and annoying) and the security levels increase.

Plastech: Control South America & Africa. Their guards have additional modifers. They also have hacker guards who summon an additional deamon when KO'ed and retake a device in a range of 5 tiles. Annoying near securing cameras as they will continually retake the camera, meaning you need to continually spend power to convert it again.

Personal Opinion: Meh. Not too hard.

K&O: Control Europe, Greenland & (somewhat oddly) Australia. They possess security turrets, which are actually potentually benifital. Like guards they have a line of sight and fire if you enter, but can be hacked - turret or connected power supply. Hack the turret itself and it will actually fire on passing guards. If a guard notices a turret is hacked, they will actually fire back at the turret, destorying it for good.

Personal Opinion: I once saw a turret kill 3 guards. For some unknown reason none of them bothered to fire back. i.e. Funny.

Sankaku: Control Asia and the Middle East. Use lots of drones in place of guards. Also, at secutity level 3, a drone will be summoned rather then a guard. Make sure you have a solid amount of PWR generation and good enough programs before coming here late game.

Personal Opinion: Difficulty varies greatly depending on whether you are equipped to deal with large numbers of drones. Dr Xu helps greatly.

FTM: Controls North America. Guards are equipped with a variety of granades, including scanning granades, identical to a drone scan but arguably worse as they can be lobbed into a room from afar. Later levels have a chance of containing a powerful scanner which detects an agents location every alarm level, sending a guard to check. Once hacked it is disabled as can be looted for valuable components worth 300 credits if you get it to the end of the level.

Personal Opinion: Not too bad provided you can find and disable the scanner quickly. The granades have never proved too much of an issue for me thus far.
Incognita: The Very Basics
Incognita plays a major part in the game (the first public versions of the game had her name as the title after all), so it's important to know how to use her. Fortunately, the basics are easy to understand.

First, in order to use incognita (and some items such as volt disrupters) you need power (PWR). You start with 10 PWR (by default in the basic gamemodes), and can gain more by stealing from drones, hacking consoles, and you will also gain 1 PWR per turn with the Power Drip program.


There is normally a console in the room in begin a level in, and you can find more stattered thoughout the facilities.

Note that consoles all give varing amounts of PWR when looted, and that you can get bonus PWR by upgrading your agents' Hacking stat.


To use Incognita, click the large "Access Incognita >" button in the top left corner. The look of the level will change to look something like the image below.


You can get out of the Incognita screen in the same way. While using Incognita, the programs you posess are displayed across the left side of the screen, beneath the button. If a program
is not a passive effect, you can select it by simply clicking on it.

The primary function of Incognita, and the thing most programs do, is break firewalls. Devices that can be hacked are labelled with a red box. The number is the amount of firewalls on that device. Incognita's second default program is Lockpick 1.0, which breaks 1 firewall at the cost on 2 PWR.

Once a device's firewall count is 0, you take control of it. Here's a list of Hackable objects and what they do.

Safe: One of the most common hackable things. Hacking it will open the safe, allowing an agent to then loot it's contents. There are actually several other kinds of safe, such as secure lockers and display cases, but they all work in exactly the same way.

Security Camera: The other most common hackable device. Hacking it will 'convert' it, getting rid of it's field of view and allowing you to see any guards or drones who are in sight of the camera.

Nano Fabricator: Hacking it allows and agent to use it and purchase items and augments.

Secondary Server Terminal: As above, but for purchase of programs.

Console/Camera Database: Shows the locations of all consoles/cameras in the facilty. The camera one is particually useful as you can then hack them long before you reach the room they are in.

Facilty Database: Allows you to see the edges of the level before you reach them.

Deamon Database: Shows what deamons a device has.

Drone: You can also hack drones (e.g. Null, Camera...). This allows you to control them for a short number of turns. Drones have AP just like agents, and you can fire weaponised drones' guns like ranged weapons equipped by your agents.

Turret: Hacking turrets will make them shoot at passing guards/drones rather then at passing agents. Note that if a guard notices a turret is hacked, they are likely to fire back at the turret, destroying it for good.

Power Supply: The description box when you hover over one of these will tell you what it's attached to (commonly laser grids or turrets). Hacking it will power off the attached object. Hacking a turrets power supply will disable the turret rather then 'converting' it.
Incognita: Daemons
Daemons can impact your success or failure in a level greatly, and (weirdly) are completely missed by the ingame tutorial.


The Akuma drone in the above screenshot has a daemon attached to it. You can tell this by the red circuit board pattern around the numbered label. To compare, here is a device which doesn't posess a daemon.


Daemons are negitive effects which will trigger once a device is hacked. They can do a range a bad things, from the annoying to the potentually game ending. You also cannot see what exact daemon a device posesses. Hovering over the drone will only yield a bunch a question marks.


There are serveral ways to reveal the daemon however. The easier way is to hack a daemon database. While the database is hacked, all daemons will be shown, like so:


You can now see that hacking this drone will create 2 more daemons on random devices. Normally you wouldn't be able to tell this, but just remember - all daemons are bad. If a device has a daemon and you don't have to hack it to achieve your main objective, it's usually best to leave it alone.

'All daemons are bad'... okay, this isn't always the case. When a daemon is triggered, there is a slim chance that Incognita will be able to reverse the daemon, creating a benifital 'algorithm'. These can give you credits or increase your agents' base AP for a few turns, so it's great when one happens.

You can find a list of all daemons, algorihms and final mission 'archdaemons' on this page:
http://invisibleinc.wikia.com/wiki/Daemons
13 Comments
Perepelkyna 24 Dec, 2022 @ 9:39am 
Nice
SticksBender 30 Mar, 2020 @ 9:32pm 
I know this guide is years old, but I'll put some thoughts anyways. Also, apparently there is a 1000 character limit and I have to fragment the comment. But I think what I have here is a worthwhile footnote.

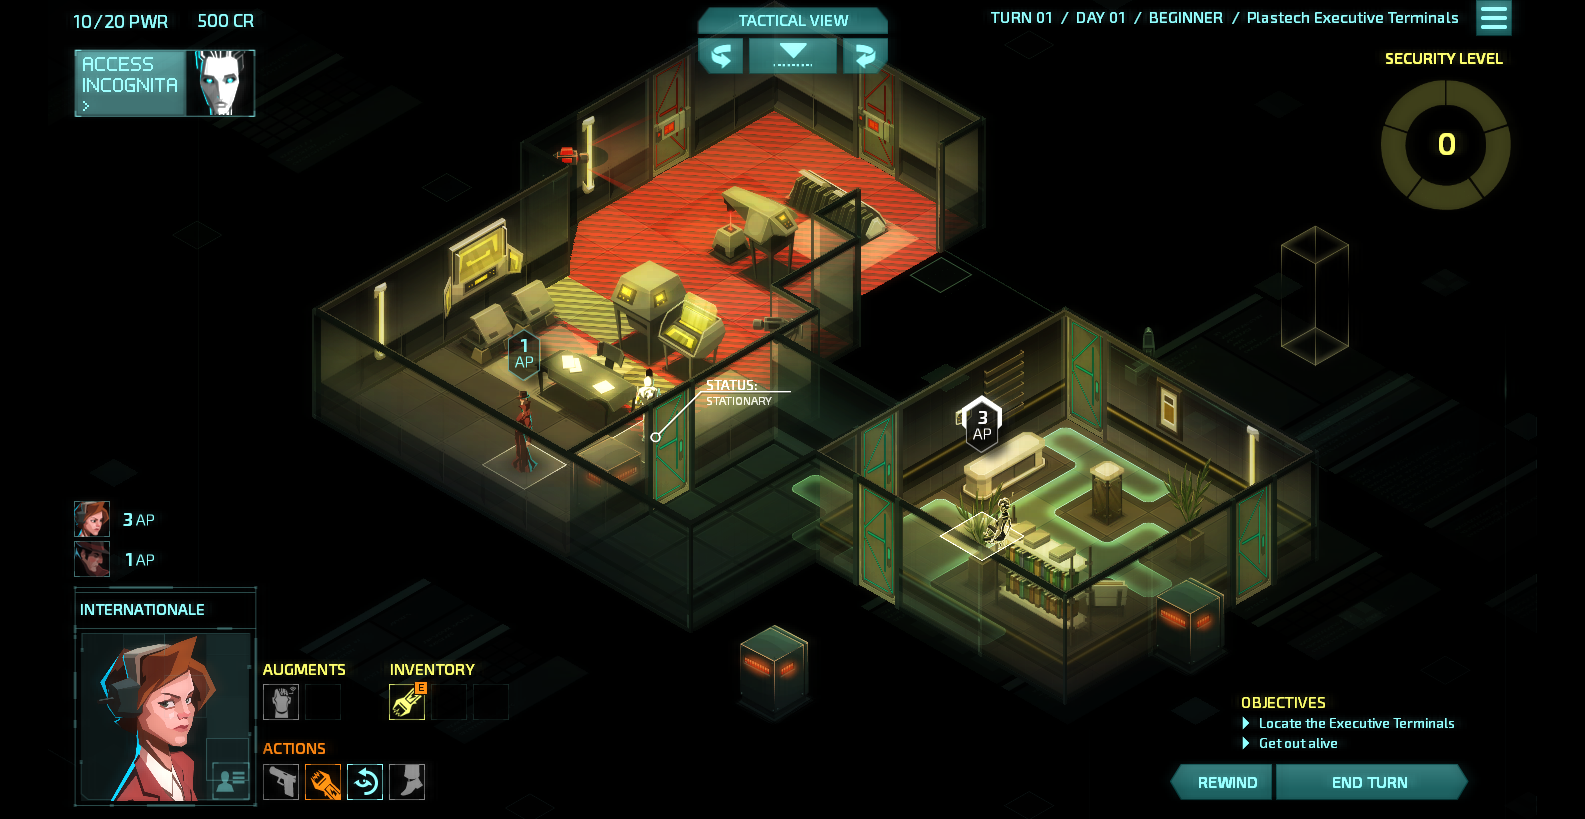
Firstly, I'd point out that one of the greatest values of executive terminals is that more possible locations means more chance of getting a tight cluster that lets you do many more missions with very low travel time, helping you to increase your power further relative to the game's power curve.
SticksBender 30 Mar, 2020 @ 9:32pm 
For Cybernetics Labs, there is a chance to have only one behind the secure door, and I also am pretty sure there will always be a secure door.

For Server Farms, as someone else said, using the store there will spawn daemons, not reboot devices.

For the Vault, you have it backwards. The "items" that you sell at the end of the mission are behind the secure door in the inner vault, the straight up cash is on the outside.

Detention Centre, it's important to note that if you already have 4 Agents (the max) you will instead get a prisoner who you can ransom, who will give you a hefty sum of credits if you get them safely out of there.
SticksBender 30 Mar, 2020 @ 9:32pm 
For hacking power supplies, I think it's very important to note that you gain control of the power switch; you can turn the turret/laser grid on and off at will as long as you control the power supply. And since guards will not travel through hacked but turned on lasers, this allows you to create valuable barriers that can assure you that at least one given guard will not be investigating the room your in for a while, buying you time to clean the place out. Also, you can manually power on the lethal laser defences when guards and standing in or KO in the area of the laser, killing them.

Finally, for daemons and "all daemons are bad", if you are in the habit of using EMPs or Dr. Xu to pop open safes, or just have a lot of power lying around, Felix daemons are the best thing that can happen to you. Increasing the firewall strength of safes while increasing the money inside is just increasing the money inside if you aren't breaking firewalls in the first place.
SticksBender 30 Mar, 2020 @ 9:32pm 
Also, I think I should just add that if you pop open a safe by disabling it with EMP or Dr. Xu, then it will NOT hack the safe, meaning it will NOT trigger daemons attached to that safe, and while it will remove the button to hack that safe with Incognita, parasite programs installed on the safe will still keep chipping away at the firewall, AoE firewall breaks will still affect it, and you can still attack the safe's firewall with buster chips, which is usually a waste of the cooldown. Be mindful of these things so you don't accidentally get wrecked by a daemon from a safe you had already looted previously.

Alright, there's more I could say, but if I want to go further I should probably just write my own guide, so I'll leave it at this. Hopefully people find this addendum helpful.
ρоѕιтяои_ 29 Jan, 2019 @ 11:52am 
Many thanks for this guide. There is alot of helpful information here things that I had no idea of at all.
Dark Stranger 3 Jun, 2018 @ 2:29am 
Thank you, I've played this game for only a few hours but I found your guide to be a big help.
PrideGroupIsEvil 24 Nov, 2016 @ 10:57am 
question, on expert some of the guards seem to seach areas i was at just 1 turn ago even thought i didn't do anything to give my position away. does the game tell them a general area of where im at? or was the guard just taking completely random locations to search
hardfoil 14 Apr, 2016 @ 9:55am 
Thanks for this guide, Violet! You make a lot of helpful suggestions, but I noticed you haven't had time to clean this up since 2015.

Would it be ok if I went through and fixed some spelling/grammar errors?
Agagamemnon 24 Jan, 2016 @ 4:20am 
Nice guide. I've just completed my first "beginner" run (2nd attempt) and I found here several clues that I did not spotted so far. Might help my next ("experienced") run :o)