The Technomancer

The Technomancer

50 ratings
Chapter 1 Story/Side Mission Guide
By Raggle Fraggles
*Note* I will not be covering the Initiation as that acts primarily as a tutorial. Nor will I be covering The Arena, since only the first round can be completed in Chapter 1. The rest of that mission is done in later chapaters.
   
Award
Favorite
Favorited
Unfavorite
Fighting for Abundance - The Deserters
Rewards for completing the quest: optionally you will receive the quest: Soldier's Bitterness, as well as rewards in accordance to the choices you make during the quest - more on that at the end of the chapter.

How to unlock: after reaching the Exchange go meet with captain Eliza Major.

Tasks:
  • Find the deserters [time to complete: 1 day and 12 hours]
  • Kill the deserters
  • Eliminate Sergeant Boris Ward

This is the first quest you receive from captain Eliza Major while working for the Abundance faction. The quest can be completed in a multitude of ways, although most of them will yield the same rewards. Your task is to kill (acquire Serum from the enemies you defeat) four groups of deserters and to catch their leader - Boris Ward.

Note - completing this quest in accordance to the guidelines will worsen your Karma significantly (because of killing enemies).

Before venturing to complete the task you will be given two companions by the captain that can be assigned to the team - David Ranger - a shield bearer - and Jeffrey Hunter - a rifleman. From now on you can manage your team by standing next to the wall going from the canteen to the locker room.


A first group of three deserters can be found in the Slums, before entering the Underworks. After killing all three of them you will receive a notification about completing part of the quest. You will meet two more groups like that in the Underworks, on the two sides of the location. The marker located in front of you should be completed at the end of the quest. There you will find Boris, but if you decide to venture there before completing the rest of the quest (killing deserters), that part won't be completed.

Note - you can't leave the Underworks after entering the location before you get rid of Boris! Otherwise the mission will be a failure.

After reaching Boris you must eliminate him and his three underlings. Watch out for grenades that the enemy will launch from time to time and for each shot he performs - he often launches a series of bullets from his weapon, dealing high damage on a wide area. If you aren't playing the Guardian class you should rush to attack Boris as soon as possible.


After dropping the health of the enemy to about 50%, Boris will stop the encounter and initiate a conversation. If you don't plan on letting the man get away, all of the other options will lead to the same conclusion - the fight will be continued. If you are planning on letting the man escape, beat him as soon as the encounter starts and ignore his underlings. If you, however, knock Boris down you won't be able to defeat his underlings anymore. The fate of Boris rests in your hands: you can either arrest him or kill him in accordance to the quest guidelines.

[[u]b]The possible outcomes and their consequences:[/b][/u]

Aborting the mission (by leaving the cave before meeting Boris) - no positive / negative effects, but you will be continuing to the next quest.

Let Boris go - 1500 EXP, +2 Karma, -1 Abundance rep. and from the Quartermaster: 100 Serum and Soldier's Steel Boots.

Arrest / Kill Boris - you will be given his unique weapon (Boris Rifle), 1500 EXP, +1 Abundance rep. and lowered Karma, and from the Quartermaster: 100 Serum and Soldier's Steel Boots.

Additionally
: killing Boris will unlock a side quest called Soldier's Bitterness.

If you've killed 3 groups of deserters before the encounter with Boris you will be given 500 EXP. In each case you will also unlock the Personal Protection main quest.
Fighitng for Abundance - Break the Opposition
Rewards for completing the quest: 2000 EXP and from the Quartermaster: 150 Serum, Soldier's Greaves, +1 Abundance rep. Additionally, depending on the fate of the Bulgakov you will receive reputation / a weapon - details can be found at the end of the chapter.

How to unlock: after reaching the Exchange go meet with captain Eliza Major.

Tasks:
  • Investigate the opposition to the regime
  • Find the opposition's leader
  • Stop the bomb from exploding

This quest will be given to you together with The deserters - the latter one should be completed first given its time limit. To learn anything about the opposition you must go to Anton Rogue located in the Slums. However, to be able to get inside without having to fight with the guard, incapacitate the bandits roaming the Slums and search their bodies to acquire the Pass. Afterwards, show the item to the guard standing in front of Anton's building.


Speak with the main behind the desk and you will be given some information about where to look for more hints. Head near the bar in the Slums and you will hear whispers (you will also notice a subtitles from the direction they are coming). Approach the place and hide behind a column to eavesdrop on the conversation.


You will learn that a bomb was planted on a platform located in the Exchange. You must get there as quickly as possible. If you don't know how to get there, you won't really a have problem reaching the destination. There will be groups of opposition fighting with the army along the way - you can join them to quell the rebellion (and to gain some experience points).

After arriving at the station head towards the trains, where you will stumble upon a group of oppositionists and their leader - Bulgakov. You will need to fight them (you just have to beat Bulgakov - you will need to fight her as well if you want to arrest / kill the woman). You will decide about the fate of the woman:

Let her go - +10 Opposition rep., +2 Karma

Arrest / Kill the woman - -5 Opposition rep.; additionally, you will acquire hear (unique) weapons: Bulgakov Dagger, Buldakov Gun.
Fighting for Abundance - Personal Protection
Rewards for completing the quest: +1 Abundance rep., and from the Quartermaster: 150 Serum, Light Soldier's Breastplate.

How to unlock: after completing The Deserters quest.

Tasks:
  • Secure the area around the hangar
  • Welcome the officials
  • Take the officials to the Exchange
  • Keep the officials alive

Head to a large warehouse in the Slums. Start with clearing the area off the people located in front of the building: the ground located on the left side will move away, but the one on the right side must be either intimidated (-1 Abundance rep.), bribed (10 Serum) or convinced to leave (Charisma).

Afterwards, head into the building. After a short introduction with the guests leave the building. Your companions will now leave you, and your task will be to dispose of the bandits approaching the area that will be targeting the escorted VIPs. You will first encounter a group of regular bandits coming at you in pairs from two different directions (4 waves), the last one equipped with a rifle. Your guests can, in theory, die but they aren't that vulnerable and can be treated as living shields. The quest won't end when one of the VIPs dies, but if you fail to protect them and all of them die, you will be forced to reload previous checkpoint.


Lead the group along the designated route, where you will encounter two more groups of enemies, ones equipped with shields among those groups. After leading the people to the border of the district to get back to Captain Eliza.
Fighting for Abundance - Down to Work!
Reward for completing the quest: +1 Abundance rep., 2000 EXP, 100 Serum, Soldier's Helmet.

How to unlock: complete the Personal protection and Break the opposition quests.
Tasks:

Tasks
  • Enter the repair area
  • Get the mutants working again
  • Inform the supervisor that work has started again

The roof of the building is leaky and the mutants were responsible for the repairs, but they suddenly decided to stop working. Head to the Slums to see what is going on. Each group can be intimidated or you can use the abilities of your character to convince them / to help them - thanks to that you will earn their sympathy.

Hint: if you don't have the necessary abilities but you still want to complete this quest in a peaceful manner, look for the clothing that will give you the required abilities for the task. Doctor's Coat, Worker's Coat, etc

After entering the building look for the group on the right side of the room, next to the stairs - they have a wounded in their group. You need 1 point of Science to help him (after the conversation the man will be sitting nearby and you can interact with him).

The second group found after going upstairs has damage tools. 1 point of Creation is required to repair them. In order to do so approach the Workshop and a new interact option will appear.


The group located on the second floor, behind the bars can be convinced by using Charisma. The last group, located below the stairs, must be intimidated - fortunately, you won't get any negative penalty for that.

When all of the mutants are back at work, head to the Overseen near the exit to report the completion of the quest. To get additional rewards head to captain Eliza and to the Quartermaster.
Fighitng for Abundance - Counterattack
Rewards for completing the quest: 2000 EXP after the explosion of the cargo, from the Quartermaster: 100 Serum, Spiked Shield.

How to unlock: Complete the Personal Protection quest.

Tasks:
  • Go back to the rover hangar
  • Go the Aurora excavation site
  • Find the tunnel leading to Ophir
  • Find the explosives and detonator
  • Destroy the tunnel

After completing the Personal Protection quest you will be given a one-time only access to a sub-location called Dig Site. Here you can also complete the second main quest (Archeology in the desert). In order to get there, you have to use the transport vehicle located in the hangar, in the Slums, the same place where you've started the escort mission of guests during the Personal Protection quest.

After arriving at the excavation place get to the north-eastern section of the complex through the domed buildings. At the destination point you will stumble upon a group of four enemies. Before you go there, however, you can clear the area off the enemies, as you will be exploring it soon either way.

After arriving at the destination - near the tunnel leading to Ophir - and eliminating the enemies in the area approach the blue barrels that are filled with explosives. You will be given a new objective to the quest - to find the explosives and the detonator. Explosives can be found nearby by going west and jumping over the wall - they will by lying on a box.


The detonator can be found near the vehicle you used to get here. Climb on the higher rock, get rid of a small group of weaker enemies and pick up the detonator (green bag) located under a steel construction. After acquiring the necessary items, get back to the tunnel, play the explosives and head back to the transporter. Use it to get back to Ophir, detonating the explosives you've just planted just before entering the vehicle.


Note: there's a small group of mutants imprisoned in the northern section of the complex. You can free them by opening the door (you don't need the ability to Unlock Locks for that). For your effort you will be given +1 Mutant rep. and +1 point of Karma.

Finding Earth - Merchant Rumors
Rewards for completing the quest: 2200 EXP, Technomancer's Pants.

How to unlock:
complete the Initiation prologue.

Tasks:
  • Investigate the caravan's disappearance
  • Negotiate with the Vory
  • Free the merchants
  • Report back to the Grand Master

This is the first part of the main Finding Earth main quest. Head towards a merchant called Tom. According to the guidelines there should be a caravan standing there, but there is none. Speak with Tom and then with Joe. The latter can either be bribed (10 Serum), or you can first try to convince him (Charisma).


After receiving the guidelines you must head to a meeting with the Vory faction located in the Slums. Their representative is a man called Anton Rogue. There are guards blocking the passage to the building with the man - get a Pass from a body of a random bandit located in the Slums to get through them without having to fight them.

Note: you can skip the above part by heading straight to the warehouse, defeat the guards located there (they have the key to the warehouse) and free the prisoners. To the left of the entrance there's a wall that can be used to flank the guards.


In the warehouse you will stumble upon three regular bandits and three prisoners located behind locked door (Locks, level 1). If you don't have the ability to open locks, try searching through the bodies of the enemies and inside of cabinets - there's a high chance that you will be able to get Vory's Jacket from there, giving +1 to the Locks skill when worn. Set the prisoners free and get back to the Grand Master to complete the quest.
Finding Earth - Archeology in the Desert
Rewards for completing the quest: 2000 EXP, Aurora Technomancer's Gloves.

How to unlock: the quest will appear after completing the Merchant Rumors quest, but it can only be continued after completing the main quest: Personal Protection.

Tasks:
  • Go to the excavation site
  • Wait for access to a rover to get to the excavation
  • Find the entrance to the colonial ruins
  • Force the technomancer to open the door
  • Get the relic
  • Report back to the Great Master

During the Counterattack quest you will get to the area called Dig Site, were this quest can be done as well. Get to the domed buildings located in the middle of the area. You will find a group of hostile Technomancers there - beat them and force them to cooperate.


Head to the other section of the building by going to the lower floor where another Technomancer will help you open the door. There you can acquire a tablet. Collect it and bring it to Ian Mancer to complete the quest.

Note: that there's a small group of mutants imprisoned in the northern section of the complex. You can free them by opening the door (you don't need the ability to Unlock Locks for that). For your effort you will be given +1 Mutant rep. and +1 point of Karma.


Finding Earth - Under Suveillance
Rewards for completing the quest: 2000 EXP, Technomancer's Jacket.

How to unlock: complete the Archeology in the desert quest.

Tasks:
  • Dispose the spy who is watching us
  • Enter the barracks at dusk
  • Investigate Jeffery Hunter
  • Investigate Captain Eliza Major
  • Investigate David Ward
  • Search Jeffery Hunter's locker
  • Search Captain Eliza Major's locker
  • Search David Ward's locker
  • Invite David to the bar to trap him
  • Dispose the spy
  • Inform the Great Master that the spy has been eliminated

Note - during this quest David will cease to be your companion. Before the investigation in the barracks start (where your companions will leave your party) make sure that you've swapped the equipment of the man with less valuable items, especially if you've given him expensive / unique items. You won't be able to get them back after this moment.

After you come back to Ian from your journey to the Dig Site, he will inform you that he suspects that someone in the barracks is a spy. Head to the barracks after dusk and speak with your friends (captain Eliza, David, Jeffrey). Afterwards, search through their lockers.

The course of the conversations, as well as their order are irrelevant - what matters are the contents of David's locker. The reputation you had with the man also doesn't change anything - he will always be the spy. You will learn about the password to David's locker after speaking with the remaining people. If the conversations weren't as successful as you hoped they would be, you can speak with the Quartermaster to learn about the companions.

At the end of the quest invite David to the bar. There you must make decision whether you will spare the man, or kill him. If you've decided for the latter, you will need to best him in combat and collect a Serum from his body. Afterwards, get back to Ian. An additional reward is associated with your decision:


Kill David - unique items: Davi's Mace, David's Shield.
Spare the soldier - +2 Karma, +10 David rep.
Safe Haven - The Escape
Rewards for completing the quest: 2000 EXP, Jeffrey's Helmet.

How to unlock: complete the main quests: Fighting the Abundance, Finding Earth and all of their components.

Tasks:
  • Go to see Captain Eliza Major
  • Go to the Source to answer Colonel Viktor's charges
  • Flee Ophir
  • Go to the rover hangar
  • Fight Jeffrey Watcher

Note - this quest is the culmination point of your stay in Ophir. If you have some unfinished business here, like uncompleted quests you should do that now, as you soon will be leaving the city. Your companion, Jeffrey, will also leave you - swap his items if you've given him something valuable / unique.

After completing the last main quests you will head to captain Eliza major to report to her for the last time. The course of the conversation doesn't matter - the conversation will be about the quests you've completed and the way you did that. This conversation will always happen and you won't be able turn away from the conspiracy.

Afterwards, you will be directed to lieutenant Victor. Unfortunately, this is a trap from which you will be rescued by Scott and Niesh (you won't be able to get to Victor - the door is are closed). From this moment onwards the whole Abundance faction is your enemy. You must head to Amelia's hangar located in the Slums, through the northern gate. Run around the railway station and straight ahead, until you reach a passage - you don't have to fight with anyone here. However, you must clear the entrance to the hangar from a group of soldiers.

An unpleasant surprise awaits you in the hangar - Jeffrey will become your main opponent. He is equipped with a special suit that protects him from your electrical attacks.


You should start by eliminating the two companions of Jeffrey, starting with the one equipped with a rifle. Both of them aren't resistant to your powers - if you've developed them well, they will be extremely effective against them. Afterwards, get rid of the enemy equipped with a shield.

Note that if you happen to get into Jeffrey's sight, the damage dealt by his attack will be critical to you. This is why you should enter this fight as a Guardian.

After the encounter you must decide whether you forgive Jeffrey (you will be given +2 Karma), or if Niesh should kill him. In both cases you will be given Jeffrey's Helmet.
Side Mission - Scattered Clients
Rewards for completing the quest: 1000 EXP, 50 Serum.

How to unlock: Speak with Fiorello about business, after rescuing him during the Merchant rumors quest.

Tasks:
  • Warn the quartermaster
  • Warn the Slum merchant
  • Get back to Fiorello

After completing the Merchant rumors quest, a merchant called Fiorello will appear in the area. He seems to be troubled - offer him your assistance. You will be given tasks to war two characters about a threat - the first one will be the Quartermaster located in the Exchange, and the second one a merchant located in the Slums.

This is all you had to do. The quest is simple, but the reward is small as well - you will be given it after going back to Fiorello and informing him that you've conveyed the message.
Side Mission - A Memory Problem
Rewards for completing the quest: 1000 EXP, 50/100 Serum, reputation points (details at the end of the chapter).

How to unlock: after the quest Merchant Rumors speak with Fiorello about the girl standing nearby.

Tasks:
  • Investigate the amnestic girl
  • Find the Black Dahlia gang
  • Find someone to leave the amnesiac girl with
  • Go back to see Fiorello

After completing the main quest Merchant Rumor and rescuing Fiorello, go back to him to acquire a new quest. During the conversation ask the man about the girl.

Head to the Quartermaster. Inside of the room with the man there's a colorful item lying on the table. The item can be investigated. Further clue leads to the Slums, where the Black Dahlia gang can be found. You should be able to find the gang members quite easily - after a short brawl they will tell you where you can find a character that will help you with your problem.


Head to speak with Mara Rogue. You will learn that the girl comes from the Vory gang. You can either deliver the girl to the Mara Rogue, or decline and deliver her to captain Eliza Major (Abundance). Depending on your choice, your reputation will change:

Deliver the girl to captain Eliza: +2 Abundance rep., -1 Vory rep., 50 Serum from Fiorello.
Deliver the girl to Mara: -1 Abundance rep., -1 Vory rep., 50 Serum from Fiorello.

Afterwards, get back to Fiorello to get your rewards and finish the quest.
Side Mission - A Body for a Merchant
Rewards for completing the quest: 1000 EXP, 200 Serum.

How to unlock: Speak with Fiorello after completing A memory problem side quest.

Tasks:
  • Find the strongest mutant in corral
  • Speak with the supervisor about Beg the mutant
  • Find a way for Beg to leave the corral
  • Go back to see Fiorello

After the conversation with Fiorello you must head to the Slums. There, right next to the edge of the district is a large building, a home of the mutants. Get inside and head upstairs, where at the end of the building you will meet a large mutant, Beg.


Beg agree to come with you, but the overseer will not when you try to speak with him (he can be found right next to the entrance to the building). Get back to the mutant and after establishing the plan attack one of the mutants.

After you've beat him enough, the overseer will arrive, and then: Beat him, Pay 100 Serum, Convince (Charisma) to give Beg back.

Regardless of your decisions Beg will go back to Fiorello and you don't have to escort him. Get back to the merchant to claim your reward.
Side Mission - Souvenir for a Mother
Rewards for completing the quest: 500 EXP

How to unlock: after completing A body for a merchant side quest.

Tasks:
  • Give Beg's mother the souvenir
  • Tell Beg what happened

This is a very short quest. First things first, speak with Beg and then head to the Slums. There, near a bar, you will find his mother - Jenny Labour. After a short conversation and a cut-scene you will be able to get back to Beg to complete this quest.
Side Mission - Crowd of Beggars
Rewards for completing the quest: 1000 EXP.

How to unlock: speak with Tom Goodsman after completing the Merchant rumors quest.

Tasks:
  • Persuade the beggars to leave
  • Equip your team with beggars' rags
  • Talk with the smuggler
  • Find smuggler in the Underworks
  • Tell the merchant about what happened

Tom Goodsman will task you with getting rid of the beggars from the city. You can find one of them several meters away from Tom's shop:

Convince him by using your Charisma to tell you what you need to know,
Beat him - after a short brawl you will be given the necessary information.

The remaining information and the further part of the quest can be found after speaking with another beggar located near Joe's store. You must now acquire Beggar's Rags, which you might already have after searching through bodies and chests in the world. If you don't have them, you can purchase them at Fiorello's for 40 Serum/piece. You must acquire 3 sets of those clothing, 2 for your companions.

Note - If you don't have two companions yet (The deserters quest), the quest can bug, telling you to dress two of your companions with the necessary items even if you don't have them (companions). If that is the case, start the quest, gather a full party and continue with it.


After equipping disguises a new objective on the train station will appear. There you will meet with a smuggler, who will offer to take you out of the city, but you will need to pay 200 Serum for the task. This is of course a hoax and you will learn about it after meeting with him in the Underworks. All you need to do is to beat the smuggler and he will stop the fight - that is if you want to let him go free. You can now decide whether you want to kill him (you will be able to get back 200 Serum you gave him) or let him go.

Side Mission - Marks of the Past
Rewards for completing the quest: 500 EXP

How to unlock: after completing the Merchant rumors quest.

Tasks:
  • Find Master Connor
  • Find Connor in the Ophir Underworks
  • Take the elevator
  • Follow Connor to Lucky
  • Discreetly listen in on Lucky and Connor's conversation
  • Investigate someone called Andrew

Next to the merchant you've rescued (Fiorello) you will find a man named Lucky (the guy leading next to the wall) who will speak you to when you walk near him. He will ask you to speak with Connor on his behalf. You won't find him in the Technomancer's Headquarters, so ask Ian Mancer whether he knows where you can find the man.


You will be directed to the Underworks. You should enter them from the Exchange, as Connor is not inside of the rocky tunnels, but in the concrete corridors. You will find him fighting with monsters. You should be especially careful about the biggest one - after performing a jump the monster will cause a shockwave. If you, however, have your companions with you, you should be able to easily get rid of the enemy. After the encounter don't forget to skin the monsters to gain valuable crafting materials.

Use the elevator to get back to the surface and head to the training field, where Connor will meet with Lucky. Sit at the nearby table and eavesdrop on the conversation between them. Finally, learn something about the mentioned name - Andrew. It doesn't matter who you speak with, the reward will always be the same. You can choose Alan, captain Eliza or Ian mencer.

Side Mission - Hostage Taking
Rewards for completing the quest: 500/1000 EXP

How to unlock: head to the marker located in the north-eastern section of the city, near the wall separating the roads around the city.

Tasks:
  • Save the hostage [time to complete: 24 hours]
  • Negotiate with the hostage taker
  • Speak with the bookie
  • Negotiate with Anton Rogue

While travelling through the city you will come across a situation - hostage taking. This quest must be completed in 24 hours, otherwise it will be automatically finished. You can complete this quest in a multitude of ways:

Convince the man to surrender (Charisma) (1000 EXP),
Attack the man, defeat and arrest him (500 EXP),
Suggest that you deal with the debt...


In the first and second case the quest will be quickly completed. In the third case, however, you need to do quite a lot of stuff. First things first, head to the Slums and look for Sam Rogue in the bar. During the conversation:

Propose to deal with the debt (200 Serum),
Convince Sam (Charisma) to pay the sum of money (if you have good relations with the Vory),
Leave the conversation

Contrary to appearances, the last dialogue option is also a choice that leads to a further scenario, but if you aren't successful you will be left with the option to rescue the captive. You must go meet with Anton Rogue. He won't help you, however, if you aren't in friendly relations with the Vory faction (you need to complete several quests for him, which will be unlocked after completing the Break the opposition quest).
Side Mission - A Soldier's Bitterness
Rewards for completing the quest: +3 David rep., 500 EXP; for improperly led conversation you will earn experience, but -1 David rep.

How to unlock: only if you complete The Deserters quest in accordance to the guidelines (by killing Boris, regardless of what you tell captain Eliza Major afterwards).

Tasks:
  • Investigate the disappearance of David Ward
  • Find David Ward at the Curiosity's

If you've killed Boris, David - one of your potential companions - will disappear. In the barracks speak with the soldier standing next to the door located between tables. From him you will learn that David likes to drink. Afterwards, speak with Jeffrey and head to the bar in the Slums.

Note - the quest might have a bug in which David is either standing in the barracks and you won't be able to speak with him, or he is still your companion and you can't speak with him about the quest either. If that's the case, take him with you to the bar and speak with him there.


The conversation in the bar can have various outcomes. By leading the course of conversation properly, you will gain reputation with David. Below you can find the dialogue options leading to the "positive ending":

Convince him (Charisma),
Try to understand -> Talk about what Boris said -> Tell one's own story.

If you've avoided this quest, started another one, or a lot of time has passed (not indicated by the game) the mission will be marked as a failed one, but you will be able to ask David where he was. It won't affect the story or the future of the man, but because of the failed quest you will lose some (-2) of the reputation with David.
Side Mission - The Feeling of Being Followed
Rewards for completing the quest: +3 Jeffrey rep., 500 EXP

How to unlock: Speak with Jeffrey after completing The Deserters quest.

Tasks:
  • Go to the barracks to put the plan in motion
  • Follow the Jeffrey's plan to draw the spy in
  • Lead the spy into the dead end to trap him
  • Search the spy to find information
  • Talk to Alan about the spy

After speaking with Jeffrey he will express his suspicion about being followed. Head with him as your companion near your room in the barracks to start the quest. You must head along the street leading around the city, until you reach a dead end with the spy waiting there.

You must beat the spy. Afterwards, search through his body to find a tablet. You will learn that was ordered by Alan Mancer. The man can be found near the barracks. After a short conversation you will need to beat Alan as well (you can ignore his companions). When his health drops to zero the encounter will end and the quest will be completed.
Side Mission - A Nasty Invasion
Rewards for completing the quest: +1 Abundance rep., 1000 EXP, 50 Serum

How to unlock: speak with the Quartermaster (Ryan Steward) and ask him about the job; after completing The Deserters quest.

Tasks:
  • Obtain traps for Ryan Steward (3)
  • Give the traps to Ryan Steward

This quest can be done in two ways. In the easier one you just have to bring 3 traps to Ryan - those can be purchased in a store, or found in the world (they are quite common).

The more difficult scenario requires you to head to the Underworks to blow up 3 locust nests. Those will be better protected than they normally are, so keep that in mind. The energy-based enemies should be dealt with as quickly as possible, as your shield won't help you against their attacks. Start by eliminating the smaller enemies and monitoring the parent. The latter one will constantly create an electrical field around itself and shoot energy balls at you. Additionally, it will charge the smaller foes with energy, allowing them to attack you with that as well (fortunately it doesn't do much damage).

You can blow up the nest by standing near it and pressing the action button, but only after you've defeated all of the enemies. The reward for completing the more difficult variant is the same.
Side Mission - A Combat Drug
Rewards for completing the quest: +1 Abundance rep., 1000 EXP, 80-150 Serum, optionally: +1 Karma.

How to unlock: speak with Quartermaster (Ryan Steward) after completing A nasty invasion quest.

Tasks:
  • Find a way to avoid casualties among the soldiers
  • Roust the soldiers from their hideout
  • Report back to Ryan Steward
  • Ask Scott for an antidote
  • Give the antidote to Ryan Steward

The quest is given to you by the Quartermaster Ryan Steward. To properly complete this quest by meeting one of the criteria (prevent casualties) head towards the closest mission marker located near the barracks. There you will find a woman, who is a wife of one of the soldiers.


Afterwards, head to the soldiers' hideout. Those standing in front of the entrance won't allow you to enter. You can either beat them, or convince them (Charisma) to change their mind. You can also try to sneak by from the other (western) side.

If you've spoken with the wife of one of the soldiers, you won't have to fight with anyone inside of the building (you will also be given +1 Karma). Otherwise, you have to beat all (3) of the soldiers inside of the hideout.

After going back to the Quartermaster you will be given a portion of your reward. The man will ask you to prepare an antidote. In order to do so, you must speak with Scott - if he is not in your party, head to his lab in the Slums.
Side Mission - A Friend Under Pressure
Rewards for completing the quest: 500 EXP

How to unlock
: Speak with Niesh after completing the Personal Protection quest.

Tasks:
  • Talk to Abbie Goodsman
  • Investigate the threats received by Abbie Goodsman
  • Keep an eye on the soldier behind the threats
  • Protect Niesha's friend [time to complete: 4 hours]
  • Tell Niesha about events

After the conversation with Niesh (located on a large plaza in the corner of the city) you will learn that he friend - Abbie Goodsman - is in need. She can be found near the barracks. You will learn that she is harassed by a soldier named Sam Scout.

Enter the barracks and speak with captain Eliza. You won't get anything valuable, so just talk with the suspect - he can be found near the workshop, next to the exit from the barracks. It still won't give you much - you must now go to the locker-room and search through Sam's bag.


Leave the barracks through the northern exit and you will be able to eavesdrop on a conversation between two soldiers standing near Abbie. By approach the tradeswoman you will start an encounter - you have 4 hours if you want to prepare for it, but it's not a difficult one. There will be 4 opponents, with one being equipped with a rifle, and Sam with a shield. You should search through their bodies before going back to Niesh.
Side Mission - Unequal Combat
Rewards for completing the quest: 1000 EXP, 100-130 Serum and Karma / Reputation - details can be found at the end of the chapter.

How to unlock: find a woman wearing a helmet in the bar in The Slums.

Tasks:
  • Go to the bar to investigate Dereck Labour, the missing boxer
  • Find Derek Labour, the boxer
  • Interrogate the merchant about the sale of jellyfish venom
  • Find the henchmen responsible for the killing
  • Take care of the backer
  • Tell the fiancée what has happened

In the bar you will be interrupted by a woman wearing a helmet. She will ask you to help her find a certain man. After the conversation head to the upper floor and speak with the Eliter Soldier located in the middle of the room. Afterwards, get to the lower floor and speak with the man located near the exit of the bar.

You will be directed on the back of the building, where you will find the body of the man you're looking for. You will learn that he was poisoned. You must contact Scott Seeker (unless he is your companion) by heading to his laboratory. He will direct you at a man that has the poison - one of the merchants.


Speak with the trader - there won't be any problems and he will tell you everything you need. You can find a Member of Vory nearby - he might be one of the suspects. Unfortunately, he is a member of a gang and he, along with 5 companions, will attack you. Fortunately for you, you need to beat them a bit and they will quickly surrender.

Get back to the Elite Soldier located on the upper floor of the bar from where you've taken the quest. He will be the one responsible for the murder and you will be able to select one of the two options:

Capture him - beat the man and his companions and send him to jail (+2 Karma, +1 Abundance rep., 1000 EXP and 80 Serum).
Offer him to bribe you (100 Serum) and in return you will forget about the case. You will receive -1 Karma, 1000 EXP and 130 Serum.


Finally, get back to the woman on the ground floor of the bar and receive your reward for the quest.
Side Mission - A Professor's Worries
Rewards for completing the quest: +3 Scott Seeker rep., 500 EXP

How to unlock: Speak with Scott Seeker

Tasks:
  • Go to the Charles Seeker's laboratory
  • Convince Veronica to give you information
  • Investigate the disappearance of Professor Charles Seeker
  • Obtain Charles Seeker's research papers
  • Give Charles Seeker's research to Scott

Speak with Scott and he will tell you about a certain worry regarding his friend. Head to the laboratory located in the east, where you will find Veronica. Speak with the girl to get further information.


After the conversation move away a little bit and Scott will speak with you again providing you with more information. Head to captain Eliza for further instructions. Afterwards, head back to Veronica and select the first dialogue option during the conversation.

Finally, get back to Scott. Give him the documents you've received from Veronica. You will now end the quest. If Scott isn't your companion, you will find him in his lab in The Slums.
Side Mission - Gun Running
Rewards for completing the quest: 1000 EXP, 50 Serum, reputation - details can be found at the end of the chapter.

How to unlock: speak with Anton Rogue after completing the Break the opposition quest.

Tasks:
  • Take weapons in the barracks
  • Decide who to give the weapons to
  • Inform Ryan about the weapon shipment

Although the quest is given to you by the Vory faction, you can complete it on behalf of the other side of the conflict. After the conversation with Anton from whom you will receive the quest, head to the Quartermaster located in the Exchange. You will be given a weapon that must be shown to one of the sides:


Head to the station - the weapon will be given to the Abundance, and you will gain +1 Abundance rep., -1 Vory rep., 50 Serum.

Head to Anton
- Vory will receive the weapon, and you will be given -1 Abundance rep., +2 Vory rep. 150 Serum, ASC Soldier's Helmet.

Note - if you want to get to the Slums with a weapon, you will have to face the guards.
Side Mission - Extortion Under Threat
Rewards for completing the quest: +2 Vory rep, 1000 EXP, 80/120 Serum, ASC Greaves, optional side quest A bothersome witness.

How to unlock: Speak with Anton Rogue after completing the Gun Running quest.

Tasks:
  • Make sure the trader pays what he owes [2x]
  • Give collected serum to Anton

After the conversation with Anton head to the first merchant located right next to the bar to collect the money. Afterwards, you will notice a man calling you. He is one of the merchants and he will be willing tell you some secrets about the Vory, initiating A bothersome witness quest. You now need to wait for 24 hours to continue it.

Now head to the second merchant on the market. This one will be more troublesome, as he hired some guards to protect him. You will be able to get rid of them in a blink of an eye. Anton's associated following you will also order you to beat up the merchant (for which you will gain +2 Vory rep. and 40 Serum). If you don't want to do that, you will be fighting with a small group of Vory, but you will be given +1 Karma.


Finally, get back to Anton and give him the money. You can also report the treacherous merchant you've met, or refrain from doing so.
Side Mission - A Bothersome Witness
Rewards for completing the quest: +2 Vory rep., 200 Serum (report the merchant) / -4 Vory rep., 1000 EXP (escort the merchant to the gate).

How to unlock: Speak with the merchant during the quest Exertion under threat.

Tasks:
  • Find the merchant later [time to complete: 24 hours]
  • Escort merchant to the Exchange [time to complete: 12 hours]

During the completion of the Exertion under threat quest you will stumble upon a merchant that wants to reveal information about the Vory. If you didn't report him to Anton, get back to this place after 24 hours so that you will be able to escort the enemy to the game of The Exchange.


During this quest you shouldn't run into any problems. The merchant won't be willing to go through every path by saying that an ambush awaits you there. When that happens, turn around and change the route. After you've delivered him to the gate the quest will be completed.
Side Mission - Contraband Recovery
Rewards for completing the quest: -1 Abundance rep., +2 Vory rep., 1000 EXP, 100 Serum, Light ASC spy's jacket

How to unlock: Speak with Anton Rogue after completing the Exertion under threat quest

Tasks:
  • Reach the barracks armory
  • Recover Anton Rogue's merchandise
  • Give the merchandise to opposition's contact
  • Report back to Anton Rogue

A second large quest for Anton is to acquire goods from a warehouse in the barracks. Head to the room with the quartermaster and pick up the key from a closet located near the man if you can't open such locks on your own (Lock level 2).


Get inside and open the two chests (level 1), collect the contents of them and deliver them to the contact. The contact can be found in the Underworks, just below the Exchange.

Side Mission - Just on the Market
Rewards for completing the quest: 1000 EXP, 100-300 Serum, ASC Soldier's Gaiters, and reputation depending on your decision - details can be found at the end of the chapter.

How to unlock: Speak with Anton Rogue after completing the Contraband Recovery quest.

Tasks:
  • Obtain a sample of the drug from the dealer
  • Find out where the drug comes from
  • Find information about the dealer
  • Analyze the sample yourself
  • Decide to go through with the deal or not
  • Report back to Anton Rogue

After speaking with Anton head to The Exchange, near the northern gate. There you can find a dealer. Get a sample of the drug by paying 25 Serum, or using Charisma.


Head to the bar in the Slums and speak with the bartender to gain information about the dealer. Afterwards, head to the upper floor and enter your room. Now examine the sample (Creation 1). If you don't have the ability, you will need to speak with the Quartermaster, which will yield the same results.

At the end you must decide what will you do with the information. You can force the woman to give you a bribe - you will be given 100 Serum and further opportunities. Get back to Anton. This conversation will decide about the outcome of the quest:

Lie to him that the drug is fine - get back to the dealer and you will be given additional 100 Serum and -4 Vory reputation points.

Tell him that the drug is harmful - Anton will order you to get rid of the dealer. You will gain +2 Vory rep.
Side Mission - A Missing Girl
Rewards for completing the quest: 1000 EXP and bonuses - details can be found at the end of the chapter.

How to unlock: Speak with the woman in the Slums after completing the Personal Protection quest and the side quests for Anton.

Tasks:
  • Interrogate Anton Rogue on the subject of Sarah Rogue
  • Ask the mother about the people close to her daughter
  • Interrogate Sarah Rouge's client
  • Go back at night to interrogate Sarah Rouge's client
  • Find the missing girl
  • Decide what the girl's fate will be
  • Optional: Speak with the girl's mother
  • Optional: Speak about the girl with Fiorello

In the Slums you will meet with a woman, a mother, whose daughter Sarah was lost. Head to Anton Rogue and get back to mother afterwards. You will learn that the daughter is a prostitute and you should just contact her regular customer. Head near the market, towards the designated place after dark. The selection of the dialogue options doesn't matter.


Now head to the place indicated by the client. You will notice the kidnapper girl accompanied by the bandits. You can:

Accept a bribe - you will receive 250 Serum and -2 Karma points

Protect the girl and send her to her mother - the girl won't be happy about it (-1 Karma) and the mother will give you 80 Serum.

Let the girl go - you will receive +1 Karma.

Help her escape the city - you will need to speak with the merchant to finish the quest, but you will receive +3 Karma.

Side Mission - The Explorer's Father
Rewards for completing the quest: 500 EXP

How to unlock: get back to the Dig Site sub-location (Counterattack quest).

Tasks:
  • Search Scott's things to find Amelia's father's letters
  • Tell Amelia what you've learned
  • Talk to Scott's ex-wife
  • Tell Amelia what you've learned

After completing the Counterattack quest and getting back to the Slums, Amelia will start a conversation with you. She will ask you to find information about her father. Scott might have the information you're looking for - he will go back to the lab after the mission, provided he was your companion.

Head to Scott's laboratory and convince him to leave the room. Afterwards, head towards his bed to find Letters there. Get back to Amelia and she will send you away to Scott's ex-wife - Angela Seeker, who can be found at the market.


During the conversation you can use Charisma, or Science as arguments. If your efforts are unsuccessful, there's the traditional option to bribe her - pay her 50 Serum to convince her to talk. Afterwards, get back to Amelia and tell her what you've learned.
6 Comments
el71Gato 12 Aug, 2023 @ 4:07pm 
About "Gun running". There is another way to get the Abundance weapons, but it is bugged: you can steal them from the room behind the quatermaster Ryan. But this doesn't trigger the quest step. You can obtain 10 weapons total, but you still give only 5 of them to whomever you choose. You cannot give other 5 to anyone and they will just clutter your inventory.
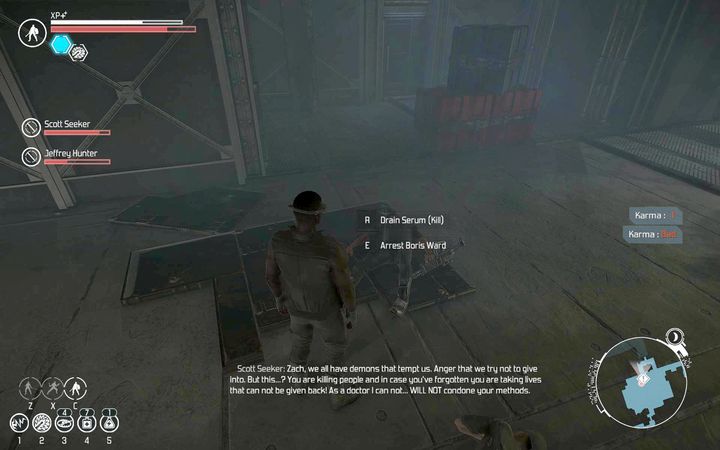
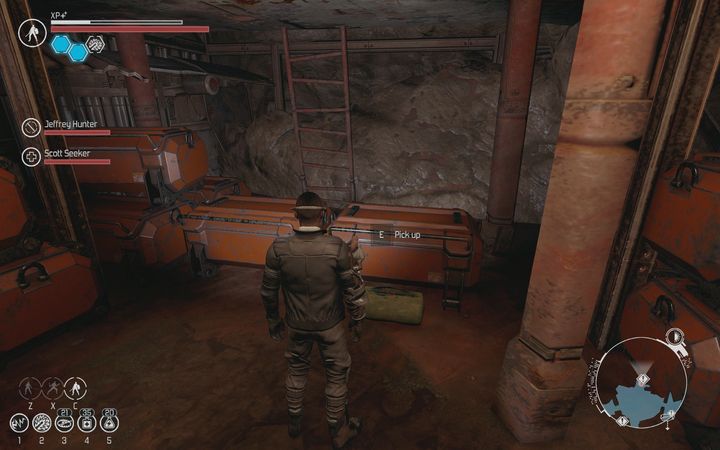
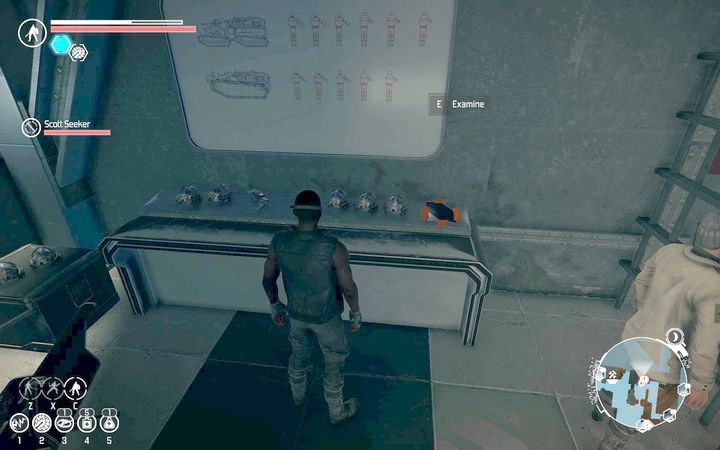
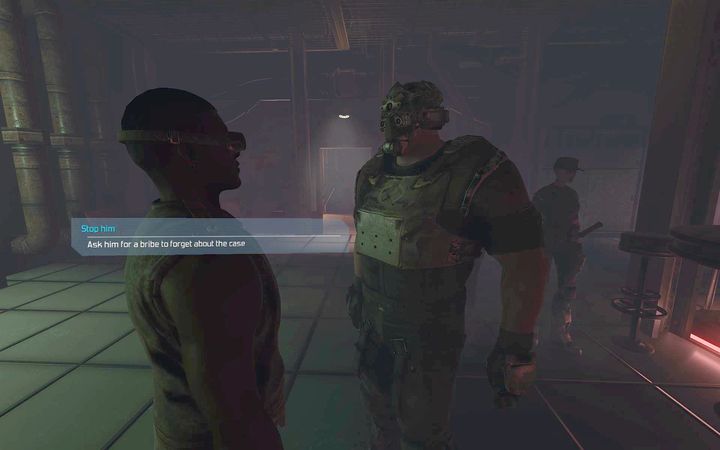
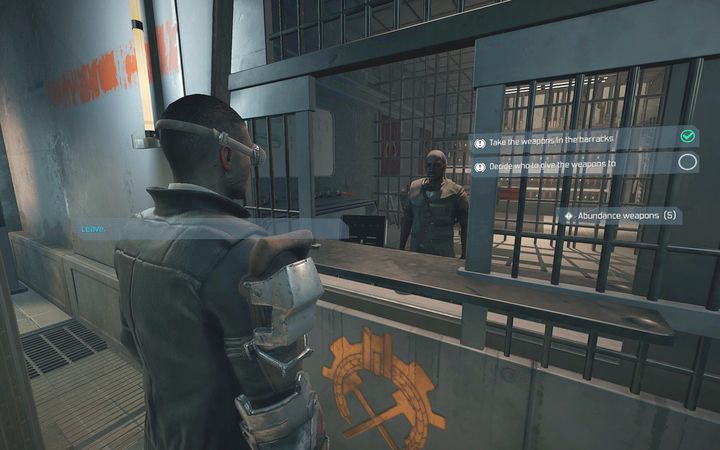
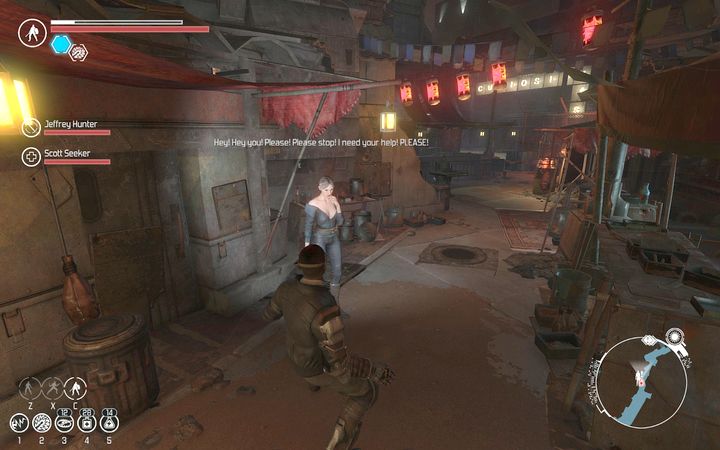
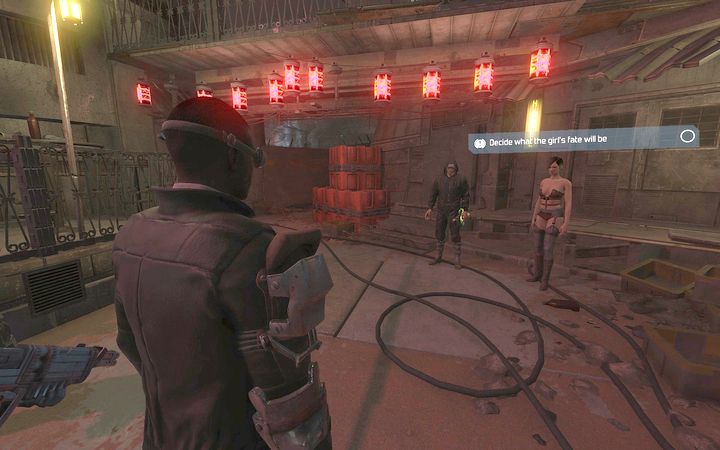
I think there should have been the third way to do the quest: to not tell Ryan about the weapons and therefore not to lose your reputation with Abundance. And obtaining the weapons one way should have made the other way impossible.
Arcion Holy Windmaster 22 Sep, 2019 @ 4:39pm 
side mission merchant rumors is bugged as due even wiht getting the passcode from anton the dialouge to say the passcode is unavaiable
Michael 25 Dec, 2016 @ 8:51am 
thanks for the guide but you copy paste this from gamepressure.com:steamfacepalm:
MLPMargeth 6 Jul, 2016 @ 7:40am 
"Side Mission - Gun Running"
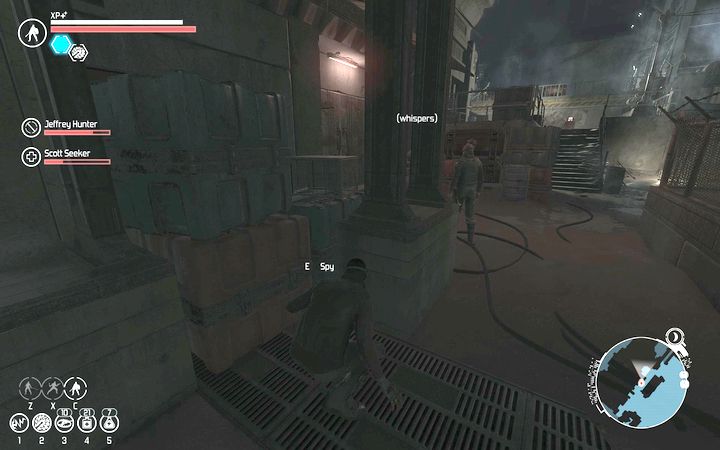
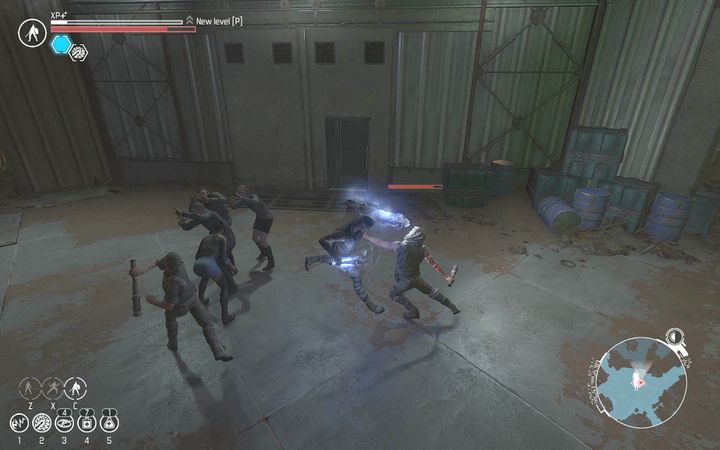
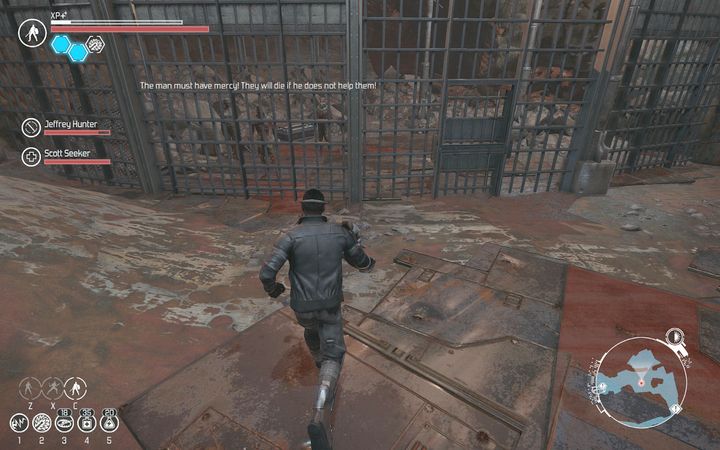
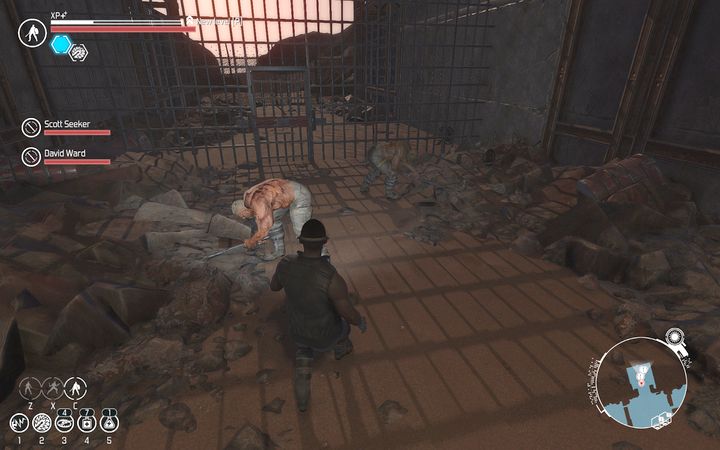
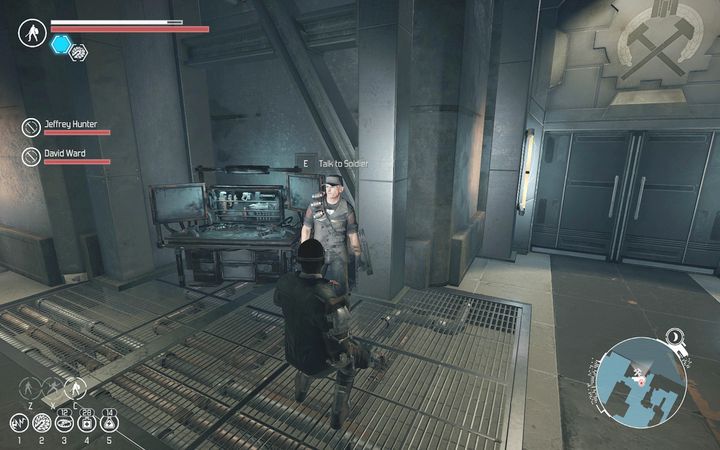
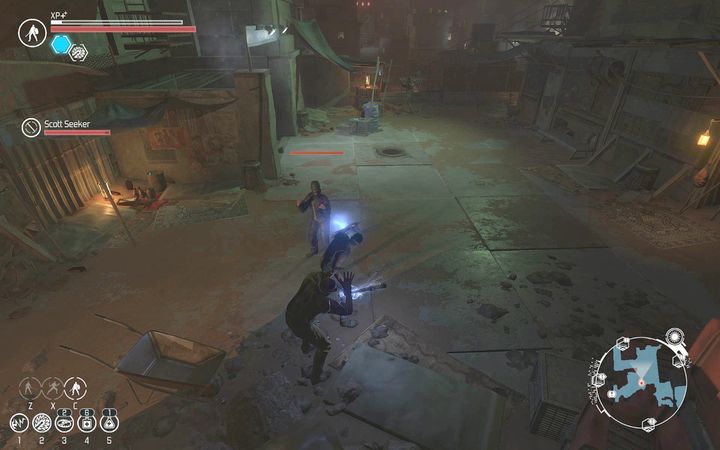
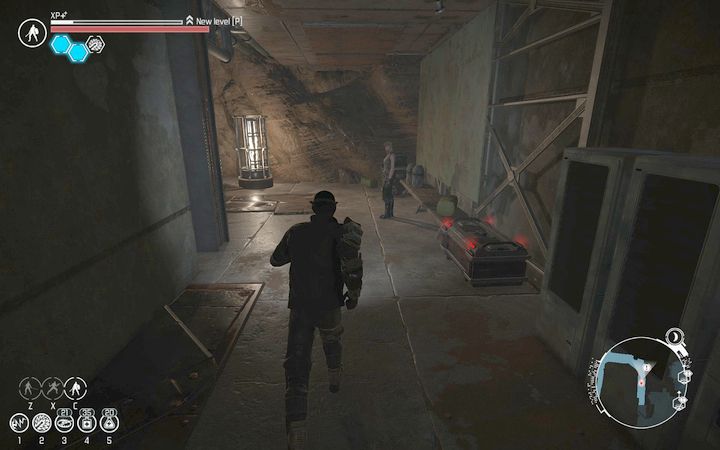
"Note - if you want to get to the Slums with a weapon, you will have to face the guards."
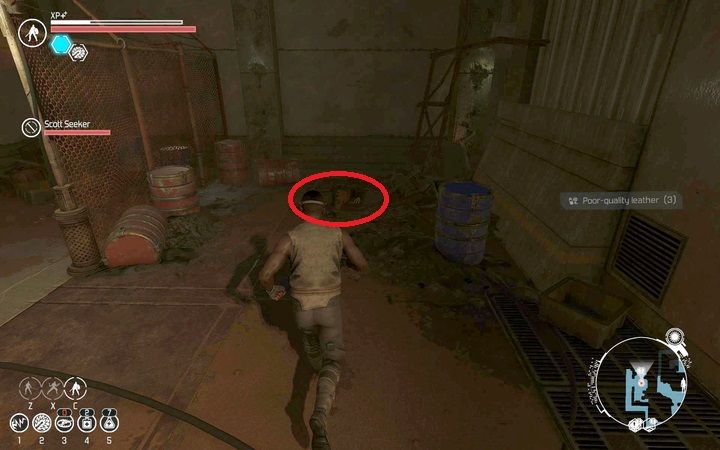
You can avoid the guards by taking a detour via the elevator to the underwork, then through the underwork to the slums - though it doesn't seem to affect the plot wether you do or not.
Raggle Fraggles  [author] 3 Jul, 2016 @ 5:30pm 
I'll make the edit
Masakura 3 Jul, 2016 @ 11:55am 
"Side Mission - A Combat Drug"
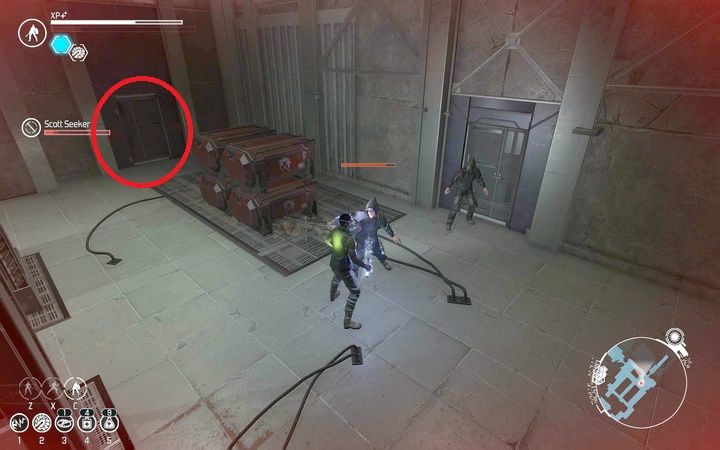
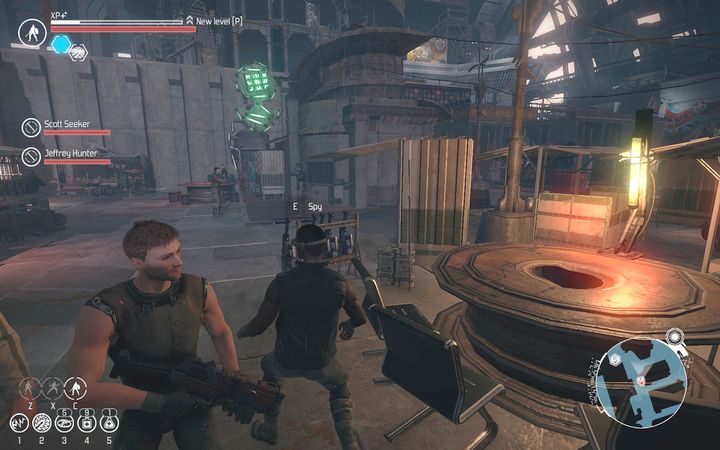
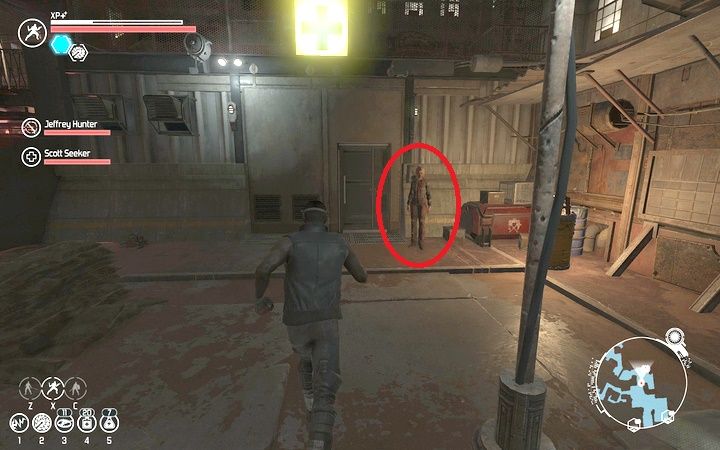
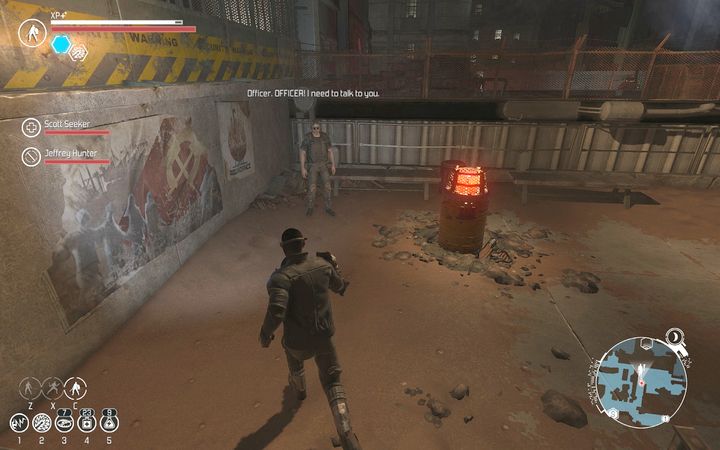
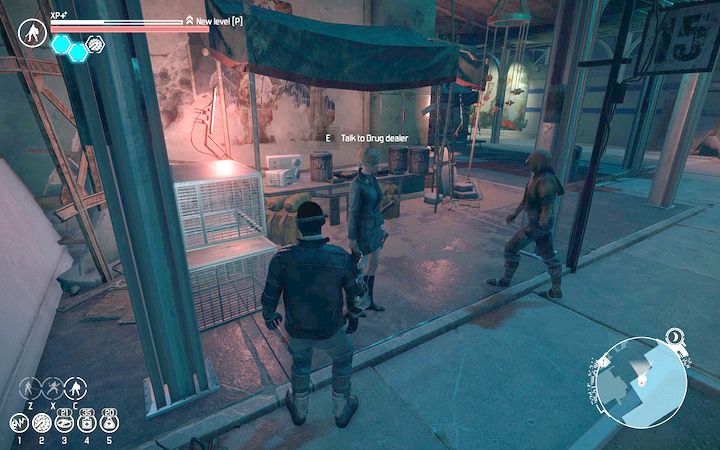
it not true that you cant stealth the side you as soon as you get in you will have to wait for guard to move a way pation is the key her