DEADBOLT

DEADBOLT

65 ratings
Level Editor Mega Guide
By JAG and 1 collaborators
This guide aims to expand upon hopoo's original Level Editor guide, bringing you more insight than ever on how to make good levels.
2
   
Award
Favorite
Favorited
Unfavorite
Back to Basics
First things first...

Please take some time to read the official guide. It covers a lot of basic stuff like making and testing a level, placing enemies, lights and music sources, amongst other things that are more than enough to make a functioning level. Master the basics.

http://steamproxy-script.pipiskins.com/sharedfiles/filedetails/?id=651807566
Uploading And Updating A Level
Uploading a level can occasionally get confusing, so we shall guide you through the gist of what each option does.

  • Individual Stages

    As simple as that, once you press the upload button a pop-up window will appear, asking you to choose an .nc you want to upload. (Basically the same procedure as with saving).

    Don't forget to manually add .nc to the end of the file name and name your level via the Mission Name button. Otherwise it'll just be Untitled.

  • .zip Folders

    Remember Vall or Bar Hopping, where it transitioned you between two levels? Well now you can do that too!

    In order for this to work, you first have to create a .zip archive (yes, by yourself) and put all your .ncs into the archive. The starting level must be named alphabetically above all others, like a01.nc or something.

    The transitions are done via the Level Transition entity in the Objectives section.

  • Updating A Level

    To update a level, you first need to obtain the Workshop ID of your level (can be found in the end of the URL of the page. The easiest place to find is the Share button.). After you've copied the ID, open up your level, click STEAM: Upload Workshop -> Update Existing Workshop ID and paste your ID in the pop-up box. After that, click STEAM: Upload Workshop -> [choose depending on whether it's a single level or a .zip folder].
Editor Controls
  • Press P to listen to music you've chosen for the level. Same key to turn it off.
  • Holding Ctrl allows you to move an object without snapping to the grid. Useful for your level's aesthetics.
  • Use Shift + Right Click to quickly delete an object.
  • You can move the camera in the editor by using the middle mouse button.
  • Experiment with properties! You never know what you'll find when right clicking on an object and inserting certain values.
—— Common mistakes ——
Here is a list of minor mistakes that can be made whilst making levels. Avoiding these is one of the major steps to making a quality, well polished level.
Don't go! (Setting Up Level Boundaries)

No, Reaper. Don't you even think about it. If you walk off the level bounda-

He's gone.

As it turns out, level boundaries only block the camera, but not where the curious reapers can move.However we can prevent them from walking off the edge and falling into the void.
Open up the editor and find your level boundary.

Then, simply place something there that blocks the player's path (street blocks are recommended)

If you want to give your player a little more freedom you can add some space so they can walk around offscreen for a short distance


Mind your head (Making Larger Doors)
How many times does this happen in levels you've played?


Unfortunately the undead aren't too intelligent and don't think to duck under doors. Thankfully, you can help!

If you right click the door and select Y-Scale, you can make the door large enough for tall enemies like Incubi and Generals to enter.


Note that Mansion Doors are tall enough for anyone to go through by default.
——Basic Level Building——
This part focuses purely on the look of your level. Nothing fancy like enemies or cutscenes, but still a rather important aspect!
Going up (Making Elevators)
So, we want to move the player up and down, but stairs aren't good enough. We need an elevator!
Note that while we're placing our lift in a random place just for example, in your level you can put it in a much more sensible place. Here's our starting point:


First we want to add an elevator shaft. Don't add walls to this, just use a Wall (Front) option to add a background for the shaft. Make it 5 blocks wide.


Great, now add all your essential elevator components. These include doors, call buttons and the elevator itself. The call button must be a very specific height, I would recommend using an enemy like a Punk for reference. The yellow line will also stop at the level the elevator will.


Congratulations! You've now got a working elevator.


Note that adding multiple elevators isn't recommended, as neither will work properly. Use only one in your level.
See-through (Placing windows)
So, you want to have a window in your level for a player to shoot through?

Go to Miscellaneous section on the top bar and select the window, it's located somewhere in the beginning of the list.


Now we have a block on the ground, how do we make a window out of it?
Right-click it, hover your mouse over Y-scale and choose Height %

100 is a REALLY big amount of units, don't use it.


And here we have our reaper, standing in front of a really tall tower of glass. Go ahead, break it, we don't mind.
Keep in mind that the actual glass is not as wide as the block and is located on the left edge of the block. You also must place the blocks onto walls in order for the windows to actually work, since they override the walls.
Watch your step (Placing Traps)
You want some traps to keep the player on their toes? Great. You can find the traps hiding in the Enemies tab, right underneath Ibzan.


Firstly, let's place a Shotgun Trap against this door.


Now we need to actually make the trap function beyond being a glorified weapon rack.
For this, we need a Trap Activator. It looks like a piece of rope. These can be attached to items you can interact with, such as Doors or Light Switches. Place it over one of these and the activator will automatically attach a wire to the nearest trap.


The traps, as you probably know, activate when the item's been interacted with, in this case the door being opened. The Punk here didn't know, unfortunately for him.


If you attach a Grenade to an activator, then they'll drop when the object's interacted with.
Going up but slower (Ladders and Stairs)
Ladders can make a good use in a level with a construction or docks theme.

The Ladders are located in the House section


In this example, we'll put them on this shipping crate.


And up our Reaper goes!


There is a small issue to be aware of though. Never place a ladder block right above the surface as shown here.


In this case, you'll get stuck. You will still be able to get out by interacting with the ladder again, but still, do avoid that.


Oh, and there are also stairs. Player can walk up with these. Nothing to say about them, really.
These are also located in the House section.


—— Advanced Level Building ——
Simple romps through buildings, repainting the walls with the tasteful colour of viscera, can be fun. However, many levels can benefit from some added flavour; conversations between enemies, an explanation for why you're doing the objectives, and so on. This section will help you bring your levels to life, even though they're filled with the undead.
That's a wrap (Making Cutscenes)
So you want your level to tell the player a story? Excellent idea. To make a cutscene click on the Trigger System icon, the rightmost one in the list.

After that, click on the Command (Cutscene) tool that looks like a list. Place it somewhere and you're ready to start setting up your cutscene.


Use the Child option to link cutscenes together.


The Text option will change what the cutscene will say.


The Icon option will change what portrait and what text grunting the cutscene will use.


The Occurs option will allow you to display the cutscene either on the first run only or on every run. (PLEASE set it to First Run if it's an introductory cutscene)


The Player Control option will allow you to select whether or not the player can move during the cutscene. However, this option doesn't work in the current version of the game, meaning that the player will always be frozen during the cutscene.
This feature is now obsolete since 1.0.3

Then you can move the location of the Cutscene object to choose where the camera focuses on.


Now you've got a fully working cutscene!


If you want to make a cutscene occur after completing an objective, you can place an enemy out of bounds and set them to spawn after that objective's completed. If you place a Force Death object (located at the bottom of the enemy tab), you can set a cutscene to play after their death using a Trigger (Destroy), found under the Trigger System tab. If the cutscene is set as a child of the destroy trigger, the cutscene will play.

This will create the illusion that completing the objective is what triggers the cutscene.

If you want more insight on the workings of the cutscene tool and/or you're searching for more complex functions, check out this guide: http://steamproxy-script.pipiskins.com/sharedfiles/filedetails/?id=1103643027
Lively Undead (Making enemies do stuff)
Levels are somewhat boring if enemies are just standing around doing nothing. Let's remedy this!

If you right click on an enemy, a menu appears.

State controls what action the enemy is doing. For example, you can make enemies sit, or bartenders mix cocktails.


Patrol makes enemies walk a certain path while they're unalert.


Frame affects Enemies and Objects, however, it's mostly Trial & Error. We'll advice you to simply use it with objects. As the title says, it changes frames or sprites of a certain entity. It can change a colour, a pose or anything whatever hopoo has put into it. We may never know.

X-scale and Y-scale affect the position of an enemy. X-scale changes the direction an enemy faces (you can use the scroll wheel to do this, too). Y-scale changes whether the enemy faces upwards or not, allowing you to make enemies walk on ceilings.


Giving the player weapons/enabling safes
Remember how in some of the game's levels you start off with a different weapon? Like a silenced pistol in The Boogeyman, and an Auto-Grenade Launcher in As A Glass? Well, this can be done in your levels, too! To an extent. This only works with the examples found in official levels, so you can't give the player a Scythe or Bolt-Action Rifle to start off with.

So, take a look at the original levels and find one that includes what you want. This would either be a level that gives the player a weapon, or a level that includes a wall safe. You can't have a level that has both a starting weapon and a safe unless you use As A Glass, which has both.

You can find the levels in the game's folder, simply Right Click on it in your Steam library, go to Properties, Local Files, Browse Local Files, then open the Stages folder.


Now you have access to the entirety of the original levels, and you can open them in the editor as well!

As an example, let's make a level that starts you off with the Auto-Grenade Launcher. This is given to the player in As A Glass.

So, first build your level as you would any other. When you save it, name the file after the official mission. In this example, it would be called "lv3_7.nc".

Now, when the level's loaded, the player will be given the Grenade Launcher! It's as simple as that.


If the level's named after one containing a wall safe, such as The Bloody Mary, it will open up that dialogue box once interacted with. This will work for Puff's Desk, too.
General Tips for Better Design
Here are some general tips that are too small to go in their own section, but too good to bear in mind nonetheless.
  • Test your level with only the .32 Revolver. A good level is completable with only the starting weapons, don't assume the player is using a specific loadout.
  • Don't place objects like Ash or weapons on top of interactive objects. It's always irritating if you need to stand in a very specific place to pick up a weapon or complete the objective, instead of just taking cover even when there's no enemies around.
  • Don't expect players to land every shot, there should be enough weapons that they can miss a fair amount and still be able to complete the level without resorting to fisticuffs.
  • Be sure to add multiple routes through a level, at least a vent or two. It's not very fun if all the choice the game sells itself on is stripped away in favour of walking down a long corridor with enemies in it.
  • Be mindful about placing lights, as too much of them can cause the level to lag.
  • I would advise against particularly large levels, as dying right at the end of those and having to clear out six whole buildings of undead a second time is more frustrating than anything. That being said, large levels can be fun if executed properly.
  • Enemies can get confused if stairways are too close together, and use the wrong one. Also if stairs are too close to walls enemies can sometimes go through them. Be mindful of where you're placing them.
  • TEST YOUR LEVELS! If you save them in the folder (deadbolt_game) you can play them without uploading them first, so make sure the level isn't broken or lags too much. Always be sure that the level files have .nc extension in their names, since the editor will never automatically set it up for you and the game won't be able to identify levels and you or anyone else won't be able to play them.
50 Comments
Chriszeltin 30 Nov, 2024 @ 11:37am 
thanks sir
Fungus Knight 30 May, 2022 @ 5:04am 
great guide
JAG  [author] 17 Sep, 2021 @ 2:36am 
Yep, all workshop levels can be accessed via:
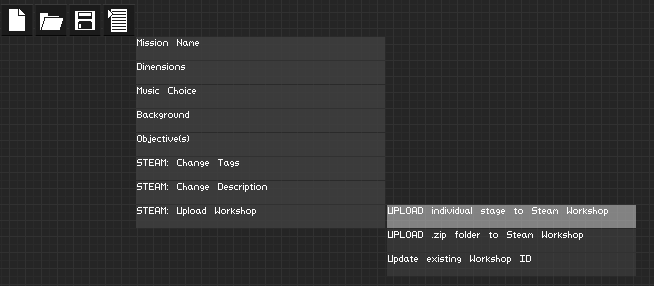
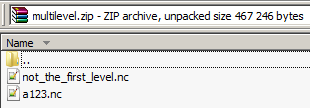
C:\Program Files (x86)\Steam\steamapps\workshop\content\394970\
nuklearboysymbiote 17 Sep, 2021 @ 12:27am 
hi is it possible for me to access a level i got from the steam workshop in the editor? thanks
Square_Rabbit  [author] 10 Feb, 2020 @ 3:38pm 
To make a shotgun trap fire instantly, place it directly above or below the pressure plate, then offset it a little by holding ctrl and moving it. If the shotgun is directly above or below the plate it won't fire, but moving it a couple of pixels means it'll shoot instantly.

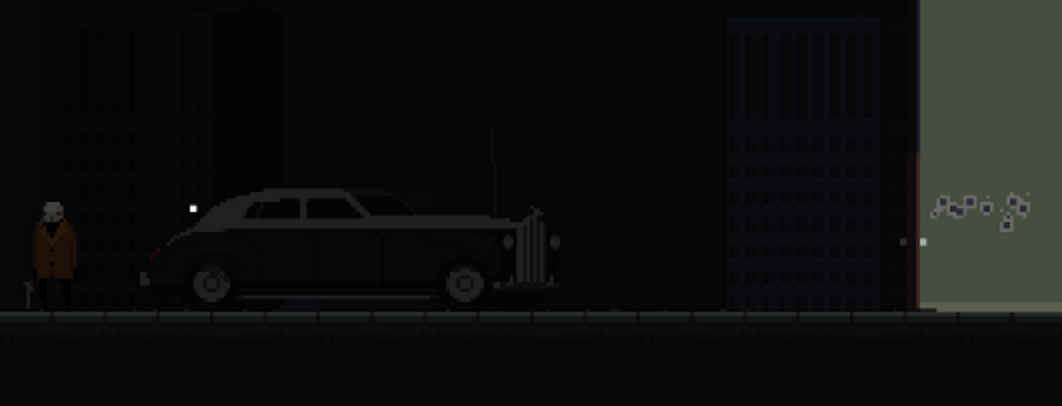
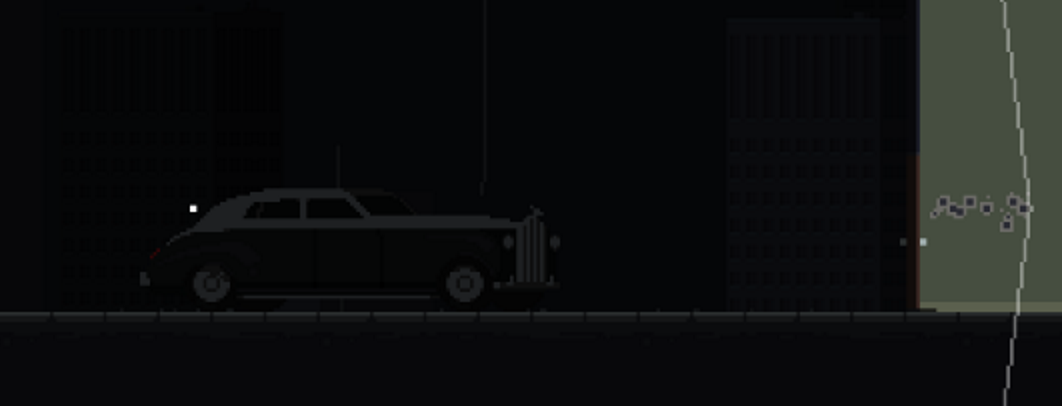
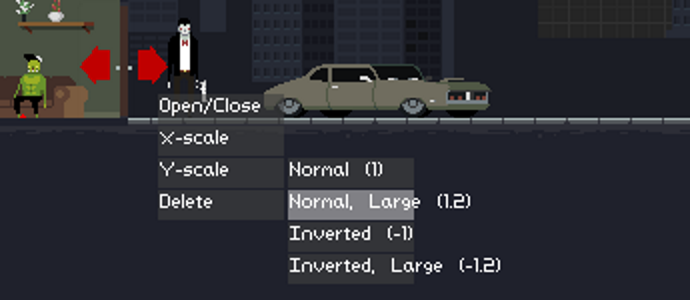
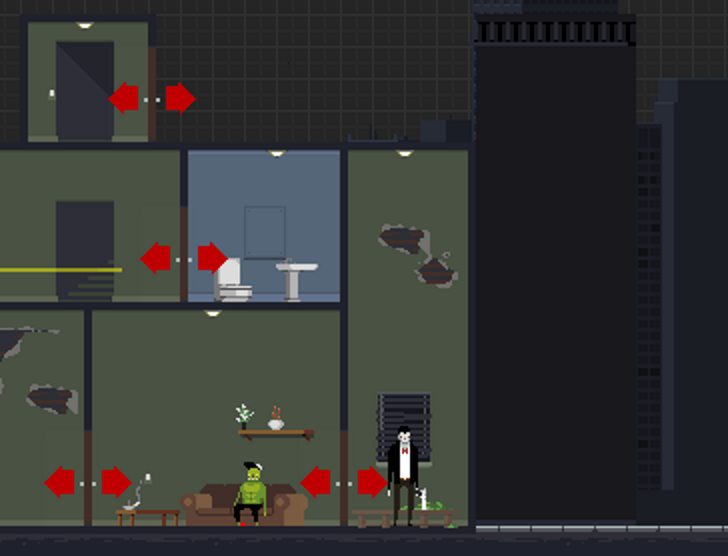
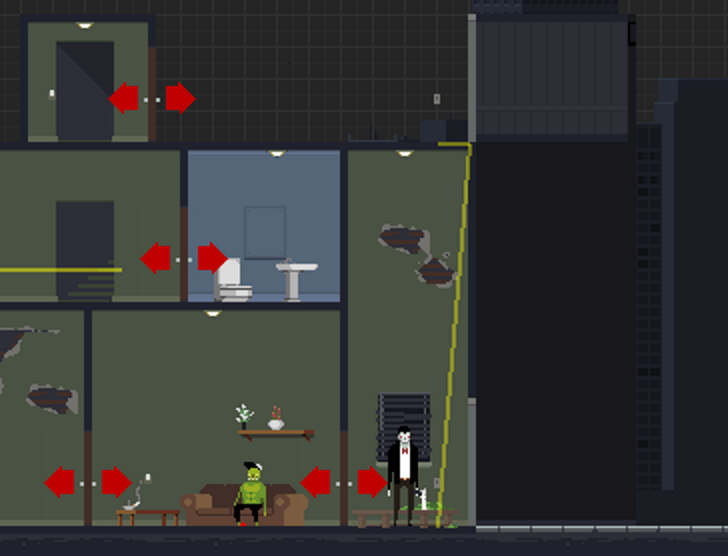
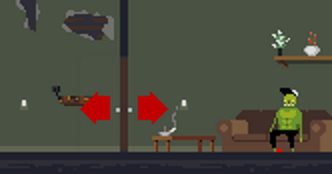
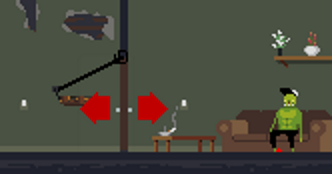
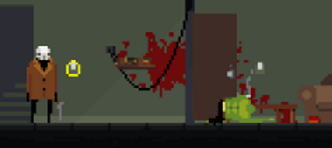
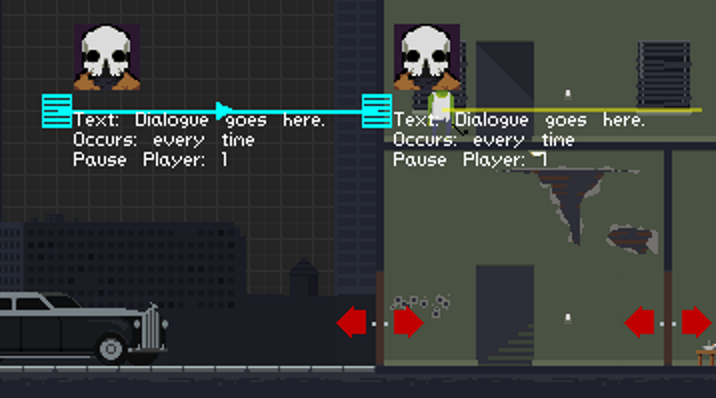
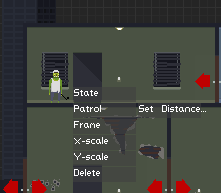
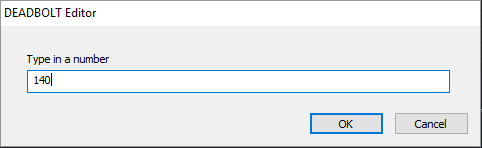
It can be as far up or down as you like - only its position on the x-axis affects the wire's speed.
Tay-Tech 10 Feb, 2020 @ 3:02pm 
Follow-up: Got the trap going. Just need to figure out how to edit the wire so I can set it so it does not have an x-axis and make the effect instant
Tay-Tech 10 Feb, 2020 @ 1:21pm 
Apologies for the request for handholding, but I admit I got a little lost. I placed some streets out of bound with a bully and a shotgun trap in between, and a trap/pressure plate below the vent leading to the room where I want the cutscene/message to occur. I am a little lost on the exact order to place things next, to make the cutscene pop up when the pressure plate is stepped on
JAG  [author] 10 Feb, 2020 @ 12:34pm 
If it's any help, the Destroy trigger works with more than just enemies - it's more of a "activate this when a property is changed" trigger, so you can make it work with a lot of stuff - picking up a weapon, taking cover, opening a door (I think?), etc. I've seen entire algorithms created with just Destroy and Spawn triggers, so play around and see what you can come up with.
Tay-Tech 10 Feb, 2020 @ 12:31pm 
I was looking at the Message Box item in the Objectives tab, hoping I could use it to leave a message, but couldn't find it in any guides. Still, thank you for the advice, I shall keep the alternative in mind!
JAG  [author] 10 Feb, 2020 @ 12:21pm 
I believe what you're thinking of is the actual Cutscene object, located in Triggers. The most common way to make a cutscene play out when you want is to combine it with a Destroy trigger. If you want the cutscene to play at a specific location, the most common way is to place a trap plate at that spot, connect it to a shotgun trap out of bounds, and the off-screen death that is caused by the trap will make the cutscene play out.

For instant effect, make sure that the wire has no x-axis length. To hide the wire, connect things as follows:
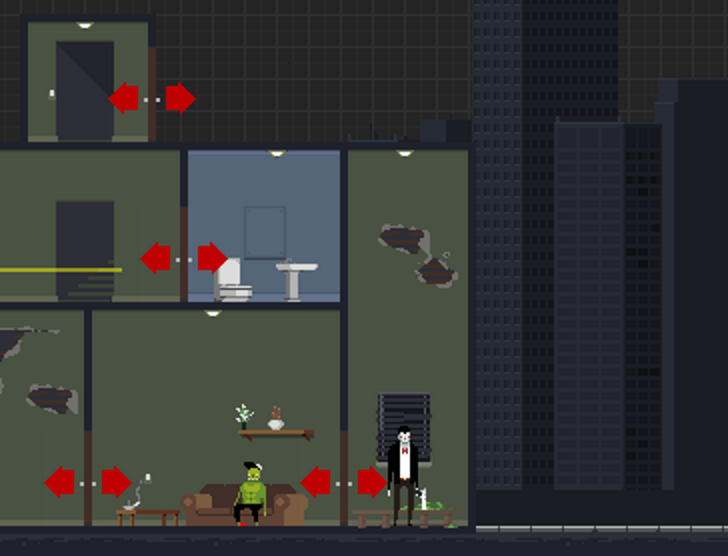
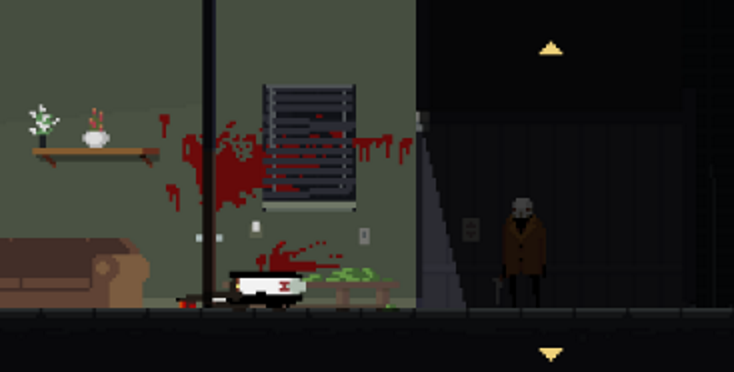
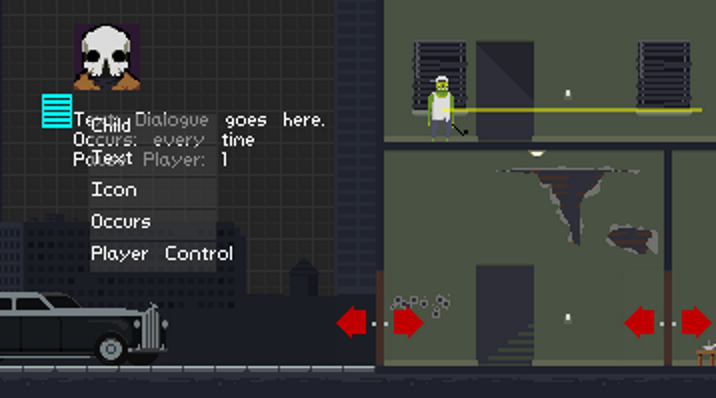
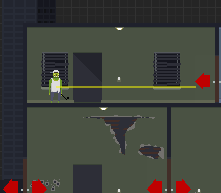
Destroy Trigger: any object (that can't be destroyed) as Parent, Spawn trigger as Child
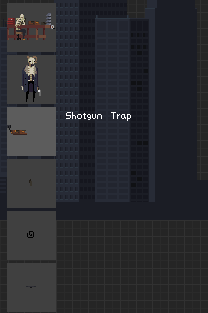
Spawn Trigger: shotgun trap (not the wire nor the plate) as Child.

Oh, and just like that, you reminded me to add that kind of stuff to the guide. I've been thinking of revamping it and merging it with other guides, but for now I hope my comment is enough.