Killing Floor 2

Killing Floor 2

926 ratings
Suicidal and Hell on Earth: A Guide (v1059)
By FeelZeSchadenfreude
A team guide towards how to hold on Suicidal and Hell on Earth difficulties.

As to prevent confusion, I will note that this guide is, obviously, PC only, and does not include any betas, but only the main version.

v1059 edits are in progress.

Steam community guides sometimes have issues with formatting correctly. If the formatting looks off, refresh the page.
7
4
   
Award
Favorite
Favorited
Unfavorite
A note from the author
As of 4/27/2018, I will put this guide on indefinite hiatus, as I anticipating taking a long, if not permanent, break from the game due to my intense disappointment with the game design direction. I no longer trust TWI's ability to judge good feedback from bad, nor do I trust that they have good faith intentions to balance the gameplay. It has already progressed to the point where I do not believe the base unmodded game to be worth playing anymore.

Judging by the most likely interpretation of the most recent teasers the mercenaries are going to receive stronger and stronger weapons, while new enemies are going to be introduced that, as of now, appear to be more frustrating to fight against compared to the existing zed lineup. The M99 AMR is supposed to be the highest direct impact damage weapon in the game, which likely means it is higher damage per shot than the railgun. The railgun was already an unbalanced and overpowered weapon, and an upgrade over it was not needed.

There has also been a recent trend of enemies that by design force you to aim at center mass by incorporating mechanics that make headshots, and by extension aiming skill, obsolete. The elite alpha gained a helmet that increased his head health to the point that it was easier to simply aim at the legs, which in practice just made him a tankier elite alpha. The quarter pound is extremely unusual in that its head health is not that much lower than his body health, making taking the time to aim for the head produce little to no reward. The enemies in the most recent teasers are robots that explicitly do not die when decapitated.

The ability to upgrade weapon damage is also extremely easy to mess up the game with, as certain weapons are already very close to reaching new, potentially game breaking weapon breakpoints. For example, the UMP, with a base damage of 45, only needs 1 extra point of damage to start decapitating gorefasts off-perk, which would give giant killer perks with limited self defense capabilities by design a powerful tool to eliminate the weaknesses that balanced their large zed killing capability. And that is just one example of many.

I have seen no acknowledgement that TWI understands just how thin the margin for error on these issues can be. This game is steadily becoming unrecognizable. All I have seen is statements that they are listening, but nothing to indicate that they understand the issue. Or care, for that matter. Facta, non verba.

It's been a good run for me. Good luck out there, but I'm out. Hopefully the guide still ages well in my absence.

-FeelZeSchadenfreude

UPDATE: 5/17/2018

Welp, here comes the 6p HoE FP one shot. It begins.

https://www.youtube.com/watch?v=Ns4aFuT1tJ4
About this guide
This guide is not a meant to be numbers guide, but it will bring up the numbers when they help explain key concepts. Rather, is is the practical application of these statistics that is the focus of this guide. It is long and covers ideas that I hope most of you already know at some level, even if you haven't put it in words.

I also assume that you possess some basic knowledge of the game. I expect that you know what each zed is named, the names and icons for perks and weapons, the basics of positioning, and the very basics of what triggers both scrakes and fleshpounds to enter rage. If you do not know these things, then go to the wiki and learn.

Like all guides there will be an element of opinion in this one. Specifically, my own. I will do my best to base my writing in objective fact, but I do not claim to be completely free of bias.

My intention is to outline the principles of team composition, behaviors, and decisions that I have observed lead to the highest probability of success on Suicidal and Hell on Earth (HoE) difficulties. This guide assumes a 6 man game and is meant primarily for Hell on Earth camping strategies. Kiting is mainly mentioned here in the context of when camping is no longer possible.

This document is geared towards explaining how to create the highest probability of winning. You can ignore everything and still win, but in the process you will take unnecessary risks. You might not find the methods explained in here fun. Some of the strategies, like berserker walling, are downright boring (to me). But they work, and in here that is all that matters.

This guide is not concerned with what you or I consider fun. Enjoyment is subjective. Enjoyment is for the individual, not for the team. A guide for having fun is not a guide, but an opinion piece. This guide is only concerned with one thing, and that is winning.

This guide does not care about what is viable or what is possible with your individual level of skill. Individual skill varies, and accommodating all of the possible levels of skill in the playerbase is impossible. As a result this guide will be, by nature, elitist, as it is only concerned with the the most efficient methods, instead of all possible methods that might work. I don't care what works for you. I care about what works best.

The guide is only concerned about winning with the minimum amount of risk. I don't care about your desire for kills counts. I don't care about flashiness or style. I don't care about your need for xp. I don't care who ends up on the leaderboard. I don't care if you like certain weapons or don't like them. I only care about winning. If the easiest path to victory means that you should shoot, then shoot, If the easiest path to victory means that you shouldn't shoot and let somebody else do the job, then don't shoot. If the easiest path to victory demands that you sacrifice your life to let a more important player survive a fatal blow, then go ahead and die for the greater good.

Many things are possible in this game. The definition of what is possible is different with every team. It is possible to hold Catacombs with 2 sharps, no demo, and no berserker.


It is possible to win maps without a medic.

It is possible to win HoE matches, standing in open areas surrounded on 4 sides by zed spawns, without ever buying tier 3 or higher weapons. And this was BEFORE HoE zed speeds got nerfed, before the gorefiend nerf, and before the implementation of spawn rate scale downs on player deaths.

It is possible to win solo games with nothing more than 9mm. I shot Hans to death with it.


In conclusion, if you're good enough at the game you can get away with a lot of stupid ♥♥♥♥ , but that doesn't make it not stupid. Being able to mentally separate what you can get away with and what is optimal is key to understanding this guide. Nearly everything can be "viable".

And when nearly everything is viable, "viability" becomes useless as a measure of worth or standard for comparison.

What is possible and what is optimal are not the same. What is possible varies because some players are better than others, and can afford to take more chances.

What is optimal is universal, because no matter how any of us play the game, the underlying mechanics are identical. And there will always be 1 thing that is optimal. This guide seeks to explain what is optimal, and why it is optimal.

It is up to the individual player to decide how much to deviate from the optimal strategies due their individual preferences. I'm not here to tell you not to have fun. I'm here to tell you what works best. Use that knowledge how you see fit.

What I hope to accomplish with this guide is to not merely tell you what sort of loadout is best, or team composition is best, or camp spot is best. What I hope to do is to teach you the ways of thinking that will let you think for yourself on these issues, while dodging the logical pitfalls that prevent many players from reaching their full potential.
For those who want the numbers
A comprehensive collection of KF2 numbers information is found here

The big ole doc of everything[docs.google.com] (credit goes to simple cat)
http://steamproxy-script.pipiskins.com/sharedfiles/filedetails/?id=430466813


Shots to kill (credit goes to Fauxy_)
http://steamproxy-script.pipiskins.com/sharedfiles/filedetails/?id=511161753

The most important takeaways are

  • Perk damage modifiers are additive, not multiplicative. A 30% damage boost stacked on a 20% damage boost is a 50% boost, not a 56% boost.

    This value is then multiplied by hitzone factors as well as specific weapon weaknesses.

  • Modifiers that increase the speed or rate of something by X are more accurately described as reduce time to do something by X. For example, a 25% increase in rate of fire is actually reducing the time between shots by 25%. So the time between shots is 75% of what it used to be, which is actually an effective 33% increase instead of 25%.

  • Some weapons, in particular shotguns, rifles, and higher tier handguns, have penetration abilities.

    Every weapon has a base penetration stat X. This can be modified by player skills and perks.
    Every different zed has a penetration resistance stat Y1, Y2, Y3, etc.

    When zeds with penetration resistance stats Y1, Y2, Y3, etc. are lined up and shot with a weapon with penetration power X, this is what happens.

    Zed 1 takes full damage. Calculate X - Y1, if it is above 0 the shot penetrates.

    Zed 2 takes (X - Y1)/X proportion of full damage. Calculate X - Y1 -Y2, if it is above 0 shot continues to penetrate.

    Zed 3 takes (X - Y1 - Y2)/X proprotion of full damage. Calculate X - Y1 - Y2 - Y3, if it is above 0 shot continues to penetrate.

    In table form
    Zed position in line
    Penetration resistance
    Proportion of damage taken
    Remaining penetration power (must be over 0 to penetrate)
    1
    Y1
    (X-0)/X = 100%
    X - Y1
    2
    Y2
    (X - Y1)/X
    X - Y1 -Y2
    3
    Y3
    (X - Y1 - Y2)/X
    X - Y1 - Y2 - Y3
    4
    Y4
    (X - Y1 - Y2 - Y3)/X
    X - Y1 - Y2 - Y3 - Y4


  • Medical syringe has doubled recharge rate if used on another player instead of yourself and heals for 20 in multiplayer.

    Medic weapon syringe darts draw from a secondary ammo pool which regenerate at different rates. They all heal for a base 15 health except the Hemoglobin which does 20. Recharge rate modifiers increase the speed of the recharge, i.e. a 200% increased recharge rate on a lvl 25 medic means you take 1/3 of the time to reach maximum charge. Potency increases the heal amount of the dart, meaning that a lvl 25 medic will heal 22.5 health instead of 15 with the medic gun darts.

    Healing is capped at 10 hp/s. Putting more darts in a player heals more, but doesn't heal faster.

    Damage taken after getting hit by a heal dart will not be healed, as the max possible healing is the amount of missing heal at the moment the dart impacts the player hitbox.

    Healing reduces fire DOT and duration by 50%.

    Medic Weapon
    Ammo cost to fire dart (% of ammo pool)
    Time to full recharge
    Heal amount per dart
    Healing potential regeneration

    (i.e. healing per dart/time to recharge dart)
    50%
    15 s
    15 hp
    2 hp/s
    50%
    15 s
    15 hp
    2 hp/s
    40%
    12 s
    15 hp
    3.125 hp/s
    30%
    10 s
    15 hp
    5 hp/s
    40%
    15 s
    20 hp
    3.333 hp/s
Current major bugs and glitches (v1059)
Attempting to sell dual pistols sells them as a set instead of only one.

Demo's Mad Bomber increases explosion AoE outside of zed time.

Firebug Napalm provides 250% increase in DOT duration instead of 150%.

Zeds knocked down by dud explosive projectiles can potentially be hit by the dud multiple times, killing them instantly.
https://youtu.be/bi2Y-xbLDHA
Impressions on latest patch (v1059)
Abomination is easier than even the King FP. He's just so slow, no ranged attack either. If you manage to lose to him then the shame is entirely on you.
https://youtu.be/8tQV-bpvpzY

Pulverizer on demo is garbage. Yeah, give a melee to the one perk with the most reasons to avoid melee range.

Freeze thrower is overpowered as it gives everybody with 8 spare blocks freeze immobilization.

UMP potentially replaces the P90 as it 1 shots gorefasts unlike every other SMG.

M16 is better, but still bad.
Status of updates for latest patch (v1059)
Everything is In Progress.
Why do teams wipe?
The Anna Karenina principle applies. The term refers to the opening line of Leo Tolstoy's novel Anna Karenina:


Most teams that win are alike. They converge towards the same set of behaviors that are proven to work.

Teams that wipe often fail for various reasons. Because there are usually more ways to do something wrong than to do it right. And among the "right" ways to do things, there is always 1 optimal method.

For people that don't like the idea of an "optimal" or "best" anything in this game, or believe that player preference matters in this issue, let me present this argument for the existence of a "most optimal way to play Killing Floor 2".

  1. It's statistically almost impossible for a game of this complexity to be perfectly balanced. Given the number of variables (game mechanics), mediums (perk/skill choices), and constructs (strategies) that exist in the game, it is nearly impossible for Killing Floor 2 to be balanced in a way that makes every choice equally good.

    Not all perks are equal. Not all skills are equal. Not all weapons are equal. Not all status effects are equal. Not all team compositions are equal. Not all maps are equal. Not all hold spots are equal. Not all players are equal. Not all zeds are equal. Balance is the exception, not the rule.

  2. Even minor differences create imbalances. The magnitude is irrelevant. For example, dark maps make Commando better than SWAT because his zed health vision lets him see crawlers better.

  3. Skill can cover up weaknesses in gameplay choices, but that doesn't make the weakness not exist. A pro with a rock can beat an amateur with a gun, but the gun is still better than the rock.

Is there just 1 way to succeed? No.

But there is always 1 most consistent way to succeed. There is this optimal way, and then there is everything else. You must know what is optimal and why, even if you choose to ignore it.

The biggest difference between good and bad players is that bad players find what is fun and convince themselves that it's good. Good players can play for fun, but they don't lie to themselves that being fun means that it is optimal. They can pull out the A-game when they want to, but bad players can't. Bad players don't see a difference between playing for fun and playing to win, which is why they can't improve. Their fault isn't in their actions, but in their stupidity and unintentional selfishness.

I'm not requiring you to play optimally. You can do what you want. But be honest with yourself, and don't delude yourself into thinking that other players have to accept it.

"Fun" and "It's my playstyle" shouldn't be excuses for not getting better at the game. And your right to play your way does not mean your teammates have to tolerate you. Your actions affect your team, and vice versa. If you act like a prick, expect to be treated like one.

You might find optimal to also be fun. Or not. Because this guide is concerned with winning, it is focused almost exclusively on what is optimal, to try to teach you how to bring out your A-game even if you choose not to. And what is optimal often involves self-sacrifice and restraint.

Self-sacrifice and restraint are things that some people either don't have, or don't want to exercise. Both are often not fun. If you are incapable of these things, then this guide is not for you. You are free to be a selfish prick and do whatever you want. It is in your right. But then your teammate will have no reason to not also be a selfish prick, for you have thrown away any reason for him to care about you, as you have shown clearly that you don't care about him.

And the end result is that you shall fail together.

Every team wipe in the game is preventable. Every map is winnable. Every zed has an easy counter. All bosses can be defeated consistently.

I have personally beaten every map on HoE and I will tell you the ugly truth: nearly all the teams that wipe deserved to lose because too many players sucked. You will encounter players that are ignorant, stupid, selfish, and stubborn, and these teams will lose.

The players themselves are the biggest reason why they fail where others have succeeded. HoE can be easy, but only if you make it so.

The reasons why teams wipe can be generalized as thus:

Lack of knowledge:
  1. Lack of awareness of changes in game mechanics and gameplay basics. Normal and Hard are so easy that they breed bad habits, arrogance, and cover over the inadequacies of certain weapons, behaviors, and strategies. Suicidal has so few zeds than 1 or 2 good players can carry the team, fooling the rest into believing that they must be doing something right. The transition to HoE, where some weapons, perks, skills, and strategies just suck, does not go well for players who don't want to let go of their playstyles.

  2. Ignorance or poor execution of techniques for killing large zeds. With 1 exception, every perk kills from range. With 1 exception, every zed uses melee. Their goal is to make it through the players' killzones to the player himself. Large zeds can do this consistently, and due to this are the biggest threats. If a team cannot kill them efficiently due to lack of ability or knowledge, they lose. If you do not know the appropriate methods of large zed takedowns for your perk, then you must learn them. Your team doesn't care why you don't know them, only that you don't know them.

  3. A poorly chosen camp spot. Many new players do not take the time to think about why a spot is or is not good, and default to the spots they have seen being used in easier difficulties. You need to think critically about what makes a spot good, and then apply that to your decision making.

Lack of mechanistic ability:
  1. Poor team perk composition or levels. Team is missing vital capabilities such as a good large zed killer, or a heavy trash zed cleaner, or a medic to deal with chip damage. Underleveled players will lack basic abilities that are not merely optional, but de facto required for higher difficulty play. This last part is most relevant for the large zed killers.

Lack of coordination:
  1. Complete absence of player initiative or coordination. A bad plan is better than no plan at all. On HoE an uncoordinated and non-communicative team, whose sole thought is "The other guy will deal with that problem", has already taken the first, biggest step towards a wipe.

  2. Lack of understanding of perk roles and weaknesses. Players trying to do what their perk is not good at and not doing what their perk is designed to be good at.

Pure incompetence:
  1. Picking their "favorite" thing instead of the "best" thing when the team isn't strong enough to tolerate less that you playing your best. Your favorite perk or favorite weapon will not always be good enough.

  2. Lack of basic game sense or attention to visual and audio cues. The closest you can come to being actually blind or deaf. Don't be this guy who let two scrakes (that have very heavy footsteps) just walk up to him.


  3. Inability to control panic, glory seeking, selfishness, or the fight-or-flight response. Some players are incapable of self-control. Panic firing into calm large zeds, wandering off away from the team in pursuit of kills, abandoning your position without good cause, engaging in meaningless competitions with your teammates, all of these are examples of a player's inability or unwillingness to control their behavior for the good of the team.


We will examine all of these areas. Except for the last section, which I believe is largely a lost cause.
Terms and definitions
A list of terms and phrases that I may be using

  • the trash: all zeds other than scrakes, fleshpounds, and the bosses

  • the walking trash: clots, slashers, cysts, gorefasts

  • fast trash: crawlers, stalkers

  • elite trash: albino clots, albino crawlers, gorefiends

  • medium zeds: sirens, bloats, husks

  • the dance, the twitch: the panic animation of zeds that are burning or poisoned

  • large zeds, HVT: high value target, scrakes and fleshpounds and quarter pounds

  • FP, SC, QP: common abbreviations for fleshpounds, scrakes, and quarter pounds

  • dbs, double barrel: the boomstick

  • stun: when a large zed is standing but immobile due to the effect of a stun grenade or certain weapons or skills; a generic catchall term for incaps that keep the zeds head still.

  • ramboing, lone wolf, overextending: a player leaving the immediate vicinity of a camping spot without adequate team support

  • tier 1, 2, 3 and 4 weapons: refer respectively to the starting weapons and the weapons that cost around 650, 1100, and 1500 dosh

  • the damage fallacy: the tendency to assume that increased damage means decreased shots to kill

  • the scrake train: the buildup of a high number of scrakes while kiting or retreating

  • 6p: six player health

  • HoE: Hell on Earth

  • AoE: Area of effect, such as explosive weapons

  • DoT: Damage over time

  • DPS: Damage per second

  • hs: abbreviation for headshot

  • AR: Assault rifles

  • 40+ AR: ARs with base damage of 40 or higher, which are the AK12 and the SCAR.

  • tube-fed: Weapons that reload 1 bullet at a time and have a magazine size of more than 1.

  • REU: Rack Em' Up skill

Mechanics - Important concepts
The Damage Fallacy: Why increased damage doesn't always matter
The gut reaction of most players is that more damage is better. For bad players this is where the line of reasoning ends. Good players realize that damage is like money: it has no value unless it is doing something.

Damage, in and of itself, is not important. Damage is only a means to an end, which is killing zeds. Increased damage is only relevant when it reduces the number of shots to kill.


An example where increased damage doesn't matter:
A stalker on HoE has 75 body health and takes 90% damage from SMGs, giving it around 84 effective body health against SMGs.

A level 25 Swat deals 31 damage per bullet with a MP5, and 41 damage per bullet with the Kriss. Ignoring other factors such as rate of fire and recoil patterns, is the Kriss better than the MP5 at killing stalkers with body shots (let's face it, Swat's usually killing stalkers with body shots)?

It isn't. The Kriss will take 3 shots to kill the stalker, the same number of shots it takes the MP5. In order to 2 shot the stalker, the Kriss would need at least 42 damage.

An example where increased damage does matter:
A 6 man HoE scrake has 1584 head health and takes 90% damage from shotguns, giving it 1760 effective head health against shotguns.

A level 25 support with Fortitude does 760 damage with a double barrel alt fire with all pellets. A level 25 support that chooses Salvo instead will do 930 damage. When it comes to killing scrakes, is Salvo better?

It is. With Salvo 2 double barrel alts fires deals 1860, just enough to decapitate the scrake. Without it you need 1 more shot. It may just seem like 1 shot, but this is a 50% increase in the time and shots to kill.

Damage doesn't matter. Shots to kill matter. Damage that doesn't change shots to kill is meaningless.


Opportunity Costs: Good choices versus better choices
This game is full of mutually exclusive choices. If you pick the left side skill on a perk, you can't pick the right side, you can either pick Railgun or M14EBR as a sharp but not both, etc.

One of the fundamental rules is that what something does, or is capable of, does not matter if there is something better that you have to give up.

The classic example is the reasoning behind why very few supports ues the M4 Combat Shotgun. As noted in this section, the double barrel can 2 shot scrakes, which honestly makes it required on Hell on Earth. A lvl 25 support can carry 20 weight; the double barrel is 4 weight, leaving you 16 weight left over.

The M4 weighs 7, the AA12 weighs 10. You cannot have both of them with the double barrel. Picking up the M4 effectively means giving up the AA12.

The AA12 has nearly twice the spare ammo capacity, and 250% the magazine size of the M4. The M4 does more damage per shot, but falls victim to the damage fallacy. At lvl 25 with Salvo the M4 deals 325.5 damage per shell, the AA12 deals 217 damage per shell. Does this difference matter for 6 man Hell on Earth?

  • All Clots, Stalkers, Cysts, Crawlers, Gorfasts, and Slashers all have 125 or less effective body health against shotguns. 217 damage 1 shots them just as well as 325.5 damage.

  • Elite Clots (white ones) have 300 body health and 113 head health. 217 and 325.5 both 1 headshot it, making the body shot difference moot if you can aim.

  • Gorefiends have 250 effective body health against shotguns, and 85 effective head health. M4 can 1 body shot a gorefiend, AA12 needs 2 shots. Both can 1 headshot it. If you're good at aiming for heads, there is no real difference.

  • Bloats have 325 effective head health against shotguns. M4 can 1 shot, AA12 needs 2 to decapitate. But shaving 1 shell on the 5-8 bloats during a wave is simply isn't important.

  • Husks have 220 head health. AA12 needs 2 shots, M4 needs 1. Which doesn't matter because you're aiming at the backpack 90% of the time, and both 1 shot that.

  • Sirens have 141 effective head health and 460 effective chest health (the metal bits deflect pellets). Both AA12 and M4 can 1 headshot.

  • Scrakes should be dealt with using the double barrel.

  • Fleshpounds on HoE 6 are on a case by case basis.

So due to the damage fallacy the M4 has few advantages over the AA12, while having severe disadvantages in the form of smaller magazines, less spare ammo, and a slower rate of fire. Taking the M4 makes it impossible to take the AA12 without giving up the double barrel, so most high level supports just don't take the M4.

The same principle of opportunity cost applies to skills. A support that chooses Fortitute instead of Salvo gives up the ability to quickly deal with scrakes.

How good something is doesn't matter. What matters is if it's the best.


Diminishing Marginal Returns: Why at some points you don't need more of a good thing

Diminishing marginal returns means that at some point, adding more of a good thing will not produce much of a difference. Support shotgun penetration is a good example of this.

Support at 25 already has a 500% penetration bonus, which is already enough for 99% of situations. At level 15 you pick between Armor Piercing Shot and Tight Choke skills. I will show that Armor Piercing Shot provides value, but increases the penetration past the point where it is pointless.

The Background:
Shoguns have a standard penetration stat of 2, the perk at level 25 adds another 5 penetration power, and the Armor Piercing Shot skill itself can add 4 power. So a level 25 support has a penetration stat of 7 on his shotguns, or 11 with Armor Piercing Shot.

The Math:
Most trash zed have a penetration resistance of 1 - 1.5. Cysts, clots, and slashers have a penetration resistance of 1, meaning that that with a penetration power of 7, a level 25 support can shoot through 6 cysts to hit the 7th, with the first cysts taking full damage (7/7), the 2nd taking 6/7th of the full damage, the 3rd taking 5/7th, and the 7th cyst taking 1/7 damage.

Given the cyst body health of 100 on Hell on Earth (stats shared by clots and slashers), let's assume the shotgun is the one with the least damage per shot, the medic shotgun, which does 20 damage per each of it's 6 pellets, for a total of 120. Assuming a level 25 support with Salvo, that damage is 186 per pull of the trigger. With all of the pellets hitting that is enough damage to body kill the 4th zed in the line. Armor Piercing Shot only improves penetration to the point where you can kill the 5th and 6th cysts in the line, as it won't be able to kill the 7th and beyond.

The Marginal Return
So Armor Piercing Shot lets you go from killing the 4th zed in the line to killing the 6th. That is, strictly speaking, an improvement. But how often does that matter? Almost never. You rarely see 4 zeds lined up perfectly, let alone 6. That is where the marginal value of the skill (letting you kill the 5th and 6th zed) is so low it is might as well be worthless.

And then there is also the opportunity cost. Taking Armor Piercing Shot means giving up Tight Choke. Tight Choke extends the support's range. And it also improves dps by concentrating the shotgun pellets into a space tight enough that all of them can hit a large zed's head. And incidentally it helps with shotgun penetration by making the spread tight enough so that all pellets can go through a line of trash zed.

The marginal return of your skills and weapon choices (What does this let me do that I couldn't do before?) need to be weighed against the opportunity cost of your decision (What am I giving up by making this choice?).
Mechanics - Important concepts (cont.)
Occam's Razor: The hidden advantage of the 1 shot kill

The importance of the 1 shot kill relies on 2 very simple concepts:


1. There is no significant difference between a wounded zed and a healthy one. Both can kill you in the same manner. The only difference is between a live zed and a dead zed.

2. The more moving parts an action involves, the more chances than a mistake in a single part will cause the whole thing to fail.


Compare the mechanics of the 2 sharpshooter subclasses, Railgun and M14EBR, against a scrake.

Headshots to kill:
Railgun: 1
M14EBR: 10 (assuming LLRL)

The chance that a sharp will hit a headshot with the equipped weapon: 95%

Chance of a dead scrake within 1 Railgun headshot: = 95%
Chance of a dead scrake within 10 M14EBR headshots = (0.95)^10 = 59.87%

Does this mean that the M14EBR build is incapable of dealing with scrakes? No. It just means that it is considerably harder to reach the maximum theoretical efficiency of the build.

This is not only a large zed killing concept. The same thing applies to the trash killing weapons and perks.

Gorefiend
Headshots to kill:
AK12, Level 25 Commando w/ Hollow Point rounds: 2
Kriss, Level 25 Swat: 4

The chance of a headshot with the equipped weapon per pull of the trigger: 95%

Chance of a dead gorefiend within 2 AK12 headshots = (0.95)^2 = 90.25%
Chance of a dead gorefiend within 4 Kriss headshots = (0.95)^4 = 81.45%

This means that commando's advantage in efficiency against gorefiends is more than just the fact that it only has 50% of the shots to kill with perfect accuracy. With 95% player shot accuracy it is, relatively speaking, 10.8% more likely to kill the gorefiend within 2 shots than the swat is to kill it within 4.

In this game anything that requires multiple shots follow this rule: You fail unless everything goes right. There is no such thing as a 95% kill. There is only 100% kill, and 0% kill. Unless you are a human aimbot with functionally 100% accuracy, this means that the fewer shots needed the kill the more likely you will reach maximum efficiency.

Weapons and perks with fewer shots to kill have the advantage of only killing faster, but also are more likely to succeed in killing with the theoretical minimum number of shots needed.

Concentration of force: Creating unfair fights and leveraging available firepower


The first and foremost rule of the later waves of HoE games: if you find yourself in a 1 on 1 fight with a large zed accompanied by any trash, somebody screwed up. It could be you. It could be your team. But never get into a fair one on one fight if you can help it.

Many people assume that the firepower of a team increases linearly. 2 players having twice the firepower of 1 player, etc.

That is false. The force multiplier is actually quadratic, the number of players squared. In this case 2 players will actually have 4 times the firepower of 1 player. For those more fascinated by the history of the theory of force concentration from Napeleon and onwards, that can be found in plenty of online sources.

The reason why the equation is quadratic is because more firepower means less time to kill and less risk.

For example, lets say 2 players theoretically capable of soloing a fleshpound take on 2 fleshpounds separately. The problem is that either 1 or both can screw up in any number of ways, leading to 1 or 2 uncontrolled and raged fleshpounds.

However if the 2 players take on 1 fleshpound at a time, they can easily annihilate the first one with minimal risk. And then turn their attention to the other fleshpound and annihilate it too. This is because when 2 players focus fire on 1 target at a time, the target gets down twice as fast, and there is less risk of needing to reload before the fleshpound is dead.

The consequence of this is that when dealing with large zeds the team's firepower should be focused on 1 large zed at a time. No player should be forced to take on 1 without backup either there or close by.

The Goldilocks Problem: The issue with middle of the road approaches

Before we start, what is it that I mean by a "middle of the road approach"?

A middle of the road approach is what many people would call "jack of all trades, master of none": excelling at nothing, at least minimally useful at most things. Some players may be tempted into thinking this is a strength.

The truth is the complete opposite. Optimization is often called min-maxing for a reason. The reason being that mediocrity in all things ignores the fact that all things are not equally important. Being okay at everything is far less appealing when you realizing that not everything is important. Only some things are important, and circumstances will determine which of those things are more important than others.

Lets say you join a game in progress of 5 players, with the following perks:


The team already has a healer, 2 actually if the commando has a medic rifle. The team already has more than enough trash killing capability. The team already has a tank. Adding more to these capabilities is pointless due to diminishing returns.

What this team lacks most is a large zed specialist. The greatest value you can provide is large zed killing capability, and nothing else you bring matters because those areas are already covered.
So join as a demo or a sharpshooter, or if you're confident in your skills any generalist perk with good large zed takedowns, like gunslinger, support, or M14EBR sharp.

Killing Floor 2 is a game of specialization. It is inherent in the perk system and the weapons. Intentionally pursuing a jack of all trades approach begs the question: what are you actually good at? Is what you're good at actually important? Why does the team need you, and will they notice if you did not exist? Is there anything important that you can be relied upon to do well enough for the team to actually depend on you?

That therein is the problem with middle of the road approaches. The answer to the question of "What are you good at?" is simply "Nothing". If you are good at nothing, then you have no value because chances are that there is something else that can do what you have been doing, but better.

In a team game of 6 players, it is nearly impossible for the team to be perfectly balanced in all respects. There will always be at least 1 or 2 areas where it is, relatively speaking, most deficient. There are the things that actually matter. Picking a middle of the road approach does not address these points as well as picking a more specialized approach.
Mechanics - Sui and HoE changes
There are a myriad of changes that occur in suicidal and HoE. In general you get less cash, the zeds get more health, faster reaction times, and stronger attacks. But the following are the most relevant ones.
  • All the zeds are Olympic runners, they're faster and more likely to sprint. Consequentially the ability to 1 shot zeds become more important became missed shots and body shots means wasted time, and wasted time means that the zed horde closes the distance. Range also becomes a factor since the farther away you can kill the horde from, the more breathing space you have when you need to reload. The speed of the zed also makes it very easy for players that are out of position to be surprised, surrounded, and subsequently eaten.

  • Husks get a flamethrower attack that is almost insta-death to non-firebugs. This argubly makes groups of 2 or more husks *THE* most dangerous close quarters enemies in the game. Do not underestimate how much damage these things can do. Depending on your distance from the husk 40 health per second is a safe estimate on the amount of health you're losing if you stand in the flamer.


  • The Scrake enrage threshold goes from 75% to 90% for suicidal and HoE respectively. To put it another way, the maximum possible health of a raged scrake, which needs to be put down as quickly as possible, goes up by 20% (90%/75% = 120%).

  • On HoE FP have a 33% chance to spawn enraged. On Sui it is a 33% chance.

  • The spawn rate of elite clots and crawlers (the white ones) is significantly increased from around 1% on hard to in the neighborhood of 15-35% on suicidal and HoE. Gorefasts have a 35% chance to spawn as a gorefiend on suicidal, and 45% on HoE. The elite trash zed have special abilities.

    Elite clots have much more health, and an ability called Rally that causes trash zed to sprint and gives all zeds near it +20% damage resistance and +20% damage output. You can tell if Rally is active by the zeds having red lights on their hands and the Horzine symbol under them.

    Elite crawlers explode like Hans' gas grenades when killed by something other than a headshot. The gas eats through armor and health and does noticable DOT to everbody except berzerkers with poison resistance.

    Gorefiends have much more health than Gorefasts, a better headshot block move, and a spinning attack that can easily eat through 50+ HP if all of them connect.

  • The chances of large and medium zeds spawning as a squad are increased at least from my own experience. The big ole doc of everything has a list of zed squads in the difficulty tab. If you see 2 Sirens, a Bloat, a Scrake, and 2 Fleshpounds, that's one of the squads.
Mechanics - Damage calculation
When using a weapon on-perk the base damage of the weapon is multiplied by the damage modification multipliers of the perk level and the perk skills. The perk multipliers are additive, not multiplicative. But they are multiplicative with the hit zone and weapon vulnerabiltiy multipliers.

For example

AA12 with a level 25 support using Salvo

AA12 base damage per shot = 7 * 20 = 140
Level 25 multiplier = 1.25 (0.25 in calculation)
Salvo multiplier = 1.30 (0.30 in calculation)

Damage per shot = 140 + 0.25 * 140 + 0.30 * 140 = 217.0 damage

This adjusted damage value will be either

ROUNDED
Berserker
Demolitionist
Firebug
Swat
Field Medic
Survivalist
ROUNDED UP
Commando
Support
Gunslinger
Sharpshooter

This adjusted value is then multiplied by hitzone and damage vulnerability modifiers. These can be seen in the stats and mechanics spreadsheet.

Some weapons, in particular explosive projectiles, will deal from multiple categories of damage that will be calculated separately. Impact damage is calculated identically to how ballistic damage is.

Explosive damage is calculated by:
Explosive Damage = Base Damage x ((Proximity Percentage) ^ Falloff value)
or
Explosive Damage = Base Damage x ((1 - (Distance from target/Explosion radius)) ^ Falloff value)


I am almost certain that the distance is calcuated to be from the center of the explosion to the middle of the zed's chest hitbox.
Mechanics - Damage output
What is your effective damage output? It is easy enough to calculate how much damage exits the barrel of your weapon, but how much of that damage is actually relevant? This section seeks to answer this question and expand on related concepts.

Long term damage output = Continuity of Fire * ((Damage * Accuracy * AoE/Pierce factor) - Overkill - Bodyshot Waste)

Long term kill count = (Headshot kill to bodyshot kill ratio * Long term damage output) / Total zed health pool

Continuity of fire is a general reflection of how often you are shooting. It is takes into account your rate of fire, your magazine size, and your reload speed. Your rate of fire affects how quickly you can unload the damage at your disposal. Your magazine size affects how much damage you can unload before you are vulnerable and need to back off, as well as your reload efficiency. A larger magazine, assuming that your reload speed stays constant, means more bullets loaded per second for the reload animation, meaning that you reload less over the long term. Your reload efficiency is (Bullets loaded during reload)/(Reload time). However, make note that even a very high reload efficiency means nothing if the reload is too long. A long reload can be incredibly efficient, but if you can't find time to easily complete the reload animation then it is basically worthless.

Damage is just the raw amount of damage you can deal if everything hits. It is affected by hitzone and weapon vulnerabilites.

Accuracy is how much of your damage actually gets applied. Your damage doesn't matter if it completely misses. Affected by recoil and spread on the part of the players, as well as zed animations and stun grenades that can make it easier or harder to aim.

AoE/Pierce factor is to account for the weapons that can hit multiple targets, such as shotguns, flamers (ground fire), explosives, and certain rifles and handguns. Affected by penetration power and blast radius.

Overkill is to reflect the fact that only the damage that is needed to kill is relevant. Shooting a 100 health zed with a 100 damage weapon, versus a 500 damage weapon, produces no difference because the zed is just as dead.

Bodyshot waste is to reflect the fact that body shots do not lower zed head health. If a zed is killed with headshot damage that causes a decapitation, then ALL damage that was inflicted to the body was useless and wasted. However headshots do lower the body health, which creates a small exception to this rule. If the body health is low enough, damage to the head may kill the zed before it is decapitated. Bodyshot waste is 0 if it was a bodyshot kill.

Headshot kill to bodyshot kill ratio is what it sounds like. Zed health health is always lower than zed body health, and a headshot kill takes less damage to accomplish than a bodyshot kill, and results in a zed that is just as dead.
Mechanics - HoE Zed Health / Multipliers
All zeds with the exception of bosses have a separate body health and head health pool. Bosses only have body health, and the husk has an additional health pool for his backpack.

Damage done to the head health pool is also inflicted to body health, but not the other way around. Same thing regarding the health of the husk backpack.

If body health is depleted the zed will drop dead.

If head health is deplete by a low damage attack, or with little overkill damage, the zed will be decapitated but not die instantly. Extra damage from the decapitating shot will be inflicted to body health. From what I understand, when a zed is decapitated it loses additional body equivalent to at least 25% or more of its body health + the total damage of the decapitating shot, which is what determines if the zed is killed outright or put in a headless state.

Headless zeds can't use special attacks, are limited to the special pool of decapitated state attacks, have slower rotation speed, and will bleed out over time.

When the health pool of the husk tank is depleted it will blow up with the equivalent of its suicide attack, dealing damage to nearby zeds but not to players.

Zed health and hitzone multipliers
Zed
Body Health
Head Health
Hitzone Multipliers
Cyst / Clot / Slasher
100
20
Head - x1.1 / All other - x1
Elite Alpha
300
125
Head - x1.1 / All other - x1
Bloat
526
82
Head - x1.0001 / Cleavers - x0.2 / All other - x1
Crawler / Elite Crawler
55
20
Head - x1.1 / All other - x1
Gorefast
200
50
Head - x1.1 / Blade - x0.1 / All other - x1.
Gorefiend
400
150
Head - x1.1 / Blade - x0.2 / All other - x1.
Stalker
75
20
Head - x1.1 / All other - x1
Husk
600
220 / Backpack: 82
Head - x1.001 / Backpack - x1.5 / Husk cannon - x0.5 / All other - x1
Siren
230
155
Head - x1.1 / Neck - x1.1 / Chest - x0.5 / Hips - x0.5 / All other - x1
Scrake (6p)
3569
1584
Head - x1.1 / Chainsaw - x0.2 / All other - x1
Fleshpound (6p)
5310
1716
Head - x1.1 / Chest core - x1.1 / Gauntlets - x0.2 / All other - x1
Quarter Pound (6p)
1724
1228
Head - x1.1 / Chest core - x1.1 / Gauntlets - x0.2 / All other - x1
King Fleshpound (6p)
25812
N/A
Head - x1.1 / Chest core - x1.1 / Gauntlets - x0.2 / All other - x1
Hans Volter (6p)
38061
N/A
Head - x1.2 / Chest core - x1.05 / Backpack core - x1.05 / Left, right arms - x1 / Left, right forearms and hands - x0.2 / Legs - x1 / Exo suit - x0.8
Patriarch (6p)
18242
N/A
Head - x1 / Body - x0.8 / Tentacle (if used) - x1.3 / Abdomen, hips - x1 / Left arm, weapon - x0.1 / Right upper arm - x1.3 / Right forearm - x1 / Right hand - x0.5 / Left leg - x0.1 / Right leg - x0.8 / Right foot - x1
Abomination (6p)
28350 (body)

3150 (helmet)

12600 (chest plate)

9450 (spine armor)
N/A
Head - x1.1 / Axes - x0.2 / All other - x1


Mechanics - HoE Zed damage type multipliers
Unless otherwise stated, zed is neutral to freeze and ballistic shell damage.

Weapons vulnerabilities
Zed
Vulnerable to
Neutral to
Resistant to
Cyst
Ballistic_Submachinegun - x1.5, Ballistic_AssaultRifle - x1.5, Ballistic_Handgun - x1.01
Ballistic_Shotgun - x1, Ballistic_Rifle - x1, Fire - x1, Explosive - x1, Piercing - x1, Toxic - x1
Slashing - x0.85 (Slashing_Knife - x1), Bludgeon - x0.9, Microwave - x0.25
Clot / Elite Alpha
Ballistic_Submachinegun - x1.5, Ballistic_Handgun - x1.01
Ballistic_AssaultRifle - x1, Ballistic_Shotgun - x1, Ballistic_Rifle - x1, Fire - x1, Explosive - x1, Piercing - x1, Toxic - x1
Slashing - x0.85 (Slashing_Knife - x1), Bludgeon - x0.9, Microwave - x0.25
Slasher
Ballistic_Submachinegun - x1.5, Ballistic_Handgun - x1.01
Ballistic_AssaultRifle - x1, Ballistic_Shotgun - x1, Fire - x1, Explosive - x1, Piercing - x1, Toxic - x1
Ballistic_Rifle - x0.85, Slashing - x0.85 (Slashing_Knife - x1), Bludgeon - x0.9, Microwave - x0.25
Bloat
Fire - x1
Ballistic_Submachinegun - x0.35, Ballistic_AssaultRifle - x0.35 (Ballistic_AR15 - x0.4), Ballistic_Shotgun - x0.25, Ballistic_Handgun - x0.35 (Ballistic_9mm - x0.65), Ballistic_Rifle - x0.3, Slashing - x0.3, Bludgeon - x0.3, Microwave - x0.8, Explosive - x0.5, Piercing - x0.25, Toxic - x0.25
Crawler / Elite Crawler
Ballistic_Submachinegun - x1.5, Ballistic_AssaultRifle - x1.5
Ballistic_Shotgun - x1, Ballistic_Handgun - x1 (Ballistic_9mm - x1), Ballistic_Rifle - x1, Slashing - x1, Explosive - x1, Piercing - x1, Toxic - x1
Bludgeon - x0.9, Fire - x0.9, Microwave - x0.2
Gorefast / Gorefiend
Ballistic_AssaultRifle - x1.2, Ballistic_Shotgun - x1.6, Ballistic_Rifle - x1.25
Ballistic_Submachinegun - x1, Ballistic_Handgun - x1 (Ballistic_9mm - x1, Ballistic_Rem1858 - x1), Explosive - x1
Slashing - x0.8, Bludgeon - x0.9, Fire - x0.85, Microwave - x0.85, Piercing - x0.75, Toxic - x0.75
Stalker
Ballistic_AssaultRifle - x1.5
Ballistic_Shotgun - x1, Ballistic_Handgun - x1, Slashing - x1, Bludgeon - x1, Piercing - x1, Toxic - x1
Ballistic_Submachinegun - x0.9, Ballistic_Rifle - x0.85, Fire - x0.85, Microwave - x0.2, Explosive - x0.75
Husk
Microwave - x1.15
Ballistic_Shotgun - x1
Ballistic_Submachinegun - x0.75, Ballistic_AssaultRifle - x0.6, Ballistic_Handgun - x0.85 (Ballistic_9mm - x1, Ballistic_Rem1858 - x1), Ballistic_Rifle - x0.7, Slashing - x0.75, Bludgeon - x0.85, Fire - x0.5, Explosive - x0.75, Piercing - x0.5, Toxic - x0.25
Siren
Ballistic_Submachinegun - x1, Ballistic_AssaultRifle - x1, Ballistic_Shotgun - x1 (Ballistic_DBShotgun - x1.1), Ballistic_Handgun - x1, (Ballistic_9mm - x1, Ballistic_Rem1858 - x1), Ballistic_Rifle - x1, Slashing - x1, Bludgeon - x1
Fire - x0.5, Microwave - x0.85, Explosive - x0.85, Piercing - x0.5, Toxic - x0.25
Scrake (6p)
Ballistic_RPG7Impact - x4
Ballistic_Submachinegun - x1, Ballistic_AssaultRifle - x1, Ballistic_Rifle - x1, Slashing - x1, Bludgeon - x1, Microwave - x1
Ballistic_Shotgun - x0.9, Ballistic_Handgun - x0.8, Fire - x0.3, Explosive - x0.4, Piercing - x0.75, Toxic - x0.25
Fleshpound (6p)
Explosive - x1.5
Microwave - x1
Ballistic_Submachinegun - x0.5, Ballistic_AssaultRifle - x0.5, Ballistic_Shotgun - x0.75, Ballistic_Handgun - x0.75, Ballistic_Rifle - x0.75, Slashing - x0.5, Bludgeon - x0.6, Fire - x0.3, Piercing - x0.75, Toxic - x0.25
Quarter Pound (6p)
Microwave - x1, Explosive - x1
Ballistic_Submachinegun - x0.62, Ballistic_AssaultRifle - x0.62, Ballistic_Shotgun - x0.75, Ballistic_Handgun - x0.75, Ballistic_Rifle - x0.75, Slashing - x0.62, Bludgeon - x0.62, Fire - x0.37, Piercing - x0.75, Toxic - x0.31, Other - x0.5
King Fleshpound (6p)
Ballistic_Submachinegun - x0.5, Ballistic_AssaultRifle - x0.5, Ballistic_Shotgun - x0.75, Ballistic_Handgun - x0.75, Ballistic_Rifle - x0.75, Slashing - x0.5, Bludgeon - x0.6, Fire - x0.3, Microwave - x0.9, Explosive - x0.8, Piercing - x0.75, Toxic - x0.25, Other - x0.5
Hans Volter (6p)
Fire - x1.1, Explosive_RPG7 - x1.2
Slashing - x1, Bludgeon - x1, Microwave - x1, Explosive - x1
Ballistic_Submachinegun - x0.8, Ballistic_AssaultRifle - x0.8, Ballistic_Shotgun - x0.8, Ballistic_Handgun - x0.8, Ballistic_Rifle - x0.9 (Ballistic_RailGun - x0.9), Piercing - x0.8, Toxic - x0.1
Patriarch (6p)
Slashing - x1, Bludgeon - x1
Ballistic_Submachinegun - x0.5, Ballistic_AssaultRifle - x0.5, Ballistic_Shotgun - x0.4, Ballistic_Handgun - x0.5, Ballistic_Rifle - x0.5, Fire - x0.5, Microwave - x0.9, Explosive - x0.4, Piercing - x0.5, Toxic - x0.05
Abomination (6p)
Slashing - x1, Bludgeon - x1, Ballistic_Shell - x1, Freeze - x1
Ballistic_Submachinegun - x0.5, Ballistic_AssaultRifle - x0.5 (Ballistic_AR15 - x0.4), Ballistic_Shotgun - x0.4, Ballistic_Handgun - x0.5 (Ballistic_9mm - x0.65), Ballistic_Rifle - x0.5, Fire - x0.5, Microwave - x0.9, Explosive - x0.4, Piercing - x0.5, Toxic - x0.05
Mechanics - Afflictions/Incapacitations
Afflictions/incapacitations are the methods by which players can immobilize zeds or otherwise hinder their movements.

Weapons with afflictions abilities will stack their affliction power onto the target's meter with every successful weapon hit, and when the total stacked power exceeds 100 (or 25 for the EMP or 65 for bleed) then the zed is affected by the affliction for a specific duration. AoE damage sources with affliction powers, such as grenades and rockets, have their incap powers modified according to the zeds' distances from the center of the explosion. Explosion gives maximum amount of the given powers at its epicenter and minimum at the edge. Weapon powers scale up / down linearly with distances from the center of the explosion.

There are cooldowns for afflictions, and zeds will dissipate their affliction meter at a constant rate. Most incaps will dissipate at 20 power/s, with the poison and and fire panic at 10 power/s and EMP and 50 power/s.

Different body parts have affliction modifiers that make them vulnerable, resistant, or neutral to affliction power.

Raged fleshpounds and quarter pounds only take 25% of affliction power towards their meter accumulation.

The afflictions categories as as follows:

  • Knockdown
    The zed becomes a ragdoll and has to wait until he gets up. Only 5 zeds can be knocked down at any given time. Zeds will get back up after 1.5s. Knocked down zeds will die if they fall from 7.5 meters or greater.

    Zeds are almost always more vulnerable to knockdown when it is applied to their legs. For the bosses the most vulnerable spot is switched to the head.

  • Stun
    The zed becomes immobile and goes into a sleeping state. Scrakes will stand still and have stars circling their head. Fleshpounds will be standing but slouched forward. Stun is followed by wakeup animations.

    Zeds are almost always more vulnerable to stun when it is applied to their heads or to exposed chest cores.

  • Stumble
    Zed goes into "stumble" state in which it appears to trip or recoil from a weapon hit. Stumble animation and duration depends on the direction of the stumbling attack.

    Zeds are almost always more vulnerable to stumble when it is applied to their heads.

  • Melee hit / Gun hits / Reaction / Flinch
    Also known as a flinch stun. Whenever "hit" with an attack of enough weapon hit power the zed's AI will be paused for listed amount of time. The zed will appear to momentarily freeze in place. Gun hit / Melee hit can interrupt ZED's special moves (if listed power > ZED's resistance, ZED is not in cooldown and such move can be interrupted by design).

    Gun hits usually have no hitzone modification to effectiveness. Melee hits are usually most effective when applied to the head.

  • Snare
    Slows movement by 30% (x0.7 multiplier). Will stack multiplicatively with the speed debuff from bleed.

    Zeds are almost always more vulnerable to snare when it is applied to their legs.

  • Panic
    Caused by poison, microwave damage, fire, damage, and EMP. Cancels certain abilities and causes the zed to go into a flailing animation.

    Panic has no hitzone modification to effectiveness.

  • Freeze
    Caused by the sharpshooter's freeze grenade. Zed is frozen in place and immobile.

    Freeze has no hitzone modification to effectiveness.

  • Bleed
    Bleed. Bleeding is a ZED state, when bleeding ZEDs takes more incap power towards its incap meter, moves 30% slower (stack with Snare for total of x0.49 speed multiplier), does 30% less damage (x0.7 multiplier) and attacks 25% slower (animation-wise, as bleeding multiplies the duration of animation by x0.8). Bleed increases amount of the incap power taken by ZED: by default amount of the power given by damage type is "1 + perk incap bonuses", instead bleeding ZED take "1.3 + perk bonuses" amount the weapon powers towards its affliction meter. For the duration of bleed affliction ZEDs shrink in size, however their hitboxes remain the same. ZED affected by bleeding as long as it's stacking meter above the Incap Threshold.

    Bleed has no hitzone modification to effectiveness.
https://youtu.be/7N9QE8y8KMo


Mechanics - Miscellaneous items
A collection of uncategorized tips to make life easier for you, and to lower the blood pressure of your teammates.

Crouching reduces spread and recoil
Recoil is generally reduced by 25%. Spread reduction can be seen visually by enabling the crosshairs.

You can sprint backwards.
Try it.

Explosive projectiles will deal the impact damage at any range.
The idea that they have to not explode to deal the impact damage is a myth.

Railgun auto-aim mode deals 50% damage
The railgun is in auto aim mode by default. Alt fire will swap modes. You can tell if it is in auto-aim mode if you see targeting rectacles.

Demos and supports, stand back from the trader
Your teammates can't get supplies off you if you're too close to the trader, because the trader prompt will override your supply prompt.

Immobilized big zeds are the number 1 target of opportunity
If a big zed is stunned and you are not in immediate danger, pump bullets into its head to kill it faster, even if you did not initiate the stun.

If you are the player at the front of the group, crouch
The rest of us need to aim too, and do not enjoy scoping in on the back of your skull. Also, refrain from walking in front of big zed killers as they try to do their job, you will mess up their aim and cause their targets to switch directions. Especially relevant for sharps.

Reload cancelling
This cuts the time to reload dual pistols by roughly half, and vastly increases the skill ceiling of gunslinger.

  1. Begin the reload animation
  2. Hold down the primary fire button
  3. When you see the ammunition count go back to the full value, hit the bash button
  4. Some people prefer to spam primary fire when they hit bash, I don't know how effective this method is

    Here is a list of the time that is save by reload cancelling:
    Cat's reload animation cancel excel[docs.google.com]


It also works with other weapons

If you want to set reload cancelling to a bind, open console and type in:

setbind x "GBA_Fire | GBA_TertiaryFire"

Now the "x" key will reload cancel if it is possible to do so at the moment.

Selling 1 pistol from a dual pistol set gives you ammunition
If you have dual 9mm or some other dual pistol, and you sell 1, you get roughly the starting ammunition for a single pistol added to your ammo pool. (NOTE: No longer works as of 1053)

Buy pistols one at a time
If you have a single pistol and buy duals, you do not get extra ammunition.

For example, buying a deagle gives you 35 spare rounds. If you have a single deagle on you, and then buy the 2nd one to get duals, you do not get 35 more spare rounds. You end up with dual deagles with 35 spare rounds.

You need to buy 1 deagle, drop it on the ground, then buy another single deagle. Then pick up the dropped deagle. You will now have 70 spare rounds instead of 35.

Ammunition skill abuse
Very similar to the single pistols purchasing shown above.

Various perks have skills that increase carried ammunition. There is a way to have that extra spare ammunition without having the skill.

For example, with support Resupply Pack lets me have 174 spare AA12 shells instead of 150. However taking Resupply Pack means that I don't take Concussion Rounds, which would let me stumble raged fleshpounds. There is a way to have the benefit of both.

During trader time I make sure I have Resupply Pack (aka the ammunition skill). I go to the trader, and fully resupply all my ammunition.

Then I drop all my weapons, then I switch to Concussion Rounds (aka the not ammunition skill). I then go to pick up the weapons I dropped. My AA12 will still have 174 spare shells instead of 150.

If you change skills while you are still carrying the weapons, you will lose the spare ammunition.

I have also personally tested with the spare ammo skills of sharpshooter (including the extra grenades), demo, swat, and commando, and they all work. Doing this gives you the benefit of the extra ammunition skill, while keeping the benefit of the skill on the opposite side.
https://youtu.be/0NQIQhdUyjU
http://steamproxy-script.pipiskins.com/sharedfiles/filedetails/?id=913121624

Large zed bashing
Large zeds can be stumbled with bash attacks. I've done this with scrakes, both calm and raged, and calm fleshpounds. Have not tested with raged fleshpounds. Note that the stumble has a significant cooldown. The bash is extremely important for getting past large zeds that have spawned in chokepoints while kiting. It also tends to line up the head in a predictable manner for combo finishers.

Example below. He bashes towards the end of the combo.

Assist with kills but do not compete
The game will go a lot smoother if you don't compete for kills. Competing for kills makes people move out of position, creating holes in the defense. It messes up other people's aim as the zeds dodge and flinch. Don't do it

In particular if it is zed time, and you have a commando shooting at trash zed, let him have the trash so that he can extend zed time as much as possible.

The Test Map

The Test Map

Use the test map to practice your combos.
http://steamproxy-script.pipiskins.com/sharedfiles/filedetails/?id=643313659

The Origins of the HoE Meta
First of all, what do I mean by meta?

Meta, which is short for metagaming, is this:
Metagaming is any strategy, action or method used in a game which transcends a prescribed ruleset, uses external factors to affect the game, or goes beyond the supposed limits or environment set by the game. Another definition refers to the game universe outside of the game itself.

In simple terms, it is the use of out-of-game information or resources to affect one's in-game decisions.

The HoE meta is the product of using knowledge of non-obvious game mechanics and information to produce optimal strategies.

The HoE meta, despite the apparently complexity, all originates from a small set of objective truths that are clearly visible from game mechanics.

  • Head health is universally less than 50% of body health. It's actually even less when you consider the headshot multiplier.

  • Zed status is binary. There is alive, and there is dead.

  • Time, space, and player attention are resources too.

  • Scrake and fleshpound health are orders of magnitude greater than the health of lesser zeds.

  • Increased damage that doesn't change a breakpoint produces no practical difference.

Nearly everything in this guide, if you trace the line of reasoning back far enough, will come from these first principles.
Perks - Roles and diminishing returns
There are a number of distinct roles that perks can fill.

These ones are mandatory. If the team doesn't have the capabilities it will lose unless you have exceptionally skilled players.
  • Trash cleaner: Has ability to rapidly kill groups of small to medium zeds (crawlers, clots, slashers, cysts, bloats, sirens and husks, collectively called trash).

  • HVT killers: High value target killer. Can reliably solo a single scrake or a fleshpound.

These ones are optional or are map dependent. They are powerful, even necessary on certain maps, but not on all.
  • Knife-fighters: Perks that specialize in fighting at point blank ranges and functionally serve as tanks and choke point holders.

  • Team support: Provides buffs or supplies to teammates.

Teams need to be balanced because every role follows the law of diminishing marginal returns. For example, 2 commandos is not 2x as effective than 1 commando, because their abilities will overlap. 1 commando will call out stalkers just as effectively as 2, and can usually extend zed time just as effectively as well. You would be better off with a commando and a swat because the swat would bring his flashbangs, which commando doesn't have. Or a commando and a sharpshooter, so the commando can deal with trash without worrying about large zeds, and the sharp shooter can deal with large zeds without worrying about trash.

With a few exceptions perk diversity generally results in a stronger team. This fact is extremely important. Due to the diminishing marginal returns of overlapping skills and abilities, having multiples of a strong perk will not always outperform having a strong perk and a weaker perk that brings new abilities to the mix.
Perks - Why survivalist is suboptimal
Before the screaming starts, I must clarify that survivalist isn't bad in the sense that it can't work. An adequately skilled player will make it work. In the same way that a carpenter can pound in a nail with his hands if he really had to.

Survivalist is bad because it is always suboptimal. A waste of player slot. It is a walking showcase of how damage fallacy and Goldilocks problems combine.

He's a jack of all trades, but he uses everything equally well because he uses everything equally badly. He is free to do what he wants, because in the end every choice is one flavor of bad or another.

The perk has weaknesses where they matter, and strengths where they don't.
  • His damage boost often irrelevant due to the damage fallacy
    Survivalist has a 15% damage boost at lv 25. Everybody except medic and firebug gets 25%. His only damage skill raises melee by 10%. Every other combat perk but SWAT has skills that raise damage 25% or more.

    Survivalist's lack of a significant damage boost increases the number of shots needed before he hits a breakpoint that distinguishes him from a person using the weapon off perk.

    Example:
    Lvl 25 Support w/ Salvo shotgun damage compared with Lvl 25 Survivalist and offperk
    Number of shots
    Support (effective damage)
    Survivalist (effective damage)
    Offperk (effective damage)
    1
    1.55
    1.15
    1
    2
    3.10
    2.30
    2
    3
    4.65
    3.45
    3
    4
    6.25
    4.60
    4

    The number of shots at which point the support is guaranteed to be better than an player using a shotgun offperk is 2, because the support has a >1 shot damage advantage with 3.1 shots of damage versus 2 at offperk. Anything that offperk needs 3 shots to kill, support will do it in 2.

    Survivalist doesn't have the numbers to achieve this. With a 15% boost it will take 7 shots to get the damage advantage (7 x 0.15 = 1.05) needed to make his output better than offperk use. Every combat perk except Swat can get the necessary advantage over offperk usage within 2 shots.

    For nearly every reasonable weapon/zed interaction, a survivalist using a weapon is identical to a player using it offperk, and is vastly inferior to on-perk use.

    A level 25 Com can kill a 6p HoE scrake in 23 AK12 shots with Hollow Point Rounds. Off perk takes 36 shots. Survivalist level 25 takes 32 shots, which is just 4 bullets better than some lvl 0 firebug that bought an AK12 by accident. But since 36 and 32 are both greater than the AK12 default mag of 30, both are equally bad.

    Because survivalist can't hit breakpoints through skills, he is pushed to buying higher tier guns to get the same results. For example, commando can use his damage skills to enable him to 2 shot a gorefiend with his tier 3 AK12. Survivalist is incapable of doing this, and must use a tier 4 SCAR to get the same shot ratio with a 20 mag size weapon, compared to the potentially 45 mag size on-perk AK12. Survivalist requires more money to be less effective.

  • He lacks the secondary skills that raise the skill ceilings of weapon usage.
    • Shotguns: Lacks any penetration bonus. He is stuck at a penetration power of 2 compared to a level 25 support's base penetration of 7. That means he can only penetrate 1 zed at most, not counting crawlers and stalkers. The lack of Tight Choke restricts effective shotgun usage to nearly point blank. Also lacks support's passive ammo bonuses.

    • Handguns: Lacks the recoil bonuses that make pistols controllable near the max rate of fire. Meaning that he has to either crouch, ADS, or fire slowly.

    • ARs: No recoil reduction. No magazine bonuses.

    • Rifles: Shots to kill w/ the Railgun are identical to everybody else due to the damage fallacy. The lack of recoil reduction and firing speed increase makes the M14EBR hard to use.

    • Melee weapons: Lacks the parry bonuses and health regen/uber health that makes melee combat reasonably safe. Lack of Smash makes melee inadvisable against large zeds.

    • SMGs: Lack of magazine size bonuses erases the mag size SMGs need to compensate for low weapon damage per bullet and keep their kills:magazine ratio in an acceptable range.

    • Explosives: No siren resistance. Low ammo due to lack of demo's passive ammo bonus. Less resistance to self damage. Lack of bonuses to direct impact make the RPG-7 inefficient against scrakes.

    • Medic weapons: No buffs. His recharge bonus of 25% and potency boost of 20% are ♥♥♥♥♥♥♥ silly compared to medic's effective recharge bonus of 66% and potency boost of 50%.

  • The damage resistance is irrelevant in good teams.
    Your health does not matter until it reaches 0. Unless you are a berserker, damage resistance won't matter in a HoE capable team because you won't get damaged that often in the first place. If there actually comes a point where his 25% native damage resistance comes into play, such that if he didn't have that resistance he would have died, then somebody screwed up. If you're on a team where your resistance constantly becomes relevant, then you've grouped up with morons and you have bigger problems.

    For ranged perks, the best damage resistance in the game is having the positioning and damage to kill the zeds before they touch you. Survivalist creates his own need for this resistance because he just sucks at killing things.

  • The reload bonuses are the same ones the other perks have.
    You switch from the normal reload to the elite reload.

  • The level 15 skills are irrelevant.
    Ammo Vest is inferior to the perk based ammo skills, and unless you actually need the additional ammo, that skill is useless except for the inferior healing grenades which don't stack buffs like medic's can.

    Weapon Harness enables stuff like AA12 + RPG, but at that point you might as well be an actual support so that instead of a mediocre AA12 and RPG, you get a majorly buffed AA12 and a normal RPG, because a 15% damage buff for the RPG produces almost no difference, while a 55% damage buff difference for the AA12 (Salvo 30% + passive 25%) will mean a large difference in shots to kill. Similar things can be said for Railgun builds.

  • The tier 4 skills are also bad.
    The zed explosion perk will annoy any precision based perk near your, so your sharps, gunslingers, commandos, swats, and occasionally RPG demos will hate you for messing up their aim. The explosion radius multiplier also doesn't matter, because the radius of the M79 explosions is already large enough, and making it bigger only grants it a very small increase in effectiveness, due to the falloff mechanics of explosion damage in this game. As for the RPG the increased radius only comes into play with multiple fleshpounds that somehow are spaced far enough to not be caught in the regular explosion radius, but close enough to be caught in the enhanced radius. This doesn't happen often enough to be a survivalist instead of a regular demo. The only weapon where this has a use is the M16M203, which is an abortion of terrible weapon design as will be discussed later in this guide.
Perks - Survivalist is suboptimal, really
This section is solely to address the various excuses people come up with to convince themselves and others that survivalist isn't garbage.
  1. Survivalist can 2 headshot 6p HoE scrakes with a railgun and 3 headshot fleshpounds.
    Oh, shut up. EVERYBODY CAN DO THAT. A level 0 firebug can 2 shot 6p HoE scrake and 3 shot 6p HoE fleshpounds. It's not the perk that's doing the work, it's the weapon. The railgun is the most blatantly overpowered weapon in the game.
    https://youtu.be/yAysXLopB7o

  2. He's versatile.
    What does this even mean? And does it even matter? It doesn't matter how many choices you can make if every choice sucks. That is the position survivalist is in. Every possible choice sucks in one fashion or another. While many perks have obvious, brain-dead skill choices that aren't even really choices because one option is clearly better than the other, that is still better than having no good options in the first place. Other perks have choices that choose between winning the lottery and pound town, while survivalist usually chooses between pound town district 1 and pound town district 2.

    I've already outlined in detail why he sucks at basically at using every weapon in the game. For nearly all intents and purposes, other than the reload speed his use of weapons is identical to a person off-perking them because the damage boost is so low that it misses nearly every breakpoint.

    And even his "versatility" is in a way a lie of omission. Because even if every weapon sucks in his hands, some suck less than others. Due to the very nature of the *extensive* problems that the perk has, Survivalist only has particular use with 4 categories of weapons:

    1. High tier SMGS, because Swat only has a 25% possible damage boost and thus the SMGs lose less of their effectiveness when used off-perk. A fully leveled survivalist will only lose 10% of damage on SMGs compared to on-perk usage, which is small compared to potentially 40% damage loss on ARs, 40% on shotguns, up to 85% on rifles, up to 60% on handguns, 45% on explosives, and 40% on flame weapons.

    2. High damage per shot weapons so that he can reduce the impact of his non-existent damage boost by upping damage through weapon choice instead of skills. He if can't make a tier 3 work due to lack of damage skills, he'll have to buy a tier 4 to get the damage needed to hit breakpoints.

    3. Weapons that fire slow enough to ease his complete lack of recoil control.

    4. Something to parry/block with.

    So that boils down the effective arsenal to this
    P90
    MP5
    Railgun
    RPG
    M79
    DBS
    Single Deagle
    Single/Dual .500 Magnums
    SPX
    SCAR
    Crossbow
    Katana

    Which is basically the offperk weapons list of KF2. Let us go down the list of every other weapon and why it sucks for survivalist.

    Firebug:
    Everything, no Ground Fire, Heat Wave, DOT bonuses, or even the reload speed bonuses.

    Berserker
    Pulverizer: Heavy, no Smash
    Zweihander: No Smash or Parry
    Vlad: No Smash, damage is unnoticeable
    Eviscerator: No Smash
    Bone Crusher: No Smash, no Parry

    Commando:
    L85A2: It already sucks on Commando, and here it sucks even worse.
    AK12: Recoil uncontrollable.
    Stoner: No mag size bonus.

    Support:
    Everything, completely lack of penetration bonus makes them inefficient with mobs, no Tight Choke makes headshots unreliable.

    Field Medic:
    Everything, syringes recharge slowly and don't buff.

    Demo:
    C4: Only 2 stickies instead of 7.
    M16M203: The increased radius improves a terrible weapon to merely horrible.

    Gunslinger:
    M1911: Not enough damage
    Dual Deagles: Recoil uncontrollable.

    Sharp:
    M14EBR: Recoil uncontrollable, misses Gorefiend breakpoint, lack of the shooting speed boost from Marksman

    So no, he isn't versatile, because his only even remotely viable weapons are the ones that were already viable off-perk anyways.

  3. He requires skill.
    I don't care, I want results. Your skill only matters when it produces meaningful improvements in observable, measurable performance.

  4. He's good at surviving.
    The best defense is a good offense. Survivalist takes hits from encounters where other perks would have taken no damage simply because they slaughtered everything due to either killing in fewer shoots, shooting faster, having more bullets in a magazine, having better penetration abilities, i.e. the secondary skills that survivalist lacks.

  5. It's for players looking for a challenge.
    Doesn't change the fact that it sucks. I want results. Your subjective mental need has 0 importance to the rest of the team.
Perks - Levels needed for Sui and HoE
Picture shamelessly stolen from Ecfor.

Levels matter because the skills they unlock are game changers. I will list what I consider to be the absolute minimum level needed to attempt 6 man suicidal without having to be carried by the other players in your team.

On Hell on Earth you should be level 20 minimum. Failing to do so renders you dead weight, and your team will better off without you. Every additional player adds more zeds to the wave and more health to the large zeds. If they lack the ability to contribute more to the team than they contribute to the zeds, the team is better off without them. It disrespectful to your team, and no amount of skill will erase the fact that you lack fundamental abilities.

No individual player has the right to be carried by the rest of the team. Unless you are playing with friends, as a pub player I do *not* care why you are under level 20. Your motivations and circumstances do not matter to me. I only care that you are under level 20. Being carried is a privilege, one that your teammates can give or retract at will.

Are there players that can still pull their weight with low levels in the higher difficulties? Yes. Absolutely. But they are uncommon, the exceptions to the rule. They do not change the truth of the larger trend.

The larger trend is that good players tend to have many hours, lots of experience, and the common courtesy to know that being underleveled is incredibly selfish. Many hours means that their perk levels tend to be high. The spark of self-awareness means that they tend to not play underleveled in the first place since they know that it's annoying to the rest of the team.

Underleveled players are not necessarily bad. But only bad players tend to play underleveled.


For suicidal 6 man, the below are what I consider the suggested minimum levels.
  • Firebug: 20
    Heat Wave is absolute necessary to function without being carried because it is what lets firebug hold back raged large zeds and prevent you from being hit point blank with gorefiend spins.


  • Berzerker: 15
    The resistance skills are what will keep you alive. Not having the resistance to siren and poison damage, or the parry skill, means that siren packs and elite crawlers will chew through your health.


  • Commando: Variable, preferably 20
    Given that the perk is largely dedicated to killing trash zed, there are no absolutely necessary skills. Hollow Point Rounds at 20 lets you solo scrakes, but the major implication is that the damage boost lets you hit multiple breakpoints with various weapons, and the recoil reduction increases your effective range and enables effective use of the AK-12 and HMTech-401.


  • Support: 15
    Tight Choke is the basis for *all* large zed killing combos with support, because it decreases the spread of shotgun pellets to the point where all of them can be grouped onto a target the size of a zed's head. It also greatly increases the support's ability to hit targets at medium range.


  • Medic: Variable
    The major draw of medic is the healing power which scales with each level gained, but the largest power spike is at 20 where Coagulant Booster is. The skill can stack up to 30% damage resistance on a heal target which is the only thing than can consistently let player take multiple hits from big zeds without armor.


  • Demolitionist: 15, preferably 20
    Armor Piercing Rounds lets high level demos solo kill Scrakes with RPG headshots without enraging them. But the resistance to siren screams at level 15 is absolutely necessary to function.


  • Gunslinger: 15, preferably 20
    Rack Em Up and Bone Breaker are the skills that let gunslinger take out large zeds. Speedloader patches up his largest weakness, which is his constant need to reload, which matters in higher difficulties because the zeds are more numerous and faster. Skullcracker is a major component of his ability to kite large zeds.


  • Swat: variable, preferably 20+
    You need to be around level 20-22 ish to be able to killing a scrake with a flashbang and a magdump from the Kriss.


  • Sharpshooter: 15 (EBR build), 20 (Railgun)
    For EBR build Rack Em Up is the skill that makes the entire thing work. For Railgun build you need Dead Eye to be in the range where you can either 1 shot scrakes or 1 railgun shot + 1 lever action shot them.


  • Survivalist: Don't play survivalist.
    Stop.
Trash Cleaning - General Principles
The trash:


You know, the stuff you could theoretically take on 1 on 1 with a 9 mm pistol.

The biggest considerations when dealing with the trash are as follows:

1. How much trash can you kill before reloading?
Recall that most trash have head or body health in the 20s-50s. That is within 1-3 shots from any weapon in the game to kill. However, they come in large hordes. Damage isn't an issue when dealing with trash because they're weak. The need to reload is a issue when it comes to trash, because they're numerous. Therefore a large kills per magazine number, or a faster reload, or both, are needed for trash cleaning. But of the two, kills per magazine is more important. The reload, at a minimum, should not have a down time so long that it forces the team to post a 2nd trash killer in your area.

2. How do you deal with trash that is grouped together with a large zed?
Large zeds tend to come in mixed groups. How can you deal with a trash mob crowded around a large zed? Will it affect your performance?
Trash Cleaning - Specialists
There are two perks that stand above the others when it comes to killing trash zed and which I consider to be the trash specialists,


and several other perks that can kill trash, but are either mediocre, or situational


As for why I consider these perks to be mediocre or situational, the reasons are as follows.
  • Berserker:
    Needs either a medic or Vampire to deal with large trash mobs, and if a scrake or a fleshpound is with the mob he is prevented from approaching it safely without dealing with the large zed first. Berserker's biggest flaw is that his lack of range makes his playstyle inherently high risk without somebody watching your back, which comes into play against several enemy types. I have seen many berserkers who, upon seeing a large zed in the trash mob, stop swinging and start retreating, with the trash following right behind them to harass the large zed killers. A commando or a swat would be able to deal with the trash accompanying the large zed due to having range. Berserker's lack of range also makes Husks extremely dangerous, and makes mixed groups that have them almost unapproachable. The dilemma is that husks are usually slow, which means that the faster trash like gorefast variants get in front of them and body block you. If you try to get to the husk, the trash directly in front of him will delay you long enough for the husk use the flamer and melt you.

    However, if the zerker is holding a choke point and has a tank build with a dedicated medic, he will naturally work as a trash killer due to having the backup he needs to alleviate his weakness to these scenarios.

  • Demo:
    Demo can deal with trash if the zed are so polite as to come in discrete groups one at a time. That doesn't happen. In suicidal and HoE the trash in later waves comes as an almost endless stream. Explosives are too expensive to be wasted on single zeds, and the M79 does significant self damage. What demo needs to be effective is something to draw the zed aggro away from him, as well as something to cluster up the zeds so that his explosives have maximum effectiveness. In other words, a berserker, or a trash specialist and a chokepoint.

  • Support:
    Support's trash cleaning power is dependent on map and positioning. If he is at the end of a long hallway in an indoor space, or in front of a high traffic doorway, then he can clean trash due to his shotguns' penetration. But in an open area where zeds approach from all directions he will waste ammunition at a frightening rate, while his shotgun penetration will be far less effective. Support also can't retaliate against Husk squads that approach from long range. His pellets are also not hitscan, meaning that beyond medium range their travel time needs to be factored in.

  • Firebug:
    Firebug's issues are multifold. He can't easily eliminate elite crawlers from a distance and avoid their gas. He typically gets in siren scream range. Unlike a berserker he has no way to resist or passively regenerate health lost to the gas and screams. His ranged weapons are inaccurate and low capacity. He is incapable of dealing with large zeds, which creates the same problem with berserker, since having a large zed in the trash mob forces him to do nothing unless he wants to set it on fire and rage it to make everything worse. If you see a horde of crawlers and cysts with 2 scrakes and a fleshpound in the middle, do you approach it or not? If you approach it you will risk setting it on fire accidentally and making it harder for your large zed killers to do their job, in which case you become a liability. If you don't approach it, you're twiddling your thumbs being useless. He also doesn't immediately kill the zeds, which creates panic firing by your team members who are unsure if the zed is going to burn to death or not, which wastes bullets. This is a particular problem with gorefiends, which have enough health that the question of whether it would burn to death is uncertain, and are dangerous enough that the certainty of ensuring that it is actually dead is worth putting a few more bullets in it.

  • Gunslinger:
    Small magazines, the need to juggle multiple weapons and their reload cycles, and the small ammo pool all restrict this perk from dealing with heavy trash.

  • M14EBR Sharp:
    Only has 1 real magazine fed weapon, the EBR, and the ammo pool on it is restrictive enough that the EBR can't be the sole trash killer on the team, or he must make judicious use of the 9mm on the lowest trash.

Swat and Commando excel in that they can deal with large amounts of trash zed from a safe range, without undesirable collateral hits on large zeds, and in nearly all types of hold spots or kiting routes. The differences between the two are as follows:

Commando is a specialized trash killer that helps the team with passives, and generally functions much better in an open area with long lines of sight. SWAT is a more general purpose class that is still geared towards trash killing but can initiate large zed takedowns with his flashbangs, and is more useful in hallways, corridors, and close quarters in controlled spaces.

Effective of both will vary depending on where you camp and team composition.

Are you camping in an open space with long sight lines like the square in front of the Eiffel Tower? Commando is better because those positions make Stalkers packs really bad.

Are you camping in a controlled space with very narrowly defined entrances, like the turbine room on Containment Station or the horseshoe shaped walkway on Volter Manor? Then Swat might be better, because Stalkers can only enter in through 2 narrowly defined choke points and are likely to simply walk into bullets intended for the zeds behind them. And in those hold spots large zeds are the most dangerous threat, and the Swat's flashbangs can initiate takedowns.

Swat can solo 6 man HoE scrakes in confined spaces, and a Swat + any decent DPS class can handle fleshpounds. The SWAT initiates with the flashbang, and then he and his partner unload into the fp's head while it is stunned. Commando can solo 6 man HoE scrakes with the med rifle or the AK12, but he needs a bit of space to do so.
Trash Cleaning - SWAT and Commando
If you need to choose between the two, generally you want Commando unless it's already taken.

(assume SWAT is lvl 25, commando is level 25 w/ Hollow Point Round and High Cap Mags)
Commando's has the upper hand on shots and time to kill

The AK12, SCAR, and HMTech-401 1 shot stalkers in the body, unlike SMGs which needs 2 or more.

They also 1 hs gorefasts with any perk weapon, and can 2 headshot gorefiends with 40+ damage rifles. Only the UMP can do the first, and it needs 3 hs for gorefiends. Commando can consistently decapitate gorefiends before they block, meaning less wasted ammo and quicker kills. Swat will need 3+ hs on gorefiends with the Kriss, which becomes a time waster when they block.

The added time to kill on each gorefast, gorefiend, and stalker add up. SWAT's weakness to them is problematic because it lowers its kills per magazine, reducing the practical effect of his mag size advantage.

For example:
Commando lvl 25 w/ Hollow Points and High Capacity Mags
AK12 = 45 dead stalkers
AK12 = 22 dead gorefiends
AK12 = 45 dead gorefasts


Swat lvl 25
P90 = 33 dead stalkers w/ body shots (they're invisible)
P90 = 25 dead gorefiends
P90 = 50 dead gorefasts

Kriss = 22 dead stalkers w/ body shots
Kriss = 16 dead gorefiends
Kriss = 33 dead gorefasts

The ARs and SMGs have identical shots to kill on clot variants and crawlers. However, there is little practical difference between being able to kill 45 cysts within 1 AK12 magazine and killing 100 of them with a P90 (diminishing returns). You're far more likely to be able to reload than to have to kill 46 cysts in a row. Commando's disadvantage here is unnoticeable.

However the difference in performance between commando's ARs and SWAT's SMGs against stalker and gorefast variants is big enough to notice. Because the shots to kill difference is larger than on paper.

  • Stalkers: Commando's cloak reveal and stalkers having AR vulnerability means he can kill with a single bodyshot from range. SWAT is more likely to be ambushed by a stalker pack in melee and waste bullets panic spraying.

  • Gorefast: Due to Commando being able to decapitate these with a single shot, there is no chance for a block. With SWAT using anything but the UMP there is a possibility that the 2nd hs will bounce off a block. The need for a 2nd shot also makes recoil a problem. Commando's recoil isn't as much of a problem, because the gun bucking a bit doesn't matter if the target is already dead.

  • Gorefiend: See gorefast, but more severe. Needing 3-4 SMG hs minimum to decapitate means that it is very likely that the gorefiend will block in time and charge. And it makes recoil a more severe issue, since attempting to get 4 shots off in a reasonable amount of time requires automatic.
Cheaper maintenance. SWAT's ammo costs are high due to weak damage, fast fire rate, and vulnerability to bad recoil control.

AK12, 30 rounds, 40 dosh: clot variant kills cost 1.33
AK12: gorefast kills cost 1.33
AK12: gorefiend kills cost 2.66

HMTech-401, 40 rounds, 40 dosh: clot variant kills cost 1
HMTech-401: gorefast kills cost 1
HMTech-401: gorefiend kills cost 3

UMP, 30 rounds, 45 dosh: clot variant kills cost 1.5
UMP: gorefast kills cost 1.5
UMP: gorefiend kills cost 4.5

Kriss, 33 rounds: 35 dosh: clot variant kills cost 1.06
Kriss: gorefast kills cost 2.12
Kriss: gorefiend kills cost 4.24

P90, 50 rounds, 50 dosh -> clot variant kills cost 1
P90: gorefast kills cost 2
P90: gorefiend kills cost 4

With most rifles (especially the 401), a commando spends less money per kill. The difference is bigger than it appears due the previously mentioned issues with increased shots to kill wasting ammunition due to blocking and recoil.
Zed health vision lets him maintain awareness.
Relevant when working with perks that generate visual noise, like Demo, or on dark maps. It lets him pick off targets of opportunity like weakened large zeds. The ability nearly eliminates tunnel vision, as it reveals crawlers and zeds trying to flank, making commando a much better bodyguard for perks that are vulnerable to trash.
Stalker callout helps your team.
Saves ammo from panic firing and conserves armor.
Zed time extension lets him wipe out all trash near him and provides a massive power spike for the team.
Self explanatory. Up to 21 seconds of slow motion where you and your team can aim in real time.

You basically can give your level 25 team up to 21 seconds of god mode.
Jump to 0:30 or 0:55 and you can see how the zed time extensions just lets the gunslinger unload onto large zeds.

Gunslinger with either zed time skill can mag dump into large zeds' heads.

Support with Barrage can magdump the AA12 into heads and clear entire lanes.

Sharp with Assassin gains 35% damage boost.

Demo with Destroyer of Worlds has a massive 50% explosive damage boost and a 35% blast radius boost that leaves behind a lingering radiation cloud that panics everything it doesn't outright kill.

Swat w/ Rapid Assault turns his Kriss into a bullet hose that can clear scrakes and trash.

Berserker w/ Spartan walks around in real time chopping off heads.
Is better against scrakes with enough range.
SWAT's standard method of taking down scrakes uses a flashbang to stun it, then sprays the Kriss into his head. While this is easier to execute than the commando's methods, it is limited in that it becomes obsolete as soon as you run out of flashbangs. This takedown has a range issue, because the it only works if you are near the scrake. If you spot a scrake at range, you must wait for it to slowly walk towards you, or try to initiate the mag dump from range without using a flash.

Commando's takesdowns are higher risk, but more efficient. With all damage boosts the AK12 will take 23 bullets to decapitate 6p HoE scrakes. With Impact Rounds these weapons will let you engage the scrake at range, delay its charge with the stumble, and decapitate it before it reaches you. The HMTech-401 also has flinchlocks identical to those of the .500 magnums, making the takedown even safer. The non-reliance of these takedowns on a limited number of grenades makes them more sustainable. Commando also executes these ranged magdumps faster due to having better DPS. The AK12 burst clocks in at a max of 1034 DPS, compared to the Kriss' 820 DPS.


Arguably the only major advantage of a SWAT other than starting bonuses are flashbangs. If your team desperately needs more stun grenades and more trash killing ability, then go SWAT.

The relative value of the first SWAT compared to the first Commando also increases the more the camping spot pushes Commando out of his effective range. That, and a better zed time ability that is reliant on having a commando to extend the zed time in the first place. The more confined and short ranged the spot is, the less relevant are Commando's range and damage per shot advantages are compared to SWAT's grenades and fire speed. The first SWAT is also better than having a 2nd commando, due to not having zed time extensions conflict, as well as adding 5 flashbangs to the team grenade arsenal instead of 5 more HE grenades.

Support being there to alleviate SWAT's ammo costs is a big bonus.
Trash Cleaning - The issue with Firebug
I know I've said that survivalist is the only useless perk. Firebug does have a use. It's a very good chokepoint holder and a tank that unlike berserker is not in melee. It has excellent incapacitation power.

It has 4 very, very big problems though. 3 of the which are closely related.

It has no perk weapon that is accurate enough to headshot at medium range.
Trying to hit headshots with the Spitfires:
The flareguns have significant spread and travel time that combine to create accuracy issues beyond short range. The speed of the flare is identical to the projectiles of grenade launchers and their intense glow makes it hard to determine where the projectile is in that blob of light, making adjusting your aim difficult if not impossible.

The trenchgun also is not accurate enough to attempt headshots. Compare the spread of the firebug trenchgun with a Tight Choke AA12.
The spread of the trenchgun is huge. It isn't centered, and is larger that most zeds' chest hitboxes at medium range.

You can see that the spread pattern of the Tight Choke AA12 at medium range is well centered, and roughly the size of a large zed's head hitbox.

Even a support with Tight Choke can't reliably score headshots with a trechgun at medium range.
The pellet marks on the left are affected by Tight Choke
And this testing is done in a shotgun's optimal range: close, but not close enough for the zed to attack or start a charge. Even then the spread of the weapon, even with Tight Choke, is considerably larger most zed's heads.

The trenchgun's pellets are noticeably affected by gravity, unlike every other shotgun.

These factors have implications that make firebug extremely situational.
  • If the camping spot has line of sight beyond close range, then firebug becomes inferior to any ballistic trash killer due to the range advantage. This makes any outdoor map and plenty of indoor ones less than optimal for firebug, since the ballistic perks can kill from range and back off while still dealing damage. Firebug's limited range means that he often has nothing to kill, or must advance towards the zed, which is stupid.

  • In order to kill things he need to be up close to the zeds, without berserker resistances. Heat Wave gives your attacks 1000 stumble power, but it has a cooldown.

Due to perk mechanics, firebug is almost exclusively reliant on body damage.
Firebug plays a different game from nearly every other perk. They get to play Headshot Floor 2. You do not.

On HoE body health greatly exceeds head health and scales faster with more players. This does not matter to ballistic based perks because they have the range and accuracy to decapitate zeds before they get close enough to be a threat.

But firebug can't do that. The flamers are short ranged, and the projectile weapons are too inaccurate to reliably go for heads. Being reliant on body damage means that Firebug's time to kill on larger enemies, especially elite trash like gorefiends, is terrible compared to commando who can kill them with 2 headshots in about a tenth of a second from across the map.

By playing Firebug, you are fighting against a completely different health pool.

It is the only perk that is unable to safely solo any large zed or contribute to clean takedowns.
It is the only perk without any spike damage or a moderately high dps. Large zeds have 70% resistance to fire damage, and the microwave multiplier on them is 1.0, or neutral. Even with the damage skills the microwave direct beam features a DPS of only 549, which is applied to the body health pool. Other perks have DPS's of 1000+ that can be applied to the head. 6p HoE scrakes have 3569 body health, and fleshpounds have 5210 body health. It ideally takes nearly 7 seconds of direct beam damage to kill a scrake with all damage boosts (an actual impossibility outside of zed time, you'll need to reload first). That is far too long to be useful.

The Spitfires do not have enough damage in a single magazine to decapitate a scrake. The Trenchgun does, but the spread is so huge that it is nearly impossible to land all the pellets onto the head, meaning that a decapitation is only possible at point blank, with the barrel of your shotgun in the large zed's mouth and your torso in chainsaw/hand blender reach.

However, all these problems would have been tolerable if firebug's mechanics didn't make life a living hell for big zed killers.

Every combo for safely killing scrakes in under 7 seconds uses headshots. The only large zed takedown that doesn't involve headshots is demo versus FP's. And even that requires aim; the rocket must hit the legs for knockdown.

Firebug, due to the fact that he sets things on fire, creates fire panic. The panic animation of zeds gives a form of mutual invincibility: the zeds can't hurt you, but it's nearly impossible to headshot them. Body shots don't lower head heath. So from the view of the big zed killers, all that happens is that time gets wasted, the large zeds get into awkward locations, and in the end they use the same number of bullets to put it down.

This is the reason why firebug is hated. Every perk has a set of weaknesses. But these weaknesses are usually what the perk can't do, and needs help with. For example, a commando doesn't have enough damage in any weapon to kill a 6p HoE fleshpound, and needs help with those.

Firebug's big weakness is that he can ♥♥♥♥ over his entire team and incapacitate aim dependant players just by existing. Instead of just needing help, he actively makes it hard for himself to get help in the first place.

It's ♥♥♥♥♥♥♥ annoying to aim at a twitching zed's head and it needs to stop. Bad firebugs cause wipes.

But what about the "good" firebugs?

Good firebugs that don't shoot at large zeds essentially don't shoot near them at all due to the large spread of fire weapons. If you aim *near* a large zed, you run a high chance of accidentally hitting it and setting it on fire. Meaning that large zeds give any trash near them a form of invincibility if you're trying to not set them on fire. Meaning that the large zed killers get swarmed. Causing wipes. Again.

Damned if you do, damned if you don't.


Many of the criticisms leveled at firebug can be leveled at some other perks like demo or berserker. But the central premise is still this: Firebug can't contribute against large zeds and makes life difficult for the perks that can. Demo and berserker don't have these problems. If they make a mess, they can clean it up themselves.

Firebug is not a useless perk. However, is the *most* situational perk. There are many maps and team compositions where firebug is a negative asset.

Firebug is unique in that the team has to be built around the presence of a firebug. Just by existing he immediately prevents precision perks like sharp and gunslinger from being effective.

When deciding to chose firebug, please check the following the following things

1. Is the camping spot restricted to firebug's optimal range? Firebug most exels on maps where the range is too short for other perks to work effectively.
2. Will your existence inconvenience any nearby headshot dependent perk? Firebug is very annoying to gunslingers, sharps, and commandos.
3. Does the team have enough large zed killing power? Firebug has basically no anti large zed utility other than being a berserker replacement.
4. Are you backed up by the perks that can put down large zeds with body damage (support and demo)?
HVT Killers - General principles
Scrakes and fleshpounds are the zed assault units compared to the rest of the cannon fodder. They cause team wipes by breaking down the front line, forcing the team to retreat, and allowing the trash zeds to start pouring in while the team is preoccupied.

In order of deadliness, from most to least are
  1. Raged scrakes
  2. Raged fleshpounds
  3. Calm fleshpounds
  4. Calm scrakes
Raged scrakes, especially in multiples, are the most dangerous enemies in the game unless it is near the end of wave, because they will kill most unarmored players within 3 attacks, are extremely difficulty to parry properly, never stop raging, and can effectively take 1 player out of commission because he will be too busy running to shoot much. On HoE their rage threshold is at 90% health, meaning that 3-4 headshots from most tier 3 or higher weapons will rage them.

The basic principle of large zed killing:
Calm large zeds are not large threats. They are slow and predictable and their attacks are not exceptional in power.

Raged large zeds are the opposite. They are fast, they swing and change directions and speed wildly, and deal large amounts of damage.

Dealing damage to calm large zeds converts them to raged ones.

What does this mean?

The shot that causes a large zed to enter rage must wound it severely.

Let's use the 6 man Hell on Earth scrake to illustrate this. It has 1584 head health. At 1584 head health it is a slow creature with an easily dodged attack.

It rages at 1425 head health. Beyond this it is a sprinting madman that has combo attacks that can kill you within 3 hits without armor. It's a threat.

Let us compare the different between using an RPG on a demo to kill a scrake, versus a commando using a SCAR.
Demo RPG versus a scrake at full health
A scrake has a x1.1 multiplier on its head

And a separate x4 multiplier for the RPG impact damage.

A level 25 demo with all left side skills has these multipliers for RPG impact damage:
Perk level multiplier: x1.25
Bombardier: x1.25
High Impact Rounds: x1.25
Armor Piercing Rounds: x1.5

Due to the additive nature of damage bonuses, these add up to an (1.1 * 4 *(1.25+.25+.25+.5)) = 9.9 damage multiplier.

The RPG does 150 impact damage as a base.

If a level 25 demo with all left side skills hits a scrake with an RPG headshot, it will deal a whopping 1485 damage.

The result: A raged scrake with 99 head health.
Commando SCAR versus a scrake at full health
The maximum damage of the shot that rages the scrake is:
Perk level multiplier: x1.25
Hollow Point Rounds: x1.30

Scrake head multiplier: x1.1

Scrake assault rifle multiplier: x1.0

Total multiplier: x1.705

SCAR bullet base damage: 55

Damage of raging bullet: 94

So the best case scenario is that a 1426 health calm scrake (just about to rage) takes 94 damage to become a raged scrake with 1332 head health. Or 13.5 times the health of the scrake hit by the RPG.
This is an illustration of the biggest principle of killing large zeds. Unless you can delay the rage somehow using stuns or incapacitation, the bullet that rages the large zed needs to *hurt*.

Beyond this, in general the following principles apply to killing large zeds
  • The farther away you can kill it from the better.

  • If you can kill it before the rage animation or during it, do it. Raged zeds are much more unpredictable once they start running.

  • If you take more than 7 seconds to do a takedown from start to finish, then it's taking too long.

  • The more things that have to go right for the takedown to work (aka Commando needs 18 SCAR headshots in a row with Hollow Point Rounds to kill a 6 man HoE scrake), the more likely you'll screw up. Takedowns with the fewest shots needed, or that use immobilization or slowdown techniques, are the ones most likely to succeed. This cannot be overemphasized. Needing more shoots means more opportunities to miss and ♥♥♥♥ up.

  • Headshots are king. Body killing large zeds takes too long and wastes too much ammunition.

  • If a large zed is immobilized by somebody else's stun, pump bullets into its head, because the person that started the stun might mess up.

  • Do not bodyshot raged fleshpounds unless you know you can kill it. All it will do is rerage it immediately.

  • If you are the target of a large zed's melee, pull out the knife, jump, and parry the attack. You will receive some knockback that will put distance between you and the zed, and the parry will cancel out about 20% of the damage, or more if a melee with a higher parry stat is used.

  • Do not initiate combat on calm large zeds unless you can kill it yourself.

  • If you are a dedicated trash killer, ignore the large zed and kill the trash that will be right behind it. Let your HVT specialists deal with it.

  • If you are a firebug, the large zed does not exist unless it is raged and you have a microwave gun. It is a figment of your imagination. Ignore it, do NOT set it on fire, and kill the trash.

For further information, just go to the Killing Large Zeds guide.
https://steamproxy-script.pipiskins.com/sharedfiles/filedetails/?id=812769080
HVT Killers - Spike damage vs DPS
We will get more in-depth regarding the qualitative difference between these two separate methods of large zed takedowns.

As mentioned before spike damage is vastly preferable due to the fact that the takedown doesn't truly begin when you take the first shot. The takedown in reality should be timed from the moment the large zed becomes raged and initiates its charge or rage animation. After this point you usually only have several seconds before the large zed is within melee range.

So every bit of damage you take before the rage threshold, as well as the hit that initiates the rage, are free shots.

Spike damage:
The spike damage weapons are the ones put as much damage as possible in the free shots allowed, by putting a huge amount of damage in the last free shot that vastly exceeds the rage threshold, leaving the raged zed with much less health than it would normally have. Generally after the raging shot they only require 1 or 2 more shots to finish off the large zed, or 0 if the shot that rages also kills it.

There are only 5 weapons that I consider to be genuine spike damage weapons:
Railgun
C4 (FP only)
RPG-7
DBS (alt)
Eviscerator (primary, scrakes only)

These weapons don't necessarily have huge dps. They don't need it either, because due to the large amount of damage they sneak in before the rage kicks in, they're fighting against a much smaller large zed health pool.

DPS:
DPS weapons, in the context of large zed takedowns, do not have enough damage per shot to take advantage of the free shots you can take against the large zed. The large zeds will rage at nearly the max possible rage health. What DPS weapons attempt to do however is to whittle down that health as quickly as possible. And due to that fact, the factors that make a DPS weapon viable against large zeds are different, and more complicated, from the mechanics behind spike damage weapons.

  • DPS: The most basic component. You have at most several seconds before the raged large zed reaches you, and if you can't kill it fast enough you've already failed.

  • Accuracy: You can pump out as much damage as you want, it won't matter if it flies off into the distance without hitting anything. You're going to need to hit a lot more bullets than you would need to with spike weapons. This places high importance on recoil control, memorization of zed behavior patterns, knowledge of surrounding terrain, the retaining of the zed's aggro, and predicting zed pathfinding.

  • Magazine size: Your magazine size determines the margin of error that you have, and how many shots you can afford to miss. Your magazine at a minimum needs more damage in it than the head health of the large zed, and preferably more than just that to compensate for missed shots.

  • Effective range: It's a contest. Will you kill the zed first, or will he reach you first? Longer effective range means more time for you to win the contest.

  • Incapacitation ability: This is just an extension of range. Incapacitating or otherwise immobilizing a zed effectively increases the distance the large zed has to cover before its charge reaches you. It can also extend your free shots period by letting you pump in more damage before the zed wakes up from the stun or recovers from a stumble or flinch lock.

I separate the DPS weapons into 3 tiers:

Tier A: Capable of taking out both large zeds on their own without excessive setup.
Dual Deagles
Dual .500 Magnums
AA-12
SPX 464 Centerfire

Tier B: Easily capable of taking out scrakes without excessive setup, but requires some setup against fleshpounds.
M14EBR
Crossbow

Tier C: Only suitable for situational use against scrakes.
AK-12
HMTech-401
SCAR
Kriss
HVT Killers - Specialists
So from the previous section you can probably guess the one thing that makes a perk or loadout good at killing large zeds: exceptional spike damage, the ability to hit the large zed so hard in one shot that it either dies right there, or becomes trivially easy to kill afterwards.

A more complete definition of a HVT specialist is that is has all of the following properties.
  • Can kill both scrakes and fleshpounds solo, because quite honestly you can't depend on your team some times.

  • Can kill from medium range or farther, so as to keep personal risk to a minimum.

  • Can kill both large zeds without the rage animation triggering, or before the rage animation finishes.

  • Have easy ways to immobilize or stun large zeds.

  • Can deal with multiple scrakes or fleshpounds safely.
The only two loadouts that fit the description are
LLLL Railgun Sharpshooter


https://youtu.be/NHR7gpjX4Pk


and
LLLL RPG, C4, and Magnum Demo
(LLLL refers to all left side skills for the first 4)


https://youtu.be/uVpjviDrMRk

As for why certain other perks are not on the list
  • Berserker:
    Can't kill either large zed with the Eviserator without triggering rage. The fleshpound kill also requires 3-4 headshots, and a lot can go wrong. Getting into melee combat is messy, takes too long, isn't a good idea against multiple large zeds, and messes up your teammates trying to take headshots. Is good at blocking or otherwise distracting a group of large zeds, but isn't nearly as good at actually killing them.

  • Support:
    The support can use the double barrel alt fire 2 (but realistically it's usually 3) times, along with Tight Choke and Salvo, to decapitate a scrake. The problem is that it requires you to get in his face, which is in his chainsaw range, making the takedown risky if something goes wrong. The fleshpound takedown involves 8 headshots with the AA12 during the rage animation, and then a double barrel alt to the head when he charges you. And like the scrake takedown, it can go sour very quickly especially since it is done in close range. Both takedowns are considerably safer if you take Concussion Rounds. However, a very skilled support can take the role of a close quarters large zed killer.

  • Gunslinger:
    Killing a large zed will, in the best case scenario, consume all or nearly all of the ammunition in either his dual Deagles or dual .500s. Meaning that usually he can only take down 2 before he needs to go through his reload cycles. The need to reload 2 weapons will then occupy him for a significant amount of time. The fleshpound he can't kill before it enters its charge, unless his aim is almost perfect. His grenade has a comparatively weak stun, usually taking 2 close range detonations to stun something. What the skilled gunslinger needs most of all for large zed killing is space for backpedalling.

  • M14EBR + SPX Sharp:
    Suffers from 2 issues. The first is range: the FP takedown usually requires you to be in their face due to the recoil and tunnel vision when scoped, which makes it dangerous unless all the trash is clear and the large zed isn't travelling in a pack with other large zeds. Since the speed bonus from Markman is marginal, his weapons don't have snare, and he doesn't have the DBS recoil jump, if the takedown fails he'll usually have to take a hit. The second is dealing with multiple large zeds, in particular fleshpounds, since you will likely have to reload the M14 or the SPX between each kill, as well as spend a grenade. Grenades are a very finite resource.

Both Railgun Sharps and RPG demos can easily kill both large zeds from medium range or greater without them ever entering rage. On Scrakes LLLL Sharp needs 1 railgun headshot, while LLLL Demo needs to headshot it once with a .500, then the RPG impact on the head will cleanly decapitate it.

Sharp can kill a fleshpound with 2 railgun shots to the head, 1 guided and 1 unguided, before it can finish the rage animation. Demo can stun it with the dynamite, plant 2 C4 on it, hit it with an RPG, and then detonate the C4 before the rage animation completes. The RPG can also knock down the fleshpound with leg or hip imapct, giving the demo time to put 2 more rockets into it to kill.

Both also have immobilization grenades that will consistently lock large zeds in place with 1 grenade. Sharp has freeze grenades, while demo's dynamite will explode on contact and stun large zeds. Both loadouts are also the only ones than can hope to solo deal with multiple fleshpounds without damage.

The pros and cons between Sharp and Demo are easy to define.
  • Sharp is better at dealing with multiple Scrakes. Demo is better at dealing with multiple Fleshpounds.

  • Sharp works at long range, demo is more medium range.

  • Sharp needs to be immobile and to aim, and thus needs peace and quiet. Demo doesn't need it nearly as much. Meaning that he works better with the perks that naturally cause a mess, namely berserker and firebug, and that he also loses less of his efficiency when the hold position is in the process of being overrun.

  • A LLLL demo can handle a raged scrake in close quarters. If the scrake is raged it is often already in range of a 1 shot kill with the RPG to the head. Bashing it will cause it to stumble in a rather predictable pattern, letting you kill it with an RPG dud to the face. Sharp's need to be immobile to achieve his damage bonuses renders him less capable when backpedaling from a raged scrake, while demo's damage bonuses are not reliant on positioning.

  • Sharp can't hit multiple targets unless they are exactly lined up. Demo can, though whether or not this is a good or a bad thing depends on the situation. If it is 2 fleshpounds together, it's a good thing. If it's a fleshpound and a scrake together, it might not be so good.

  • Demo can launch large zeds into the air or knock them down with RPG direct impacts, making him better for saving teammates trapped in a corner. Sharp could do this with freeze grenades, but that is limited by grenade capacity and the fuse timer.

  • Demo benefits more from his zed time skill. For the railgun sharp Assassin usually doesn't hit any breakpoints on the railgun, and Ranger is only useful on fleshpounds, which usually makes no difference because slow motion makes aim easy. Demo on the other hand gains access to the nuke, which actually hits a breakpoint (it usually shaves a rocket off FP kills), and gives powerful area denial.
HVT Takedowns - Scrakes
My list of what I consider to be the methods that account for over 90% of solo scrake fatalities in HoE 6 man games. All takedowns assume level 25.


Sharp with LLLL skills can 1 headshot scrakes with the railgun. If you do not take Rack Em Up or Dead Eye, a followup headshot is necessary from a sidearm or a teammate.
https://youtu.be/6gAqf68PAPA


Demo with the LLLL skills can decapitate a 6 man HoE scrake with 1 RPG headshot preceded by one of the following

1 .500 headshot
3 AK12 headshots
2 SCAR heashots
1 Deagle headshot + 2 9mm headshots

It is imperative that you do not shoot more than these numbers, or you risk raging the scrake. At 5 players alive the RPG alone will decapitate the scrake.

Alternatively if you choose the R skill at level 10 for more ammunition, a RPG headshot followed up by a M79 headshot will still kill the scrake.
https://youtu.be/-pcJsQmhHhE

At around level 22 a Swat can solo a 6 man HoE scrake with 1 flashbang and a mag dump to the head. For a level 25 swat it will take 36 bullets from a Kriss to decapitate, which is possible during the stun length. Unfortunately the UMP and P90 do not have enough DPS to decapitate before the stun wears off. A flashbang-less takedown needs Cripple, Tactical Movement, Suppression Rounds, and enough space to backpedal. Simply aim either a Kriss, P90, or the UMP at the scrake's head, and backpedal while ADS'ing.
https://youtu.be/21qE6rDwZPU
https://youtu.be/Ni4mNlVO7E0


With Tight Choke and Salvo a support can decapitate a 6 man HoE scrake with 2 DBS alt fires. When reload canceled at point blank range, the scrake will be decapitate before it finishes the stumbling animation. Alternatively, 8 perfect AA12 headshots will decapitate, and with Concussion Rounds the scrake will stumble before it can reach you; be advised that this is risky as it requires auto AA12 fire, which decreases accuracy the longer you hold it. A combination of the two weapons is also possible. If not confident about your aiming ability, it is advisable to soften up the scrake with a shot from a sidearm first, with the .500 Magnum being most useful for this purpose. If you are using the DBS solely as a finishing weapon, then the HMTech-301 has enough damage to initiate the takedown.
https://youtu.be/yYzdk-C-0BQ

With Rack Em Up and Balistic Shock, a Sharp can stun a scrake with a crossbow body or headshot, then unload the EBR into its head. Alternatively, 4 EBR headshots in quick succession will stun the scrake as well. Generally expect each scrake to take around 10 M14EBR headshots minimum to kill. NOTE: The crossbow stun is unreliable on scrakes and has a chance of not stunning when it should. A 2nd crossbow bolt is often needed. At around 3 REU stacks 3 crossbow headshots will decapitate the scrake.
https://youtu.be/Q00mn16w0Fk


With level 25 and only REU the Centerfire will decapitate a 6p HoE scrake with 6 shots and stun in 3 with Ballistic Shock. With 1 starting REU stack it will kill in 5. Going all left can reduce this to 4. Keep a sidearm if it fails. The .500 magnum can also be used as a finisher to keep SPX reloads to a minimum. With Stability instead of Ballistic Shock the shots to stun is too great to be of any use, so simply burst down the scrake as quickly as possible.
https://youtu.be/pjCX54ugqVs


Oh boy, here comes one of my biggest personal beefs with the pub playbase. Just because commando is not the scrake killer of first resort, DOES NOT mean that he isn't capable of killing scrakes on demand.

With Hollow Point Rounds, High Capacity Mags, and Impact Rounds a level 25 commando will be able to solo a 6 man HoE scrake with 23 headshots with the AK12, but taking missed shots to account it will generally take 30+ bullets if your aim isn't very good. The AK12 burst mode, with its incredible fire rate of 1000 RPM, kills the scrake fastest clocking in at a theoretical minimum time to kill of 1.38 seconds. It will rage at bullet 3, stumble at bullet 10 or 11.

The SCAR will decap the scrake in 18 bullets. It has a theoretical minimum time to kill of 1.724 seconds. It can't flinch lock. It rages on the 2nd headshot, with bullet 9 stumbling. The issue with the SCAR is that is it less safe than either the AK12 or the HMTech-401. It stumbles the scrake more slowly because it doesn't have the fire rate of the AK12 or the stumble power of the HMTech-401. Bullet 11 of the AK12 comes out .2s before bullet 9 of the SCAR due to the difference in the fire rate. The scrake will cover a lot more ground because the SCAR rages at bullet 2 instead of 3 and stumbles it slower. The smaller mag size leaves less margin for error.

This is not to say that it's impossible for the SCAR to do the job. Just that there are better options.
https://youtu.be/OraagU8cPiE


With Rack Em Up or Bone Breaker a high level Gunslinger should be able to solo a 6 man HoE scrake within 1 magazine of either the dual Deagles or .500s using headshots. With 0 REU stacks it takes 12 Deagle headshots, or 8 Magnum ones. It is advisable to prep the takedown by using the HMTech-101 or 9mm to get REU stacks pre-emptively before starting the takedown. This usually saves 1/2 bullets, and can mean the difference between killing it with 1 weapon, or needing to switch to another to finish the job.
https://youtu.be/Tjr4ToYrDbY


With Smash and level 25, 2 headshots from the Eviscerator will decapitate the scrake. If you are not level 25, you'll need Butcher to hit the 2 shot threshold.
https://youtu.be/Clho0gMnxQg
HVT Takedowns - Fleshpounds (no hits)
My list of what I consider to be the methods that account for over 90% of solo fleshpound fatalities in HoE 6 man games. All takedowns assume level 25.


Same as for the scrake, but the crossbow needs to hit the head to stun, even with Ballistic Shock. With REU the crossbow alone at max stacks it will take 4 headshots to kill if no stacks fade. The M14EBR alone will take anywhere from 11-19 headshots to decapitate a 6p HoE FP. Generally, expect the takedown to take around 15 M14EBR shots, with 2-3 shots deducted for every crossbow headshot.
https://youtu.be/oc5YOMOuit0

With just REU it will take 8 headshots to decapitate a 6m HoE FP with the Centerfire with a sharp. Marksman is necessary [/previewimg]for the fire rate. It is possible to do this during the rage animation in the same way that a gunslinger can kill a FP with his .500 magnums, but the lack of the recoil control that gunslinger has and the inability to snare the FP makes this much riskier. A sidearm is necessary to compensate for missed shots. The tube fed mechanic of this weapon also makes multiple FPs problematic. With just 1 REU stack the number of shots needed drops to 7. The easiest method I have found is to hit the FP twice in the head with the M14 to build REU stacks, then 6 shots from the SPX will decapitate.

If you use your 9mm to start with 5 REU stacks, the EBR alone is capable of decapitating the FP if your aim is good.
https://youtu.be/9jvRKF1K9VM
https://youtu.be/YUHFwatZfdQ


Requires at least 2 shots for a LLLL sharp, 1 guided and 1 unguided.
https://youtu.be/sX7D8rsNEBA

Same as the scrake, but both guns are needed, unless you have almost perfect aim. With level 25 and Rack em Up at 0 stacks it takes a full 14 deagle headshots, or 9 magnum headshots, to decapitate the fleshpound. Pre-emptively getting stacks so that you start the takedown at max REU stacks will shave 1-2 bullets off that total. If you can't do this, initiate with the deagles to start the Rack Em Up counters. It is advisable to hit the FP with a single magnum headshot before starting the takedown if you have the time and space, so as to create a larger margin of error.
https://youtu.be/VhOqT1KLH7o


There are multiple methods. All REQUIRE Bombardier, and you to not take Fragmentation Rounds. You can use 3 rockets; first you need to hit the legs with the RPG, which will knock it down. And by hit I mean a direct hit, with the rocket physically making contact with his leg, not a near miss. Then put 2 more rockets into it while it gets up and rages. You can dynamite stun it on the legs to make the rpg shot easier. You can also place 1 C4 on it, leg shot it with an RPG, hit it with 1 more rocket as it gets up, then detonate the C4 to kill it. Note that C4 has a 3s cooldown, during which the next C4 explosion will deal only 75% damage. It is more efficient to space the C4 detonations instead of setting them off all at once.

Dynamite will stun the FP, but beware that if you hit it in the chest with the dynamite, there is a high probability that the FP will immediately rage instead of being stunned. For a guaranteed stun, you will need to hit the FP on the legs with the dynamite. If the FP spawns raged, I advised that you shoot it once with the RPG, let it hit you, and then used a combination of 1 dynamite and 2 C4 to kill it. The primary thing when dealing with raged FP is to NOT PANIC. Jump when you take the hit so that you get knocked backwards, and immediately fire the RPG at the legs once the FP derages, or initiate a dynamite/C4 takedown sequence.

The short list of takedowns. C4 is usually placed pre-emptively before the takedown and is assumed to be stuck to the FP torso.
1 RPG leg shot + 2 RPGs
1 RPG leg shot + 1 RPG + 1 C4
1 Dynamite +1 RPG shot + 2 C4 (debuff doesn't matter)
1 Dynamite + 3 C4 + 1 Dynamite
1 Dynamite + 2 C4 + wait 3s + 1 C4

https://youtu.be/qh6Owp6eF8w


Actually kinda easy to pull off with adequate support from teammates to keep the trash off you. With Tight Choke and Salvo you need around 7-8 AA12 shots to the head during his rage animation, and then one DBS alt to the head to kill. With the Concussion Rounds skill the DBS alt to the head will stumble the raged fleshpound (this has a 5 second cooldown), letting you get another chance to kill it if you mess up.

The DBS along can solo 6p HoE FP. Use 1 alt to stumble, the 2nd during the end of the stumble animation, and a 3rd alt to decapitate during the beginning of the rage animation. If reload canceled the FP will be decapitated and bleeding out within 1.4s.

If using only 1 weapon, it takes 10 perfect AA12 headshots, or 5 DBS shots (2 alt + 1 normal) to decapitate.

The HMTech-301 can be subbed in for the AA12 if using the DBS as a finisher.

The AA-12/DBS takedown list. Generally use a little bit more than these numbers to provide a margin of error.
10 AA12 headshots
2 DBS alt headshots + 1 regular shot (still better to use an alt to be sure)
2 AA12 headshots + 2 DBS Alt headshots
6 AA12 headshots + 1 DBS Alt headshot
https://youtu.be/FSMb3RXP5jI
https://youtu.be/958JpG_H5rw
https://youtu.be/qVl0yrpdF78
HVT Takedowns - Fleshpounds (you gonna get hit)

This one I'm kinda uncomfortable calling a takedown, as it is more of a "hit em until they die" thing. With a level 25 Berserker w/ Parry, Smash, and Butcher, it will take 5 hard hits with the explosion to kill the FP. With Vampire instead it'll take 6 hard hits, unless around 3-4 of your first 5 hits landed on the head, in which case it'll still kill in 5 hits. You can also opt to not reload for the 6th hit, in which case it'll take anywhere from 1-3 additional blunt hard hits to put down the FP. Obviously it goes without saying that this method is messy, risky, and takes quite a bit of space and often creates trouble for your teammates.
https://youtu.be/p5qVzjFzAhY


This is a possible, but impractical no hit takedown, so in the *you gonna get hit* section it goes. I consider the no hit impractical due to the non-hitscan nature of the weapon and the accompanying accuracy issues that this causes.

With Smash and Butcher it will take 4 headshots without the Parry buff. With Smash and Vampire and no Parry buff, it will take 5 headshots. With Vampire budget this to take 4 headshots assuming that you have Smash and can Parry enhance the 3rd and 4th blades.
https://youtu.be/enFjO2VxGjY

Now this is technically a *possible* no hit takedown. But to make it with no hits you need an large amount of space to backpedal, and very high accuracy. The takedown requires Tactical Movement (so you can use the ADS bonus to spread and to control recoil), level 25 (for mag size and damage), Tactical Reload (it'll require more than 1 Kriss magazine), Cripple (to put snare on the stunned FP and buy you time), and the ability to reload cancel. Flash it, and immediately unload onto its head. Once you run dry start backing up, and reload cancel the Kriss and ADS onto the FP's head. If it all goes well the FP will be decapitated just as it attempts a swing. Alternatively you can use Suppression Rounds for a flashbang-less kill. Just the Kriss to unload on the head to stumble it and put snare on the FP, then back off while finishing the decap with another SMG.
https://youtu.be/xh4K0_BkRSA
https://youtu.be/aQxUH8ZomRE

Requires High Capacity Mags (to let the AK12 do as much damage as possible at the start) and Hollow Point Rounds. Initiate with the AK12 burst mode to mag dump as much as possible onto the FPs head. The FP should get in your face just as the AK12 runs dry. Take the hit, and switch to another rifle (SCAR is the best for this due to having the 2nd highest DPS, but med rifle is good enough too) to finish the decap. If your AK12 accuracy was high enough, the FP will be decapitated before enough damage is done to rage it a 2nd time.
https://youtu.be/H_6E8QVbIb8
HVT Takedowns - Quarter pounds
Quarter pounds are weird. First off, remember that tidbit that nearly all zeds have head health around 50% or less of their body health? Quarter pounds are the single exception.

With a head health of 1228 and a body health of 1724, taking into account the x1.1 headshot multiplier their head health is 64.75% of their body health, compared to a health : body health ratio of 29.38% for actual fleshpounds and 40.35% for scrakes.

This means that out of all the non-boss enemies in the game, quarter pounds are perhaps the only ones where it may be acceptable to simply start body shotting if it is necessary.

Here is a comparison of the damage that needs to be dealt to the head from each damage category to decapitate every large zed.
Damage category
Scrakes
Quarter pounds
Fleshpounds
SMGs
1440
1800
3120
Rifles
1440
1489
2080
Assault rifles
1440
1800
3120
Pistols
1800
1489
2080
Shotguns
1600
1489
2080
Slashing (Evis)
1440
1800
3120
Piercing (Crossbow)
1920
1489
2080

So you can see for sharps (rifles + xbow), gunslingers (pistols + rifles), and supports (shotguns), decapitating quarter pounds is as simple or simpler than decapitating scrakes. For SWATs (SMGs), commandos (assault rifles), and berserkers (Evis), quarter pound kills are somewhere between the effort needed for scrakes and for fleshpounds. For both SWAT and Commando the quarter pound decap is like the scrake ones in that it takes less than a full magazine, but since the number of shots needed is increased the risk of failure is higher.

Below is a condensed list of the shots needed to decapitate with certain weapons, perks, and skills. Assume lvl 25.

Perks
Shots to Decap
HPR Commando
22 SCAR
30 AK12
35 HMTech-401
SWAT
33 UMP
50 P90
44 Kriss
Salvo Support
2 alt DBS
8 AA12
6 HZ12
9 HMTech-301
5 M4
Berserker Smash only
3 Evis
REU Gunslinger
10 Deagle
7 Magnum
6 SPX
M14 Sharp REU only
11 M14EBR
6 SPX
3 Crossbow
All L Railsharp
1 Railgun

Overall I would not change any skill sets to specifically deal with quarter pounds. For SWATs and commandos, treat it like the scrake kill but only more ammunition intensive and requiring more space. For other perks, treat it like an easier FP takedown.
HVT Takedowns - FP spawn rage
You honestly shouldn't be having much trouble with this. The base percentage on HoE for an FP to spawn enraged is 33% per FP. If 1 FP spawns enraged, just listen to know where it's coming from, and then once it comes into view focus fire it down and heal up/reload before the rest of the large zed spawn comes into view.

For FP spawning enraged, here are your options:

Have a player parry them to derage, then the player pulls back and a big zed killer takes it down.
The easiest option. A player runs TOWARDS to FP, pulls out a melee, parries it, and then retreats to allow a big zed player take down the now calm FP.

You run TOWARDS the FP, not AWAY, because you want more room for the person doing the takedown to work with. The candidates for the job would be:

The obvious choice if it is available, due to him usually having a higher tier melee weapon with better parry stats and bonuses to damage reduction. If he has a pulverizer, he can just start swinging and with Smash+Parry the FP should be died in 5-6 hard hits with the explosion. Assuming that nobody else helps; with focus fire it'll die faster.

Will usually have the highest amount of intact armor in the team. Speed bonus lets him move towards the FP and back off faster. With Symbiotic Health he can give himself his own Coagulant Booster bonuses to give him up to 30% damage resistance. And through self heal and Symbiotic Health he can quickly boost himself back to full health after the parry.

Alternatively, should the first 2 be unavailable, literally anybody with a katana will do. The parry will block 50% of the damage. Assuming no armor, the FP hit will deal around between 25-30 health damage through the parry, which can be healed up in 3 seconds with 2 darts from an HM101 from a non-medic on the team. Should you have a medic on the team that didn't choose to take the hit, you can take less damage and heal up to full more quickly through the buffs. Many perk loadouts should have the 3 blocks free to stuff in the katana.

Kill them before they touch you you
Contrary to popular perception, there are a variety of perks that are capable of simply killing a spawn raged FP before it touches them, assuming that they are positioned properly.

This one is is likely the easiest. It'll generally take 5 headshot hits with Skullcracker to snare the FP and slow it down to the point where you can nearly outwalk it. If you have the dual Deagles and the dual Magnums, you should have more than enough bullets loaded to snare the FP and then proceed to shoot its head off.

Possible with both the Railgun builds, and with the SPX in the EBR build. With the railgun just shoot the head twice. Use the FP's obnoxiously loud charging noise to determine where it is coming from, shoot it once when it comes into view, and then stand up and hip fire the last shot. Standing up for the second shot is pretty important because as the FP gets closer, if you're crouched his gauntlets cover more and more of his head. If your teammates can contribute damage you often don't need the 2nd shot at all. With the SPX on a EBR build with Marksman it is possible to backpedal and hip first the fatal number of bullets fast enough if you catch sight of the FP at far enough range. If Assassin activates, you win.

With Concussion Rounds the DBS alt to the head can stumble raged FPs. With Salvo and level 25, it only takes 5 shots (equivalent of 2.5 alts) of damage to decapitate a 6p HoE FP. The stumble and reload cancelling will give you enough time to simply decapitate the FP as you would normally, and the DBS recoil jump will prevent you from getting hit if it fails. Alternatively, if you catch sight of the FP at medium range or farther, just send 2 or more AA12 shots' worth of damage to the head, and then 2 alts from the DBS will kill it without it getting a chance to retaliate.

Credit for first video goes to RykerZzZ
https://youtu.be/lcZ7zTO1MCA
https://youtu.be/PD6Dd0V9Iuc

More difficult than the railgun takedown due to usually needing 3 rockets. Generally the way I've done it without damage is that I hear the roar and the charge, and guess correctly where it is coming from, then I immediately start laying a bread crumb line of 2-3 C4 stickies. Once the FP comes into view I hit it with an RPG once, maybe twice if there is enough space, and then start detonating the C4 as it walks over them, and toss a dynamite as the coup de grace if necessary. If there is a door, just pile up the C4 in front of the door and weld it.


Any 2 ballistic perks can focus fire on the FP's head as it charges and take it down with only a moderate amount of space.


If zed time hits and you have a commando, you win.
Generalists - The DPS perks
There are the 3 perks that I consider flexible enough to do everything with enough skill, the right positioning, an favorable map, and good judgment: M14EBR sharp, support, and gunslinger. While each of these three have distinct gimmicks, the main thing that differentiate them are their effective ranges. Support is close to medium range due to the spread of his shotguns and the great ease of lining up penetration at those ranges. Gunslinger is more medium range due to having hitscan weapons, but no real scopes. M14EBR sharp is medium to long range due to having true scopes.


Generalists have the following characteristics:
  • They can generally hold down a single lane by themselves without assistance, assuming that their positioning plays to their perk strengths.

  • Can handle trash with favorable positioning.

  • Can kill both large zeds without getting hit.

These are the true jack of all trades. (Don't play survivalist for the love of all that is holy)

As for why berserker is not on this list:

  • He suffers from a crippling vulnerability against husks that hampers his ability to deal with trash. While other perks might be weak against husks due to lack of accuracy to hit the fuel tank at medium to long range, berserker's husk weakness goes much further since the husk actively prevents him from killing anything near it, as it creates an area of denial (equal to the range of the husk flamer) that the berserker can't enter or else risk death. The husk flamer both blinds the berserker, and has enough damage to burn him to death in under a second. Notice how quickly it can eat through health when you have no armor (and as a zerker, you will rarely have intact armor).

    Berserker is also extremely vulnerable to the husk suicide attack due to his inherent lack of range; the husk's kamikaze rush does enough damage to 1 shot any zerker build short of a full health Dreadnaught with resistances up, and has a deceptively large blast radius, very quick windup time, and almost no falloff (lowest falloff in the game at 0.5). You can very quickly go from "This is fine" to "Oh no" to "Damn it all, I'm dead".

    There have also been occasions in the past where the husk simply doesn't play the initiation animation.

    The generalists can either hit the husk tank, or barring that, just take cover/dodge and still kill trash near the husk while waiting for an opportunity to hit the tank again. None of them need to wander into flamethrower range to do their job, and all of them can easily kill a suicide husk attempting to rush them.

  • His melee playstyle is high risk, which means that more than the others he needs somebody to help him should a string of unlucky events occur. In other words he can't really be left unattended, due to reasons inherent in the perk's design. He's always one missed parry, a bad gorefiend spin, or an unlucky stalker pack away from needing to be saved.

  • His no hit fleshpound takedown requires him to not take Vampire, which is one of the self-reliance skills that might feasibly let him handle a lane without assistance. So yeah, he can conceivably kill fleshpounds without damage, but to do so he decreases his self-reliance.
Generalists - Gunslinger
Gunslinger
  • General strengths:
    Gunslinger is the best 1 on 1 combat perk. He possesses two exceptional DPS weapons in the dual deagles and magnums, and his takedowns of large zeds are the safest behind the specialists due to his exceptional headshot dps. He's also very fast, making it easier to kite zeds and dodge attacks.

    His speed also makes it easier to back away from unfavorable/agile targets that are hard to headshot, such as crawlers, stalkers, and raged scrakes performing attacks, giving him time to wait for a headshot opportunity. His passive speed boosts combined with the slowdown from Skull Cracker means that he is nearly always faster than the zeds.

  • General weaknesses and implications for gameplay:
    The endgame loadout of dual .500s, deagles, and M1911s are the equivalent of buying tier 2, 3, and 4 weapons, which no other perk has to do. This might not be the load out you end up with, but gunslinger in general carries more individual weapons than any other perk.

    He also goes through ammunition quickly for his more powerful handguns (which have spare ammo counts of around 100), and needs to consistently get headshots to maintain damage output.

    The juggling of 3 weapons also means needing to manage 3 reload cycles, and his low magazine size ensures that he will almost constantly need to reload. His magazine size means that his dual pistols have just BARELY enough rounds to decapitate large zeds, placing a huge premium on accuracy. Mastery of reload cancel will largely solve the reload weaknesses, but not eliminate them.

    The combination of low magazine size, low ammo carrying capacity, and somewhat long reload cycles punishes inaccuracy heavily.

    The biggest problem though is how easily his teammates can ruin large zed takedowns for him. He is headshot reliant, but has small magazines and no real means for forcibly locking heads in place. Inconsiderate or frankly stupid teammates will stumble your targets and cause their heads to wobble around unpredictably. Unexpected stumbles, flinches, or large zeds switching their aggro will cause you to miss enough bullets to need to reload/switch weapons to finish the takedown, if you can at all.

    More than perhaps any other perk, gunslinger is the one that most wants his targets to be left alone by his teammates.This is why many pub game gunslingers prefer to play away from the team, because they honestly don't trust them to not interfere with their kills.
    In particular, when I play gunslinger I ♥♥♥♥♥♥♥ HATE berserkers, firebug, and players that spam explosive weapons
    .

    This is not to say that you shouldn't contribute to focus fire with your gunslinger teammates, but that you should be aware that your involvement can cause him to miss some shots. Your help at the minimum should outweigh the loss of these missed shots. If it won't, then don't bother.

    Gunslinger struggles against zeds when they come within attack range, because the attack animations adds another layer of uncertainty and variance when going for headshots. Thus, he generally functions better on wide open maps with long lines of sight and plenty of room for backpedaling.

    The worst maps for him are usually tunnel maps, or maps with uneven ground that causes zed pathfinding to be unpredictable. The former renders his speed boost potentially irrelevant because of the potential to get cornered or blocked at a doorway. The latter exacerbates inaccuracy issues.

  • Against trash:
    Gunslinger is okay against trash, but struggles against large mobs that require a reload or switching to another weapon (and likely wasting expensive ammunition). Stalkers and crawlers are also problems because they are the ones most like to be absorbing body shots, wasting time and ammo.

  • Large zeds:
    Gunslinger is good against large zeds as long as he can engage them one on one without interference from trash zeds or teammates that cause the head to bob around excessively. This is because his small mag size doesn't give him too much margin for trash killing and killing large zeds in quick succession. His small magazine size means that if his misses a shot, then the takedown often fails. And if the zed is raged headshots are more difficult, and the gunslinger will find it nearly impossible to immobilize it. Can control raged zeds to an extent with Skullcracker.

(credits to dandyboy66)
Generalists - Support
Support
  • General strengths:
    Best perk for holding a heavy traffic hallway, since penetration makes killing mobs efficient. Gives ammo and potentially armor to teammates, helping perks with ammunition issues and saving money for earlier weapon upgrades. High damage per magazine in his tier 4 gives plenty of room for error, and lets him kill large zeds through body damage. Support also doesn't need to aim as much, making it easier to work with chaos causing classes like Firebug. Is the only perk with both a Tier A DPS weapon and a spike damage weapon.

  • General weaknesses and implications for gameplay:
    Support can be summarized as high risk, high reward. It has very high killing potential, but lacks any significant perk based self defense capabilities such as speed boosts (other than the DBS jump), immobilization mechanics, or slowdown. If you play well everything dies. If you mess up, you probably die before getting much of a chance to run away.

    The high reward portion is easy enough to explain: regular shotgun shells have damages easily in the 200+ range, which is enough to outright kill anything other than bloats, scrakes, and fleshpounds in 1 well placed shot. If you can make that damage connect, then there is nothing you can't kill.

    The high risk portion, beyond his lack of self defense capabilities, is a result of the unique weapon mechanics of shotguns.
    Shotgun damage is spread out among multiple pellets.

    Shotgun spread creates inaccuracy that gets worse the farther the target is.

    Shotguns fire slowly compared to other weapons

    Shotgun pellets have slower travel speed compared to regular bullets.

    Some shotguns have pump animations that essentially lower the actual firing rate.

    Shotguns have low number of loaded shots compared to most other weapons.

    Shotguns have heavy recoil.

    Some shotguns reload shells slowly one at a time.

    Which, in turn, creates these following implications
    Support must be closer to the zeds to meaningfully leverage his damage, which is inherently higher risk.

    Support is weaker against fast moving trash like crawlers or stalkers that take advantage of his low rate of fire and small magazine. This also makes elite alphas problematic when they make trash hordes rush you.

    If he can't get zeds to line up, then he doesn't kill many trash zeds before having to reload.

    Due to these factors a support, more than the other generalists, must maintain high awareness of their environment, and position himself in a favorable area. His weapon mechanics, combined with a lack of moment bonus, makes him particularly vulnerable to being rushed and/or surrounded when he makes mistakes. It becomes imperative to listen to game audio to determine if you're getting flanked, and position yourself in a way where you can't be rushed without advanced warning. It is very important to find a chokepoint or some other position that makes the zeds line up for your penetration, or else you will essentially be using your shotguns as assault rifles, which you have neither the ammo capacity or the magazine size to do so safely.

    For this reason the support works best in confined indoor maps, hallway maps, or positions where there are only a few major spawn points which make the zeds walk in one big conga line towards you, letting you take advantage of your penetration and see rushes coming. I.e, places like this:


    Ammunition is expensive; he can need up to 750 dosh to fill up the AA12 after he buys it. Without his AA12 he can also easily run out of ammunition during the wave.

    The last major issue with support is with his weapon economy. He is heavily incentivized towards getting the AA12 because it solves so many of the issues with shotguns as as a weapon class: it is tied for the tightest spread and thus the longest effective range, is magazine fed, has the biggest magazine, has no pump animation, has incredibly tame recoil, and arguably has the fastest fire rate. However, due to it being tier 4 it usually means that you need to wait until mid-game to afford it. The other generalists can reach their major end-game primaries by tier 2 or 3.

  • Against trash:
    In his favored environment (a medium length hallway) a support with a fully loaded AA12, or any automatic shotgun for that matter, can hold against a nearly unlimited amount of trash. The only issue would be husks from range, which can fire at you without you being able to retaliate until they come closer. The trench gun also extends his range against all trash except husks, but this this is complicated by the fact that it is the only shotgun to be affected by bullet drop.. In an open area support is much weaker since his penetration can't come into effect as often, wasting time and ammunition.

  • Large zeds:
    *THE* premier close quarters big zed killer due to having both a DPS and a spike damage weapon. The DBS can eliminate scrakes in under 1 second with 2 alt fires to the head. With the reload skill a support can easily handle multiple scrakes by raging them one at a time to draw them out. The double barrel also stumbles them and lets the player recoil jump, making fighting raged scrakes much safer that it would usually be. Against the fleshpound the takedown is riskier, as it needs 6-7 AA12 headshots and then a double barrel alt to the head as it charges you. Alternatively can you decapitate it with around 10 perfect headshots with the AA12 during the rage animation. For added safety taking Concussion Rounds at level 20 lets the DBS alt fire stumble raged fleshpounds. That ability makes fleshpound takedowns nearly as safe as scrake ones. Against multiple fleshpounds it is possible to rage then one at a time to draw one away from the other, but is extremely risky.

    Support's large zed takedowns are not nearly as vulnerable to ill-advised teammate interference as those of gunslinger due to being partially spike damage based and the large damage per magazine of the AA12, but the small margin of error on the 2 DBS alt scrake takedown makes it prone to failure if not aimed perfectly. However the recoil jump of the DBS makes recovering from this relatively easy if you have space to backpedal, and if the scrake retains its aggro on you.

    Here is a combo video (credits to dandyboy66)

Generalists - M14EBR Sharpshooter
M14EBR Sharp
  • General strengths:
    He's cheap. Doesn't need his tier 4 weapon, so he can be fully kitted out by wave 3 or 4, unlike gunslinger who needs his dual magnums and support who really, really wants his AA12.

    Has unmatched access to the only afflictions in the game that will completely immobilize zeds in standing positions: stun and freeze. He has the only guns in the game with noticeable stun power, and exclusive access to freeze power. Ballistic Shock lets many of his weapons stun scrakes on chained headshots, though only the crossbow can stun fleshpounds without raging. The M14EBR can stun scrakes with around 4-ish headshots, the SPX in 3.

    He also has the longest effective range, and his weapons have true scopes with magnification. This lets him pick off trash and snipe husks at ranges where other perks would just be wasting ammunition. The EBR build is also the best for using the level 25 skills to trigger zed time. Marksman gives a moderate speed bonus for kiting.

  • General weaknesses and implications for gameplay:
    He is headshot dependent, but not to the extent of gunslinger, since his 20 round box magazine gives a larger margin of error, and can 1 bodyshot stalkers which the M1911 can't.

    Due to being DPS bases it is advised to take Marksman, because the firing rate boost actually provides an effective 33% increase in DPS, compared to 25% from using Sniper.

    But he is headshot reliant in the long run because his largest problem is ammunition. Sharp can only carry 150 spare rounds max for the main trash killer, the EBR, which can be strained during the later rounds if your aim is not on point. Compare that to up to 174 AA12 shells spare for the support, who can carry up to 3 shotguns, and Gunslinger who has 128 spare for the M1911 + 240 for the HM101.

    The SPX is his highest DPS weapon and the designated large zed killer, but is tube fed and reloads slowly, meaning that it is not suitable for killng trash long term. The M13EBR sharp can't take the elite reload because that means not taking REU, which is absolutely necessary because it both shaves shots off takedowns (i.e. helping with the low spare ammo issue), and it makes takedowns faster. Under these circumstances it can take up to 5.33 seconds to fully reload the SPX, which can be troublesome if you don't have enough space to backpedal.

    The ammunition issue can be partially solved by taking a sidearm such as a single Deagle or a .500 magnum. However, these are only bandaid solutions because their small magazine size renders them unsuitable as anything more than backup weapons against trash zeds.

    Overall this means that the perk is best suited for medium to long range areas where his scope will let him pick off targets and maintain higher accuracy, while also giving him enough room to back off and reload the SPX between large zed kills.

  • Against trash:
    Like gunslinger can deal with a moderate amount of trash, but is limited by the small magazine size of 20 for the EBR. However if given enough range to work with the sharp can potentially deal with heavy trash. Is headshot dependent, but the EBR can 1 shot stalkers in the body unlike the M1911 and with just REU will 1 shot gorefiends.

  • Large zeds:
    Can handle single large zeds effectively with the crossbow to stun and the EBR to follow up with headshots. Alternatively, the SPX by itself can solo both large zeds with REU .

    With Ballistic Shock the perk is the best scrake killer among the generalists. With enough headshots the scrake will stunned and stand in place, allowing you to easily put in the remaining fatal shots. It makes sharp's scrake takedowns very resistant to teammate bumbling and interference.

    Multiple large zeds can be handled with freeze grenades. But often his takedowns involving getting very close to the large zeds to assist with aim due to having less recoil control than a gunslinger, meaning like with support if the takedown fails things can get very bad very quickly, but unlike support the sharp can't easily kite or juke raged zeds like how the support can do so with the double barrel (which also allows recoil jumping), or like how gunslinger can do with his level 20 skills and speed.

    However, his defensive capability is enhanced with his freeze nades, which are are the best panic buttons in the game and give you the chance to salvage failed takedowns. Because freeze operates on a separate cooldown timer than stun, this allows him to chain them and immobilize zeds for longer periods of time.

    The big zed takedowns get a big buff from being level 25, since then chained M14EBR headshots can trigger zed time and with Assassin decapitating the zed becomes a breeze.

(credits to dandyboy66)
Tanks - Berserker and Firebug
Berserker and Firebug (with Heat Wave) are the perks specialized in dealing with zeds at point blank ranges, and are the only ones than can hold back with multiple raged zeds within melee range. Note that they are not good at actually killing them in these situations, but are very good at distracting them and keeping them away from from teammates. Note that Heat Wave is *mandatory* for this to work, as that is the only way firebug can consistently hold back large zeds.

These two are in their own separate category because they are usually used for a specific strategy, and when used poorly actively hurt the rest of the team.

Firebug and berserker naturally cause chaos. Firebug causes zeds to do the fire dance, berserker attracts aggro and causes the zeds to frequently change direction and go into attack animations. Both tend to make it difficult for other perks to aim, and their presence in the general area of a sharp, gunslinger, swat, or commando reduces their abilities significantly. There are some maps and some hold spots where berserkers and firebug are strictly inferior to the alternatives, sometimes to the point of uselessness.

What these two perks excel at is holding a narrow choke point, such as a doorway, against nearly everything. Not exactly killing everything that gets near the doorway, though both perks are good at killing trash as long as the trash comes to them, but they both can ensure that very little gets past them. Berserker does this by parrying, along with his passive resistances. Firebug primarily does this with Heat Wave to keep the zeds back and fire panic is render them momentarily harmless..

These two perks create strategies on certain maps where the team would go into an area with 1 main entrance, station a firebug and/or a berzerker at the entrance, and then stack up high dps or long range pick perks such as demo and support behind them to kill the zeds while the berserker/firebug holds the entrance. And of course there needs to be a medic to help them. This is the classic MMO trinity[tvtropes.org] of healer (medic), tank (zerker/firebug), dps (support/demo).

Together this enables the strategy that many players refer to as "zerkwalling".

THE FRONT LINE CHOKE POINT


THE BACK OF THE TEAM

This is a video of how this works in practice.
https://youtu.be/hGtIRoaTsD0

  • Tank:
    Firebug and berserker hold the line, and kill trash if the opportunity allows.

    However, generally berserker is the better tank because Heat Wave has a cooldown timer, while the parry skills on berserker do not. Firebug is usually meant to be a compliment to a berserker, not a replacement. Due to being an AoE class with fire panic it excels at thinning down the size of the mob that the berserker has to deal with, while Heat Wave allows him to sub in for the berserker if the berserker needs to back off. He also generally requires fewer heals due to not engaging in melee, which means less strain on the medic.

  • Healer:
    Medic keeps everybody alive, but priority is on keeping the tanks alive.

  • DPS:
    Demo's and support's role is to kill everything by any means possible. Demo unloads M79 grenades into crowds and husks, and RPGs into large zeds while the tanks hold them back. There is also the option to keep a pile of C4 under the tanks. Support supplies the demo with more explosives and the firebug with more fuel, uses the double barrel for additional large zed control, and dumps AA12 shells into large zeds and husks in medium range. The trench gun is also usable to kill non-husk trash from a distance. Sharp with the railgun is useful in many of these positions to eliminate scrakes from a distance to prevent too many of them being near the tanks at once, as well as to use his freeze grenades as panic buttons.

    Outside their use as tanks, berzerker and firebug excel at being the rearguard when the team is kiting. But that is for another section.
There are also some perks that can function as situational tanks for teams that are not using the walling behind the zerker strategy.

Medics with Resilence, armor, and a tier 2 or higher melee weapon can also function as tanks in emergencies. Due to the combination of armor inherent damage reduction, the potential 50% resistence from Resilence, the potential 30% damage reduction from your own medic grenade giving you Coagulent Booster buffs, and the parry/block damage reduction multiplier, a high level medic can hold a choke against a pack of large zeds long enough for a well coordinated team to clear the area.

A support with Concussion Rounds, DBS, and AA12 can essentically function as a DPS tank, due to the fact that it is capable of killing everything so quickly in close quarters to the point that he is untouchable in his favored environment (a medium length hallway). In this environment, with some backup an adequately skilled and equipped support can handle every zed spawn short of triple fleshpound.
Team support - Non-combat utility
What do I mean by a support perk, or a perk with support roles?

Team support is anything that does not directly kills or otherwise involve combat with them, and provides benefits for your teammates.

The only 100% support class is medic. The number one rule for medic is:

Don't use poison.
Don't use poison.
Don't use poison.
Don't use poison.
This skill is worse than useless.

Really, don't even think about using any right side skill other than the level 5 one.

Using poison means not using the powerful buffs on the left side skills. Your teammates don't know if the poison will actually kill the zed, making them waste bullets and time just to be sure. The poison makes zeds do the poison dance, making them incredibly annoying to headshot.


Poison does 7.5% of base weapon damage a tick for 5 seconds, at 1 second a tick. Yes, 7.5% of the base damage of some of the weakest weapons in the game. Which sounds bad even if everything the size of a gorefast and above didn't have a hilarious amount of poison resistance. Gorefasts have 25% poison resistance. EVERYTHING bigger than a gorefast has a whopping 75% resistance to poison or higher. You're doing a grand total of 1-2 damage a second to these targets. You can output 20 times the amount of dps by slapping them with your weapon stock.

Don't use poison.
Don't use poison.
Don't use poison.

If you want to play with poison, be a level 25 demo and nuke stuff. He can actually kill things.

The right side skills for medic are garbage on higher difficulties compared to the buffs the left side skill gives. Additional speed and resistances lets teammates survive otherwise fatal hits and run away from threats when the team is kiting.

The other perks with support capabiltiies are
  • Support:
    Gives ammo and potentially armor. Greatly cuts down on maintenance costs for perks with expensive ammunition like swat, as well a gives a safety net for perks with low spare ammo capacity like gunslinger, sharpshooter, and demo. In the early waves this allows certain perks to accumulate enough cash to reach key weapons quicker.

  • Commando:
    Stalker vision significantly reduces their threat, and prevents a significant amount of chip damage by allowing players to see an kill them before they can be rushed. Damage prevented is basically healing. Grants zed time extensions that for level 25 teams essentially turns on god mode.


  • Demolitions:
    Gives grenades. Best for perks that have useful special grenades like medic, swat, demo, and sharp. Is the the most powerful knockdown perk, being the only one with ranged knockdown abilities that do so in 1 shot.

  • M14EBR Sharp:
    The usage of Ballistic Shock makes the EBR Sharp the only perk in the game that can easily cause large zed stuns without the use of grenades. Is the most powerful stun perk, with multiple weapons that can stun scrakes in 5 headshots or less, and is the only perk able to stun fleshpounds outside of grenades. Has exclusive access to freeze.
Team Support - Field Medic
When and why should you be a medic?
Field medic is a poor combat class. Its weapons are either weak, have high recoil, or both. He has no passive perk damage bonus. In most if not all circumstances, field medic is a non-combat asset, and is probably most suited to killing targets of opportunity rather than being a responder of first resort.

So why would you want to be a field medic?

There are two major reasons:
Reason 1: The team is not capable of killing enough zeds at a distance to avoid accumulating chip damage, which will eventually overwhelm their ability to heal each other without distracting them from combat.
The occurs while kiting, or camping in an area that can't be 100% controlled by ranged perks. When the team is kiting there is the increased risk of damage due to the fact that the team is moving, and will walk into close encounters resulting in damage. When the team is camping in open areas there is the possibility that a group of fast zeds like stalkers or crawlers will sneak through and get hits on players. Firebug and berserker, due to being close range, will almost always suffer chip damage.

There are other reasons for why a team might be getting large amounts of chip damage, but they generally involving them being deficient in some matter, either in game sense, teamwork, or deathmatch skills. These things I will not focus on, because a medic can't heal stupidity.

Overall this can be summarized as a division of labor via specialization. The combat perks kill, the medic heals them up so they don't have to waste time or retreating for heals, and thus can kill more. The combat perks are better at killing due to various bonuses to damage, magazine, size, recoil, control, etc., while medic is better at healing chip damage due to stronger healing darts and faster dart recharge times.

Reason 2: There is a high probability that your team will encounter situations where 10 hp/s healing will not be enough to save somebody.
Healing in this game is capped at 10 hp/s. It is impossible to heal faster than this rate no matter how many darts you use. More darts means that the total amount healed is greater, but it doesn't increase how fast it happens. There are situations in this game where this can make regular, non-medic healing meaningless.

Example:
Raged FP on HoE deal ~60 damage.
Players generally have 100 health.

  1. An unarmored player get attention from a raged FP and doesn't block or parry it. He goes from 100 hp to 40.
  2. A non-medic with a medic weapon, say a commando with the HMTech-401, immediately puts some healing darts into the injured player.
  3. Injured player starts healing at 10 hp/s.
  4. Some fool immediately rerages the fleshpound after the commando darts the player. Or there is a 2nd fleshpound that just raged. By chance it targets the injured player.
  5. It'll take this FP another 1.8s to reach the injured player who is running away.
  6. At this point the injured player only has 58 HP.
  7. The FP hits the injured player for 60 damage, and because the math of the universe is cold and impersonal, he dies because 60 is greater than 58.

However, medic has 2 perk skills that will change the outcome of this scenario:
Adrenaline Shot: Shooting teammates with darts increases their speed by 10% for 5s, stacking up to 30%. The 5s timer is reset by every dart that hits the player. The section below has parts bolded showing how this speed boost can change the equation.

  1. An unarmored player get attention from a raged FP and doesn't block or parry it. He goes from 100 hp to 40.
  2. A Medic with the HMTech-401 immediately puts some healing darts into the injured player and boosts him to 130% of normal speed.
  3. Injured player starts healing at 10 hp/s.
  4. Some fool immediately rerages the fleshpound after the medic darts the player. Or there is a 2nd fleshpound that just raged. By chance it targets the injured player.
  5. It'll take this FP another 2.4 seconds to reach the injured player who is running away.
  6. At this point the injured player has 64 HP.
  7. The FP hits the injured player for 60 damage, and because the math of the universe is cold and impersonal, he lives because 60 is less than 64. It is also possible the the FP's attack misses entirely, because FP slow down to hit players and at 130% speed a sprinting player can literally run faster than the FP can swing his arms.

Coagulent Booster: Shooting teammates with darts increases their damage resistance by 10% for 5s, stacking up to 30%. The 5s timer is reset by every dart that hits the player. The section below has parts bolded showing how this speed boost can change the equation.

  1. An unarmored player get attention from a raged FP and doesn't block or parry it. He goes from 100 hp to 40.
  2. A Medic with the HMTech-401 immediately puts some healing darts into the injured player and boosts him so that he only takes 70% of damage
  3. Injured player starts healing at 10 hp/s.
  4. Some fool immediately rerages the fleshpound after the medic darts the player. Or there is a 2nd fleshpound that just raged. By chance it targets the injured player.
  5. It'll take this FP another 1.8 seconds to reach the injured player who is running away.
  6. At this point the injured player has 58 health.
  7. The FP hits the injured player for 42 damage due to his damage resistance, and because the math of the universe is cold and impersonal, he lives because 42 is less than 58.

These two particular skills are what allows a field medic to bypass 10 hp/s healing. The speed boost lets players outrun incoming damage fast enough for the healing to work, or avoid it entirely. The damage resistance allows a medic to "heal" players instantly by increasing their effective health pool the moment they're darted. A 100 HP player with 30% resistance effectively has 142 health. Coagulant Booster makes players tougher instantly without waiting for the 10 hp/s healing.

The damage boost skill (Focus Injection) doesn't really save lives, but poison is garbage, so you take this instead.

Why is battle medic (usually) a waste of oxygen and server space?
By battle medic, I mean a medic player that heals, but doesn't not use Focus Injection + Coagulant Booster, and instead tends to shoot more due to taking Combat Doctor and Battle Surgeon. A medic that just doesn't heal isn't a battle medic, but rather an terrible player.

The problem is that out of the two reasons for being a medic in the first place, reason number 2 is the more important because no other perk can fill in for it. Since the advent of crossperk all medic weapons have found use in other perks who have the bonuses to turn them into effective killing weapons. Commando will often use the HMTech-401, support the 301, and gunslinger the 101. They can help mitigate chip damage. What these perks can't do is bypass the 10 hp/s cap on healing, which is something ONLY MEDIC CAN DO.

Medic's combat bonuses are also poor enough to not do anything meaningful. The damage bonus of Battle Surgeon doesn't shift breakpoints on any sort of target other than large zeds and bodyshots on some trash. It doesn't even let you 1 shot stalkers.

Overall the speed and resistance bonuses are something only medic can do. Mitigating chip damage on the other hand is something EVERYBODY can do with medic weapons. If a team can survive with a medic lacking those skills, then that medic wasn't needed in the first place, and in practice was probably just a rather bad commando.
Team Support - Commando
Other than the medic, I consider commando to be the other "true" support perk in the game. While the other previously mentioned perks (support, demo, sharp) have support abilities, I do not consider them "true" support perks because those abilities are limited to supplies (which doesn't matter unless you run out), or are closely tied to their combat strategies.

For example, a sharp can freeze a group of fleshpounds to make it easy for a demo to blow them all up with rockets, but the freeze grenade is more often than not used so that the sharp himself can do the job. So it *could* be used in a support role, but that often isn't the best course of action.

Commando on the other hand has 2 major abilities that can vastly improve the abilities of the rest of the team.

Stalker callout:
Most perks that are weak to stalkers are not weak to stalkers because they're particularly bad at killing them, per se. An M79 grenade can easily wipe a stalker pack, as can 1 well place shotgun shell. They're weak against stalkers because they do not like being surprised in close quarters. For the M79 the demo has his minimum arming range, which prevents him from defending himself if he gets ambushed. For the shogun example, shotguns fire slowly, meaning a support caught in close quarters with a stalker pack can't clear them out quickly enough to prevent getting hit.

Commando, by revealing the stalker at range, basically turns them into weaker but faster clots, giving other perks the opportunity to kill them before they get close.

Zed time extensions:
First, the mechanics of zed time.
ZED Time in Killing Floor 2 happen during killing ZEDs or killing players. If ZED dies under other circumstances his death also may cause ZED Time.

ZED Time duration is 3 seconds.

ZED Time is a timer (float value 3.0000). It goes down from 3.0000 to 0 and resets back to 3.0000 as long as player's perk can do that.

Note 1: ZED Time cannot be extended by certain amount of the seconds. Instead it gets reset.
Non-Commando can reset the ZED Time only once. Commando can reset it by up to 6 times: Levels 1-4 - 1 reset, Levels 5-9 - 2 resets, Levels 9-14 - 3 resets, Levels 15-19 - 4 resets, Levels 20-24 - 5 resets, Level 25 - 6 resets. ZED Time will be reset as soon as another ZED will be killed. For example Support can accidently reset it just because his shotgun has killed another ZED by penetration.

ZED Time slows the world to 20% of its normal speed (i.e. by 5 times).

Minimum interval between two ZED Times is 10 seconds. Cooldown starts right at the beginning of each ZED Time.

Base chances to get ZED Time:
  • Player kills ZED (within 300 units of range) - 5%.
  • Player kills ZED (range > 300 units) - 2.5%.
  • ZED kills player or other ZED - 5%.
  • ZED dies under other circumstances - 5%.
  • Commando's extension - 100%.
  • Boss dies - 100% (duration - 6 seconds).

In addition following events also has their (separate) chances to cause ZED Time:
  • Player kills 4 or more ZEDs with an explosion - 5%.
  • Player kills 2-3 ZEDs with an explosion - 3%.
  • Player kills ZED with a headshot (within 50 units) - 3%.
  • Player kills ZED with a headshot (range > 50 units) - 5%.

    Note 2: These chances are separate. While having 5% chance to cause ZED Time by killing ZED at same time there is 5% chance to cause it by killing this ZED with a headshot. Units are centimeters, 1uu = 1cm.

Following chances increase in time if time passed since the last ZED Time is:
  • 10 seconds - no chances.
  • 10-30 seconds - normal chances.
  • 30-60 seconds - 2 times better chances (x2).
  • 60+ seconds - 4 times better chances (x4).

How it works:
With each ZED / player death, the game rolls the dice (uses FRand() function that returns random float value between 0 and 1). Then checks if this value is greater or less than base chance (3% = 0.03, 5% = 0.05 etc.). If this value is less than base chance ZED Time begins.

Zed time for level 25 perks is basically god mode. You have all the time in the world to aim. You can look around in real time. Recoil basically disappears. If you have real time firing skills, your DPS is basically multiplied by 5. Commando extends the maximum possible zed time frm 6 seconds, to 24 seconds, which for a level 25 team is usually enough to kill everything in sight.
Perk Performance - Effectiveness
This section will probably be the one, and only, part where I address the issue of individual skill.

I assume that you are familiar with the concept of skill floor and skill ceiling. This is how I define them.

Skill floor:
The ease of access for the perk to a complete newcomer. Basically how effective the perk is in the hands of a complete novice.

Skill ceiling:
The theoretical maximum effectiveness of a perk. How the perk performs in the hands of a truly experienced player.

The way I use these terms do not take into account how much skill it takes to reach skill ceilings, but merely how well the perk performs once you reach the skill ceiling. It may be more accurate for me to call these "effectiveness ceilings and floors".

I will list what I believe where the perks fall in these areas. Note that by definition a low skill ceiling is still higher than a high skill floor.

  • Berserker
    Skill floor: Low
    A novice berserker who doesn't know how to parry, position himself, body block, or stay out of other players' sight lines is a rogue element that has no value and is a liability to himself and his team.

    Skill ceiling: Moderate
    Once a berserker knows how to time his parry, and has the game sense/comms to position himself optimally, there is little else to learn. The issue is that berzerker is at the end of the day is the "Oh we screwed up send help" perk. His utility increases as the skill of the team diminishes, since his best asset, survivability, generally comes into play in the circumstances where the team has messed up.

  • Commando
    Skill floor: Moderate
    Perk is very headshot dependent, but has just enough damage that it isn't a complete disaster. His presence basically nullifies the threat of stalkers. Lack of game knowledge regarding zed time extensions and target prioritization will hurt though.

    Skill ceiling: High
    Zed time extensions create huge power boosts for your team. With good aim commando is the best medium to long range trash killer in the game, and can solo scrakes if trash are not present. With proper coordination he can also assist bullet based perks with large zed decapitations.

  • Support
    Skill floor: Moderate
    Shotguns have minimal aiming requirements on trash and enough damage to bodyshot kill many targets. The main issue is the slow reloads and small magazine sizes that hurt low skill players.

    Skill ceiling: ♥♥♥♥♥♥♥♥♥
    A maximum efficiency support is a god in his favored environment. Shogun shells w/ penetration clears entire hallways. Large zeds can be decapitate in seconds without ever sprinting or exiting their rage animations. And support has the combination of raw damage, magazine capacity, and reload efficiency to put down large zed through body damage if needed.

  • Field Medic
    Skill floor: Low
    Battle medics are a curse and a liability.

    Skill ceiling: Moderate - High
    Medic's impact is highly dependent on your team. If the rest of your team is filled with incompetents, you will be saving lives on a regular basis. If the rest of your team are masters, then you can afk and nobody will notice.

  • Demolitionist
    Skill floor: Moderate
    Demo doesn't really need to aim. High damage weapons means he can deal with zeds in messy and inefficient methods.

    Skill ceiling: High
    A highly skilled demo evaporates fleshpounds and scrakes. The RPG with the correct skills deals catastrophic damage to scrake skulls, outright killing any short of 6 man Sui and HoE ones. For those two scenarios, the RPG impact deals 93.75% of fatal headshot damage or more. His stun grenade is unique in that it stuns on physical impact, meaning less guesswork as to where to throw, and has the bonus of siren resistance (take that skill, always). He has the best knockdown power in the game with RPG impacts on legs, capable of knocking down both large zeds with direct impacts and no skill bonuses.

  • Firebug
    Skill floor: High
    You literally don't need to aim.

    Skill ceiling: Low
    The gap between complete novice firebug and good firebug is literally knowing not to set larges zeds on fire. And when to switch off firebug.

  • Gunslinger
    Skill floor: Low
    Small magazine sizes, multiple reload cycles, and weak stun grenade means that every miss shot is going to hurt.

    Skill ceiling: ♥♥♥♥♥♥♥♥♥
    A max skill gunslinger is a god. With reload canceling to counter his biggest weakness, he has by far the best non-spike headshot dps in the game with the dual deagles, the 2nd best non-spike headshot dps with the dual magnums, fast movement, and the ability to engage from medium range.

  • Sharp (Railgun)
    Skill floor: Low
    Low ammo + missed shots = useless player

    Skill ceiling: High
    Basically you can pretend scrakes don't exist. Anything short of multiple fleshpounds ceases to become a threat. But trash will be an issue.

  • Sharp (M14EBR)
    Skill floor: Low
    Same for all headshot dependent classes really.

    Skill ceiling: ♥♥♥♥♥♥♥♥♥
    Edges out demo for having the best incapacitation ability in the game. With the addition of the SPX he can now kill multiple large zed without going through lengthy reload cycles, and his exceptional range will make him outclass the other dps perks on many maps.

  • Swat
    Skill floor: Low
    The low damage bullets means that anything bigger than a clot will soak up bodyshots like a whirlpool.

    Skill ceiling: Moderate
    The flashbangs provide great utility, but unfortunately that is the only exceptional thing about swat.
Loadouts - General priniciples
What I consider to be the first principles when considering which skills and weapons to take. Specific examples will be elaborated on later.


  • Remember the principle of diminishing marginal returns. Getting more of what you already have enough of is not worth sacrificing the things you don't have enough of.
    A generalization of the overkill principle. Having enough of everything is better than having a excess of one good characteristic, while being severely deficient in another.

  • Personal preference makes things fun. It does not make things good. Do not confuse the two.
    You are free to pursue enjoyment in sub-optimal weaponry, skills, and tactics. However, at a minimum you should be honest with yourself about how effective it is, and keep in mind if your team is strong enough for you to not have to perform at your best.

  • Addressing critical long term weaknesses is more important than increasing existing strengths.
    This is because the marginal value of addressing weaknesses is usually greater than the marginal value of creating wasteful overkill. A good example is the need for demo take take Sonic Resistant Rounds as soon as possible to alleviate his weakness to Sirens.

  • The marginal return of the skill is what matters for the most part.
    What the skill lets you do does not matter. What matters is what the skill lets you do, that you could not do before.

  • Skills do not exist in a vacuum.
    Skill often end up in sets due to natural synergies between certain skills and loadouts. For example, the M14EBR Sharp usually uses Marksman, Ballistic Shock, Rack em' Up, Always Prepared, and ZED Time: Assassin.

    Marksman has a 33% effective DPS boost compared to Sniper's 25%, so the perk takes that.

    Since Marksman boosts the fire rate, the stun meters of zeds fill up faster. Therefore adding Ballistic Shock onto that suddenly makes stuns reliable.

    Due to Marksman's firing speed boost, Rack em' Up Stacks add up quickly, and become necessary for damage output.

    Due to Marksman making you run through ammo quickly, you take Always Prepared.

    Due to already taking Ballistic Shock, the target will already be stunned if not dead by the time zed time activates. So you take Assassin.

  • If something is strong but situational, then the fact that is it situational is more important than how well in functions in that situation.
    You can be very good at doing task A, and only task A, but if task A is not important, then you're not important, and therefore expendable.

    If task A is adequately done by somebody else who can also do an important task B, then you are out competed. (Do not take this as an argument for survivalist as it currently is. The problem with survivalist is that it doesn't adequately do anything well.)

    So when you mentally think that a loadout or perk does this particular task well, keep in mind if the task is important at all, and if anybody else can do it well enough to fill the role and potentially fill another role in the process.
Loadouts - Meaningful positive attributes
This section is dedicated to attributes that are positive and have worthwhile impacts on gameplay
.
  • Long term strengths will outweigh short term or situational weaknesses.
    Situational or immediate short-term weaknesses tend to be the ones most easily addressed by simply improving as a player. Example will be the fact that over the long term the efficiency of the reloads for the automatic shotguns will outweigh the fact that their reloads can't be interrupted.

    Automatic shotguns are magzine fed, and load more shells in less time. The disadvantage that the reload can't be interrupted can be dealt with by proper positioning or having a teammate cover you or switching weapons to clear the immediate area. I.E., it can be mitigated.

    Tube fed shotguns reload fewer shells in the same amount of time compared to magazine fed shotguns. The disadvantage is mathematically coded into the game,. This results in needing to be covered (can be mitigated), but also needing more time overall to reload (can't be mitigated, it's basically coded into the game).

  • Hits major damage breakpoints.
    Simple to explain, the skill or weapon reduces shots/time to kill on enemies.

  • Enables new techniques against enemy types that the class is usually weak to.
    For example Commando is usually bad against scrakes. But the 3 skill combination of Large Mags, Impact Rounds, and Hollow Point Rounds enables him to do solo takedowns on them, with the HMTech-401 takedown being trivially easy.
Loadouts - Meaningless positive attributes
This section is dedicated to attributes that are technically positive, but have no value.

  • Damage that is over a major breakpoint. Overkill has no value. Extra damage doesn't make a zed more dead.
    This concept is an extension of the damage fallacy. While the damage fallacy is mainly concerned with underkill (i.e. increasing the damage but not enough to change the number of bullets to kill), the main principle remains the same. Damage doesn't matter. Bullets to kill matter. Any damage that goes above and beyond what is necessary to kill is wasted.

    The easiest example is the use of the SCAR vs the AK12/HMTech-401 on a level 25 commando with Hollow Point Rounds. Note that the skill description is bugged and gives a 30% bonus, not 25% to damage.

    On HoE a stalker has 75 body health and a 50% vulnerability to AR damage.
    The AK12 will deal 93 damage to a stalker on a bodyshot.
    The SCAR will deal 129 damage to a stalker on a bodyshot.

    Technically the SCAR does 38% more damage to the stalker than the AK12. But every point of damage past 75 is worthless, and that includes the entirety of the extra damage of the SCAR.

  • Damage resistance or extra health that did not directly save your life does not matter.
    Just like the zeds, you can either be alive, or you can be dead. It's a binary existence.Your health doesn't matter until it reaches 0.

    The strongest single non-boss attack in the game, other than the husk suicide, is the hit of a raged fleshpound, which does around 60 damage. It doesn't matter how much health the player getting hit has as long as it is above 61. As long as the player survives the encounter with at least 1 health, then he can be regenerated back to full for free.


  • Your ammunition numbers don't matter until they reach 0. Extra spare ammo that you don't even use is worthless because it's idle.
    If you pass each wave with 1 bullet left in each gun, then you didn't need more ammunition. Ammunition skills only matter if you would have run out of ammunition without them. Note that due to the ammunition skill glitch noted in Game Mechanics - Miscellaneous items, ammunition skills can effectively be taken without using the skill itself.

    For example, lets say that you notice that you consistently use around 300 bullets during the wave. The default spare ammo capacity of your weapons is 350 bullets. If you take a skill that lets you carry 450 bullets, does that make any difference?

    It doesn't.

    If you don't take the ammo skill, you use 300 bullets, end the wave with ammo to spare, and buy 300 bullets at the trader.

    If you take the ammo skill, you still use 300 bullets, end the wave with ammo to spare, and buy 300 bullets at the trader.

  • "Versatility" by itself is worthless. The only two questions that matter are "Does this let me or my team kill more zeds safer and/or faster?" and "Is this better than every other available option?". Any decision that is a negative on either issue is non-optimal.
    Versatility is the same thing as the damage numbers in the damage fallacy: versatility only matters as a means to an end. "Versatility" that does not directly translate to more dead zeds is worse than useless.

    Having a variety of choices to pick from does not matter. It is better to be forced to choose 1 very good choice compared to having the freedom to pick between 10 bad choices. If you had to pick between being forced to win the lottery (1 choice) versus being forced to choose between getting afflicted by one of 10 different forms of cancer (10 choices), you'll pick the lottery.

  • Any weapon or skill that you use because your team is bad suffers from a fatal flaw: Your team is bad.
    A bad team does not make a weapon good. Your 9mm pistol will not by some sorcery start firing lasers as the IQ of your of your team approaches 0. The weapon is still terrible. However, the circumstances have conspired to make everything else equally or more terrible. This particular piece of criticism is directly largely to the M16M203 as a self defense weapon for the demo.

    If something is only useful when your team isn't capable of winning in the first place, what is the point?


  • When evaluating a weapon or skill, ask yourself this question: Can the effect of this skill or weapon be replicated by improving my gameplay or that of my teammates?
    Any skill or weapon whose effect can be replicated by changes in player behavior is a crutch. You would not need it if you improved as a player. It does not raise your skill ceiling, but rather your skill floor.

    For example, the effect of demo's Concussion Rounds on a fleshpound can be replicated by landing headshots without the skill, or just aiming for his legs.

    Automatic/Semi-auto fire selectors for weapons with around 700 RPM or less are ultimately useless. You can fire single rounds by keeping it on automatic and just tapping the fire button. If anything the fire mode selector is actually counterproductive, because you might attempt to use full auto in a panic situation only to realize that the weapon is in the wrong fire mode.

    For perks with primarily magazine fed or single shot weapons, reload skills are generally unnecessary, and should be taken only if the other option is even more unnecessary. Learn to reload cancel, and you can get better reload times as well as the benefit of the skill on the opposite side of the tree.
Loadouts - Workable negative attributes
This section is dedicated to attributes that are technically negative, but that can in many circumstances be worked around to the extent that the negative attribute is either unnoticable, or irrelevant.
  • Any weakness that can be addressed by simple behavioral changes is not a real weakness.
    Any weakness that can be erase by simple improvements to gameplay or game sense should be done so by those methods. Certain perks like gunslinger or support that seem to have low magazine sizes can have acceptable kills per magazine with hight headshot accuracy.

  • Weakness at close range.
    Perks weak to zeds at close range can always offperk close combat weapons or cheap holdout options like the DBS or the Deagle. For many of them, they aren't even weak to close range per se, but rather the players tend to panic a bit when the zeds get close, and as a result spray and waste ammunition. This type of "weakness" can be solved by leaning to control the panic instinct, or you know, pre-emptively backing up.

  • Requires accuracy.
    Accuracy can alwaye improved. Either by picking a more favorable spot that makes it easier to aim, or by improving your own aim through practice and memorizing animations.
Loadouts - Unworkable negative attributes
This section is dedicated to attributes that are negative, but are generally not worth the trouble needed to work around the issue. It'll usually be a better idea to simply abandon the skill/weapon altogether.

  • Any weapon that can be summarized as "I was too poor to afford a _________" is a weapon you don't want to keep, and should consider very carefully before buying.
    Every weapon that you want to keep must have at least 1 important characteristic where it is most exceptional, outclassing every other available weapon in this area. Every weapon that is primarily defined as being a worse version of something else usually has no such defining characteristic. You don't want to keep it, and buying it sets you back monetarily since you lose money when selling it back.

  • Only finds value when you're engaged in behavior that is otherwise just stupid.
    For example, gunslinger is a headshot class.

    Why? Because it has the following perk limitations:

    Small magazines: Body shotting can cut your kills per mag in half.
    Low total ammo pool: Body shotting makes you much more likely to run out of ammo.
    Longish reload cycles: Body shotting makes you more likely to get caught reloading before every threat is dead.

    So therefore any gunslinger skill that depends on you *not* headshotting is inferior garbage.

  • Requires a completely different set of perk skills compared to the best weapons available to the class or the the rest of the perk arsenal.
    The easiest example is the commando arsenal. Every rifle, but the Stoner, benefits more from High Capacity Mags than Tactical Reload. Why? Because their base reload times are already good enough, and with reload canceling they reload fast enough to essentially be reloaded at almost any opportunity, since it is rather rare that you can't find 1.5s free to reload a weapon.

    However, the Stoner benefits from Tactical Reload more because its reload time even with reload canceling is a genuine disgrace. However, should you take Tactical Reload for the Stoner, the 2nd rifle that you carry with it will be gimped, because you're not running the best skill setup for that 2nd rifle.

    Why not just run 2 rifles then that are both helped by your perk skill choices, rather than one that is, and one that isn't?

  • Annoys your teammates for little or no real advantage over other options.
    Medic poison does 1 damage per second against anything larger than a gorefast. It makes the zeds dance and twitch and much harder to headshot. Anything the size of a gorefast or smaller generally dies to 1 headshot or bodyshot. For all intents and purposes, medic poison does nothing of use except in rare, once in a blue moon circumstances.

    Same thing can be said for other skills like Firebug's Zed Shrapnel.

  • Only finds value with genuinely bad teams.
    You're losing anyways. Or at least your chances of winning are not worth the effort needed to pull out the victory.

  • Has a severe range disadvantage compared to another viable option.
    The problem here is that if anybody else on your team picks that other option you either stay put and becomes useless, or overextend and become annoying to the rest of the team who suddenly have to protect you while you overextend.

  • Requires special circumstances to find use.
    For example, the shotgun penetration example for Armor Piercing Shot found near the beginning of this guide. It only really finds use over default support shotgun penetration when you have more than 4 zeds lined up. That's rare enough that it might as well be never on certain maps.
Loadouts - Hidden stats and applications
There are a lot of hidden modifiers in this game, or just actual typos in the skill descriptions. And then there are skills that just describe what they do, but leave the actual applications of it unspoken.

TWI fix this stuff.

    • Difficulty
      • On HoE you take 50% of all self damage. Especially dangerous with explosive grenades that usually deal upwards of 200 explosive damage.

      • When respawning after death the amount of cash is the highest of either the standard starting dosh for your wave, or 75% of the dosh you had upon death.
    • Zeds
      • Enraged fleshpounds/quarter pounds only take 1/4 of incapacitation power, stop wasting stun grenades on them.

      • Fleshpounds/quarter pounds have a 33% and 20% chance respectively to spawn raged on HoE and Sui.

      • Scrakes, Fleshpounds, and Gorefast variants only take 1/5 of incapacitation power when blocking. During the animations they respectively have a 10%, 10% and 20% global damage resistance respectively. If you're wondering why they sometimes no sell stun grenades and crossbow shots, this is the reason.

      • When a Husk has 15% or less health it will start sprinting and attempt its death or glory suicide attack, which deals 190 damage in a 500 unit radius, with a 0.5 damage falloff.

    • Berserker:
      • Affected by all forms of damage over time by 20% less time.

      • Butcher: Yes it affects the Eviscerator's projectile.

    • Commando:
      • Hollow Point Rounds: 30% damage boost instead of listed 25%.

      • ZED TIME - Tactician: Reloads initiated before ZED Time don't benefit from the skill.

    • Support:
      • High Capacity Magazines: Doesn't affect DBS.

      • Armor Piercing Shot: +4 to penetration

      • Resupply Pack: Does not change the amount of ammunition given. The only additions are the extra ammo capacity and giving out armor.

      • Concussion Rounds: Perhaps the most misunderstood *good* perk skill in the game. Concussion Rounds on Support has a real, and important, use. You don't see it that often because the vast majority of players are ignorant of what it enables, or don't have the skill needed to use it.

        Concussion Rounds does 2 things, which combined turn Support into a much better large zed killer.

        • Enables the AA12 to kill scrakes in close quarters. The AA12 stumble power is too low to stumble Scrakes usually. It takes 8 perfect AA12 headshots with all damage boosts to decapitate a 6p HoE scrake. And it normally takes around 12 AA12 shots to stumble a scrake, meaning the AA12 stumble power is useless against them since the scrake will be decapitated before it stumbles. But with Concussion Rounds you will stumble the scrake by the 5th shot, letting you decapitate it with less backpedaling. This does multiple things for the support. One, it enables the support to initiate scrakes takedowns from longer range since the AA12 spread is much tighter than the DBS. The DBS is risky to use against scrake packs due to the need for point blank range. It is considerably safer to unload 5 AA12 shells to rage the target scrake from medium distance, switch to the DBS while it stumbles, and then blow its head off as it charges you. The skill greatly increases the pool of available anti-large zed ammunition because without it the DBS ammo is consumed at an alarming rate due to the 194 AA12 ammo pool being unavailable for regular scrake killing (there are still ways to get the extra ammo from Resupply pack)

        • Reliably lets the DBS stumble unraged FP's, and makes it possible for it to stumble raged FP's. Once you learn the sweet spot before an unraged FP would lunge at you can fire the DBS at its head, and with Concussion Rounds you only need 5 pellets out of 24 (alt fire) to hit his head to stumble him. Without it you will need 12. The DBS with all damage boosts needs only 2 alt and 1 normal shot to tear a 6p HoE FP's head clean off, and with Concussion Rounds it becomes much safer to attempt this. 1 alt to stumble, the 2nd alt during the stumble animation, and the 3rd shot while he is in his rage animation. Concussion Rounds turns the DBS alt into the only thing in the game capable of stumbling a raged FP (other than a Heat Wave firebug). It turns support into the only perk in the game that can conceivably fight a full health raged FP in close quarters without taking damage, since the combination of stumble and the DBS jump gives you ample opportunity to shoot his head off.


      • ZED TIME - Penetrator: +40 to penetration, no damage reduction.

    • Medic:
      • Buffs affect teammates as long as the dart hits them. It doesn't need to heal.

      • Symbiotic Health: You get your own buffs when you are healed by this skill. The speed, damage, and damage resistance buffs. If you heal teammates while you are at full health, you also get your buffs. Now you can understand why so many people think Resilience is for scrubs except in very specific instances.

      • Resilience: Damage resistances applies to your armor.

      • Focus Injection: The damage multiplier is unique in that it is not additive like most perk damage boosts, but multiplicative.

      • Acidic rounds: Deals 7.5% of weapon damage as poison damage, at 1 second intervals, for 5 seconds.

    • Demo:
      • Bombardier: Increases all damage types, including impact damage.

      • ZED TIME - Destroyer of Worlds: The hidden modifiers are what turn this skill from "good" to "♥♥♥♥♥♥♥♥♥ ". Initial explosion has a 50% damage boost and 35% blast radius boost and deals no self damage. Radiation cloud has a radius of 3 m, lasts for 8 seconds, and deals 20 damage at 1 second intervals to anything in it. In addition the radiation cloud deals 20 toxic damage at 0.3 second intervals for 5 seconds.

    • Firebug:
      • Groundfire: 2x modifier to ground fire damage.

      • Heat Wave: All attacks have 1000 stumble power.

    • Gunslinger:
      • Rack Em Up: Damage boost is applied to the shot that triggers it.

    • Sharpshooter:
      • 25% headshot bonus only applies to perk weapons, as does the perk recoil bonuses.

      • Rack Em Up: Damage boost is applied to the shot that triggers it.

    • Swat:
      • N/A, everything should be understandable.
Loadouts - What makes something bad?
This is condensation of the principle laid out in Loadouts - General Principles, and their implications. These are the important general questions to ask of any weapon, perk, or skill selection you choose.

  • Is it the best in class at some role that actually matters?
    Like the mythical underwater basket weaving degree, you can be good at something. But the something you're good at can still be worthless. If you're not the best at anything, why should I even consider you?

  • Is that role already occupied?
    If somebody is already performing that job why are you going to double book the role? Do something the team actually needs.

  • Is this strictly inferior to some other combination of perk, skill, and loadout?
    It's not just weapons that are competing, it's the combination of weapons, perk, and skills. Just because your weapon choice is the best options for your particular perk with your particular skill selection, does not mean that is it optimal. There are no sacred cows here, if you'll be a greater asset as another perk or with a different skill selection, do it.

  • Am I going to piss off my team in ways that make them wish I didn't exist?
    Don't be that one idiot that thinks firebug's a good idea in a team with gunslingers and sharpshooters.

  • Does this loadout become less and less useful the better I get at the game?
    This is why I hate training wheel, *easy to play, but low impact*, or *convenient but unnecessary* sorts of loadout decisions. As you improve at the game they become increasingly worthless, and saddle you with bad habits that you'll need to shake off once you hit an actual challenge.

  • Am I'm taking this because my team or I am bad?
    You're losing anyways.


I must reiterate that the following loadouts and skills are not bad because they're useless or not viable. They're bad because there is something better. The loadouts I'm going to list below are bad because for on perk usage during the regular waves before the boss, there exist options that are universally better in all of the ways that matter.

"Viability" is a meaningless and subjective term. Everything in this game is potentially viable if you're good enough. Viability depends on the personal skill and idiosyncrasies of the player. Viability is not a useful measure of how good something is. And neither is "personal preference". Both terms are usually used as blanket excuses to attempt to dodge critical examination of personal deficiencies at the game.

Some teams win easily.
Some teams win barely.
Some teams just lose.

Obvious somebody is doing something correctly, and somebody isn't. And that something usually has to do with the 6 questions I've posed above.
Loadouts - Unconditionally bad skills
In a 6 man HoE game, there are some perk skills that are bad in nearly all situations. Or only find use if you're not good enough for HoE in the first place, and need these skills as crutches. This section is dedicated to the skills that should almost never be chosen due to these reasons, or the other option being too good to not take.

Berserker
  • Resistance: Resistance is a straight downgrade to Parry. Parry gives you a 40% general resistance compared to 20% if you can parry at all. If you can't parry at all, you have no business being a berserker.


  • Massacre: Smash's 25% headshot bonus applies to ALL attacks. Meaning that if you can aim for heads/necks, which you should be, then Smash only has a 5% disadvantage on light attacks, a change which does not shift a single breakpoint that I know of. All this, while Smash has a huge advantage with the hard attacks that you will be relying upon to deal with large zeds.

Commando
  • Eat Lead: You *NEED* to take Hollow Point Rounds. It makes full auto controllable and lets you contribute against large zeds. Not taking it makes you miss several damage breakpoints.


  • Tactical Reload: You need the magazine size increase to reliably solo scrakes without reloading. Unless you are a human aimbot. The reload bonus can be obtained by reload canceling, which makes this skill pointless.


Support
  • High Capacity Magainze: In early waves tube fed weapons are almost unusable without reload bonuses. For later waves the magazine shotguns already have enough shells loaded that this skill pushes past the point of diminishing returns. A 20 shell AA12 will kill a Fleshpound just as well as a 30 shell AA12 when it takes only 10 shots of damage to decapitate it. The clincher is that the mag skill does not affect the DBS, and a fast DBS reload makes takedowns faster and safer.

  • Fortitude: Not taking Salvo misses several big breakpoints. Fortitude only has 1 use: to save you from teams bad enough to let you suffer >99 points of damage, but somehow not bad enough to let you take >149 points. In that case, you're losing anyways.


  • Armor Piercing Shot: Support already has huge penetration bonuses at level 25. Adding more does almost nothing. The R option Tight Choke makes Support viable at dealing fatal headshot damage beyond point blank because it concentrates the pellets in 1/4th of the normal area, effectively increasing damage.


  • ZED TIME - Penetrator: Support already has enough penetration at level 25. The R skill Barrage lets you decapitate large zeds with the AA12 during zed time.


Field Medic
  • Acidic Rounds: Poison does around 1-2 damage per second and makes things hard to headshot.


  • ZED TIME - Zedative: "Massive amounts of poison" is a 100x multiplier. Which means your poison can now, maybe, kill a siren. ZED TIME - Airborne Agent is a lot more useful because it is a medic grenade spawned on you, and you can spread it around by moving.


Demolitionist
  • Shock Trooper: Not having Bombardier makes you miss the 3 rocket FP breakpoint. Bombardier also increases the RPG impact damage which is essential for scrakes. The reload bonus is also made irrelevant by just reload canceling.


  • Fragmentation Rounds: The explosive radius is already large enough. Not having siren resistance means a siren will protect any zed near it against your explosives. Fleshpound/siren packs will suddenly become dangerous.


  • ZED TIME - Mad Bomber: Very few things need 2 explosives to kill. The expanded area of effect is smaller than the nuke's. The only things that eat 2 or more explosives are scrakes and fleshpounds. In that case, the nuke is better because it creates an area of denial which kills any trash zed come up behind them. And as a bonus it panics them which delays the charge and buys time to shoot more rockets. The nuke also has a hidden x1.5 damage multiplier and a x1.35 blast radius multiplier.


Firebug
  • Barbecue: Ground fire kills now instead of later, and deals snare, and is a complete upgrade.


  • Firestorm: Because it isn't Heat Wave. Heatwave is the only reason the perk isn't 100% useless in higher difficulties, as it turns firebug into a stumble on demand. And if you needed range, chances are you shouldn't be a Firebug in the first place.


Gunslinger
  • Line 'em Up: Gunslinger is a headshot class. If you're good you're aiming for heads. Heads don't exactly line up often. Line em Up encourages body shots, which is bad.


  • Knock 'em Down: Gunslinger is headshot dependent. If you're shooting at legs or chests, don't play gunslinger.


Sharpshooter
  • Tactical Reload: Because it isn't Rack em Up. However, note that it does have a *VERY* situational use on Railgun builds, since when there are 5 or less players the Railgun can still 1 shot scrakes and 2 shot fleshpounds with LLRLL. However in 6 player Rack em Up is necessary for efficient large zed takedowns.


  • ZED TIME - Ranger: The other zed time skill, Assassin, gives you a 35% damage increase. You don't need to stun zeds if they are dead, and Assassin saves ammo. The sharp 25 skills trigger most frequently on an M14EBR build. The M14EBR build often takes Ballistic Shock, meaning the target will often already be stunned when zed time triggers.


Survivalist
  • Don't play survivalist.


SWAT
  • ZED TIME - Battering Ram: The skill encourages you to run *towards* the zed, instead of *away*. Running towards the zed is generally a stupid idea, and especially so if the zed time fades and now suddenly you're in front of a scrake.
Loadouts - Low skill ceiling choices
In the previous section we dealt with skills that are bad in nearly all circumstances, for all players with enough skill to not be dead weight on HoE. In this section I will address skill choices that have these kinds of options:
Option 1: A choice that has less potential than option 2, but is easier to take advantage of and more forgiving. Often more viable during the early game.

Option 2: A choice that can only be taken advantage of if you are a skilled player, but results in more effectiveness than option 1 can achieve under nearly all circumstances.
The section will be formatted as Low Skill Option / High Skill Option

Berserker
  • ZED TIME - Berserker Rage / ZED TIME - Spartan: Spartan has the higher skill ceiling. As for Berserker Rage, why do you want the zed to run away from you, when your swords can't shoot bullets? If you take this skill for the health boost, Spartan with Vampire regenerates a similar amount if not more by running around chopping off heads, and can be used offensively unlike Berserker Rage which is a purely defensive skill. With a commando extending zed time you can walk up to a large zed and kill it with no risk. The only reason to take Berserker Rage is if you're zerkwalling and can't kill enough zeds in Zed time to heal a noticeable amount.


Commando
  • Fallback / Impact Rounds: Fallback is better in the earlier waves for the 9mm boost, but once you get any higher tier rifle it becomes obsolete. The weapon switching speed does nothing except in panic situations. The issue being that as a commando, your job is to not let the situation become a panic situation in the first place. Impact Rounds is a component of the 3 skill combination (High Cap Mags, Hollow Points, and Impact Rounds) that together make it possible for a Commando to solo 6p HoE scrakes by himself.

  • Prepared / Tenacious: I've said it once, and I'll say it again, ammo carrying capacity doesn't matter unless you're hitting empty. If Prepared means the difference between you having 50 spare rounds and 150 spare rounds at the end of the wave, then Prepared did nothing other than provide you with a security blanket that you didn't need. When wave 10 of 6p HoE has 321 zeds, and 2 higher tier rifles gives you base spare amount counts of 600+, you won't need the extra spare ammo capacity, ever, unless your aim is abysmally bad, or if your teammates are so incompetent at killing scrakes that you become the scrake first responder. Tenacious on the other hand has a small, niche use: the health boost puts you just over the point where you can survive 2 raged FP hits without armor.

  • ZED TIME - Tactician / ZED TIME - Machine Gunner: Tactician's only use is to help you extend zed time if you get caught with every combat weapon you have being completely empty. By waves 5 and beyond, which are the ones where Zed time extensions are truly useful, you should have 2 rifles. If zed time hits, and the weapon you have has 10 or so bullets, then you're still good to go because most of your regular targets will die in 1-2 shots on critical spots. If your weapon is completely empty, then just switch to your other rifle, which can be done before an extension ends. If your other rifle is ALSO completely empty, then either you or your team are the problem, because if a commando with 2 rifles is running through his 60-90ish loaded rifle bullets without having time to reload, something is wrong. Only 32 zeds can exist on the map at one time. Most of these zeds will die in 1-2 well placed bullets from tier 3 or higher commando weapons. Your best 2 rifles will usually have 45 bullets in a magazine, which should be enough to kill all or nearly all the trash zeds on the map. If you're running out, then something is clearly going wrong. The reload bonus of Tactician is not needed with good gameplay. Machine Gunner on the other hand elevates your possible choices during Zed time. It makes targets that require multiple bullets, such as gorefiends and husks, more reliable zed time extenders. And it also enables you to kill scrakes easily in zed time, as you can extend once, then pump bullets into the scrake's head, then target a trash zed to extend zed time again, and then pump more bullets into the scrake's head, and repeat until it dies.


Support
  • Resupply Pack / Concussion Rounds: First off, the only effects of Resupply Pack are the extra ammo capacity, and the armor. The skill does not give out more ammo to teammates than default. The extra ammo capacity is nearly always unnecessary, and the extra capacity can be obtained anyways using the weapon dropping glitch. Concussion Rounds is a key component of several large zed takedowns, as it lets the AA12 stumble scrakes in less shots than it would take to just kill them, and it lets the DBS alt stumble raged fleshpounds on headshots, which is extremely powerful when the DBS alt itself can deal around 40% of a 6p HoE fleshpound head health. Resupply Pack is only useful early waves when access to these takedowns doesn't matter.


Firebug
  • High Capacity Fuel Tank / Bring the Heat: Ammunition functions a bit differently for Firebug since most of his damage will be coming from Ground Fire. However High Capacity Fuel Tank is effectively an ammunition capacity bonus, as it adds the equivalent of 1 full magazine to your total ammo capacity which is actually a decent chunk for the flamers. You really don't need it almost all of the time. Reloading is rarely a problem with Firebug anyways since his mag size is already quite large, and you can reload cancel the flamers. If you tap fire the flamers, you will rarely run out of fuel.


  • ZED Shrapnel / Napalm: Zed Shrapnel has an explosion radius of 200 units (i.e., almost nothing), a damage of 10 (less than a 9mm bullet), is random, and is god awful annoying to anybody that needs to aim because the explosion causes screen shake and clutters up the firing lane with particle effects. Napalm on the other hand doesn't have that god awful screen shake and blinding particles, but it has the annoying tendency to set large zeds on fire. This honestly is the choice between 2 evils, and of the two Napalm is the lesser one.

Loadouts - Low skill ceiling choices (cont.)
Field Medic
  • Resilience / Symbiotic Health: In the situations where Resilience is useful, Symbiotic Health is nearly always better, with the exception of when you are the last man standing, in which case something has gone terribly wrong and your skill choice is probably the least of your worries. Resilience has a maximum of 50% resistance, which is only achievable at 50 or less health. Symbiotic Health's health boost is equivalent of 20% resistance at base, since 100/(0.8 damage multiplier) = 125 health. However, Symbiotic Health also lets you obtain your own buffs when you heal yourself through the skill. Meaning that if you put 3 darts into another player when you're missing health, then you will get the 30% from your own Coagulant Booster, putting you at 50% resistance. In addition to the extra speed and damage from Adrenaline Shot and Focus Injection. All of this means that in the situations where you actually want the resistance, you will prefer Symbiotic Health. Let's say in this hypothetical scenario you have a huge ♥♥♥♥♥♥♥♥♥♥♥, with raged scrakes hitting everybody and a raged fleshpound or two. You're getting hit, and your teammates are getting hit. With Symbiotic you can pump 3 darts into your team, heal yourself for 30% of your health, gain an effectively 50% damage resistance over base and 30% speed bonus over base, and you AND YOUR TEAM have the health resistance and speed to get out. With Resilience the eventual resistance might be the same, but you never get the 30% speed boost, you can't heal yourself without the syringe or your grenades, and if the situation gets bad enough you will be forced to choose between healing yourself and healing your team. With Symbiotic you never have to make that choice, because you can get both. The only time Resilience is better is when you can never get the effects of Symbiotic off. Which only happens when everybody else is dead, and in that case you've either failed as a medic, or your teammates messed up.


Demolitionist
  • Extra Rounds / High Impact Rounds: Same issue with almost all ammunition skills, especially ones on perks that have perk bonuses that give you extra ammunition (support and demo). You never need them if you don't run out without them, and almost all weapons have enough spare ammunition that you won't run out if you have good aim. And again, the extra ammunition can be obtained without the skill by using the dropped weapons glitch. High Impact Rounds on the other hand makes fighting SCs easier due to their vulnerability to the RPG direct impact.

  • Concussive Rounds / Armor Piercing Rounds: The main difference this makes is on the areas on large zeds you can target to get a knockdown on a RPG direct impact. Without Concussive Rounds you will need a direct hit on the legs or the hips to get the knockdown. With it, you add to the target list the rest of the SC's body, and the FP's core. However, the base knockdown power is already good enough that you can aim for a pretty large target (the legs and hips), and get the same result with and without Concussive Rounds. The biggest change is that you can knock down the SC on any body part. But using Armor Piercing Rounds is better, because killing the scrake is better than knocking it down, and Armor Piercing Rounds is necessary for the only demo combo that can decapitate 6p HoE scrake without raging them. And again, if you have the skill to hit the legs, you can get a knockdown without Concussive Rounds.


Gunslinger
  • Steady / Quickdraw: Quickdraw is superior if you can hip fire, because of the massive recoil reduction (50%). The speed boost stacks with Gunslinger's native 20%, which pushes your speed just over the point when you can consistently bait the attacks of raged FPs. And the weapons switch lets you more quickly salvage fails takedowns when you miss shots from one set of weapons. Steady on the other hand achieves a similar amount of recoil control by substituting the natural spread reduction of aiming down the sights for actual recoil control, but you're slower, you get tunnel vision due to the gun models, and if you fail the initial takedown you're slower to clean up the mess.

  • Bone Breaker / Rack Em' Up: Bone Breaker's limb bonus is irrelevant outside of the boss wave because the perk's best skills rely on headshots, and it doesn't have the spare ammunition to be wasting bullets on bodyshots. Bone Breaker is a flat 20% boost on heads. Rack Em' Up is a minimum 10% boost on heads because the shot that triggers it gains the boost. By headshot 2 the two skills are equivalent, and beyond that REU is better. For large zeds REU will save at least a bullet, and if you start at higher stacks (such as by hitting the large zed with a 9mm before starting the takedown), it will usually save at least 1 more, which is critical when considering the Gunslinger's small magazine sizes.

  • ZED TIME - Whirlwind of Lead / ZED TIME - Fan Fire: Whirlwind of Lead is mainly there just to save ammunition. Not having to reload rarely matters because Gunslinger's native zed time reload bonus makes him reload extremely quickly in zed time, and with Fan Fire it becomes almost instantaneous. Once you get good enough with Gunslinger you'll be accurate enough to overcome the perk's ammunition capacity issues. At which point Fan Fire become better because it provides far greater DPS than Whirlwind of Lead, letting you decapitate multiple large zeds during Zed time.


Sharpshooter
  • N/A, Sharp is divided with subclasses, which often use opposite perk skills.
Loadouts - Low skill ceiling choices (cont.)
SWAT


  • SWAT LLRL versus SWAT RRLR: Swat is unique in that it has a bunch of skills that effectively do nothing other than provide starting bonuses. Heavy Armor Training and Assault Armor give free armor, but the other bonuses become useless once the armor runs out, which is essentially 1-2 bad large zed incidents away. Armor is also often chipped away by elite crawlers, stalkers, and stray husk fireballs, so oftentimes it doesn't even have to be large zeds. Armor is also an economy drain for a perk that spends a lot of money just on the ammunition. Close Combat Training becomes irrelevant once you get your first decent SMG. And the logic regarding the ammunition skill is the same as for all the other ammunition skills.
Loadouts - Situational skills
This section is dedicated to skill choices that are reliant on team composition or your camping spot. Note that this does not mean that 1 set is not better than the other, but merely means that factors outside of your control will influence your decision.


Berserker

  • Dreadnaught + Butcher / Skirmisher + Vampire: If you have a medic that you trust with your life, then you pick the first pair of skills. If you don't have a medic that you trust with your life then pick the latter two skills. If you're kiting or camping in a rather open space, pick Skirmisher and Vampire because the speed lets you reposition more quickly, and with the team spread out the medic won't be able to dedicate much attention to you, so you'll have to be able to take care of yourself.


Field Medic

  • Combat Doctor + Battle Surgeon / Adrenaline Shot + Coagulant Booster: I am personally very hesitant to put any of the Medic right side skills in the situational slot rather than simply call them garbage, because they are extremely situational to the point where their usefulness is so narrow that it basically never happens. Regardless, the medic weapon skills can be useful if

    1. Your team is good enough that they won't be running for their lives (what Adrenaline Shoot is for), and

    2. Your team is good enough that they'll never be in health ranges where they can be 1 shot by raged large zeds (what Coagulant Booster is for), and

    3. They need more help with trash.

    Generally point 3 is in direct conflict with points 1 and 2, since as teammate ability rises point 3 becomes less common while points 1 and 2 become more common.

    Overall, the medic weapon skills are fair weather sailing skills, useful mainly when things are going well. However, medic is designed to be most important when things are not going well. As a result of this, in most situations you will want to take Adrenaline Shot and Coagulant Booster, because the speed and resistance are what let you and your team escape bad situations.

    If you want the simple explanation, Combat Doctor and Battle Surgeon are only appropriate when you don't feel like saving your teammates' lives, either because they're good enough to look after themselves, or if you feel like they're not worth saving.

    In the first case they almost certainly don't need a medic at all. In the last case, well, you're losing anyways.

Firebug

  • ZED TIME - Inferno / ZED TIME - Pyromaniac: If you have ranged weapons pick Pyromaniac. If you only have flamers, the majority of your damage will come from ground fire, and you're likely better off with Inferno assuming that you have good ammo management. Overall, this skill choice rarely makes a difference, but I prefer Pyromaniac.
Weapons - Misunderstood weapons
There are weapons that have niche purposes in this game, or are just plain misused by people without any clue about the mechanics.

Kalashnikov AK-12
The AK12 burst mode provides unmatched dps for the commando, but people just treat it as a click fest in a way that reduces its rate of fire.

Whenever you click your mouse button to fire the weapon, the game will then ignore the next mouse click if it happens within a certain period of time after the last mouse click that resulted in the weapon firing. This delay reduces your rate of fire if you mindlessly click the primary fire button. What you need to do is to time your click just after the 3rd bullet of the 3 round burst exits the barrel, so as to start the next 3 round burst. If you click prematurely, before the 3rd bullet of the burst fires, you will lock up your weapon for a short period of time after the 3rd bullet fires.

C4 Explosives
C4 is far from useless. It only appears so because trash killers can't cover demos, demos don't have the courage to approach fleshpounds, and in general people are just bad.

C4 is the single largest available source of explosive spike damage against fleshpounds.
6p HoE FP's have 5310 body health.
With all damage boosts except the nuke, a C4 sticky does 1845 damage.
With all damage boosts except the nuke, a RPG explosion does 1687 damage, if you ignore the direct impact damage.

C4 is the demo's combo enabler, the thing that separates the truly exceptional demos from the rest of the pack. What C4 does is it lets you pre-emptively lock in guaranteed damage on fleshpounds WITHOUT RAGING THEM. The C4, once stuck to the zeds, basically circumvents demo's reloading speed issues and lets you take out chunks of the FP's health starting with 33% of the health with a C4 sticky without the stacking debuff, and 25% with 1 stacking debuff.

The stacking debuff refers to the fact that zeds get resistance to C4 damage for 3 seconds after being damaged with C4, so that they will only take 75% damage. If they are damaged again before the stacking debuff ends (i.e. before 3s pass), then another debuff is added, so that the next C4 explosion will only deal 75% x 75% = 56.25%. This continues multiplicatively until 3s pass without damage from C4. This debuff mechanic however is bypassed by Destroyer of Worlds (confirmed) and potentially Mad Bomber (unconfirmed).

C4 will stick to zeds if thrown at them, and only 24 can exist on the map at the same time. Also, spamming the detonate key while sprinting lets you rapidly increased the detonation rate.
https://youtu.be/2Jg2tlZEm8Q

With the strategic use of chokepoints and the dynamite stun, C4 is one of the only ways in the game to quickly and safely deal with multiple fleshpounds.

Credits for the videos goes to This duck
http://steamproxy-script.pipiskins.com/sharedfiles/filedetails/?id=878222672
Weapons - Abbreviated Descriptions
If you're too lazy to read everything, or want my *Opinion* on every current weapon, this is my position on every non-starter weapon in the game. Noteable crossperk weapons are included twice.

  • Berserker
    • Katana: Fastest swing speed and just enough damage to be effective against elite trash and medium zeds results in best performance for the price against heavy trash.
    • Vlad: For tunnel fighting due to nail bouncing mechanic and sniping husk tanks.
    • Zweihander: Offensive oriented weapon, mostly used for the longer range of the stab and better performance against elite trash.
    • Pulverizer: Better performance against FP then Zwei but still fills the roll of heavier hitting but slower swinging katana.
    • Eviscerator: Scrake killer.
    • Bone-Crusher: Tank build.

  • Commando
    • L85A2: Pointless upgrade to the varmint rifle that delays you from getting a real gun.
    • AK-12: Highest dps weapon available, weapon with the highest skill ceiling.
    • SCAR-H: Unnoticeable damage upgrade, not so unnoticeable downgrade to magazine size.
    • Stoner: Worse version of the P90 with a pointless magazine size upgrade, counterproductive rate of fire, terrible reload times, expensive ammo, and horrible damage.
    • HMTech-401: Stumble power and flinch incaps so high it makes scrake killing easy.

  • Support
    • DBS: The best tier 2 weapon in the game, a monster even off perk that puts out so much damage with the alt that it becomes a spike damage weapon, making it useful even if it didn't have the life saving recoil jump.
    • M4: A pointless upgrade over the SG500 saddled with unnoticeable damage upgrades.
    • AA12: Tied for either the 2nd or 3rd highest DPS weapon in the game, and has enough damage in the magazine to solo 2 6p HoE large zeds of both varieties without reloading; an essential weapon.
    • Trenchgun: Fire provides a way to compensate for the inaccuracy over range, but only against trash, because otherwise the small magazine, tube fed reload, and the fire panic makes it bad in every other situation.
    • HMTech-301: Like all medic weapons it has very good stumble, and being mag fed with 10 round capacity effectively makes it the M4 but better in every way that matters.

  • Demo
    • C4: Destroys fleshpounds and is the main combo enabler on them.
    • M79: En masses trash killer when you have live bait like a berserker to clump them up.
    • M16M203: Complete garbage; the bullets don't get perk benefits and still would be trash if they did, and the grenade launch has a kill zone the size of a slightly larger than average dinner plate.
    • RPG: Essential.

  • Medic
    • HMTech-201: Garbage weapon with same heal characteristics as the pistol and damage equivalent to a full auto 9mm.
    • HMTech-301: Best stumble self defense weapon.
    • HMTech-401: Best healing stats, only weapon that can put out 3 darts in a row.

  • Firebug
    • Spitfires: Best ranged DoT in a game where DoT doesn't matter.
    • Trenchgun: The only decent source of high impact damage.
    • Flamethrower: Best trash killer due to high capacity and flame damage.
    • Microwave gun: DPS useless against 6p HoE large zeds, but alt fire pushback is useful.

  • Gunslinger
    • M1911: Best trash killer since it can 1 shot crawlers and has the highest capacity.
    • Deagles: Highest dps, damage hits the stalker 1 bodyshot break point.
    • .500 Magnums: Highest damage per shot and fastest to incapacitate.
    • HMTech-401: Highest capacity trash killer, can be the best if you can consistently get headshots on crawlers.

  • Sharp
    • Crossbow: Stun initiator on large zeds, the economy options due to recoverable bolts, and medium zed hunter.
    • M14EBR: Reaches the stalker 1 shot, trash killer.
    • Railgun: Large zed delete button but requires a team that can protect you.
    • .500 Magnum: Railgun sidearm.

  • Swat
    • MP5: Cheapest ammo for the damage.
    • P90: Highest magazine capacity and rate of fire slow enough to tap fire.
    • Kriss: Only weapon with DPS high enough to deal or assist with large zeds.

Weapons - Grenades
Perk
Grenade
Damage
Blast Radius
Falloff Factor
Incapacitation Power
Fuse Time
25 (EMP)
700
1
100 EMP
0.25s
300 (explosive)
650
2
up to 50 stumble

up to 200 melee hit
1s
200 (explosive)
50 (piercing, per each of 10 shrapnel spawned)
900
1
up to 100 melee hit (explosion)

100 melee hit (shrapnel)

up to 500 stumble (explosion)

1000 stumble (shrapnel)
2s
50 (toxic)
5 (per s, for 10s)
50 (health/s for 8s, capped at 10 hp/s)
350
33 poison power per tick
0.5s
300 (explosive)
400
2
up to 100 knockdown

up to 100 melee hit

up to 300 stumble

up to 200 stun
3s
or Zed contact
60 (fire, initial explosion)
10 residual flame(per 0.5s, for 10s)
500 (initial explosion)
150 (residual flame)
1
10 burn panic per tick

up to 100 stumble (initial explosion)
Contact
100 (explosive)
35 (piercing, per each of 10 shrapnel spawned
1000
1
up to 10 gun hit (shrapnel)

39 (explosion)

up to 100 melee hit (explosion)

8 melee hit (shrapnel)

up to 500 stumble (explosion)

up to 200 stun (explosion)
2s
25 (freeze)
600
1
up to 150 freeze

up to 100 melee hit
0.15s
125 (explosive)
700
2
up to 200 stumble

up to 400 stun
0.25s
Bad Weapons - L85A2 Bullpup
I exclude starting weapons, because being free gives them license to be bad.

This section is dedicated to weapons that cost money and when used on perk are at the very least inferior to the alternatives.

SA80 L85A2 Bullpup


The numbers assume level 25 and Hollow Point Rounds. Important distinctions are marked.

Zed: Shots to kill
Cyst
2/1
2/1
2/1
2/1
1/1
2/1
Alpha Clot/Slasher (body/head)
3/1
3/1
2/1
2/1
2/1
3/1
Gorefast (body/head)
4/1
4/1
3/1
3/1
3/1
4/1
Crawler/Elite Crawler (body/head)
1/1
1/1
1/1
1/1
1/1
1/1
Stalker (body/head)
2/1
2/1
1/1
1/1
1/1
2/1
Gorefiend (body/head)
8/3
8/3
6/2
7/3
4/2
8/3
Elite Clot (body/head)
7/3
7/3
5/2
6/3
4/2
7/3
Bloat (body/head)
30/5
33/5
25/4
28/5
18/3
30/5
Siren (body/head)
10/3
10/3
8/3
9/3
6/2
10/3
Husk (body/head/backpack)
22/8/2
22/8/2
16/6/2
17/7/2
12/5/2
22/8/2
Scrake (headshot)
31
31
23
27
18
31
Weapon handling
Base magazine size
20
30
30
40
20
75
DPS w/ Hollow Point Rounds
392 (auto)
517 (auto)
620 (auto),
1034 (burst fire)
687.5 (auto)
895 (auto)
712 (auto)
Base reload (empty/not empty), Stoner (half, half-empty / dry)
2.67s, 3.07s
2.77s, 3.12s
2.90s, 3.30s
2.50s, 2.55s
2.62s, 2.78s
4.58s, 5.15s / 4.59s
Elite Reload (empty/not empty), Stoner (half, half-empty / dry)
1.74s, 2.07s
1.92s, 1.93s
2.20s, 2.29s
1.84s, 1.94s
1.81s, 2.07s
3.23s, 2.87s / 3.32s
Cost of ammunition (Dosh/bullet)
1
1
1.33
1
1.4
0.93


Looking at this chart, here are the major conclusions.


The Bullpup can't 1 body-shot stalkers, and needs 50% more headshots to kill elite trash compared to T3+ weapons.

The bullpup is a worse AK12, the latter of which is obtainable by wave 3, costs only 450 more, and is better in every way that matters. The AK12 hit 3 major breakpoints: the 1 shot on stalkers, and 2 headshots on gorefiends/albino clots. The increase in shots to kill on gorefiends is problematic for the Bullpup as it gives them time to block. The magazine size and reload are practically identical. The AK-12 burst mode shreds medium zeds and can take on scrakes.

On HoE the number of elite trash is significantly increased, and the increased shoots to kill on gorefiends and albino clots will stack up over time, causing forced retreats, awkward reloads, and ammo depletion.

If you take the bullpup mainly as a method of getting a weapon with free bullets for wave 2, the same thing can be accomplished for cheaper by just selling the Varmint Rifle, and rebuying it. Buying the bullup and selling it back at a loss can mean the difference between a full and half empty AK12 on the wave you get it.

Bad Weapons - SCAR-H
SCAR-H Assault Rifle


The numbers assume level 25 and Hollow Point Rounds. Important distinctions are marked.
Zed: Shots to kill
Cyst
2/1
2/1
2/1
2/1
1/1
2/1
Alpha Clot/Slasher (body/head)
3/1
3/1
2/1
2/1
2/1
3/1
Gorefast (body/head)
4/1
4/1
3/1
3/1
3/1
4/1
Crawler/Elite Crawler (body/head)
1/1
1/1
1/1
1/1
1/1
1/1
Stalker (body/head)
2/1
2/1
1/1
1/1
1/1
2/1
Gorefiend (body/head)
8/3
8/3
6/2
7/3
4/2
8/3
Elite Clot (body/head)
7/3
7/3
5/2
6/3
4/2
7/3
Bloat (body/head)
30/5
33/5
25/4
28/5
18/3
30/5
Siren (body/head)
10/3
10/3
8/3
9/3
6/2
10/3
Husk (body/head/backpack)
22/8/2
22/8/2
16/6/2
17/7/2
12/5/2
22/8/2
Scrake (headshot)
31
31
23
27
18
31
Weapon handling
Base magazine size
20
30
30
40
20
75
DPS w/ Hollow Point Rounds
392 (auto)
517 (auto)
620 (auto),
1034 (burst)
687.5 (auto)
895 (auto)
712 (auto)
Base reload (empty/not empty), Stoner (half, half-empty / dry)
2.67s, 3.07s
2.77s, 3.12s
2.90s, 3.30s
2.50s, 2.55s
2.62s, 2.78s
4.58s, 5.15s / 4.59s
Elite Reload (empty/not empty), Stoner (half, half-empty / dry)
1.74s, 2.07s
1.92s, 1.93s
2.20s, 2.29s
1.84s, 1.94s
1.81s, 2.07s
3.23s, 2.87s / 3.32s
Cost of ammunition (Dosh/bullet)
1
1
1.33
1
1.4
0.93

The SCAR is a victim of the overkill fallacy. With headshots the SCAR is almost identical to the AK12 against trash and elite trash. The only differences are with medium zeds, where you shave 1 bullet on the shots to kill on the critical spots of Bloats, Sirens and Husks.

However "medium zed killer" is an tiny, meaningless niche because medium zeds are not as common or as fast as the other trash, and saving a bullet on each of the 20 or so mediums that spawn is not important compared to having a 50% larger kills/magazine ratio against the 100+ of the other trash.


This is the end result of a full 10 wave HoE match as a commando. I kill a total of 574 zeds where the SCAR's damage buff compared to the AK12 makes 0 difference on headshots. I kill a total of 94 medium zeds that the SCAR shaves 1 bullet off of, which is about 2 AK12 mags worth of saved ammo over 10 waves. A tiny difference so small it's insulting. For the 17 large zeds kills the AK12's superior DPS + damage per mag and the HMTech's flinch locks are more important than the SCAR's damage per shot.

Due to these factors, the AK-12 and arguably even the HMTech-401 are better than the SCAR in every way that matters.
  • Since the headshots to kill on all trash but mediums are identical, the AK-12 50% larger magazine size directly translates to better performance because you're less likely to reload at a bad time. It has potentially 50% more kills per magazine, a huge increase. The HMTech-401's 100% larger mag size is a sizeable advantage compared to the SCAR needing 1 less shot on certain zeds' heads.

  • The AK-12/HMTech-401's lack of semi-auto doesn't matter with practice. Both rifles can be tap fired to simulate semi-automatic, and the HPR recoil reduction makes them very controllable.

  • Larger mag size makes it more likely that you are loaded when Zed time hits.

  • The AK-12/HMTech-401 are better at taking down scrakes than the SCAR. Their larger magazines means that there is more damage available before a reload is needed, giving a larger room for error. With High Capacity Mags the SCAR needs 60% of a full magazine to decapitate a 6p HoE scrake. The AK-12 needs 51% of a full mag, the HMTech-401 45%. The AK-12 burst mode out DPS's the SCAR's automatic by 15%, and the HMTech-401 has access to gun hit incaps (identical to the .500 Magnums) that will freeze the scrake.

The SCAR, however, has advantages when used off perk. It is the only AR that can 1 bodyshot stalkers when used off perk. This section is not to say that the SCAR is not viable, but rather to point out that its onperk advantages are relatively meaningless, while its disadvantages are not.

The weapon is perfectly serviceable, but there are at least 2 rifles that are better than it, and the commando can't hold 3 rifles. The biggest reason to take the SCAR on perk is that with weight 6 you can take a katana with it and the AK12. The SCAR also has the niche use of having a high automatic fire DPS making it somewhat better for close quarters panic situations, but commando's gameplay should leans towards preventing such situations rather than taking a suboptimal weapon to clean them up.

Bad Weapons - Stoner 63A LMG
Stoner 63A LMG

The numbers assume level 25 and Hollow Point Rounds. Important distinctions are marked.
I'm assuming usage of HPR because without it the Stoner can't 1 shot decapitate gorefasts, which is *unacceptable* in higher level play.
Zed: Shots to kill
Cyst
2/1
2/1
2/1
2/1
1/1
2/1
Alpha Clot/Slasher (body/head)
3/1
3/1
2/1
2/1
2/1
3/1
Gorefast (body/head)
4/1
4/1
3/1
3/1
3/1
4/1
Crawler/Elite Crawler (body/head)
1/1
1/1
1/1
1/1
1/1
1/1
Stalker (body/head)
2/1
2/1
1/1
1/1
1/1
2/1
Gorefiend (body/head)
8/3
8/3
6/2
7/3
4/2
8/3
Elite Clot (body/head)
7/3
7/3
5/2
6/3
4/2
7/3
Bloat (body/head)
30/5
33/5
25/4
28/5
18/3
30/5
Siren (body/head)
10/3
10/3
8/3
9/3
6/2
10/3
Husk (body/head/backpack)
22/8/2
22/8/2
16/6/2
17/7/2
12/5/2
22/8/2
Scrake (headshot)
31
31
23
27
18
31
Weapon handling
Base magazine size
20
30
30
40
20
75
DPS w/ Hollow Point Rounds
392 (auto)
517 (auto)
620 (auto), 1034 (burst fire)
687.5 (auto)
895 (auto)
712 (auto)
Base reload (empty/not empty), Stoner (half, half-empty / dry)
2.67s, 3.07s
2.77s, 3.12s
2.90s, 3.30s
2.50s, 2.55s
2.62s, 2.78s
4.58s, 5.15s / 4.59s
Elite Reload (empty/not empty), Stoner (half, half-empty / dry)
1.74s, 2.07s
1.92s, 1.93s
2.20s, 2.29s
1.84s, 1.94s
1.81s, 2.07s
3.23s, 2.87s / 3.32s
Cost of ammunition (Dosh/bullet)
1
1
1.33
1
1.4
0.93

Let me me preface this discussion with a question.

Do you actually *NEED* 75 bullets/mag and a 909 RPM? Is that extra 45 capacity and a faster automatic fire so important that you are willing to sacrifice reload times, a red dot sight, damage, DPS, time to kill, and ammo economy?

The trades-offs in my opinion are not worth it. The recent damage buff to the weapon has pushed the Stoner to an edge case, but I still believe that it falls short of being as good as the other rifles.

All of the Stoner's advantages look decent at first, but are pointless upon closer examination. They do not solve any actual problems, but rather are crutches for bad game sense, bad aim, and lack of trigger discipline.

  • The capacity advantage is pointless. It blows past the point of diminishing returns.
    There has never been a single moment in my HoE experience where I thought "Man, I had perfect aim and didn't make a mistake, but I really needed a 75 base capacity rifle in that situation". The Stoner's mag size attempts to improve something with little room for improvement. It's like trying to put more gas into a tank that's already full.

    The 45/60 round capacity of High Capacity Magazine AK12's/HMTech-401's are more than enough when only 32 zeds can exist on a map at any single time. If you somehow blow through the 105 combined rounds of that loadout without having time to reload, the magazine capacity isn't the problem. You or your team are the problem. Your aim sucks, or you're getting blinded by a Firebug or blocked by a Berserker or bombarded by a Demo, or your hold spot is bad, has too many lanes to cover, and has pushed you out of your ideal range. Or you're playing Catacombs, a map where you can't aim farther than you can spit because you're in a tunnel, and you should be a Support instead. These are not times where the Stoner is good, but rather times where Commando the perk is bad.

  • The 500 base ammo pool of the Stoner is pointless. Your ammo count doesn't matter until it reaches 0.
    You do not get a medal for having more spare ammo at the end of the wave. Nobody but you knows or cares. The AK12 + HMTech-401 combined spare ammo pool is 700 rounds. With Prepared that turns into 875. Wave 10 of HoE with 6 players is 321 zeds. You have enough to last the entire wave. There is no difference between ending the wave with 1 spare bullet and ending it with 300.

  • The rate of fire is counterproductive.
    It's nearly impossible to tap fire the Stoner because the rate of fire is so high. This causes you to use 2+ bullets on targets that only need 1 bullet to kill, which reduces the kills per magazine and makes the large mag size deceptively inaccurate.

    With the other rifles that lack semi-automatic fire, such as the HMTech-401, if I'm against a crowd of 10 clots I can aim at each clot's head, tap the mouse once, and fire one, and only one, bullet. 10 bullets, 10 kills.

    With the Stoner I will tap once, and then fire 2 or more bullets at what I'm aiming at, the first of which actually makes the kill (assuming low end trash), with the rest being wasted as they whistle past the severed stump where the head used to be. The ammo waste this causes is huge.

Bad Weapons - Stoner 63A LMG (Cont.)
While the Stoner's "advantages" are meaningless, it's drawbacks are not. Some are significant, some are not, but the annoyances add up.
  • The iron sights are bad compared to the red dot sights of the other high tier rifles.
    This hinders performance at long range, which commando is supposed to excel at. This is especially noticeable in dark maps, where the iron sight is nearly unusable because it is indistinguishable from a dark background. The gun model also obscures a significant portion of your vision, given you tunnel vision and making it harder for you to see crawlers.

  • The reload times are apocalyptic.
    The normal reload times of the other rifles are in the 2-3 second range. With those times you can reload basically whenever you want, because you either have a 2-3 second lull in wave where you can reload, or you can backpedal for 2-3 seconds and then advance again when reloaded. The Stoner's reload times however are in the 5 second range, which is significantly more cumbersome, because in my experience the only times I can reload the Stoner in peace, without the elite reload, is when somebody else is covering for me entirely during those 5 seconds. With the Stoner I find that I NEED the elite reload. However, no other rifle needs the elite reload more than it needs the increased magazine capacity. As a result any rifle that you take with the Stoner is gimped in potential because the Stoner's skill requirements are unique from every other AR.

  • The only way to use this rifle to extend zed time is to spam excessively.
    It can't kill stalkers in 1 bodyshot. It needs 3 headshots instead of just 2 for elite trash. All of this contributes significantly to ammo waste.

  • The increased shots to kill have severe consequences that are not immediately apparent.
    Magazine size does not matter in the same way damage does not matter. Magazine size only matters when you know how many KILLS that the full sized magazine can provide. The Stoner's combination of higher shots to kill, inability to tap fire, and bad iron sights make it so that the the magazine size advantage of the Stoner is far less noticeable in practice than the statistics would suggest.
    • You need 3 headshots on gorefiends. It is very likely that he will use his headshot blocker by the time the 3rd headshot is fired. This is because due to needing the 3rd shot, the time between the first headshot and the fatal one is actually longer than that of the other rifles despite the Stoner's fast ROF. For the Stoner the time between the 1st and the fatal headshot is 0.132s. For the AK12 the time between the 1st and fatal headshot is 0.1s It is also difficult to precisely control the number of shots fired due to the fire rate, and you will often shoot 4-5 bullets instead of the minimum 3 necessary to kill, that is assuming that shots 3, 4, and 5 don't just bounce off the block. The combination of all of these factors means that the actual shot to kill ratio between the Stoner and the 40 damage rifles is more than the 3:2 the mechanics would suggest.

    • The doubled bodyshots to kill on stalkers is very aggravating. In chaotic firefights you don't have have the luxury of aiming headshots at everything, and you well very quickly notice that doubled shoots to kill on stalkers will add up when dealing with mixed groups of trash.

    • Mediocre dps and low stumble power means that it can't deal with scrakes.
      Commando is not the first resort when dealing with HoE scrakes, but at his skill ceiling his ability to clear scrakes with the 40 damage+ rifles is an extremely powerful asset.

    • The Stoner is high maintenance ammunition wise.
      When you factor in the inability to tap fire the weapon, the bad sights, the increased shots to kill, and the vulnerability to headshot blocking moves, you will waste considerable amounts of cash on ammunition. The Stoner is essentially 1 dosh a bullet (actually .93, but close enough). The AK12 is 1.33 dosh a bullet. This seems to give you an economic advantage on the smallest trash which take only 1 headshot with the Stoner, but the thing is that you can tap fire the latter two rifles, but you can't tap fire the Stoner. What this means is that in reality you usually always fire at least 2 bullets every time you fire the Stoner, which eliminates any economic advantage the Stoner may have had. With the AK12 I can use 10 bullets to kill 10 gorefasts and spend 13.3 dosh worth of ammunition. With the Stoner I fire 20 bullets, having wasted 10 of them completely because the gun keeps firing into the empty space where the zed's head used to be, and end up spending 18.6 dosh on ammunition. Once you get to anything with more health than an elite alpha, the Stoner is guaranteed to perform worse economically even with perfect headshots and using the minimum number of shots to kill.

    There is 1 situation where the Stoner has an marginally valid purpose: When the commando is forced into close ranged fights with large amounts of trash in which he does not have time to aim or reload. In such situations, the advantages of the other rifles becomes meaningless, and the Stoner's otherwise pointless advantages suddenly become useful.

    However, this raises yet another question: why the hell are you a commando in that situation?

    You're just wasted 1500 dosh on a slow reload, mediocre dps, high ammo cost maintenance weapon. That 1500 would have been better spent on an AA12, a high DPS weapon with a faster reload since you're taking the elite reload anyways, nearly twice the base dps, and penetration which can raise your effective DPS by a significant amount.

    I am not joking when I make this comparison. The Stoner, as a result of its limitations at ranged combat due to its sights and need for more headshots, is forced to compete in the medium-close range trash clearing game, and against the AA12 that is a losing battle.

    EDIT: As of 1056 the med rifle is a better Stoner in every way that matters. 1 shots stalkers in the body, still has a mag size bigger than you'll likely ever really need, a reload that you can't sculpt The Dying Gaul while waiting for it to complete, a reflex sight, a fire rate slow enough that you can tap fire with good trigger discipline, ability to take down scrakes with the stumble and the flinch, AND it can heal.
Bad Weapons - M4 Combat Shotgun
M4 Combat Shotgun


The laughingstock of the support arsenal from KF1 returns to his role in KF2: mediocre at a little, good at nothing, bad at everything else, and overshadowed by other options.

Assume level 25, Tight Choke, and Salvo. Assume all pellets hit on headshots. Realistically pellets would miss, but taking that into account will turn this table into a book. Assume 1/3 of pellets, rounded down, hit husk backpack. Vlad assumes shotgun mode. DBS assumes single shot. Trenchgun neglects afterburn.
Zed: Shots to kill
Cyst/Clot/Slasher
Crawler/Elite Crawler
Stalker
Gorefast (body/head)
1/1
1/1
1/1
1/1
1/1
1/1
1/1
Gorefiend (body/head)
2/1
1/1
1/1
1/1
1/1
2/1
2/1
Elite Clot (body/head)
2/1
1/1
1/1
1/1
1/1
2/1
2/1
Bloat (body/head)
10/2
4/1
7/2
6/1
7/1
12/2
10/2
Siren (body/head)
3/1
1/1
3/1
2/1
2/1
3/1
3/1
Husk (head/backpack)
2/1
1/1
1/1
1/1
1/1
2/1
2/1
Scrake (body/head)
19/8
9/4
12/5
11/5
13/6
22/10
19/8
Fleshpound(headshot)
10
5
7
6
7
12
10
Weapon handling
SG500
DBS
Vlad
Trenchgun
M4
HMTech-301
AA12
Base magazine
8
2
6
6
8
10
20
Base spare shells
56
46
48
57
64
80
120
DPS (ignoring reloads)
279
3720
(alt fire)
814
540
1443
930
1085
Base reload (empty/half)
1.39s + X * 0.48s
1.41s, 1.41s
2.75s, 2.61s
1.67s + X * 0.55s
1.21s + X * 0.40s
2.54s, 2.48s
2.97s, 2.99s
Elite reload (empty/half)
1.18s + X * 0.34s
1.10s, 1.10s
2.02s, 1.93s
1.28s + X * 0.36s
1.03s + X * 0.28s
1.91s, 1.96s
2.10s, 2.02s
Reload from empty, base (High Cap Mags)
6.67s
1.41s
2.75s
6.07s
5.61s
2.54s
2.97s
Reload from empty, elite
3.56s
1.10s
2.02s
3.08s
2.99s
1.91s
2.10s
Reload base (shells/s) (1 shell left, High Cap Mags)
2.08 shells/s
1.42 shells/s
3.07 shells/s
1.82 shells/s
2.50 shells/s
5.65 shells/s
9.70 shells/s
Reload elite (shells/s) (1 shell left)
2.94 shells/s
1.81 shells/s
2.60 shells/s
2.78 shells/s
3.57 shells/s
4.60 shells/s
9.41 shells/s

The M4 has a bunch of worthless positive traits and unworkable negatives ones.
  • The M4 damage is overkill. 50% more damage than the AA12 doesn't matter when the AA12 already 1 shots trash. The hits to kill on critical spots are IDENTICAL with the exception of large zeds and bloats. A single AA12 pellet will decapitate the same enemies as a M4 pellet. You use 2-3 fewer shells on large zeds, but the AA12 fires 13% faster, has 150% more shells loaded, nearly twice the spare ammunition, and most importantly controllable recoil.

  • The M4's high DPS can't be leveraged properly. The magazine size is too small, and the recoil is so strong that aiming it properly requires actually slowing down the firing rate. Large zed takedowns are extremely prone to failure due to the small mag size, when compared to the AA12. You also can't easily take Concussion Rounds (a huge thing for FP kills), as the stumble will only increase your accuracy troubles. Notice how the takedown consumes all of the M4 ammunition, but the AA12 kills with rounds to spare.
    https://youtu.be/lzcpauVOvCw
    https://youtu.be/21qkC3JAun4

  • The reload of the M4 is a disaster. Automatic shotguns have higher shells/second reload rates. In the time it takes for the M4 to load a little over 7 shells, the AA12 can load 20 even if you don't reload cancel it.

  • The ability to reload interrupt solves a weakness that can be solved by being a better player. A support with an automatic shotgun that knows when to back off and time his reloads will never need to interrupt his reload. Or he can switch weapons. In the long run his higher shells/second reload rate lets him reload less.

The DBS has the best spike DPS in the support's arsenal. AA12 + DBS is 14 weight out of 20. M4 is 7 weight, reloads slowly, has too small of a mag to use against trash and too little damage fully loaded to be safe against large zeds compared to the DBS.
Bad Weapons - HMTech-201 SMG
HMTech-201 SMG


Why the weapon is terrible for medic is simple.

Medic Weapon
Ammo cost to fire dart (% of ammo pool)
Time to full recharge
Heal amount per dart
Healing potential regeneration

(i.e. healing per dart/time to recharge dart)
50%
15 s
15 hp
2 hp/s
50%
15 s
15 hp
2 hp/s
40%
12 s
15 hp
3.125 hp/s
30%
10 s
15 hp
5 hp/s
40%
15 s
20 hp
3.333 hp/s

It has the same exact healing stats as the pistol, and buying the weapon delays you from your higher tier weapons that sport buffed recharge times. Your team won't need you to waste money to rent the SMG before you can afford the rifle, unless it is defective in some manner.

As for why the weapon is bad for swat, the answer is just as simple: it's weak, it takes multiple bullets to kill anything that I can't simply kill by smacking it once, and its obscene recoil prevents you from actually landing those shots.

Damage numbers assume level 25.
Zed: Shots to kill
Cyst/Clot/Slasher (body/head)
4/1
4/1
3/1
2/1
2/1
Crawler/Elite Crawler(body/head)
2/1
2/1
2/1
1/1
1/1
Stalker(body/head)
5/2
5/2
3/1
3/1
3/1
Gorefast (body/head)
10/3
11/3
7/2
6/2
5/2
Gorefiend (body/head)
20/7
22/8
13/5
11/4
10/4
Elite Clot (body/head)
10/4
11/5
7/3
6/3
5/2
Bloat (head)
12
12
8
7
6
Siren (body/head)
23/8
26/8
15/5
13/4
11/4
Husk (head/backpack)
15/4
16/4
10/2
8/2
8/2
Scrake (head)
72
76
47
39
36
Weapon Handling
MP7 SMG
HMTech-201 SMG
MP5RAS SMG
P90 SMG
Kriss SMG
Base magazine
30
40
40
50
33
Base spare ammunition
330
480
320
350
495
DPS (ignoring reloads)
317
253
462
543
820
Base reload (empty/half)
2.04s, 2.14s
2.50s, 2.55s
2.56s, 2.00s
2.57s, 2.53s
2.36s, 2.24s
Elite reload (empty/half)
1.41s, 1.27s
1.60s, 1.65s
1.83s, 1.58s
1.98s, 1.97s
1.80s, 1.75s

It is, damage wise, the single worst smg in the game. If you ignore resistances, this smg is basically a full auto 9mm pistol. Most shots to kill on everything and the lowest DPS. It's only effective against cysts/cyst clones and crawlers because they have a massive 50% vulnerability to smg damage. Against everything that doesn't have it, it consistently takes around 50% more shots to kill things compared to the MP5, which costs the exact same.

And if you got this since you wanted to heal, the HM101 has identical syringe stats and doesn't cost 650. The only thing that redeems this disaster is the fact that it weighs 3 blocks.
Bad Weapons - M16 M203 Assault Rifle
M16 M203 Assault Rifle


The M4 Combat Shotgun's demolitionist cousin: laughed at and ignored for many reasons in KF1, as a twisted joke it returns to KF2 to be laughed at and ignored for essentially the very same reasons.

The M16M203 suffers from the same exact issue that makes survivalist suboptimal:

It does not matter how versatile you are if you do not have enough firepower. Weak and versatile is still weak. Having excellence in an important aspect is better than having you choice of where to suck at.


The rifle portion has the same base stats of the SA80 L85A2 Bullpup with 3 important differences:
  • Lacks single shot, but that isn't too much of a hindrance.

  • From the stats and mechanics spreadsheet:
    "Note: Demolitionist's damage bonuses and skills does not affect damage inflicted by bullets. Only grenades do more damage."

    So if you're a demo taking the M16M203, be aware that your bullets will be doing 65% of the damage of the bullets fired by a high level commando using a varmint rifle (30 damage versus 47). It feels like shooting shredded pool noodles at the zeds.

When used on a commando you are taking a Bullpup with an underslung grenade launcher. There are already a few major issues with this, all stemming from the fact that the Bullpup is a bad weapon in the first place, as elaborated in a section before this one.

  • By taking the M16M203 you are giving up the ability to carry either the AK12 (highest dps) or the HM401(highest stumble power)

  • You are using a weapon that takes 50% more headshots to kill gorefiends and elite clots compared to the other high tier rifles. And 100% more shots to the body to kill stalkers. You will be faced with hundreds of these during a game.

  • The blast radius of the grenade is very small, as will be elaborated later.

Now as for why the grenade launcher is bad, the reason is because of this equation:
Explosive Damage = Base Damage x ((Proximity Percentage) ^ Falloff value)

Or

Explosive Damage = Base Damage x ((1 - (Distance from target/Explosion radius)) ^ Falloff value)

Falloff value determines how quickly the explosive damage drops the father you get from the center of the explosion.
If falloff value = 1, it is a linear falloff.
If falloff value = 2, it is quadratic.
If falloff value = 3, it is cubic (i.e. it falls off even faster)
Here are the values of the M16M203 launcher compared to the M79.

Weapon stat
Base explosive damage
225
225
Explosive Radius
850
500
Falloff value
2
3

The M16M203 has the WORST explosive falloff in the game. No other explosive has a 3 falloff value. The falloff is so drastic that it goes beyond the ridiculous and into the realm of the sublime.

For example, if the M79 explosion hits something that is half the explosive radius away from it, the damage it deals is a quarter of the base damage.

Distance = 425
Damage = 255 * (0.5)^2 = 63.77

If the M16M203 explosion hits something that is half the explosive radius away from it, the damage it deals is not a quarter, but rather 1/8th of the base damage.

Distance = 250
Damage = 255 * (0.5)^3 = 31.88

Note that the M79 grenade is exploding almost twice as far away as the M16M203 grenade. Yet is still doing twice the damage because of the combination of larger blast radius and slower falloff.

For reference 1 in distance units in this game is around 1 cm. 188 is the range where a cyst can initiate a grab on you. The M16M203 explosive radius is less than 3 times the cyst grab range. It's embarassing.


Pretend where I am standing is where the grenade explodes. The scorch mark closest to me marks the edge of the M16M203 blast radius. The farther scorch mark represents the edge of the M79 blast radius.

Due to the falloff rate of the M16M203 explosive damage, any target that is halfway between me and the first scorch mark will take 12.5% of the base explosive damage. Basically nothing at all. In comparison an M79 grenade at the same distance would deal around 50% of the base explosive damage, or 4 times the damage.

This falloff value, combined with the small explosive radius, means that the only thing that is ever guaranteed to take significant damage from the grenade is something that is hit directly by the projectile. Which is highly problematic when the M16M203 has a little under 2/3 the number of grenades as the M79.

Two gorefasts basically right next to each other. Level 25 with Bombardier. After a direct M16M2013 hit to the chest of the left one, the 2nd gorefast is still has half health.


Two gorefast basically right next to each other. Same scenario. Lvl 25 with Bombardier. M79 kills both.


In practice the underslung grenade launcher is literally a shotgun slug. A high powered dud launcher. The radius where the grenade can kill with explosive damage is actually very well approximated by the base spread of a DBS shell. It kills what itThe falloff is that severe.

As you can see, the fatal kill radius of the M79 is generally double that of the M16M203. The M79 will be gibbing gorefasts at the range where the M16M203 barely kills crawlers.

The only reason I've ever seen veteran demos take this weapon is because their team was so bad at killing trash that they needed to buy a rifle to protect themselves. But remember, bad teams don't make bad weapons good. The problem with bad weapons that get better with bad teams remains the same: your team's bad, and you're still going to lose.

This weapon sucks. It sucks in ways I didn't know a weapon could suck. Don't take it.
Bad Weapons - Seeker 6


You knew this was coming. There's a trend here of bad weapons in KF1 coming back to be bad weapons in KF2.

I cannot describe to you in words how much I hate this weapon and all those that use it unironically. It is a plague upon the land, a travesty, a crime against nature and all right thinking demos everywhere.

Henceforth so that I do not have to speak the name of this evil, it will be abbreviated as S6.

First, basic stats. I'm assuming all left for the first 4 skills, full explosive damage + impact on FP chest, and only impact damage on SC head, because scrakes resist 60% of explosive damage and only an idiot would try to kill them that way. Assuming no C4 stacking debuff. For large zeds damage will be represented as a percentage of 6p HoE health on the appropriate body part. For trash I will put the maximum range for explosive kills and whether or not a direct impact will kill.

I'm assuming no hits to critical areas.
Large Zed: Percent of fatal damage
Scrake head
23.44%
35.16%
N/A
93.75%
15.63%
Quarter Pound chest
34.80%
42.41%
71.35%
80.48%
21.03%
Fleshpound chest
14.47%
16.95%
34.74%
36.72%
8.59%
Blast Radius
850
500
400
400
250
Explosive damage falloff factor
2
3
2
2
2


The S6 is terrible against large zeds. Pure garbage. I am insulted, and you should feel the same.

It completely lacks the impact damage needed to deal with scrakes. An ENTIRE MAGAZINE will give you the same impact damage as a single RPG rocket. In order to keep the scrake from opening up your guts while you attempt to do this, you need to use dynamite. Even then the insane recoil of the gun might make the takedown fail. The RPG doesn't need this mockery of a takedown, one magnum hit and the rocket tears the scrake's head clean off. No reliance on a small supply of grenades.

Against FP it lacks the necessary knockdown power. The RPG has enough base knockdown power to send the FP flying on the first rocket, completely bypassing his incapacitation resistance when raged. And then you can pump more rockets into the FP while it's taking a nap, letting you kill him before he can touch you. The S6 has knockdown power so weak it might as well not exist, since the first rocket will immediately rage the FP and turn on its incap resistance. And then while you slowly empty the magazine into him he will get in your face. It takes 11-12 rockets with the S6 alone to kill the FP, meaning that to have any chance of actually not getting hit, you need to use both dynamite and C4. Again, reliant on a limited supply of grenades to do the job that the RPG doesn't need grenades for.

Against quarter pounds the S6 can kill in a single magazine. Which would have been something in the positive check box for the S6 if

1. The reload canceled RPG didn't have better DPS. Which it does.
2. Quarter pounds didn't spawn in packs, which they do.
3. The S6 had a blast radius bigger than a deflated beach ball, which it doesn't.

The video below demonstrates just how torturous the S6's large zed takedowns are compared to the RPG.
https://youtu.be/x6JFss6eYls
Bad Weapons - Seeker 6 (Cont.)
For trash zeds, only M79, M16M203, and Seeker 6 are mentioned, as the HX25 is usually sold by the point where the question begins to matter, and the others are too expensive to waste on trash. I'm assuming level 25, all left skills.

Can kill without a direct hit, maximum range for explosive kill is noted.

Can only kill on direct hits anywhere on the body

Can only kill on a direct hit to the head or another critical area

Trash Zed: Fatal explosive radius
Cyst/Clot/Slasher/Stalker (body/head)
387
166
67
Crawler/Elite Crawler(body/head)
506
226
114
Gorefast (body/head)
196
80
Gorefiend (body/head)
Elite Clot (body/head)
48
Bloat (head)
Siren (body/head)
88
(can't hit metal parts)
Husk (head/backpack)

Technically some of the interactions that I have labeled body hits only are possible kills with explosive damage, but the radius needed is so tiny that it's almost physically impossible to kill with explosive damage alone, as the necessary distance the explosion needs from center mass is so small that it's actually on the zed character model.

As you can see, the S6's explosive radius is basically non-existent. The only things it can kill without direct hits are crawlers, stalkers, and clot variants, and it can only do so in about half the range where the M79 turns gorefasts into mist.

Note that the units used are the radius of the fatal explosive kill zone, not the area. When you note that the area ratio is the square of the radius ratio, it becomes apparent that the M79 kill zone is much large, encompassing an area nearly 20 times the size the kill zone of a S6 rocket. The S6 might hold 6 rockets, but when a M79 can kill things in a 20 times bigger area, and kill more enemies without needing direct hits, it becomes very possible that the S6 might actually killing zeds slower than the demo's tier 2. And the M79 lets you take the RPG with it.

The S6 blast radius is so pathetically small that I hesitate to even consider it an explosive weapon. It's functionally no different from a 6 shell mag fed shotgun. You might as well buy a DBS or an HZ12 offperk and have practically the same results.

The S6 is garbage. It's too slow to kill large zeds and too reliant on your limited supply of dynamite. Against trash it's basically a shotgun because it's rare that it'll kill anything without a direct hit. And the greatest sin of all, it weighs 9 and costs 1500. Who the &#@$ thought this was tier 4 material? The S6 serves no purpose other than to trick inexperienced or incompetent demos into dragging down their teams.
Bad Weapons - Microwave Gun
Microwave Gun


The microwave gun (abbreviated MWG). TWI's attempt to give the Firebug a tier 4 game changer that lets it overcome its inherent weakness against large zeds. This weapon has swung wildly on the useful-useless scale of viability during the life of this game. As of update 1055, I can say that this weapon is unequivocal trash outside of fighting the Patriarch.

"Why? Does this weapon not help Firebug against its greatest weakness?" you ask.

Yes. It does, strictly speaking, help the firebug. In the same manner that a roll of duct tape might have stopped the Titanic from sinking.

First off, the weapon is terrible at its stated intention of dealing with large zeds.

The first issue is that the weapon itself simply does not have enough damage in a single magazine to reliably kill scrakes without having to reload.
https://youtu.be/qdqhB1VjQuc

With Bring the Heat it takes approximately 150 units of fuel, with PERFECT accuracy, to kill a 6p HoE scrake.

With High Capacity Fuel Tank, it takes around 200 units of fuel to kill the scrake, which is actually possible given that the magazine size would be exactly 200, but again this is is only possible with PERFECT accuracy.

For a weapon that at best holds 700 units of fuel if you take the mag boost instead of damage, this is a pathetic level of ammunition efficiency. The maximum number of scrakes you can kill is with the damage boost, which is 4 scrakes (500 spare ammo + 100 fuel loaded = 600 fuel. 600 fuel/150 fuel per scrakes = 4).

4 scrakes assuming PERFECT ACCURACY. That is so bad that it transcends the level of anger and into the realm of pity. I could kill the same number of scrakes with 16 DBS shells. Which is less that 1/4th of the potential ammunition available to a level 25 support.

The other issue is that killing scrakes, let alone fleshpounds, takes so long and requires so much space that it does not even vaguely qualify as a takedown.
https://youtu.be/EKI9eI9a3-s

The "takedown" involves you running away from the scrake as it chases you, trying to keep your beam on target as he swings and dances wildly. It takes 14 or so seconds, and you are nearly guaranteed to take a hit.

That is 14 seconds of you leading the most dangerous non-boss enemy straight through your team's holding position as he swings wildly and performs the fire dance that renders your precision perk players unable to meaningfully help without wasting precious ammunition on body shots. And this is just a scrake. A dozen or so of these things spawn in later waves.

If you wanted to get the MWG to keep raged large zeds off your teammates, Heat Wave already does that with any Firebug weapon. Or, you know, any other perk that can actually kill them. Firebug can incapacitate fleshpounds, but other perks have access to the ultimate incapacitation: DEATH.

The last issue is that the MWG sucks against trash
https://youtu.be/XYj9PoWHX98

Most trash zeds are either more or identically vulnerable to microwave damage as fire damage.

Zed
Fire damage multiplier
Microwave damage multiplier
Cyst
Fire - x1
Microwave - x0.25
Clot / Elite Alpha
Fire - x1
Microwave - x0.25
Slasher
Fire - x1
Microwave - x0.25
Bloat
Fire - x1
Microwave - x0.8
Crawler / Elite Crawler
Fire - x0.9
Microwave - x0.2
Gorefast / Gorefiend
Fire - x0.85
Microwave - x0.85,
Stalker
Fire - x0.85
Microwave - x0.2
Husk
Fire - x0.5
Microwave - x1.15
Siren
Fire - x0.5
Microwave - x0.85,

The only trash enemies more vulnerable to microwave damage are Husk and Sirens. The former of which is barely a threat due to the firebug's massive fire resistance, and the later of which already is easily killed with even a Caulk.

But the most outrageous part is the MWG's lack of ground fire damage. The MWG's ground fire base damage is 50% lower than that of any other weapon that activates the ground fire skill. The Flamethrower and the CnB both have a base ground fire damage of 10 a tick, while the MWG's is 5. The CnB arguably kills trash better than the MWG.


This weapon is garbage against large zeds. It's worse that your starting weapon against trash zeds. Its function of holding raged zeds off teammates is already done with your level 20 skill. The MWG has no purpose other than being a joke weapon on an already weak class.
Bad Weapons - Hemogoblin


It was a nice try TWI, it really was, but the execution was botched. The Hemogoblin is an attempt for the game to branch out into something new: offensive debuffing. However, it fails to find use outside of the boss wave due to the same general pitfall many of the bad weapons share: being good at something that isn't important, while bad at something that is important, doesn't make you useful.

The Hemoglobin is good at debuffing certain single targets, but has a razor thin margin of error that the medic's typical positioning makes even worse. It's bad at healing multiple targets. That, in short, is why it does not fit well with the medic's role.

First, the basic healing stats.
Medic Weapon
Ammo cost to fire dart (% of ammo pool)
Time to full recharge
Heal amount per dart
Healing potential regeneration

(i.e. healing per dart/time to recharge dart)
50%
15 s
15 hp
2 hp/s
50%
15 s
15 hp
2 hp/s
40%
12 s
15 hp
3.125 hp/s
30%
10 s
15 hp
5 hp/s
40%
15 s
20 hp
3.333 hp/s

With a level 25 medic the recharge rate is increased by 200%, and healing per dart by 50%. So divide the total recharge time by 3, multiply the heal per dart by 1.5, and multiply the healing potential regeneration rate by 4.5 for the stats at level 25 med. Which leaves the medic rifle at 22.5 hp/s, and the Hemogoblin at 15 hp/s.

Keep in mind that total healing per dart is not a major relevant statistic. Healing in the game is capped at a rate of 10 hp/s.

As for why the Hemoglobin is bad:

The debuff is not useful outside of the boss wave as it is either unnecessary, or has a very large chance of raging the target, which defeats the entire purpose of the weapon.
First off, the weapon is worse than useless against fleshpounds. It takes at a minimum 3 spikes in rapid succession to inflict bleed on a calm fleshpound. Unfortunately, this is also enough for the DOT to rage it just as the bleed activates. So congratulations, you just raged a fleshpound.

A raged FP's incap resistance makes it almost impossible to bleed.

Against scrakes the weapon is still arguably worse than useless. 2 spikes will bleed without raging it. However, all this represents is an unnecessary risk, because if the scrake has suffered even a smidge of damage before or after your 2 spikes, it will be raged. In testing it only took around 12 9mm shots' worth of damage to rage it after the bleed. So congrats, you raged the scrake.

And the bleed is unnecessary in the first place. Scrakes are slow. Scrakes are vulnerable to incaps. Scrakes are not hard to kill. 8/10 of the perks in the game can easily kill them with on-perk weapons. 4 perks (zerk, sharp, SWAT, demo) have grenades that can instantly either immobilize it or reduce it to walking speed. 5 perks (firebug, DBS support, Ballistic Shock sharp, med rifle commando, RPG demo) have weapons or skills that can easily control scrakes in close range. 2 perks (gunslinger, SWAT), have snare skills that can slow it down already. The game does not lack for methods of controlling scrakes, and the Hemogoblin's contribution to the current pool is not important or meaningful.

Against quarter pounds 2 spikes will bleed it without raging it. However, it's the same exact problem as with the scrakes: if somebody has so much as even sneezed in the quarter pound's direction, the spikes + DOT will be enough to rage it. In this case, it was around 8 9mm shots' worth of damage to turn the debuff into a debuff + immediate rage. It's also a waste of 7 blocks of weight to carry a weapon *just* for the possibility of a quarter pound spawn, and the game usually spawns more quarter pounds that you have available spikes. If anything, it's better for you to heal + keep trash off the rest of the team so that they can kill the quarter pounds.

The weapon itself does not fit well with the medic's positioning in a camp spot and is easy to create messes with.
Medic is generally in the back of the team. That mean's there's a lot of bodies between you and your large zed Hemogoblin targets. As the weapon has no penetration the spikes are easily absorbed by teammates, or trash. This creates uncertainty about how many spikes have actually hit the target. This uncertainty may make you put in 1 spike too many. That one spike too many will rage your target.

The weapon is not a good healer, and the bleed debuff can't replace actual healing.
I consider the Hemogoblin's heal inferior to the shotgun. The shotgun has a faster dart recharge, due to the base total recharge being 12s instead of the Hemogoblin's 15s. This means that the shotgun can put out buffs faster, while still having almost the same healing potential over time.

The bleed debuff to zed damage is not an adequate substitute for the damage reduction from Coagulent Booster. Because Coagulent Booster comes with healing to the teammate, while bleeding the zed doesn't. The zed might be dealing 30% less damage, but if the teammate isn't getting healed enough that 70% of normal damage will still kill them eventually.

And that is assuming that you have an ideal scenario, with only 1 teammate in trouble, with only 1 zed attacking that teammate. If a teammate is in a corner with three angry large zeds, you debuff one, and he takes 70% damage from one large zed but 100% from the other two. With Coagulant Booster on a med rifle's 3 darts, he'll be taking 70% damage from all 3, and having healing. The same thing applies to when multiple teammates are in trouble. It is much easier to heal 2 targets, than to debuff every single zed attacking them.

But aren't you going to rely on the rifle for healing and saving people?
Too bad, the Hemogoblin has a god awful equip and put down time, by far the worst of any medic weapon.

So the conclusion? The offensive debuff usage is not worth the risk of raging the large zed, nor does it reasonably improve takedown performance enough to be worth it. The defensive usage of the debuff is cumbersome as it is simply much easier to harden the target with Coagulant Booster + heals instead of debuffing every single zed attacking them. Reliance on other weapons for keeping the team alive is made harder by the Hemogoblin's long equip times.

So don't take the Hemogoblin, unless it's the boss wave, because in that case it is the ideal 1 on 1 scenario where the debuff would actually work.

Bad Weapons - Crossperks
Section is dedicated to non-starter weapons that have a use in their home perks, but are absolutely terrible when crossperked.


Where to begin with this piece of crap...

Demo has, out of all the perks in the game, the most reason to avoid melee combat.
  • He has no damage resistance to any important zed damage.
  • No health regen.
  • No speed boost.
  • No extra health or armor bonus.
  • No immunity to the clot grab.
  • Weapons either don't explode or deal self damage in close range.
  • Grenade deals self damage.
  • Long reloads.

And on top of that, there are additional reasons not only to avoid melee combat, but to avoid melee weapons in general.
  • No boost to the swing speed.
  • No parry or block bonuses.

The demo, as of this moment, NEEDS to take the RPG due to the RPG's standout effectiveness against large zeds. This leaves 6 blocks remaining, and the Pulverizer would take up the entirety of those 6 blocks.

The Pulverizer has a very slow windup for both its light and heavy attacks, with a nearly half second delay between the initiation and the impact for the heavy attack. The damage per hit on the heavy, even on a fully damage specced demo, barely surpasses a berserker with just Smash and no other damage bonuses active. Zerk's damage per hit is significantly greater with either Smash + Butcher or Smash with Parry active, and his DPS is greater with just Smash due to the swing speed bonuses available at level 10, which effectively increase his DPS by 25%. This, on top of all the health and resistance bonuses that zerk has compared to demo.

If you need self defense as a demo, there are plenty of offperk shotguns, pistols, SMGs, and assault rifles with 6 weight or less to choose from.


Simple reasons. Weapon has weak bullet damage, sharpshooter doesn't have bonuses to the DOT damage, the projectile isn't hitscan like the other pistols, and the combination of travel time + spread means high inaccuracy.


HZ12 is just plain better due to being magazine fed, not pissing off your precision teammates with fire panic, having a bigger magazine, a faster rate of fire, only has to pump once every 2 shots instead of after every shell, and better range because for some reason the trenchgun's pellets have bullet drop.
Meta Loadouts - Notes
Optimal loadouts will change with maps, team composition, and hold positions. Everything will likely have an element of personal opinion. Loadouts that are 100% suboptimal with intelligent teammates and reasonable team composition are excluded.

I have also taken the liberty of adding perk specific guides that I have perused, and found to be generally useful. Though take note that there will be minor areas of disagreement.
Meta Loadouts - Commando
RRLLR
AK12 + HM401 + HM101/Deagle
AK12 has the highest AR DPS. The HM401 has the highest stumble power of the ARs (25, versus 18 for the SCAR). It is also the ONLY AR with the abilty to flinch a scrake, which makes scrake takedowns very safe. SCAR is not recommended for the reasons already outlined.

RRLLR
AK12 + RPG-7
When you quite literally don't trust your teammates to handle fleshpounds.

RRLLR
AK12 + SCAR + Katana
There is a very specific situation for this loadout.

1. You are in close to medium range.
2. You are expected to solo scrakes in said range.
3. You will likely have to deal with FP yourself.

Ideally this should never happen, but with certain maps and...underwhelming teams, this might be the unfortunate necessity.
Meta Loadouts - Medic
LLLLL or RLLLL
HM401 + HM301 + HM101
Full healing potential.

LLLLL or RLLLL
HM401 + DBS + Katana +HM101
Some tanking potential w/ Katana, as well as the ability to occupy scrakes with the stumble of the DBS. The DBS jump also lets you more effectively kite FP's.

RLLLL
HM401 + HM101 + Pulverizer
When your team doesn't have a berserker, in reality probably needs a berserker, and you foresee that you'll be tanking large zeds sometime in the near future.

LLLRL or RLLRL
HM401 + HM101 + M4 Combat Shotgun/SPX
This build is for when your team doesn't need heavy healing attention, but requires some more trash killing or focus fire potential on large zeds. You need Battle Surgeon for the med rifle to hit the gorefast 1 headshot breakpoint. But keep the rest of the left side buffs or else you might as well be a Commando, as the loss of Coagulent Booster is already bad enough. Generally I would recommend the M4 Combat Shotgun (I can't believe I'm saying this) over the SPX in this situation, as it has better raw DPS, if you can handle the recoil. And the M4 reloads faster.

LLLRL or LLLLL
HM401 + Freezethrower
A mainly support oriented build. Given that medic isn't usually in combat a lot of the time he has the least opportunity cost to using the freezethrower to immobilize large zeds for his teammates to focus fire.

LLLLL
Railgun + HM201 + HM101
Is your team so frighteningly good that normal Hell on Earth is a cakewalk? Are you getting bored because everything is dying to focus fire and execution combos? Now you too can enjoy the fun, because they're not gonna need heals.

http://steamproxy-script.pipiskins.com/sharedfiles/filedetails/?id=804325801
http://steamproxy-script.pipiskins.com/sharedfiles/filedetails/?id=1094412436
Meta Loadouts - Swat
RRLRR or RRRRR
Kriss + P90/UMP + MP5/MP7
Loadout with the longest staying power due to having 3 smgs. For bullet economy the MP5 or MP7 are the most cost effective on the lower end trash. Reserve the more expensive ammunition for elite alphas and higher.

RRLRR or RRRRR
Kriss + P90/MP5/UMP + HM101/HM201
If you want some healing.
Meta Loadouts - Demo
LLLLL
RPG-7 + C4 + .500 Magnum
The demo's premier solo large zed extermination build. .500 headshot + RPG headshot decapitates scrakes. There are an endless number of ways the RPG, C4, and dynamite can be used to eliminate fleshpounds, in singles or multiples. However you have limited self defense capability, and should ideally be operating with a commando or a swat.

LLLLL
RPG-7 + C4 + Deagle + HM101
Killing scrakes is harder and requires 1 Deagle headshot + 2 9mm/HM101 headshots before the rocket can cleanly decapitate a 6 man HoE scrake, but is better for self defense due to the faster reload spead and larger magazine of the Deagle. With good teammates or good communication though this isn't an issue, since a deagle headshoot + the RPG impact will leave the scrake with 19 head health.

LLLLL
RPG-7 + AK12/SCAR/UMP/HZ12/DBS
When your team can't kill trash. SCAR's advantages are that it can 1 bodyshot stalkers offperk and the use of semi-auto makes the recoil easier to control. AK12 however performs identically in basically all other aspects if you can tap fire, and has a bigger magazine. For a clean scrake decapitation it requires either 3 AK12 headshots or 2 SCAR headshots before the RPG headshot. UMP will put a SC in range for a clean RPG decap with 3 headshots. The shotguns will rage on headshots, so use the RPG first and use the shotguns for the followup.

LLLLL or LRLLL
RPG-7 + M79
When a tank is holding a narrow chokepoint and you're behind him.

(video isn't using LLLL, but it's good enough I guess)

http://steamproxy-script.pipiskins.com/sharedfiles/filedetails/?id=878222672
Meta Loadouts - Sharp
LLLLL or LLLRL
Railgun + .500 Magnum/SPX
When you trust your team to protect you from trash. 1 headshots scrakes, 2 headshots for fleshpounds (1 manual + 1 auto). Magnum is for medium zeds and elite trash. Husks are number 2 priority after large zeds. If you are very confident in your hip fire abilities, you can take the ammo skill instead of Dead Eye, and still 1 shot scrakes if you have 1 pre-existing REU stack.

LLLLL or LLLRL
Railgun + UMP/MP5/DBS + HM101 (weight permitting)
When you can't depend on the team to kill trash.

RRLRL
M14EBR + SPX + Deagle/.500 Magnum/Katana
Solo laning build. 4-5 EBR headshots will stun a scrake, or 3 SPX headshots. Safest FP takedown is to tap it twice in the head with the M14EBR, then 6 SPX headshot to decapitate.
https://youtu.be/pJbqCKqq4wQ

RLLRL
M14EBR + SPX + .500 Magnum
The higher skill cap M14EBR build. The advantage of Stability isn't so much the damage boost, as that only shaves off 1-2 shots on large zed decapitations, but rather the reload bonus to the SPX and the .500 Magnum which suffer from long reload cycles. This build requires marginally more space to kill scrakes due to the lack of a stun. And it requires better aim, since from your perspective when crouched the zeds' head move up slightly as they get closer to you.
Meta Loadouts - Gunslinger
RLRLR or RLRLL
Dual .500 Magnums + Dual Deagles + Dual M1911s + HMTech-101
I personally prefer to only take a single M1911 to reduce the amount of weapon cycling and button presses.


RLRLR or RLRLL
Dual .500 Magnums + Deagle + SPX + HMTech-101/M1911
SPX and Magnums handle the large zeds and emergencies, while the single pistols deal with trash. Eases weapon switch management with the big zed killers on key 1, the trash killers on key 2.

http://steamproxy-script.pipiskins.com/sharedfiles/filedetails/?id=874275491
Meta Loadouts - Support
RRRLR or RRRRR (use RRRRR when FP begin to spawn)
AA-12 + DBS + Katana + Deagle/.500 Magnum + HM101
AA-12 and DBS can handle almost everything. Deagle/Magnum is for popping husk tanks and engaging at long range, or picking off single targets that would be a waste of shotgun ammunition. Katana is for parrying large zeds.

RRRLR or RRRRR (use RRRRR when FP begin to spawn)
AA-12 + DBS + HMTech-301/HZ12
When you are in your preferred environment of a medium length hallway, and have either teammates or terrain to deal with husks or crawlers.
https://youtu.be/guppT9n6URc

RRRLR or RRRRR (use RRRRR when FP begin to spawn)
AA-12 + DBS + (MP5 + HM101)/UMP
When you have problems with crawlers.

RRRLR or RRRRR (use RRRRR when FP begin to spawn)
AA-12 + DBS + VLAD
Tight indoor tunnel maps with short, almost point blank sight lines, to take advantages of the VLAD's unique ricochet mechanism. However if the sightline extends any far into medium range, then the ricochet becomes unreliable.

RRRLR or RRRRR (use RRRRR when FP begin to spawn)
AA-12 + DBS + HZ12 + HM101
For closer rangers and most confined maps, where the wider spread of the HZ12 can become useful. Also useful for when the spawns are arranged so that the zeds approach you in a conga line.

Don't take trenchgun because it's ♥♥♥♥♥♥♥ annoying to headshot burning targets.

http://steamproxy-script.pipiskins.com/sharedfiles/filedetails/?id=807727513

http://steamproxy-script.pipiskins.com/sharedfiles/filedetails/?id=912554889
Meta Loadouts - Berserker
LLRLR
Bone Breaker + Whatever (TM)
Full tank loadout when you have a medic.

RRRLR or RLRLR
Katana + Deagle + Eviscerator/Railgun
When you don't have a medic, or you're guarding a flank or back door away from the medic's position. Katana for trash, Deagle for husk backpack, Eviscerator/Railgun for large zeds. Both of them will 2 headshot scrakes. Railgun will 3 headshot FP's, Eviscerator will need 4 blades or 2 Deagle headshots + 3 blades. Railgun's primary advantages are that it has a true scope, longer range, and greater accuracy. Eviscerator has more spare ammunition, tier 4 parry stats, and the sawblade melee.

LRRLR or RLRLR or RRRLR
Pulverizer/Zweihander + Crossbow + HM101/HM201
Support oriented berserker. Choices for the level 5 and 10 perks depend on strategy and position. Crossbow is for medium to long range medium zed killing, and stunning scrakes. The particular advantage of the crossbow against the deagle, ignoring the scrake stun, is that it has a scope that zooms.

Meta Loadouts - Firebug
LRLLR
Microwave Gun + Caulk and Burn
Microwave gun for already raged large zeds. Caulk for small zeds.

LRLLR
Flamethrower + Trenchgun + HM101/Deagle
Trash killing build. Trenchgun gives you range against Sirens and elite crawlers.
Meta Loadouts - Hard carrying
This is, hopefully, the only section that I have to write that assumes genuine idiocy on the part of your team.

You are in a pub, and see before you an extinction level catastrophe in the making. It's just you, 5 idiots who you can't believe aren't badly programmed bots, and several hundred angry mutants. Instead of leaving to preserve your own sanity, as I would have done, you have decided to drag these half-wits to glory whether they like it or not.

Well, these perks and loadouts are likely the best ways to go about it. The common theme is that they are good "last man standing" perks, due to having enhanced speed and better methods of healing themselves.

  • Berzerker, RLRLL, Evicerator, Deagle, Katana
    The true, time tested hard carry for when everybody is dead, and you need to do everything yourself.

  • Berzerker, RLRLL, Railgun, Deagle, Katana
    The meme loadout where you throw game balance out the window.

  • Medic, LRLRL or LLLRL, HMTech-401, DBS, Katana
    When you need to save these people from themselves.
    https://youtu.be/ya2WCMbEXrc

Teamplay - General principles
  • What is good/fun for you, and what is good for the team, will not always be the same.
    Do not confuse the two. I understand perfectly when a player wants to loosen up and have fun. But be honest about it, both to yourself and to your team. A player that is not willing to make compromises for the sake of the team can go play solo.

  • Your teammate doesn't care about your kill count. They care if you are doing your job.
    Some perks will by design have lower kill counts that others. The less you obsess over your numbers and attempting to kill steal, the better you will perform.

  • There are no consistently bad perks (except survivalist). However, EVERY perk is situational.
    Some are far more situational than others. The strengths of each perk and loadout is heavily dependent on team composition and positioning. There will always be a short list of 1-2 optimal perks for any joining player to choose. Make choices based on what capability the team is missing.

  • Negative perk interactions exist.
    See below for elaboration on the concept of chaos.

  • Player skill is a force multiplier. A force multiplier acting on 0 still results in 0.
    Skill can compensate for lack of actual capability, but that will only go so far. Optimal perk choice and high levels matter regardless of how skilled you may be.

  • Practice channel prioritization and target prioritization.
    Channel prioritization refers to which player(s) is covering which lane. Target prioritization refers to which targets an individual player in a lane covering group shoots at. Both will need to be flexible during the course of a game with multiple lanes to cover.
Teamplay - The concept of chaos
"I can't see ♥♥♥♥, there's fire everywhere"
"Stop raging the damn fp"
"Don't shoot the scrake you idiot"
"Don't use poison you moron"

The above all too common gameplay banter are united by the same thing: the concept of chaos.

HoE gameplay is very headshot dependent for two important reasons

  • Time to kill: Zed head health is consistently 40% or less of body health. A consistently low time to kill is important to prevent getting swarmed.

  • Ammunition conservation: There are far too many zed to be wasting bullets on body shots. Bodyshots will always take at least twice the ammunition to kill.

The majority of perks are dependent on headshots to reach their skill ceilings, even those that don't seem to have any need to aim.

  • Sharp: perk damage bonuses rely on headshots.

  • Commando: Bodyshots on trash drain ammunition from his ARs very quickly.

  • Support: Any combat that extends beyond knife fight range relies on Tight Choke and aiming shotgun shells at heads.

  • Demo: Armor Piercing Rounds needs to hit to heads to work, which is extreme important against scrakes. Fleshpound knockdown needs an RPG impact to the head or the legs to work consistently.

  • Gunslinger: Magazines and ammunition pool are too small to use bodyshots and Rack Em' Up only works with repeated headshots.

  • Swat: Bullets are extremely expensive, and ammunition wasted on body shots means that he bleeds money.

Chaos is anything that makes headshots difficult or impossible to pull off. Almost all of these are a result of player actions and choices.
  • The fire dance: the panic animation of zeds being set on fire. Firebug does this by simply existing and being in the general area. Support using a Trenchgun does this too.

  • The poison dance: the panic animation of zeds that are poisoned. Done by medics that take Acidic Rounds and demos using Destroyer of Worlds.

  • Gas clouds from elite crawlers.

  • Fire. You can't see through it. Either comes from a Husk or your own Firebug.

  • Zeds entering attack animations. Most commonly caused by a berserker simply being in the area.

  • Raged large zeds.

  • Elite Clots causing mobs to sprint.

  • Explosions from demo shots or firebug/survivalist skills shaking your scope and knocking around zeds.

Chaos is the single biggest source of negative perk interaction. Perks that create it, by simply existing, reduce the ability of the perks that don't like it. It is common sense and basic courtesy to not generate excessive or unnecessary chaos in the vicinity of the player using perks that can't function. Do not be the player that chooses firebug and parks himself in the lane with a sharp and a gunslinger. Either they leave, or you leave.

Berserker and firebug are the two biggest offenders of the "nobody behind me gets to aim" crime. They are short ranged, meaning that they invariably get in front of you. They get close to the zeds, meaning that they invariably attract zed aggro and cause them to enter unpredictable attack animations.

Chaos is reduced by 2 things: killing zeds and the use of stun grenades such as the flashbang, dynamite, and freeze grenades.
Teamplay - Perk characteristics
As it bears repeating, there are no bad perks (except survivalist). All perks are situational. For every situation there are optimal and good perks, and then all the rest. Perks are defined by their key general characteristics, as outlined below.

Perk
Effective range
Tank ability
Spike damage
DPS
Incap ability
Chaos creation
Chaos tolerance
Effective mag size
Team Support
Point blank
Very high
Medium (high with Evis)
Medium
Low
High
High
Infinite
None
Long - Medium
Average
Low
Medium
Low
Low
Medium - Low
High
High
Medium - Short
Average
High - Medium
High
Medium
Low
High - Medium
High - Medium
High
Medium
High
Low
Medium - Low
Low (no poison)
Low
High
Medium
Very high
Medium
Average
Very high
Medium
High
Medium
High
Low
Medium
Short - Point blank
High
Low
Low
Medium
High
High
High
None
Medium
Average
Low
High
Medium
Low
Low
Medium
None

Long - Medium
Average
Very high
Medium - Low
High
Low
Low
Low
None

Long - Medium
Average
Medium
High - Medium
Very high
Low
Low
Medium
High - Medium
Medium
Average
Low
Medium - Low
High
Low
Medium - Low
High
None

These guidelines will help you determine which perk is most optimal.

  • The best perk is the one that conforms best to the camping spot as well as the needs of the team at the moment.

  • A perk will more likely be optimal if the camping spot is arranged in such a way that the zeds appear right at the edge of its effective range, or a short distance beyond it.

  • Perks will be high capacity trash cleaners if they combine high to medium effective magazine sizes (taking penetration into account) along with being in their effective ranges.

  • Perks will be effective HVT killers if they have high spike damage or dps, as well as being within their effective ranges. The difference being that high spike damage makes killing HVTs easy, while perks with high dps but without high spike damage will need good aim and skill. Medium dps perks without high spike damage should be able to conditionally solo scrakes, or take them down with help.

  • Taking a perk strong in an area that the team lacks will usually provide the greatest marginal value. Taking doubles of a perk usually doesn't do this, which is why I strongly discourage this unless you're trying a cheese strategy.

  • Take a note of how many chaos intolerant perks there are, and where they are positioned. A high chaos generation perk will decrease the effectiveness of any chaos intolerant perk near it.
Teamplay - Weapon aiming requirements
As a disclaimer, by nature some perks are naturally aim intensive, while some perks are not. These measures are at least partially relative ones.

This section is not meant to be a judgment on how good weapons are when used to their full potential. It is merely a description of how tolerant they are of bad aim. Starter weapons and bad cross-perks are excluded.

Category
Characteristics
Aim unintensive
    One or more of these:
  • Basically can't hit headshots, so why try?
  • Hits bodyshot breakpoints
  • Tolerable magazine size
  • Fast firing speed
  • Good enough reload speed
Neutral
You can bodyshot with it, but to hit the skill ceiling you need to be capable of aiming the weapon.
Aim intensive
    One or more of these:
  • No bodyshot breakpoints or major ammo waste
  • Small magazine size
  • Slow firing speed
  • Slow reload speed
  • Low spare ammunition pool
  • Expensive ammunition

Perk
Aim unintenstive
Neutral
Aim intensive


Teamplay - Target prioritization
The general rule of thumb is that you want the individual members of the team to be shooting at the targets that they have the lowest time and shots to kill on. If two players both have the same shots/time to kill on a certain type of zeds, the player with the cheaper ammunition or bigger magazine size should be focusing on that particular category of zed, while the player with the more expensive ammunition should save it for tougher enemies.

Given that I can't find any good icons anywhere else, I'll just borrow these from Smash.

Legend
What it means
You are one of the best perks in the game for dealing with this zed. If you're having trouble with these something is wrong.
Your perk is pretty good against this zed, so you're a first responder against this category.
You're good or okay against this zed, but it's a waste of ammunition or inconvenient in some way.
If there is nobody else available you can handle it under most circumstances, but it's risky, time consuming, has little room for error, and/or requires a lot of space.
This zed is dangerous or disadvantageous for you. Significantly more ammo waste, risk, and/or ambush potential. Requires a teammate for support, a stun, and/or focus fire. Otherwise, prepare to get hit.
This zed hard counters you in direct combat. Only shoot it to save yourself or save a teammate from immediate death. Otherwise if you so much as even touch it I'll give in to the welder itch.
Teamplay - Target Prioritization (cont.)
Perk
Cyst /
Clot /
Slasher
Crawler
+ Elite
Stalker
Gfast
E. Clot /
Gfiend
Siren
Bloat
Husk
SC
FP or 2+ QPs


(Evis)


(M79)


(M79)


(M79)


(M79)


(M79)


Teamplay - Negative interactions
This section is dedicated to the perk combinations that for reasons native to their very design, don't want to be near each other.

This is not to say that these perks can't be near each other. But that they have a very strong potential to make each other worse with relative ease, compared to other combinations.

The reasons for not liking each other can be:
  • Reason 1:
    They have very similar lists of preferred and unpreferred targets, meaning that they fight over the same kills and run away from the same enemies.

  • Reason 2:
    Have heavily overlapping preferred targets, but one perk out-ranges the other by such a significant margin that the latter would need to overextend significantly to do anything.

  • Reason 3:
    One perk annoys the other with chaos generation.

  • Reason 4:
    One perk is incentivized to engage in behavior that is extremely aggravating to the other.


Commando and SWAT:
They generally want the same targets, while both have situational scrake takedowns and run away from fleshpounds. Which results in them targetting the same enemies and wasting bullets overkilling it, while not compensating for each other's weaknesses due to being weak to pretty much the same things. The biggest issue is the SWAT is incentivized to steal kills from the commando during zed time. Commando wants to space out every kill to maximize the zed time, while SWAT wants to kill everything with a Rapid Assault enhanced Kriss, which tends to cause the zed time to end prematurely and raise the commando's blood pressure. Other ranged perks may have rapid fire skills during zed time, but none of those rapid fire skills come with infinite ammunition, which is why SWAT tends to commit this crime more than any other perk. Well, there is also Pyromaniac firebugs with Spitfires I guess.


Firebug/Berserker and Demo/Commando/SWAT/Sharp/Support/Gunslinger:
The latter group is dependent on headshots to reach maximum effectiveness. The former group messes with that by getting in front of them because of their short range, which causes the zeds to switch directions and enter unpredictable attack animations. Along with Firebug's fire panic and flame particles that blind players. And the fact that both of them tend to result in a lot of exploding gas crawlers. Firebug and berserker do this because of their short range and inherent inaccuracy, but the reasons for them doing it doesn't matter. They're still doing it.

Note that while demo and support don't like the mess firebugs and berserkers cause, they can usually still function, just not as well against certain targets.

On the flip size the latter group's range advantage means that they kill the firebug's/berserkers targets before they can come in close, forcing overextension should they want any action.


Commando and Berserker/Firebug/Demo:
Commando really, really hates being blinded during zed time because it forces him to guess where to shoot when trying to extend. Demo's nuke skill and firebug's Pyromanicac skill actively incentivizes them to spam during zed time, resulting in a cloud of blinding particle effects. Berserkers with Spartan are actively incentivized to advance into the commando's targetting area in an attempt to chop off heads, not realizing that their body is blocking the bullets extending zed time. This behavior also tends to result in kill stealing from the commando.


Commando/SWAT/Support/Demo and Gunslinger/Sharp:
The first 4 perks can easily cause stumbles at range, while the latter 2 perks don't, and really, really hate having heads suddenly moving in unpredictable directions without notice. Unexpected stumbles will often cause enough missed shots to necessitate a reload to finish the job. Therefore, unless you are fully committed to devoting your entire attention to bringing down the large zed (any thereby putting enough damage on the zed to compensate for the missed shots you are causing), if you are one of the left four perks do not attempt to "help" the right two.
Teamplay - Positive interactions
This section is dedicated to the perk combinations that for reasons native to their very design, really, really want to be near each other or otherwise interact favorably with each other.

The reasons for really liking each other can be:
  • Reason 1:
    They compensate for each other's weaknesses to specific zeds, where 1 perk is strong against the enemies the other perk is relatively weak against.

  • Reason 2:
    Their existence in close proximity allows them to delegate tasks which results in otherwise inexecutable strategies.

  • Reason 3:
    Their existence in close proximity allows them a greater safety net to engage in high risk/ high reward behavior.


Commando and Sharp/Demo:
The commando is beyond question the best bodyguard perk in the game for the large zed specialists. He has the range to deal with husks, the zed health vision to see crawlers, the range to kill gas crawlers before they can reach you, the decloak to trivialize stalkers, and the combination of damage per shot, fire rate, and magazine size to kill every other variant of trash zed. Not other class is better equipped to make sure that the large zed killers are not harassed when trying to do their job.


Commando and Gunslinger/Support/Sharp/Demo:
Commando's zed time extension ability provides massive power spikes for these perks. Gungslinger's reload bonuses in zed time along with Fan Fire allows him to easily and quickly kill multiple large zeds. Supports Barrage skill along with the AA12 does a similar thing, while Sharp's Assassin lets the EBR build kill large zeds with fewer bullets. Demo gains the nuke which has it's 50% bonus to explosive damage and 35% increase to the blast radius, which also effectively increases damage. The nuke also leaves behind a radiation cloud that does respectable damage, creating an area of denial. All of these perks also get time to perfectly aim their shots.

Berserker with Spartan and SWAT with Rapid Assault also gain similar increases in effectiveness, but their inherent problem is that if they're near the commando, they tend to cut the zed time extensions short if they take advantage of that increase in effectiveness.


Support and SWAT:
SWAT has an inherently unfavorable dynamic for its ammunition economy. The combination of fast fire rate and weak shots means due to recoil and inaccuracy a lot of shots are going to miss. And that is not counting the interaction with headshot blocking moves and the perk's inherent disadvantage when trying to headshot stalkers. Support's ammunition backpack however compensates for the ammo economy issue as it gives ammunition based on the starting magazine count, with combined with SWAT's mag size bonuses means that the SWAT gets a considerable number of free SMG rounds.


Support and Demo/Sharp/Gunslinger:
Support's ammo ability gives a larger margin of error for these perks, who have low overall ammo capacity for key weapons. These perks also coincidentally have issues dealing with close range mobs, which is what support is naturally strong against while also not interfering with aiming.


Demo and Medic:
Due to the fact that the damage bonus from Focus Injection is multiplicative, a level 25 LLLL Demo can be damage boosted by 2 Focus Injection darts to the point where he can decapitate 6p HoE scrakes with a single RPG impact to the head.


Notable perk combinations which the entire team can be centered on.


The ZED time ballistic DPS trinity
Commando and Gunslinger and M14EBR Sharp:
The staple 3 perk combo of higher level play. The EBR sharp uses the combination of the EBR and lvl 25 skills to trigger zed time, which the commando extends. The gunslinger, using the combination of Fan Fire and his zed time reload passives, can single handedly wipe out large zed spawns. All 3 perks can solo scrakes, and both the gunslinger and the sharp can kill fleshpounds, while the commando keeps the trash zeds off them and provides both with stalker vision.

SWAT and support are common additions to this setup due to their zed time rapid fire capabilities and low chaos generation.

Highly dislikes berserkers, firebugs, and M79 demos due to their particle effects, tendency to make zeds unpredictable, and inability to easily contribute to headshot focus fire.
https://youtu.be/ywo-tCBcjTo


The zerkwall tank and spank trinity
Berserker and Demo and Medic:
Berserker is inherently high risk due to being a melee class, but Medic's combination of heals and damage resistance buffs lets him tank an extensive amount of damage, which effectively reduces the risk. Berserker also naturally tends to bunch up the zeds as they pile up around him, making him a good partner for a demo who can take advantage of this to send an explosive straight into the mob. The demo in return also serves as the berserker's panic button, as a single explosive will clear the trash around the berserker if he is getting overwhelmed, as well as as momentarily incapacitate any large zeds he is fighting. The demo's RPG also does extensive damage to the large zeds that berserker takes the longest time to kill, while generally being a bit more tolerant of the bad aim that is a result of a zed movement unpredictability while fighting a berserker. Demo's nuke radiation area also gives the berserker some breathing room.

Firebug is a common addition to this setup due to his crowd control capabilities in close range.
Teamplay - Comms and consistency
There are two majors things that separate your average pub team of half-wit degenerates, and your decent pub teams.

Communication:
The communication wheel is there for a reason. Binds are there for a reason.

How to make chat binds:
  1. Open the console (default key is tilde or ~)

  2. type in
    setbind o "say Scrake incoming!"

  3. Now pressing "o" will cause you to say in chat "Scrake incoming!"

Congrats, you are now more capable of more communication than most of the playerbase. Communication lets you alert your teammates to when you need help. It gives valuable information. Lack of communication causes your sharpshooter to think everything is fine and dandy only to turn around after hearing explosions and seeing you running towards them with an army of angry chainsaw wielding mutants right behind you.

Now, by simply pressing "o" your sharpshooter will know that you need help and come by and solve that problem for you.

Consistency:
One of the more aggravating behavioral issues I see with teams is that nobody seems to keep to their roles and positions. Too many players are twitchy, seemingly unable to stand still or watch a single area before wandering off.

This causes issues when the rest of the team is under the impression that a certain area is covered, but in reality is not. It is infuriating because it leads to meaningless deaths, and nothing is more annoying than to die to teammate stupidity.

I have personally died many times because I started a large zed takedown and began backpedalling, only to be blocked unexpectedly by another player that should have been watching my back coming to "help" me. And suddenly the doorway he should have been watching is unattended and a trash mob comes through, boxing us in. And we both die because 1 player could not keep still and watch a doorway.

I have also seen many, many team wipes that occurred because the main lane was being overrun and 5 players had to retreat to the kite path, only to realize rather rudely that the 6th player in change of watching the escape path had wandered off into the distance. Or, even worse, come to "help". And now the escape path is filled with zeds because he could not sit still and do his job.

Stay in your area unless you have a very good reason to move. As in a "somebody is about to die right now" level of a good reason. Communicate when you are moving. Your positioning has a concrete impact on the decision making of the rest of your team. If your position is unpredictable, then your team can and will make decisions based on inaccurate information. If your teammates can't depend on you to do your job and watch your lane, then they will be less willing to take high risk high reward actions because of the chance that your ADHD will screw everything up.
Teamplay - Things to not do (please don't)
This list can otherwise be described as

"Stupid actions detrimental to team functionality."

A player that does any of these actions can usually be kicked without being missed. Not because these actions are that serious in and of themselves, but because they are usually a indication of more serious issues with the player.

Be warned, due to subject matter this section will be judgmental.


  • Overextending in front of the trash cleaner perk.
    Do not walk in front of a trash cleaner without a good reason. What this does is it causes the zed mob to switch aggro onto the closer player, aka you. It makes headshots harder for the trash killer when the the trash suddenly start heading in another direction. If the trash is heading directly towards you, when targeting its head you only have to aim vertically. But if a player walks in front of you, then the zed starts moving laterally.

    What makes this infuriating is when players do this with the unspoken expectation that the trash killer will feel obligated to help them if they screw up and get cornered. You've played a stupid game, don't complain if you win a stupid prize.

    Skip to 1:36 for an example. I will not mince words, these people are idiots.
    https://youtu.be/p7-FjmvkGyM

  • Treating your medic as a license to be an idiot.
    A medic doesn't make you immortal. Healing in this game is capped at 10 hp/s, and a pack of raged large zeds or gorefiends will easily out-damage it. A medic is a safety net, not carte blanche for you to overextend or engage in risky behavior. The rule of thumb is if the action is stupid if a medic isn't there, it is likely still stupid if a medic is there. What a medic does is to eliminate long term chip damage and to shift the odds on high risk high reward decisions by lowering the odds of you dying, giving you greater freedom to take *calculated* chances.

    However taking chances does not mean engaging in high risk low reward behavior like overextending for no good reason.

  • Kill stealing from the commando in zed time.
    Your commando needs the kills to extend zed time. Let him have the trash kills so that you get 21 seconds of zed time instead of just 3.

  • Initiating, or engaging in the "Overextension Game".
    The Overextension Game goes like this
    1. Player 1 overextends in front of another player in an attempt to get more kills/action, without an otherwise legitimate purpose.
    2. Player 2, seeing that player 1 has extended in front of him, decides to overextend in front of player 1 for the same reason.
    3. Player 1 repeats the actions of step 1.
    4. Repeat ad nauseum until both players are now severely out of position in unfavorable terrain.

    Players that can't control themselves from making tactical obvious mistakes like overextending have no business playing a team game at the hardest difficulty. You either learn to control your animal instincts, or you play a game that caters to it like Call of Duty.

  • Becoming a player number 2 of a perk that doesn't scale well with multiple players using it.
    It should have already been abundantly clear that the principle of diminishing returns applies to the perks that players.

    What usually happens when 2 players choose the same perk is summed up in one word: inefficiency.

    What usually causes players to do this is 3 words: ignorance, or idiocy.

    You get multiple players competing with each other over the same role, ending up with an excess of capability in one necessary area while crippling yourself in another necessary area.

    • 2 Commando: Zed time extensions become impossible to coordinate. The number of maximum zed times extensions is not increased by adding a 2nd commando. All that happens is that during zed times both commandos ruin each other's extensions. Each kill by a commando in zed time does not add more time to the extension, but merely resets the 3 second counter before zed time ends. What happens with multiples commandos is that instead of 1 commando resetting the counter to 3 seconds after 2.9 seconds has passed, you get 2 commando resetting the 3 second counter at intervals of 1 second or less for the simple reason that they can't read each others minds

    • 2 Medic: This is just pure, asinine stupidity. A single medic is already a high amount of healing capacity, not counting the potential of medic weapons being used by the rest of team. All this does is turn 1 additional player from a combat asset to a combat non-asset, while adding excess healing capacity that is not needed.

    • 2 Berserker: All that you get is 2 players fighting in the same range, competing with each other for kills, turning everything into a giant mess.

      The risk is that this causes the players to mutually egg each other on; the more overextended berserker gets more action due to being closer, tempting the other berserker to also overextend, which then repeats the cycle of idiocy and overextension.

      If the berserkers split up into separate lanes, then the consequence is that the medic's attention is split up because a berserker *NEEDS* heals on a more consistent basis than any other perk.

    • 2 Firebug: Same exact issue with berserker. If they share a lane they run the risk of mutually egging each other into overextending due to their short ranges. If one player controls his animal instincts and doesn't participate in the cycle of overextension, then he is kinda useless as the player that is overextending will be doing most of the work. If they split up, then instead of 1 lane where the people behind the firebug can't see, you get 2 lanes where anybody that needs to hit heads might as well give up.

    • 2 Swat: Swat's issue is that he's a money sink. His bullets are numerous and weak, but expensive for what they do. Swat is often perpetually in poverty without support to provide ammunition, and the consequences of having multiples of a perpetually poor teammate is that the team has less spare cash to contribute towards strategic investments, such as getting the medic his rifle or a demo his RPG.

  • Welding doors without an immediate purpose for doing so.
    What welding doors does is it creates a large mob behind it that will be released at an unexpected time in the future. It blocks potential paths of retreat. It delays fleshpounds that spawn behind it until they collectively rage due to their internal rage timer. Unless welding the door will save your life in the immediate future, don't do it.

  • Raging large zeds that one doesn't have a plan for killing.
    The only people who should be initiating large zed rages are the people who have a plan for taking them down either solo or coordinated with another player. An idiot raging a large zed without having a concrete plan for dealing with it has just created a huge problem.

  • Playing berserker or firebug in a lane with medium+ line of sight and is watched by a ballistic trash killer, or anybody that needs to aim.
    Here's the deal. The ballistic perks have better range than you do. They need headshots. Everything you can can possibly do other than sitting in the back, doing nothing while waiting for an emergency, is counter productive.

    Move forward in an attempt to get action? You've starting the Overextension Game and are blocking people's line of sight while redirecting zed aggro.

    Fire your ranged weapons? You're either ineffective, or if you're firebug, you also start blinding people and accidentally setting stuff on fire that you shouldn't be setting on fire. It only takes a single stray hit to set a scrake on fire, panic it, and make the rest of the team start wishing you didn't exist.

    Is every lane like this? Then don't play those two perks.
Teamplay - Large zed assists
Most of the techniques illustrated so far for killing large zeds are executed solo. The reason for this is because in the vast majority of pubs there is no real teamwork. Instead of a team, you have 6 individuals.

The following methods of killing large zeds are only possible with coordination, or very experienced players who can understand what their teammates are attempting to do, and act accordingly.

Here are some of the more commonly practiced ones.


  • Crossbow stun:
    The crossbow off perk can stun a non-blocking scrake on a headshot. This opens it up to be focus fired and decapitated before the stun wears off. [Bugged as of 1050]

  • Zed Time: Commando + Swat w/ Rapid Assault:
    If a commando can extend zed time sufficiently a swat can unload enough Kriss rounds into a scrakes skull to decapitate it before it can take more than 2 steps.

  • Zed Time: Commando + Berserker w/ Spartan, Smash, Butcher and Zweihander/Pulverizer:
    If a commando can extend with enough Zed time the berserker can simply run up to the scrake and knock its head off before it can react.

  • LLLL Demo w/ RPG + non-idiot who can aim:
    The problem with 6 man HoE scrakes is that the demo is just 99 damage short of decapitating it after an RPG headshot. That's the equivalent of 3 headshots or less from any tier 2 or higher weapon. Demo should fire first, then a bullet based perk can clean it up before it has a chance to attempt a swing.

  • LLLL Demo w/ RPG + Medic w/ Focus Injection:
    The problem with 6 man HoE scrakes is that the demo is just 99 damage short of decapitating it after an RPG headshot. With 2 stacks of Focus Injection the RPG has enough damage to decapitate the scrake in 1 shot.


  • Demo + Berserker w/ Pulverizer, Smash, and Parry:
    After a direct RPG hit 4 pulverizer hard swings enhanced by Parry will gib the fleshpound. It'll take even less if the demo puts in a second rocket.

  • Demo + Commando:
    Commando's grenades have a fuse time of 1s, making them incredibly easy to stack under a fleshpound. 3 of them will be a little over the damage of a demo's RPG rocket. This is especially relevant if multiples show up. In that case the demo stuns the one in front with dynamite, and then the demo times his rocket and commando times his grenades so that they all explode as the father fleshpounds walk right up next to the stunned one.

  • Flashbang + Swat w/ Kriss + Support w/ AA12:
    Flashbang the fleshpound and both players run up to it unloading Kriss bullets and AA12 shells into the head. Works on scrakes, but in that case the Kriss alone is enough. Any it doesn't necessarily have to be a support, any perk with medium+ dps will work.

  • Zed Time: Commando + LLLLL Demo w/ RPG and C4:
    Due to the hidden 50% explosion damage bonus of the nuke during Zed time a single RPG rocket + 1 C4 sticky should gib a fleshpound.

  • Commando + Swat focus fire:
    The commando's issue with soloing scrakes is lack of magazine capacity. Swat's issue is the inability to immobilize or control their movement without the flashbang. Both do not have enough damage in a magazine to decapitate a 6 man HoE fleshpound before needing to reload. But if both of them focus fire they are capable of decapitating the large zed with little risk if they have enough room.

  • Zed Time: Commando + Support w/ Barrage:
    A lvl 25 support using Salvo needs 10 perfect AA12 headshots to decapitate a 6 man HoE fleshpound and 8 for scrakes.. This is trivially easy when a commando extends zed time long enough for the support to aim each AA12 shell.

  • EMP Grenade + high DPS perk:
    And EMP Grenade will give any high DPS perk enough time to decapitate a fleshpound before it has a chance to charge. Same for a scrake.

And there are a lot more than just these. Refer to the perk grid when coming up with ideas to deal with 6 man HoE large zeds.
Teamplay - Team composition
Here are some general team compositions. Note that medic is in all of them. However, this is only an indication of its usefulness, not of actual necessity. It is perfectly possible to win the waves before the boss on 6p HoE without a medic, though it will require decent players.


However there are some general rules:
  • Ballistic perks do not like berserkers, firebugs, and spammy demos for the variety of reasons already mentioned
  • Do not have more than 2 trash specialists
  • Do not take a perk that is heavily outranged by other players on the team
  • The only perks that are okay to have multiple of are usually the DPS generalists

Zerkwalling:
Extremely close quarters, most engagements are in knife fight ranges

1 Tank berserker
1 Medic
1 Demo
1 Support
2 Filler perks

Coordinated and skilled DPS team:
If your team is coordinated and/or highly competent

1 Commando
1 RLRLR Gunslinger
1 Lvl 25 M14EBR Sharp
1 RRRRR Support
1 RRLRR SWAT
1 Filler

Camp + Bait:
5 players camp an enclosed space, while 1 player roams. Used particularly on maps with enclosed camp spots surrounded by lots of open space that the camp spot has line of sight on

1 Skirmisher Berserker/Gunslinger

1 Medic
1 HVT Specialist
1 Trash Specialist
2 Filler

Open space camping:
Team is camping a central area where the lanes converge.

1 Medic
1 Commando
1 HVT Specialist
1 High DPS perk
2 Filler

Defined lanes:
Camping spot is separated into distinct lanes such that one lane can't easily support the other.

1 Medic
2 Trash specialists
1 HVT Specialist
1 High DPS perk
1 Filler

Kiting:
You're running on a set path through the map.

1 Medic
1 Tank
1 Commando
1 HVT Specialist
1 High DPS perk
1 Filler


Camping - General principles
It's really not that hard to figure out whether or not a camping spot is viable.

Here are what I consider basic principles for finding a good camp spot and holding it.
  • The less entrances big zeds can come from, the better.
    More entrances means that the number of players that can watch each entrance decreases. With 1 entrance 6 people can watch that entrance. With 2 entrances 3 people can watch each entrance. With 3 entrances 2 people can watch each one. This decreases the likelihood that an entrance will have the appropriate perks guarding it when a threat comes. 3 directions that big zeds can come from is the MAX that a viable hold spot can have, because beyond that point somebody will watching an entrance alone, and may not be able to deal with everything that can come through there.

  • Flat ground is always better.
    Flat ground ensures makes aiming easier by letting you adjust aim only horizontally, not both horizontally and vertically. And if all the zeds' heads are around the same height due to being on level ground, if you miss a headshot on one zed you can hit a headshot on the zed next to it. Non-level ground such as a staircase or a ramp increases the likelihood that every shot that misses is completely wasted.

  • Have a retreat path and know when to run.
    Having a space to backpedal into, or a way to run when things get too hairy, is always a plus. Far too many teams have a sense of macho honor that makes them stand their ground with 3 fleshpounds and a pair of scrakes are raged while the trash are getting closer.

  • Change your perk to fit the camping spot.
    Your favorite perk is not guaranteed to work on all camping spots on all maps. If you have a camp spot with multiple entrances, and open space, and medium range line of sight, firebug is going to do nothing but annoy the other players. If you want to win, be a commando.

  • Have a primary caller for certain actions.
    Somebody has to be the leader on certain actions, like which large zed to engage first or when to run.
Camping - The noob traps
There are certain mistakes that I've seen so often that they've become tragi-comedy for me at this point. Here is the list of the common ones I see.

Note: An adequately skilled team can hold each and every one of these spots. That does not change the fact that they are stupid spots.

  • Camping the outdoor central courtyard with the trader pod on Outpost. This spot is genuinely idiotic. 5 different directions that large zeds can come from, 3 of which have stairs and ramps that making aiming more difficult, and the other two which deposit the large zeds at medium and close range.

  • Camping the central room with the hanging bodies in Infernal Realms. 4 directions which large zeds can come from, 3 of which are from staircases, and the 4th one has a wall that blocks line of sight until the point where a large zed is 5 or so seconds away from you.


  • Camping the outdoor courtyard in Volter Manor. 5 directions that large zeds can come from, 3 of which involve stairs, the 4th of which involves a drop from the 2nd floor, and the last one hides the large zed until they come around the corner. AND 2 additional entrances for trash zed, the hedges in the back and the hole in the ground.

  • Camping the overturned truck in the central intersection on Hostile Grounds. 3 common lanes for large zeds to approach from with 1 additional possible but rare direction, and the subway entrance deposits them at extremely close range to you.


  • The escalator room on Evacuation point. Stairs everywhere, and 4 entrances for large zeds, the escalators, the 2 stairs from the side, and the bridge. You need an exceptionally good team to hold this spot.


  • The water sluice in Black Forest. The entire spot serves as husk target practice for every husk that comes from the other side of the pond, so much that I think this is the actual inspiration for the Husk Dodgeball map. Even worse, should you get hit by a husk shot you have the chance of falling off into the pond with only 1 way to get back up. Which happens to be the same path the zeds are concentrating in. The narrowness of the thing makes it difficult for a person in the back of the sluice to shoot at the zeds at the front, and the people in the back will spend half their time staring at the buttocks of the player in front between dodging husk shots.


  • Large central room with the trader pod in Catacombs. Stairs, check (you're on a raised platform for crying out loud). Potentially up to 9 entrances, check. Entrance put large zeds 5 seconds away from you, check. No place to retreat, check.

  • Camping outside with the cars in Farm. You have zeds approaching from every direction.
Camping - Viable HoE spots
Biotics Labs
  • The room with the large blenders. 2 people watch the upstairs doorway, 2 watch the downstairs long hallway, and at least 1 person needs to stay between theblending machines to watch the entrance from the lecture room. Medic stands on the railing upstairs where he can have line of sight on everybody.


  • The L shaped corridor with the cysts and clots in containment. Requires multiple tanks though and a medic.. Escape is the path of least resistance.

Outpost
  • The trucks. Everybody camps there for a reason. If things get hairy run up the hill.

Burning Paris
  • The courtyard in front of the Eiffel Tower. Requires a commando to deal with the multiple additional directions small zeds can spawn from. Escape is either towards the courtyard with the fountain, or up the ramp on either side of the subway entrance.


  • The bridge above the courtyard with the fountain. 1 generalist covers the right side narrow hallway, the rest of the team watches the big hallway comes from the stairwell. HVT specialists are a must. Escape path is through the windows.

Volter Manor
  • The horseshoe shaped walkway next to the hedge maze. A single player watches the right side entrance, while the rest concentrate on the left. Medic stays in the middle and deals with the occasional spawn from the vents. AoE perks are most useful on the left side.

Catacombs:
  • Small staircase in the room next to the big central chamber. Tank guards the bottom of the stairs while a commando or a support watches the bridge coming from the sewer room. Medic and demos stand on the railing.

Evacuation Point
  • The cruise ship in the back near the hole. One person, ideally the medic, stays in the hole to make it harder for trash to drop down into it. One person watches the hallway spawn on the right, the rest concentrate on the left side. Escape path is through the hole.


  • The trader pod near the car ramp can be held with a decent team. A pair holds the car ramp, 1-2 people hold the stairs to the ship, and a 1 person holds the entrance to the street, while the medic stands on the railing near the trader pot. You can shoot through the fence. Escape through the street if necessary.

Farmhouse
  • 2nd floor balcony, either left side or middle doorway. Weld the other 2 doorways shut, and shoot the zeds as they exit the stairs that lead to the 2nd floor. Keep a person in middle of the walkway to prevent zeds from spanning on the right half of the balcony. Zerker tanking the door is often useful.


  • The barn. Zerker tanks the bottom of the stairs, somebody keeps the trash clean when they drop onto the 2nd floor from the roof of the barn, and demos shoot explosives at the ground floor. However, I HIGHLY caution against this spot unless you have absolute trust in every member of the team, because if the hold breaks you are almost guaranteed to wipe. There are only 2 routes out of the barn, and both of them will be filled with zeds in the case of a break in the hold formation.


  • You can camp outside, either in the area with the car and generator, or the field with the rope swing. Both areas will need a commando to help with the stalkers and crawlers. Gunslinger is powerful due to the open space letting him take advantage of his speed.


Camping - Viable HoE spots (cont.)
Black Forest
  • The raised rock near the end of the train right next to the cave with the trader. Zerker/firebug hold the ramp, medic keeps them alive, rest of the team kills. Railgun sharpshooter stays in the back and picks off scrakes from in from the valley and from the other end of the train. Escape path is off the back of the rock into the valley.


  • The small platform inside the house. Same tactic, only playing a sharp in this spot is much more difficult.


Prison
  • The guard tower. Tank holds the entrance, demo camps at the top of the tower and rains explosives. Alternatively you can just camp the general area.


  • 2nd floor of the L shaped cell block, the cell block you see the entrance when you're at the base of the guard tower. Tank holds the stairs on the left side, while the rest of the team holds the center of the L and shoot zeds coming from the right side. Very little spawns from the doorway on the 2nd floor of the left side. That is the escape route.


Containment Station
  • Big room with the turbine and 2 entrances. Everybody camps there for a reason. It has sightlines across the entire map and a huge amoutn of space to backpedal.

Hostile Grounds
  • Above ground at the T intersection near the truck tipped in a hole. Most zed spawns will come from the subway entrance you can see, with some occasionally coming from the other subway entrance on the other side of the map, or from the back lane with the trader pod. Retreat is towards the back.

Infernal Realm
  • Corridor to the right of the giant clock in the front of the map. Most spawns come from the passageway under the clock, and the entrance is narrow enough that a single tank can cover it. some spawns will come from the stairs in the back, but rarely will the big zeds from from that direction. That is also the escape direction.


  • Room with the trader on a raised platform, 2 doors, and an elevated spawn on the right side. Medic stands on the center platform. The left lane has longer sight lines and should be covered appropriately by a commando and/or a sharp.

Zed Landing
  • The beach. Most spawns will be coming from the left. A berzerker underneath the drop down closest to the trader pod will attract the majority of zed aggro.


  • The corridor near the back of the map along the river. 2 entrances that large zeds can come from, one at each end, multiple choke points, and an escape route with the drop down into the large central chamber.

Nuked
  • The truck lot in the back. Generally the spawns are concetrated on the right hand lane, with moderate pressure coming from the left and very little from the middle. However, all of the escape routes are through tunnels or alleyways.


  • Front entrance. Wipe open street for retreating, spawns mostly come from the holes leading outside the map.

Tragic Kingdown
  • The roller coaster has only 1 direction that zeds can approach from if you stay far enough from the back spawn. If you do so any back spawns will drop down and join the other zeds approaching from the front lane.

  • The swing ride is okay if you have a skilled berserker hold the left side choke point coming from the ticket booth, while the other players can cover the 3 additional lanes that come from the river, the dunk the bloat, and from over the fence.


Camping - Viable HoE spots (Holdout)
For holdout mode (i.e. The Descent) just pretend you're zerkwalling. Load up on the short range, aim-unintensive, tanky, AoE, and high spike damage perks, and pick the spot on the map with the least number of controllable entrances, if possible.

The most important part is team composition. The Descent is practically designed to make headshotting as difficult as possible, through a combination of small maps, fog, stairways (spiral staircases, that's how far they went), dropdowns, and foliage. There is almost always some small back entrance where trash can spawn from. It is recommended that you go with the full on body damage composition, with these particular lane assignments.

1 Medic - In the back, watching the small back entrance but primarily keeping the tanks alive.

1 Support - In the back, assigned to kill anything coming through the entrance and acting as emergency DPS. Also should clean up scrakes that are hit by RPG headshots.

2 Demo - To drop the hammer on large zeds and blast small ones off the berserker. Nuke is an exceptional method of controlling a choke to allow the team some breathing room.

1 Berserker - To act as live bait for the demo and to tank large zed spawns.

1 Firebug - To control trash zed spawns and sub for the berserker as necessary.
Camping - The transition to kiting
Knowing when to run is always important. If you're getting overwhelmed, then retreat to give yourselves time to reload and regroup, as well as the chance to deal with big zeds 1 at a time. generally if you see triple FPs or double FPs with scrakes, it's probably time to backpedal a bit.

In general when you start the transition, you need to all move in the same direction as a group to prevent people from being picked off. Pick the path of least resistance. The tankier perks need to occupy the horde in the back, while the DPS perks and trash cleaners open up the kite path.
Kiting - General principles


  • Don't stop moving

  • Do NOT stop moving. You will likely be able to outrun or even outwalk what is behind you, but what spawns in front of you will be harder to avoid for the simple fact that you need to get past them. If you stay still too long a large enough horde will spawn in front of you to sandwich you in.

  • Do not loiter in front of narrow choke points. The more time you spend there, the bigger the chance that a scrake or something equally nasty will spawn there and box you in. Tunnels, doorways, and staircases are the common causes of these kinds of wipes because they are often small enough that a single large zed can block it completely to create a sandwich situation. The best way to clear these is to have 1 player melee bash to stumble the large zed, get past it, get its aggro, and then lead it beyond the choke point so the rest of the team can run through. If necessary, that player should deliberately rage the large zed if clearing the chokepoint quickly is important.

  • Discretion is the better part of valor.

    For example, the two most notorious chokepoints on Paris

    The Stairs


    The Tunnel

  • Kite as a group. Do not kite with multiple groups in opposite directions, or you will have 2 groups of zeds that will eventually met and sandwich you.

  • Kite indoors as little as possible. You get trapped far easier when indoors or underground. Religiously avoid tunnels if possible.

  • Large zed takedowns should involve multiple players if at all possible. Wasted time leads to disaster.
Kiting - Strategy
Kiting, like camping, requires a plan for the best outcome.

Without a plan, a team isn't kiting, but rather is an unorganized rabble running for its life. Don't be an unorganized rabble.

An organized kiting team is generally divided into 4 separate groups/areas of responsibility

Vanguard
Composed of the perks that do not have movement bonuses, but can handle trash and have very low time to kill on the trash. Must also be able to kill scrakes.

This group is meant to secure the area the rest of the team is going to be kiting into. In particular you need to get past choke points and keep them and the area beyond them clear.

Perks: Support w/ AA12, Commando, Swat
Middle
The medic needs to be here where he can have line of sight on everybody. The perks and loadouts that can't deal with moderate to large numbers of trash zed need to be here as well. If need be this group needs to go help the vanguard.

Perks: Railgun Sharp, Demo, Medic
Rearguard
Basically human shields. The majority of the large zed, in particular the fleshpounds, will be behind the group. Rearguard is there to kill or delay trash zeds from hitting the rest of the team, as well as to control any raged large zeds sprinting in from behind

Perks: Berserker, Firebug w/ Heat Wave or the microwave gun, Support with DBS and/or Concussion Rounds
Flex
The high dps perks with movement speed buffs. Are meant to go wherever they are needed at the moment.

Perks: Gunslinger, M14EBR Sharp w/ Marksman, Skirmisher Berserker w/ Eviscerator
Good example of kiting. HoE with the controlled difficulty mod.

More kiting. HoE with controlled difficulty.

Boss Wave - Why teams wipe


You have survived the waves, and now you must prevent the tragedy seen above.

These are methods for improving the odds of victory, *NOT* ensuring it. You can ignore everything and still win. You can do stupid things and win. I went level 0 survivalist on the boss and we still won.


Doesn't mean it wasn't stupid.

The following are the biggest causes of failing the boss
  • Not having a medic with Coagulant Booster and the medic AR. It is almost impossible to out-heal Hans' damage otherwise.

  • Not having a tank perk to control the boss's aggro. Management of the boss's aggression is paramount.

  • Picking an bad area to fight the boss. Hans and Patty often require different arenas to fight in, because they are fundamentally different. Hans is a speedy melee unit, while Patty is a slower sniper.

  • Being out of position and getting trapped, getting caught with no nearby cover with the Patriarch, or getting clustered near Hans' explosive grenades. Or separated from the team, and subsequently getting chased down by the boss.

  • Having too many low DPS or precision based perks or skills. You're not going to be hitting headshots on the boss that consistently, especially Hans. Swat, commando, gunslinger, and M14EBR sharp in particular are bad for the boss wave due to low dps and/or headshot dependence. Certain perks like commando, which are exclusively useful against only 1 boss, are also bad ideas.

  • Failing to deal with the trash zeds that come during the boss round. Everybody is shooting at the boss and forgetting about that one guy stuck in a corner with 2 husks and a bloat. Do not tunnel vision on the boss. If anything, gorefiends and suicide husks are the most dangerous enemies on the boss wave, more than the boss itself, because they spawn in numbers and can kill players very quickly if not eliminated. Keeping the team alive is the top priority, not a little bit of extra damage on the boss.

  • Not parrying the boss's melee attacks.

  • Leaving a player to fight the boss alone. Group up.

Boss Wave - Team composition
RULE NUMBER 1 OF TEAM COMP ON THE BOSS WAVE:
Pick a team comp that can handle any boss. Don't whine about your luck if you choose a perk for a single particular boss, and then the wrong boss spawns. It's your own fault for leaving things to chance, you took a risk and you lost.

The icons below indicate if the perk is particular strong against one of the bosses:
Particularly strong against Hans Volter


Particularly strong against the Patriarch


Particularly strong against the King FP


Particularly strong against the Abomination


The general guidelines on team composition for the boss wave for particular perks are as follows.

MANDATORY:
If you don't have these your chances go down the drain. You could still win, but I won't be betting on it. Are either vital for both bosses, or so vital for 1 boss that not taking it severely handicaps you if the wrong boss spawns.


  • Needs Coagulant Booster and the rifle. Without it it is nearly impossible to deal with the potential damage output of Hans, who when in melee spam mode is similar to a permanently enraged fleshpound. If you don't get a medic and you get a Hans spawn, I am almost certain that you will lose. It is heavily advised that you go all left. Symbotic Health will keep your own health topped off, give you your own buffs, and put you in the range where you can reliably take 2 melee strikes. Adrenaline shot allows players to sprint out of the bosses' melee lunge, and Coagulant Booster lets 100 health players survive 2 hits. Focus Injection is taken because poison is useless against the boss. Recommended off-perk weapons would be a katana to parry and a DBS to jump out of a boss's lunge.

    Is slightly less useful against the Patriarch due to the fact that you can't outheal a rocket that kills instantly, but his buffs to speed and resistance are essential to help players escape the chaingun when caught out of cover.

TOP TIER:
So good they're as close to mandatory as you can get without being 100% necessary. Are effective against both bosses even when stacked.


  • 1 tank Berserker with a tier 4 weapon and Parry. Berserker is unmatched in the ability to tank the boss, attract his damage, and mitigate it. Dreadnaught is preferred because it lets you take 3+ melee strikes and gives the Medic a lot more HP to work with and apply Coagulant buffs. However, if you are confident in your parrying, you can take Skirmisher because the speed will let you chase down the boss when he tries to go after other players, or when Patty flees to heal. Bone Crusher is better for Hans because the block counters melee, while Eviscerator is better against Patty due to the ranged attack letting you chase him down more easily when he heals. Parry is the best skill for 1 on 1 duels, which is what the boss wave is. A combination of the berserker passive, Parry active, and Coagulant can put your damage resistance up to 85%. Combined with blocks/parries the boss's melee will be doing less than 10 damage to you. The EMP grenade deactivates Patty's cloak and prevents Hans from grenading.

    Overall however he is like medic, in that he is more effective against Hans due to Hans' heavy reliance on melee.


  • Any number of Demos with RPGs and C4. Needs at least 1 spare RPG each due to ammo consumption. C4 can be attached to the Patriarch and will be visible when he cloaks, making it easy to not get surprised by him. You see a levitating pile of blinking C4, no, the C4 didn't come to life, it's actually the Patriarch. Is also the best DPS perk against Hans due to range and his weakness to the RPG, as well as the safest DPS against Patty due to range. The rocket explosion also counters Hans' evasion. Provides extra grenades for the medic, which lets him be more aggresive with grenade usage. Buy a DBS in case it's Hans to use the recoil jump to escape his lunge, and a med pistol. His reactive armor also gives you a second life, letting you be more aggressive.

    Demo is very strong against both bosses, but weak against trash. Is exceptional against Patty due to the C4 revealling him, and killing him early.


  • Damage skills require you to stand still and let the boss come closer, which is the main issue with taking sharp to the boss wave. But with reload canceling, good aim, a good spot, and a team that knows how to distract the boss, you can contribute enormous DPS. The freeze grenades can also immobilize Patty if 2 connect in close range, and give you a chance to kill him then and there. If you can consistently reload cancel the railgun this perk becomes Good/Top tier, because at that rate of fire the DPS of the railgun rivals if not exceeds that of a reload canceled RPG even if you miss plenty of shots. If you can't do what I'm doing in the second half of this video, don't go sharp.
    https://youtu.be/HQcjeQst_dA

    Generally though the same issues with all ballistic perks against Hans also applies to sharp. But it becomes less important because the reload canceled railgun puts out so much damage that you can afford to miss plenty of shots.
Boss Wave - Team composition (cont.)
GOOD:
Really good perks, but don't want multiples. Have uses against both bosses, but due to diminishing returns having a 2nd one isn't advised.


  • 1 Support for DPS, giving armor and ammo to players, and for killing the trash zed that spawn. Is mostly useful against the Patriach due to his large weak zone on his right arm which renders him more vulnerable to ballistic damage compared to Hans. Can also act as a secondary tank for both bosses by using the recoil jump from the DBS to safely keep the boss's attention. It's also okay, for once, to take Fortitude if you anticipate doing this quite a bit. His reload speed with the DBS allows him to keep the boss' attention almost indefinitely as long as no projectiles are used. Can chip in damage against the boss with the AA12 and be a secondary medic with the HMTech-301. Is very effective against the variants of trash that spawn, especially the gorefiend packs.


  • Arguably one of the better bodyshot DPS against the Patriarch due to his relatively weak resistance to microwave damage. However, as usual the firebug's range gives him significant issues. He can't be up close because he just doesn't have the tankiness to deal with Patty's melee. He can't stay far away because of his inaccuracy and low range. So he ideally wants to stay just beyond arm's reach of Patty. Which is basically the perfect range for Patty to deploy the chain gun/rocket and kill you before you can get away. Otherwise though if you're very, very careful you can use Heat Wave and fire panic to keep Patty under control, but one string of bad luck will often end up with you being dead.

    However firebug excels against Hans, who is actually weak to fire damage. Firebug is arguably the equivalent of a Hans auto-win button. The AoE nature of firebug counters Hans' evasiveness. Firebug can easily clear the trash that spawn. Heatwave is guaranteed to stumble both bosses if it isn't on cooldown. Hans also dodges ground fire so often that it becomes a reliable way of controlling his movement, which makes it trivially easy to break his shields. A firebug can literally steer Hans into moving in the direction he wants, which can completely trivialize him due to most of his damage being done through his melee.
    https://youtu.be/RS3jgfzY-Fk
    Between Heat Wave, fire panic, Ground Fire snare, and ground fire dodging a firebug can keep Hans more or less permanently preoccupied.

Boss Wave - Team composition (cont.)
Mediocre:
Valuable on 1 boss in particular, or have deficiences that make it a risky take.


  • 1 Commando to spot Patty if it's patty, and to kill the trash zed; it's not mandatory since a demo can stick C4 on Patty to make him visible anyways, and a Support with an AA12 can clear trash just as well. Demo's cloak counter is better because it doesn't require Patty to be in line of sight for it to work, while commando's cloak reveal does. Commando's cloak reveal is more obvious, but generally the floating pile of C4 stickies should usually be obvious enough.

    The bigger issue though is if Volter is the boss spawn. Hans is very evasive, has small critical zones, is covered by a bullet deflecting metal exoskeleton, and can rush players extremely quickly, all of which which makes ballistic perks inherently weak against him because of the difficulty of hitting an unpredictable target. The biggest risk of going commando on the boss wave is getting the wrong boss, and then subsequently being rendered largely useless other than acting as a trash cleaner, or a secondary medic with the HMTech-401.


  • Gunslinger is a lot like the SWAT: ballistic based means that it will suffer against Hans, and it has no special use against Patty. Small maganizes mean that you're spending a lot of time reloading your .500s. This means that the long term DPS suffers due to being forced to constantly reload. The limited spare ammunition capacity also makes it very likely that you'll simply run out of ammunition for your best weapons before the boss dies. Hans in particular hard counters the gunslinger due to his twitchiness and jetpack, which makes REU almost impossible to use unless he is targetting you directly, as well as the fact that his limbs are covered by a damage reducing armored exoskeleton, which counters Bone Breaker. Hans also has enough speed to chase down a gunslinger, making the speed advantage almost irrelevant since it only delays the inevitable. The only way I'll ever take this perk is if you are a human aimbot, and if you are a human aimbot, a reload canceled railgun is better.

No:
Chances are that this is a idiotic pick. Has no special utility against either boss, or is heavily countered by one.


  • Bad DPS and no Patty callout. This for all intents and purposes is a bad commando that can't even decloak Patty, and suffers from the same issues that all ballistic perks suffer against Hans, who is too evasive and twitchy to hit consistently with bullets. His "tankiness" is barely noticable, as a few stray gas grenades or couple of boss melee hits will completely eat away his enhanced armor, leaving him just as squishy as any of the other 100 hp classes. Flashbangs can't stun either boss unless you stack multiples directly under them, which is impossible due to the fuse timers spreading out the stun explosions as well as their massive stun resistance. I have never seen the flashbang work on the boss, although theoretically it might happen if multiple SWATs time their grenades perfectly. SMGs are also less than adequate against the large number of gorefiends that spawn.


  • Survivalist: Don't play survivalist.
Boss Wave - Hans Volter
The strategy for Hans is simple and time tested. Hans is the easier boss because this method of taking him down is extremely consistent and reliable, if done well.

In order to understand this strategy, you need to understand how Hans works.

Hans is extremely fast and twitchy.
Hans does most of his damage with melee strikes.
Hans' ranged attacks are either weak, or have a significant delay.


These 3 things have multiple implications:
Explosives are better against Hans because the AoE partially counteracts his speed. Bullets miss, but explosives can be aimed at his feet. His 20% vulnerability to the RPG explosion magnifies this. His combination of speed and melee lunge means that it is impossible for somebody to not get hit by his claws. The team composition must be planned on the assumption that somebody will be taking hits, and that somebody is ideally a medic-backed berserker with Dreadnaught, a high tier weapon, and Parry. Hans' movement MUST be controlled to prevent him from running past the designated tank in order to reach the squishier players. This can be done using map geometry, or exploiting his dodging behavior which makes his movement controllable via the strategic placement of ground fire.


RULE NUMBER 1 OF FIGHTING HANS:
Assume ALL grenades are explosive unless you have visually confirmed that they are not. Hans' explosive grenades does 95 explosive damage with linear falloff (falloff = 1) and a blast radius of 800 (for comparison M79 radius is 850). It is the strongest attack he has and is the cause of most team wipes when the players get overconfident. For comparison his melee claws do 70 base damage.


  1. Ideally you can pick an area with a lot of choke points or narrow spaces, anywhere where the berserker can easily block him. This also serves to limit his ability to throw grenades everywhere. However, the primary consideration is to not pick a spot where you can easily get trapped in a corner.

  2. Berserker tanks his melee strikes with a tier 4 weapon while the medic heals him. With all of the medic Coagulant buffs and Parry active, a berserker with the Bone Crusher in a block position will take 10 or less damage for each of Hans' strong melee strikes. The berserker must not die, or else Hans doing 10 damage to a buffed berzerker turns into Hans doing 50+ damage a swing on everybody else. The medic must not die either. Priority is placed on saving them if the situation arises. If possible find favorable terrain that allows the berserker to body block Hans. Doorways, windows, tunnels, alleys, hallways, openings in fences, stairs, ramps, street lights, stacks of boxes, cars, use everything possible to limit Hans' movement.

    Firebug can sub in for berserker due to Hans' high prioritization on dodging groundfire, which allows it to manipulate his movement.

  3. Demo and the rest of the team unloads on Hans with the rpg and so does everybody else with any spare rpg lying around, since Hans takes 120% damage from the explosion. His weak points are his chest mechanism, head, and his gas tank. The rest of his body is resistant to damage by varying degrees. It's safer to aim for the feet instead of potentially missing the rocket entirely.
    https://youtu.be/IL0OeoHd9as

  4. If Hans ignores the berserker and targets somebody else, that person needs to have the double barrel. Use the alt fire to push yourself away from Hans' melee strikes while the berserker tries to reestablish Hans' attention back on himself by smacking him.

  5. When Hans' health drops to certain thresholds he generates a shield and enters hunt mode to search for a player to heal himself. Breaking the shield stops him from healing and knocks him down. Place priority on breaking his first and second shields; the third shield is significantly greater than the amount of health he would regain from draining a player, and it has too much health to consistently break and may result in wasted ammunition. This time is better use killing any trash zed that spawn. If you can break it, fine, but it isn't necessary. If possible the demo should stack C4 on Hans during the last draining animation, so as to end Hans' phase 4 as quickly as possible, since he is most dangerous during his final phase.

    On 6p HoE the maximum amount of health that Hans can have after fully healing during his last health drain is 14273 hp. A level 25 demo with Bombadier will deal 1230 damage with each C4 sticky on Hans, taking down his health 8.6% with each one.

  6. Heal any player than Hans successfully grabs. Yes, this is idiot level advice, but sometimes the medic is otherwise occupied.

  7. If for *any* reason you believe that Hans has thrown explosive instead of gas grenades (grenades don't leak gas, Hans mentions any word that sounds vaguely like "explosive", Hans doesn't mention "gas" when throwing the nades, Hans is in his final stage, etc.) you RUN, because a single explosion can put you in range when Hans 1 shots you with his claws.

  8. When trash is present prioritize their removal. The trash needs to die, they force your medic to waste time defending himself and in that window of time the berserker can and often does die. And the husks and sirens can kill you just as easily as Hans can if you give them the chance. Gorefiend squads often also spawn and they need to die before they get in range for their helicopter attack. This is primarily the Support's job, but it is everybody's duty to clear the trash while the berserker occupies Hans.

  9. Repeat until Hans is dead.

Video example of an okay Hans fight:
https://youtu.be/Y1eHFBE5dQk

Boss Wave - How to lose to Hans
Sometimes the best way to learn is to watch how other people fail. Below is a prime example of how to fail the boss wave with Hans.

https://youtu.be/3fvPXrIIvxA
What went wrong?

Before the boss wave even starts:
  • Team composition is medic (me), berserker, support, 2 SWATs, and a commando. A total of 3 low DPS perks that do negligible damage to Hans. And the lack of damage shows throughout the fight.
  • Support does not have DBS
  • We have no demo, and nobody uses the RPGs I bought
  • Nobody has an offperk DBS or katana to absorb Hans' attacks other than me.
During boss wave:
  • 0:00 - Team loiters in the trader zone instead of immediately moving to the big room where Hans is more easily handled.
  • 0:04 - Berserker somehow doesn't block Hans' first attacks and drops dead. At this point considering the team composition, I would suspect that we have already lost.
  • 0:47 - 1 Swat lets himself get in a corner. Survives this time.
  • 0:55 - Badly wounded Commando tries to walk past Hans while in 1 shot range. Survives this time due to luck and Adrenaline Shot.
  • 1:46 - Team wastes ammunition damaging a shield they have no hope of breaking.
  • 1:59 - Commando stands on an explosive grenade. Again survives due to dumb luck. Dumb luck eventually runs out.
  • 2:13 - Commando walks into hallway away from my LOS where he can get isolated and cornered by the boss. Boss proceeds to follow him.
  • 2:18 - Commando again decides that it's a good idea to walk right past the boss while in 1 shot range. His luck runs out as Hans' gas fart kills him instantly.
  • 3:44 - First SWAT dies while my darts are on cooldown. At this point I know we have already lost.
  • 5:14 - 2nd SWAT gets caught on a table corner and gets hit with the gas fart and dies. Which is partially his own fault for running backwards.
  • 5:31 - Support gets caught in corner. Survives.
  • 6:07 - I get caught on the table corner but realize it quickly enough to get out. Hans' target fixation on the support also helped.
  • 6:31 - Support gets 2 shot while I'm reloading.
  • 6:53 - I die.
Boss Wave - The Patriarch

The Patriarch is the opposite of Hans in many mechanics. Do not treat him like Volter.

Patty is a large, slow target with a massive vulnerable zone on his right arm.
Patty has multiple ranged attacks that are effectively 1 shot kills.
Patty can go invisible, and exit cloak with a melee strike that puts you in range of a 1 shot followup.


These 3 primary characteristics have the following implications for boss strategy:
Against the Patriarch you have 2 primary considerations: negating his invisibility and minimizing the risk that you'll die if Patty decides that now is the right time to deploy the chaingun. The two go hand in hand, because his cloak will give him the vital few seconds to uncloak and surprise you with a rocket while you're out of position. There are 2 long term ways of dealing with the cloak. A commando can call him out like a stalker, or a demo can paste him with blinking C4 stickies that remain visible even when he cloaks. Generally demo is the better option, because he is also a good option against Hans, while commando isn't. In an emergency a berserker's EMP grenades, or the afterburn from firebug flames, will also temporarily reveal Patty. It is imperative that you always remain in or near cover to avoid his ranged attacks. The vast majority of Patty wipes happen because people did not practice good positioning, and Patty started picking off players one by one with rocket hits and the chaingun. An early snipe on a key player like the medic will basically lose the round. You can struggle for a bit longer, but you've already lost. The ballistic impact damage of a Patty rocket is 200. That, combined with the explosive damage, is enough to 1 shot any player short of a drugged up Dreadnaught Berserker, or certain other perks with full armor and health buff skills. Patty's large size and slower speed makes it easier for ballistic perks to hit him.

RULE NUMBER 1 OF FIGHTING PATTY:
If you are more than 1 second away from the nearest source of cover, you're too far away from cover. Patty can whip out his chaingun that does 133 damage per second in around 0.3 seconds. He takes only slightly longer to ready a missile that does 200 damage on direct hits and 70 explosive damage. If you get hit, you are dead.

  1. Did you start in a place where you thought you were going to fight Hans? Tough luck, you might have to move. Stubborness in the choice of fight location can be fatal.

  2. Pick a wide open space with lots of cover to avoid his chain gun and rockets. Any place where you can play ring around the rosie with Patty running after you in circles around a large piece of cover is a good start. If this is not possible, see the next step.

  3. If you can't reach cover in time when he starts firing, run up to the Patriarch so that that the projectiles spawn behind you. The bullets and rockets spawn from the barrel of his gun, and if you run past the barrel up to his chest, you won't get hit direct because they will spawn behind you.
    However unless you're standing on a slope you WILL get hit by the splash from the rockets, making this risky against this attack unless you are a high level and nearly full health berserker or demo (demo has high explosive resistance). Players with the DBS or speed bonuses can strafe the rockets even at relatively close ranges.


    The mark of the amatuer is panicking when the Patriarch starts using his guns, attempting to run away to cover you can't reach in time, and dying while he shoots you in the back. If the choice is between certain death, or a possible melee hit that you can dodge if you time your escape well, you take the latter option. If the nearest piece of cover is the Patriarch himself, USE IT.

    Skip to 35m18s for an example of this.

  4. If the ceiling is high enough, or if you are outside, Patty can deploy a mortar that fires his missiles into the sky which then arc down. He has unique voice lines for this action, and the animation is different, with Patty aiming his weapons platform upwards. When this happens sprint backwards while looking up to see if any of the missiles are tracking you, and if possible get indoors where you have a ceiling to block the mortar rounds. Afterwards regroup at the original spot, or if a player is being pursued by Patty and can't do so, the rest of the team should regroup at his location, and then collectively return to the original spot.

  5. The berserker should still keep his attention, but more priority is placed on dodging rather than parrying, since Patty's melee attacks have more windup than Hans', and thus are far easier to dodge. Your main goal early in the fight is to distract Patty long enough for the demo to paste him with every C4 sticky he can. Afterwards you are to maintain his aggro on you, while using EMP grenades to decloak him in emergencies and to stun zed mobs.

  6. Don't shoot the metal bits on him as they are extremely resistant to damage. Microwave damage is potent against him. Aim primarily at the tentacled right arm and his chest. Compared to Hans Patty is a huge target.

  7. Demo is still the primary dps on him with the RPG, but should attempt to place as much C4 as possible on Patty while he is distracted by the other players. They will be visible when he cloaks. Commando callout only works if he has line of sight on Patty. Presumably most players would notice a floating piling of blinking C4 stickies and realize it's the Patriarch. This is important even if you have a Commando, because the Commando can always die. It is important that a demo does this, because otherwise a stray siren scream with destroy the C4 stickies.

    The C4 serves 2 functions.
    The first is that it reveals Patty's position so that you don't get surprised, and helps the team aim since the C4 will give you an approximate outline of his hitbox. Just aim at the blinking lights.


    The second is that the C4 will give you an opportunity to end the fight early if Patty is damaged sufficiently enough before he heals. Patty runs away to heal at 35% health, which on 6p HoE is 6385 hp. A level 25 demo with Bombadier will deal 492 with a C4 sticky bomb without the 3s stacking debuff. A nuked C4 sticky will deal 656 damage. C4 will take down a fleeing Patty's health in 7.7% chunks.

    https://youtu.be/2ctMfi2RjtM

  8. Once he attempts to heal, the berserker or any player at hand should block the retreat if possible while the dps perks try to kill the Patriarch right then and there. Weld the doors before this if you want to. Anybody with any sort of incapacitation grenades, especially sharps, should throw all of them in an attempt to immobilize him. Note that sharp is usually the ONLY perk with a reasonable chance of actually immobilizing Patty. 2 close range freeze grenades will lock Patty in place. The EMP grenade will decloak Patty and delay his sprint. If done correctly, this should put the Patriarch, at a minimum, in range for the C4 to kill him. If zed time hits while Patty is running, the demo should eyeball his health bar and if it looks close enough, use the C4 to bathe Patty in nuclear fire.
    https://youtu.be/qLmDTMtzNx0

  9. If this fails do NOT attempt to chase Patty if it looks like he's getting away. Focus on killing any trash that spawn.

  10. Repeat until dead.
Video example of an okay but drawn out Patty fight. You generally want to kill him early, but this is an example of how to kill him the long way.
https://youtu.be/ujang12psFM


Boss Wave - How to lose to Patty
Sometimes the best way to learn is to watch how other people fail. Below is a prime example of how to fail the boss wave with the Patriach.

https://youtu.be/Ch7l7g8cldE

What went wrong?

Before the boss wave even starts:
  • Demo does not have C4.
  • There's a SWAT that should have been a commando.
  • Team has no method of countering the cloak long term and it causes several deaths.
  • Survivalist joins last wave. Team would have done better if he was just kicked.
During boss wave:
  • 0:16 - Survivalist doesn't pay attention or take literally 2 steps to the left to get behind the pillar, and eats a rocket and dies.
  • 0:34 - Medic and SWAT get caught out of cover when Patty pulls out the chaingun. SWAT loses whatever armor he may have had.
  • 0:48 to 0:55 - Multiple players constantly out of cover. Had Patty pulled out the chaingun the SWAT would have been dead at this point.
  • 1:33 - Demo is out of cover.
  • 1:40 - Firebug gets hit by the heavy melee but doesn't react appropriately to the sign that Patty is literally right next to him.
  • 1:50 - Lack of invisibility counter means Patty decloaks to shoot a rocket and people don't react in time. This rocket in all honesty should have killed 3 players. Only Firebug dies.
  • 1:55 - Demo reactive armor triggers.
  • 2:02 - SWAT gets too close to Patty.
  • 2:06 - Again the SWAT gets too close and too aggressive, implicitly assuming that Patty will continue to chase the berserker. He finally gets Patty's attention while out of position and gets killed by a rocket.
  • 2:32 - Demo not near cover. Had the rocket been targeting him he would be dead.
  • 2:43 - Demo nearly gets caught in corner.
  • 3:26 - Demo decides it's a good idea to try to aggro Patty when he's isolated from the rest of the team. Lives due to dumb luck.
  • 4:00 - Demo again lives because the rocket that should have targeted him, wasn't targeting him.
  • 4:20 - Team splits up.
  • 5:04 - Demo gets too aggressive. Survives the 6th or so rocket that honestly should have killed him.
  • 5:10 - Medic gets isolated and is 2 shot. At this point I would usually say that the team has lost.
  • 7:25 - Demo dies to crawlers.
  • 8:01 - Berserker survives due to dumb luck. Had the stalker not intercepted the Husk fireball he would be dead.
  • 10:05 - Berserker probably would have died if Patty have started his chaingun just a little further up the tunnel entrance.
  • 11:55 - Berserker dies to what looks like a lag spike.

https://youtu.be/jGL7bENd55E
What went wrong?

Before the boss wave even starts:
  • There's a survivalist. With a M16M203.
  • There's a SWAT that should have been a commando.
  • Berserker has ping so bad that it is debatable if he can even parry properly.
During boss wave:
  • 0:23 - Berserker gets caught out of position by the minigun, and loses most of his armor.
  • 0:58 - Several near misses with rockets and grenades let Patty escape. Otherwise he would have been in range for the C4 to finish him off.
  • 1:26 - Demo gets caught out of cover. Patty targets him for the minigun, and medic doesn't dart him with a speed boost to get away. Demo subsequently dies.
  • 1:35 - Demo leaves the game and rejoins, which detonates his C4. However, there is no possible way that this could have killed Patty, and now the team no longer has C4 to reveal his position.
  • 1:37 - SWAT (why does he have dual Deagles?) decides to stand in a corner. Patty decides to go for him. This incident likely depleted most, if not all of his armor.
  • 1:46 - SWAT is out of position, and would have died had Patty decided to start shooting.
  • 1:58 - Survivalist gets caught on a corner, and likely loses most of not all of his armor.
  • 2:07 - Survivalist aptly demonstrates the perk's lack of killing ability, and proves that damage resistance isn't a substitute for intelligence by dying to two stalkers and a crawler. Let this be a lesson to everyone to not sit right under a spawn point.
  • 2:42 - SWAT somehow doesn't hear the clanking sound of Patty walking right behind him. Either that, or he ignores it. He gets hit into a corner. And then he gets hit again as he tried to escape. And he dies.
  • 2:52 - With most of the trash killing and AoE perks dead, the trash rampages unchecked. The sharp gets damaged by trash and loses enough health that Patty kills him in 1 hit.
  • 2:59 - Medic overextends from cover to heal the berserker. He eats a rocket and dies.
  • 3:32 - Berserker seeks refuge from the chaingun by attempting to run into a corner in full view of Patty. He dies.
Boss Wave - King Fleshpound
Oh, I'm sorry, did you expect an image of the King FP? The King FP is not the real boss. The intro screen is a lie.

King FP has a slow walking speed which is slower than the quarter pounds
King FP only sprints once enraged and enrages basically identically to regular FP.
His chest laser can be dodged by simply crouching.


These 3 primary characteristics have the following implications for boss strategy:
The King FP is not a real boss. He is a taller FP with more health. He has no ranged attack worth anything because his laser can be trivialized by simply crouching. His enrage mechanics makes him supremely predictable. He has no method of 1 shot killing a full health player with default stats, let alone a berserker. So, in conclusion he's slow, he lacks damage, and he's predictable. The King FP is too weak to be a boss, and in fact he isn't the real boss at all.

The real bosses are the quarter pounds. The King FP is something to be distracted, while the quarter pounds are the targets that merit actual attention. If we pretend that the quarter pounds are the equivalent of the 1998 Chicago Bulls and the boss wave is the NBA championships, then the King FP is the mascot in a fur suit on the sidelines.

RULE NUMBER 1 OF FIGHTING KING FP:
Focus the quarter pounds. Kill all of them first, and I mean ALL OF THEM, then focus your attention on the King FP once every last quarter pound is dead.

  1. You need quarter pound killers. As many as you can get. Generally speaking a team setup that can take on Hans can most likely deal with the King FP while half drunk.

  2. You need a distraction tank + somebody to heal him. Ideally a berserker + medic, which is the same setup used for the other bosses. Ideally the zerk should have a pulverizer or an Evis to help with the quarter pounds.

  3. Select an area with long lines of sight, yet some obstacles that forces the quarter pounds in chokes. Generally areas that are good for Patty are also good for King FP.

  4. There is no real skill or nuance involved in this boss fight. Everybody unloads on the King FP while the designated distraction takes the damage to derage him and control his movement. The medic ensures that the tank survives.

  5. Demo is extremely powerful for this boss, due to being good damage against the King FP as well as quarter pounds. At 6p health a single RPG + a dynamite stick will gib quarter pounds, while an RPG alone will leave quarter pounds at low enough health that mop up becomes trivial. If 3 players died somehow, the RPG will start killing quarter pounds in 1 shot.

  6. If a player is low on health, do NOT shoot the King FP until the player can be healed up, so as to not potentially get him killed. Same thing you would do for regular FP.

  7. Once the King FP drops enough health, quarter pounds will spawn as signified by the spawn roar, which will indicate the arrival of between 1 and 12 quarter pounds. This occurs when it drops below 65%, 50%, and 20% health respectively. At this time, stop shooting the King FP at all, and focus ENTIRELY on eliminating all quarter pounds while the tank distracts the King FP and stops him from joining the quarter pounds.

  8. Below 65% health the King FP can cause explosions when ground pounding during the enrage animation. This is only a problem for the designated tank, and is trivialized by simply not getting greedy and getting too close.

  9. Below 50% health the King FP can shoot a laser out of its chest. Which is trivialized by crouching so the beam simply passes over your head.

  10. At 20% the King FP generates a shield similar to Hans'. Which simply makes him easier since damage to the shield won't rage him, and he doesn't have a health regen. Just treat the shield as a portion of his health bar where it is impossible to rage him with damage. Good god this boss is easy. It's actually kind of pathetic.

  11. Break the shield and just keep shooting him.
Boss Wave - How to lose to King FP

If you lose to the King FP, you're bad. I have literally never lost to this boss, and it flabbergasts me that anybody could, short of computer problems or being completely new to this game.
Boss Wave - Abomination
Boss Wave - How to lose to the Abomination
You don't. You shouldn't.
Boss Wave - Fight locations
Biotics Labs
  • Patty: Blender room. Use the blenders for cover. Alternatively, the front lobby can be okay for Patty.
    https://youtu.be/2ctMfi2RjtM
  • Hans: The L shaped corridor with the cysts and clots in containment. Needs a good medic. The blender room is also okay, as is the front lobby, assuming you have a good berserker.
    https://youtu.be/VO4Appff0zc

Outpost
  • Patty: The trucks. Use the trucks for cover. Alternatively, the central courtyard with the trader. Use that one pillar for cover.
    https://youtu.be/LDvgeEec8NU
  • Hans: Trucks too. All of the places with tight spaces tend to get you surrounded when the trash spawn.
    https://youtu.be/IL0OeoHd9as

Burning Paris
  • Patty: The courtyard in front of the Eiffel Tower. Use ambulance and the news stands for cover.
    https://youtu.be/ujang12psFM
  • Hans: Same place as patty due to the same issue with Outpost. All of the places with tight spaces tend to get you surrounded when the trash spawn.

Volter Manor

Catacombs:
  • Patty: Big central room with the trader. Use pillars for cover and duck underground if necessary. It is advisable to kite around the room instead of staying in the central platform.

  • Hans: Kite using the hallways around the big central room.
    https://youtu.be/o86HAXDe7J8


Boss Wave - Fight locations (cont.)
Evacuation Point

Farmhouse
  • Patty: The barn and the area near the barn door. Use the vehicles and barn walls for cover.

  • Hans: The barn. Berserker either tried to stall at the bottom of the stairs or the small doorway. Alternative the house 2nd floor balcony is narrow enough to block Hans.

Black Forest
  • Patty: The cave with the trader. Alternatively the house.

  • Hans: The house is the only place with good chokepoints for the berserker to block Hans. Otherwise, as long as you have a zerker or firebug to control his movement, almost anywhere will do.
    https://youtu.be/0TEmy1NRBms


Prison
  • Patty: Open courtyard with the barbells and lifting equipment (NOT the punching bags). Use the walls for cover. Alternatively you can fight in the cafeteria and use the pililars for cover.

  • Hans: The cell block is narrow enough to block, as is the reception area. Beware of nades though.

Containment Station
  • Patty: Airlock room is the only place with good cover. Use containment units for cover. This area though will need a very good trash killer. Turbine room is doable with good positioning.
    https://youtu.be/Njwqff1XwtU
  • Hans: Turbine room hallways are narrow enough for the berserker or firebug to block. Arguably any hallway would do, as long as it doesn't have a really bad side spawn.
    https://youtu.be/_E6J4cGYg_s
Boss Wave - Fight locations (cont.)
Hostile Grounds

Infernal Realm
  • Patty: Any room with a pillar to hide behind.
    https://youtu.be/dl9BRs5HTVs

  • Hans: The room with the grates and the tunnel under the floor will make it easier for the berserker to block him. Otherwise, the cage room with the trader can also be used to exploit his pathing around the pillars.
    https://youtu.be/aHQw-nQq4hs

Zed Landing
  • Patty: Beach near the big rocks. Use rocks for cover.

  • Hans: Long corridor towards the back of the map near the lava river. Alternatively, the beach is still okay.

Nuked
  • Patty: Outside trader near the bus. The only open area with 2 large pieces of cover. Truck lot trader area is also acceptable, as is the embassy entrance with the 1 armed boy statue.
    https://youtu.be/JzNpOc4ULMU
    https://youtu.be/Qstz5gs4mkk

  • Hans: Outside trader near the bus has some chokepoints and doorways close to it, as well as the trader in the truck lot. Going underground or inside the building generally makes it easier for the berserker to stall Hans in a doorway.
    https://youtu.be/Y1eHFBE5dQk

Descent
Gameplay Videos
So having made it all the way through this guide, you now want to watch higher level gameplay videos, or quite literally creep people better than you and watch them destroy zeds in ways you didn't know they could be destroyed.

Don't creep me. I'm just consider myself a bit above average. Creep or watch these people.

Fat Cat
Youtube
The one person I will ever allow to play survivalist.

This duck
Quack

Duck's partner in crime

Dandyboy66
Youtube

mike5879
Youtube
Notes
1059 updates in progress..

Crossbow I don't consider bad yet, but the inherent RNG of the stun on scrakes pushes it nearly there. It has a use as an offperk medium zed killer for players with the 6 blocks to spare. However, the RNG factor does not seem to apply to fleshpounds.

Point out inaccuracies and typos in comments, I'm too lazy to look for them myself as this guide has grown far too long.

If a skin ever comes out for the M16M203 before they buff it, do all of us a favor and destroy it.

EDIT: Vietnam skins are coming out for the M16M203, destroy them so that you are not tempted into evil.

EDIT again: The buff isn't enough. It still sucks. Destroy the skins!
135 Comments
zadupiarz 4 Sep, 2023 @ 3:13am 
this guide is probably not bad but you still need to get laid
𝅺 19 Feb, 2023 @ 11:25am 
guide needs a guide
Yoshi 26 Dec, 2022 @ 10:34pm 
this guide actually helped me so I can finally get used to and slowly enjoy suicidal difficulty ever since.
Jacket 25 Dec, 2022 @ 8:58am 
This game is so dead it's not even funny.
GreekBoy 24 Dec, 2022 @ 5:33am 
@Sencho#3184
1. This guide hasn't been updated since 2018. Idk if you have a reading disability, but it literally says that in the first paragraph, so your comment is worthless.
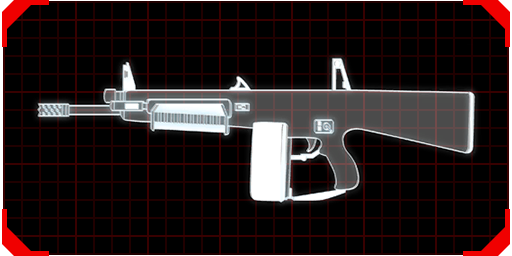
2. I just checked your profile. You barely play on HoE difficulty, so what the fuck are you talking about? The locust, like most of the newer guns, sucks ass against SCs and FPs in a 6-player HoE game. I just tried it out, it takes forever for them to die.
Sencho 24 Dec, 2022 @ 4:56am 
Calling Survivalist useless is pretty crazy to me, since his locust weapon is one of the strongest weapons in the game for only 900 bucks. It can kill groups of zeds, and takes care of anything special, even fleshpounds with ease. They are an amazing value for a team, since they can shine in doing multiple things, like support healing and such. This guide may be in depth and therefore very long, but I think its not very good qualitywise.
Luna 22 Jun, 2021 @ 10:24pm 
OOF, you know it's bad when someone who was dedicated enough to write a guide like this decides to stop playing the game
Ricardo Milos 20 Aug, 2020 @ 10:41am 
Outstanding guide. Probably top-1 out of all KF2 existing guides. :winter2019coolyul:
floof birb 19 Jul, 2020 @ 11:37am 
b u t t h e s u r v i v a l i s t i s d u r a b l e
Tomocha 16 Mar, 2019 @ 2:03am 
Tldr: if you dont play like me, you suck.
I found it funny that the author of this guide thinks everyone is able to score headshots 100% of the time.
Has some usefull info tho...