Graviteam Tactics: Mius-Front

Graviteam Tactics: Mius-Front

137 ratings
GTMF Beginner Guide
By ack-ack
A general guide for beginners. This is an ongoing WIP. Information is valid as of the November 14, 2016 game patch.
5
   
Award
Favorite
Favorited
Unfavorite
Off-map Artillery
You will know that off-map artillery is currently available to you when the artillery interface is present on the right side of the screen:

Note that this interface will only appear after the deployment phase is complete.


Another way to tell if off-map artillery is currently available is to take a look at your platoon cards on the bottom of the screen:


The shell icon you see here:

in the bottom right corner of the platoon card indicates that somewhere in that platoon there is an off-map artillery spotter present.


Taking a look at the squad cards inside of the platoon, off-map artillery spotters are indicated by the circle icon in the top right corner:

In this example the battalion commander is acting as a spotter and there is also dedicated artillery spotter squad.

Hover over the squad to see exactly what type of artillery it is:

“10.5cm” -> diameter of the barrel, “LefH” -> name of the gun, “X4” -> number of guns in the battery.


The preparation time and initial spread of rounds is greatly reduced when placing them during the initial orders phase. Placing marks during the battle will be much more costly.


Before you start placing artillery marks on the map, you should have a basic understanding of the artillery interface.

1 - Indicates the beginning of a new artillery battery. Gives the name and number of guns. Click on the artillery icon in the first column to minimize or maximize the information display.
2 - These three rows are your artillery markers. Right clicking on the dashed line icons will automatically select that artillery mark (if not already selected) and move the camera it’s location. Left clicking the dashed line will call in an artillery strike.
3 - These next series of rows display the ammunition available to that artillery battery. To change ammo type, left click on the icon in the first column.
4 - This row displays how many rounds will be fired per artillery fire mission. Left click on the icon in the first column to increment, right click will decrement. “Adjustment fire” will fire 3 rounds per gun.
5 - This last icon will change the setting of the shell fuse.


How to place artillery marks and call in fire missions:

In order to get artillery marks to appear at all, you need to have the spotter selected. By default, all three artillery target markers will be placed next to the artillery spotter


To set a new location for the mark: hover your mouse cursor over the artillery mark until the lines become highlighted, then right click. Your mouse cursor should turn into a flag icon. Now right click anywhere on the map to set the new location. You can also click and hold RMB to drag out a line.


Looking at the artillery mark:
The number on the left indicates the amount of time it will take to prepare the fire mission. The number on the right indicates the amount of spread (in meters). More on these values later…

Once your artillery target markers are placed you will want to specify what ammo type and how many rounds you want to fire. For this example I want to fire high explosive rounds and I’m going to set the number of rounds to 10 per gun. Since I have two guns total in my battery, this means 20 rounds total will be expended. Go ahead and left click on the dashed line icon to call in the fire mission. The line will turn red to indicate that the fire mission is being called in.

The total number of rounds to be expended in the fire mission is shown here:


This countdown timer indicates the amount of time remaining until the fire mission begins:


To cancel the fire mission at any time simply left click again on the dashed line icon.

When the fire mission begins you will receive a message in your event log. Left clicking the event icon will move the camera to the location where the first spotting round will fall.

How spotting works:
If your spread value is very high it will take some time for the accuracy and rate of fire of the artillery barrage to improve. Slowly but surely the spread will get smaller and the rate of fire will get faster. The minimum spread value is 10 meters - at this point your rounds will be firing at maximum rate of fire and accuracy.

Changing the position of an artillery mark will reset the spread and preparation time values.

New artillery marks that are placed in close proximity to other marks which have already gone through the spotting process will receive a bonus reduction to preparation time and a reduced spread.

If the artillery spotter squad is killed in combat you will lose access to that spotter’s artillery battery for the rest of the battle.


Ammo types:

High explosive ammunition is the most common ammunition type. By default, the shells will explode with a delayed action. You can set shells to immediate action via an option in the artillery interface (#5 on the interface chart above). Delayed action is supposed to have more of a demolishing effect making it more effective againced dug-in positions, buildings and armored vehicles. Immediate action blasts are more effective against exposed infantry or guns that are not dug in.

Smoke shells are also very common among all artillery types. They are primarily used for concealment, however they also inflict some incendiary damage on impact. Keep in mind that the current wind direction and speed will blow your smoke around. You can check the current wind direction and weather conditions in the game menu.

Shrapnel ammo is only present in a few artillery types, so far I’ve only seen it available for the Soviet 76.2mm. When set to delayed action the shells will explode in the air just above the target (default setting). When set to immediate action the shells will explode on impact.

Incendiary shells are given out in small quantities to most artillery types. Infantry, buildings and vehicles can be lit on fire. Tanks will usually require multiple direct hits in order to have a chance of being lit on fire.

Flare ammo is only available at night. Flare shells are ignited at high altitude and slowly parachute down illuminating a large area on the ground.

Close Air Support
In general air support is not something you get to control via spotters (like off-map artillery), it operates automatically. Air support is only available on pre-selected turns during a campaign, you do not get to alter these arrival times. If there are multiple battles on that turn air support will only arrive in one of those battles and it is chosen at random.

In addition to the air support icon (#6 on the interface list in the campaign section below) you can also check the arrival times in the forces list, usually located near the top:

Once CAS arrives on the battlefield they will spot and attack targets on their own. Their spotting capabilities are usually very good. Unless a unit is fully concealed by foliage or hiding in a building, expect it to be vulnerable to air attack.

By default, orders to fire on planes is turned on for all units that are able to. You may tell your units to hold fire against aircraft by unchecking the icon in the bottom left corner of the unit orders interface:


Campaign Basics Pt. 1
Campaigns are also known as Operations.


The Main Interface:


1 - Hovering over this icon shows you the current turn and briefing.

2 - Hovering over this icon shows you the current overall score. A line indicates a draw, arrow pointing up indicates victory, arrow pointing down indicates defeat.

3 - Current time for the turn. Hovering over the icon will also show you the current lighting conditions, like whether it’s morning, midday, or night.

4 - Hovering over this icon will show you the current weather conditions for that turn.

5 - Shows when extra reinforcement squads will arrive. If the icon is clear, reinforcements have arrived. If the icon has dots, the number of dots indicates how many turns until a group of reinforcements will arrive. If this icon is blacked out, there are no extra reinforcement squads. Most likely this icon will be blacked out, since there is currently only one campaign that uses this mechanic.

6 - Shows when air support will arrive. Works like the reinforcement arrival icon. If the icon is clear, air support is currently available. If there are dots, the number of dots indicates the number of turns until arrival. If it’s blacked out, there is no friendly air support throughout the entire campaign.

7 - Shows only the terrain map.

8 - Shows a visualization of the current briefing. Note that the visualization and the text briefings are based on the historical outcome.

9 - With this icon toggled on, hovering over a platoon on the map will highlight other platoons that are in the same battalion. A blue circle appears around platoons that are in the same company, a green circle appears around platoons that are in different companies but still within the same battalion.

10 - Takes you to the Forces List.

11 - Takes you to the statistics page.

12 - Ends the current turn/phase. Hitting this will end your movement phase for the turn and begin the AI’s movement phase and the combat phase. You hit this one more time after all battles are finished in order to start the next turn.

13 - Restarts your movement phase. The only way to undo any movements is to undo all movements.

14 - Exits back to the operations menu. All of your moves will be automatically saved if you happen to exit during your movement phase.

15 - Briefing log. This gives you historical information about the campaign and shows the current score after each turn.


Movement:

First, understand that all platoons on the map are placed on-top of these nodes:


The map is divided up into squares, each of these is 1 square kilometer:


Each square contains 1-4 nodes on which platoons can be placed. Notice how squares that contain friendly units are red, squares containing enemy units are blue, squares that belong to no one are clear.

Note that the term "platoons" is being used as a generic term for all individual units on the operation map, even though some of these units are not technically platoons - they might be companies, HQ units, supply units, etc.

Your platoons are able to move further through friendly territory than enemy territory. Supplies are not able to move through enemy territory - if a friendly square is completely surrounded by enemy territory all friendly platoons in that square will become encircled.

Whenever you left click on a platoon some nodes on the map will turn into green squares, these indicate where that platoon is able to move to. You may also see green dots around other platoons, this means that you can swap positions. Left clicking again will deselect the currently selected platoon. Right click on a green square to move.

Once you move a platoon, that platoon cannot be moved again for that turn.

Every time you move a platoon, that platoon will suffer fatigue. Fatigue gained from the campaign map will lower the stamina of infantry in real time battles. Vehicles will lose fuel every time they move. Vehicles can eventually run out of fuel, without fuel they are unable to move on the campaign map or in real time battles.


Defenses:

Platoons that do not move and are not involved in any real time battles for a turn will automatically start digging defensive earthworks for themselves. There are two levels of earthworks, each level takes one turn to build:

lvl1: foxholes


lvl2: trenches.


Platoons lose their entrenchment ability whenever they move or are involed in a battle. Earthworks will remain permanently on the battlefield once they are built in real time battles.


Attacking:

Attacks are initiated by selecting a friendly platoon then right clicking on an enemy platoon. It’s only possible to initiate an attack when in close range of an enemy platoon, usually from an adjacent square. An orange or yellow dot will appear over enemy platoons and that dot will turn into a target when you mouse over. Right clicking will initiate the attack.


Platoons can attack after moving.

The attacking platoon along with all other platoons in the same square will forfeit their movement for that turn.

Initiating attacks against the enemy during your movement phase will result in a real-time battle which takes place in a 3X3 square where the attacking platoon’s square is at the center.

In this example the center square was on the edge of the map, so the battlefield will be shortened to 2X3.
Player movement turn:


The resulting battlefield, after the AI’s movement turn:


After you initiate attacks in the movement phase, the AI opponent takes it’s turn of movement and attack. If an AI attack overlaps one of your attacks, there is a good chance that the resulting battlefield will be altered from what you originally planned.

Campaign Basics Pt. 2
Battle Radius:

By default not all platoons inside the radius of a battlefield will participate in the battle. Notice how these platoons near the edge of the battlefield are greyed out:

These platoons will not participate in the battle.

The setting that determines how many units will get to participate in battles is known as the battle radius. The battle radius can be changed in the options menu under Game and Realism Settings. It can be set to limited (smallest), medium (default) or no limit. As the name implies, no limit will allow all units within the radius of a battle to participate and it will also allow all squares to be capturable. Setting the option to no limits might be ok for smaller campaigns where troop concentrations are more likely to be smaller, but in larger campaigns (like Stepanovka) troop concentrations will most likely be too high for your computer to handle.

While you are planning your attacks during your movement phase it can be difficult to predict exactly which platoons will be able to participate in any given battle. The best you can do is assume that platoons that are closer to the attacking square are more likely to enter battle.

When looking at a battle, notice how some squares are greyed out:

Those greyed out squares are not capturable. When issuing a standard attack you are usually only allowed to capture one enemy square, the square that you initiated the attack on. Greyed out squares are also visibly identifiable during real-time battles when you enter the tactical map mode.

The number of capturable squares and platoons allowed into battle will likely be altered if any enemy attacks are in close proximity to your own attack.

There is also an alternative attack type which allows you to take one extra enemy square while giving you less units and less territory to start with compared to a standard attack. This blitz type attack can be carried out by the following types of units: tanks, motorized infantry, scouts, and company commanders. An easy way to tell if a platoon can carry out a blitz attack - when you select a friendly platoon, nearby enemy platoons will have a yellow dot on top of them instead of an orange dot. Ctrl+RMB to initiate the attack.

Here's an example. The attack was carried out by the tank platoon in the bottom right square against an enemy platoon in the center square:

Notice how the battlefield is centered on the square where the attack was initiated instead of on the attackers square. The extra capturable square is located behind the center square along the line of attack.


26 Comments
hipotermia 13 Oct, 2023 @ 2:55pm 
Thanks for this guide. The game is very complex but I want to learn how to play.
jungle.james 18 Feb, 2022 @ 4:01pm 
Could you add a segment on how HQs work, and how to move them? Thanks!
Gallus 22 May, 2020 @ 2:52pm 
Appreciate you taking the time. Great guide for beginners and those revisiting the game after a long break.
MeatPupPeT 25 Aug, 2018 @ 2:22pm 
Benjamin Maximus " Is there any auto Battle im tired of doing each battle and ever battle? "

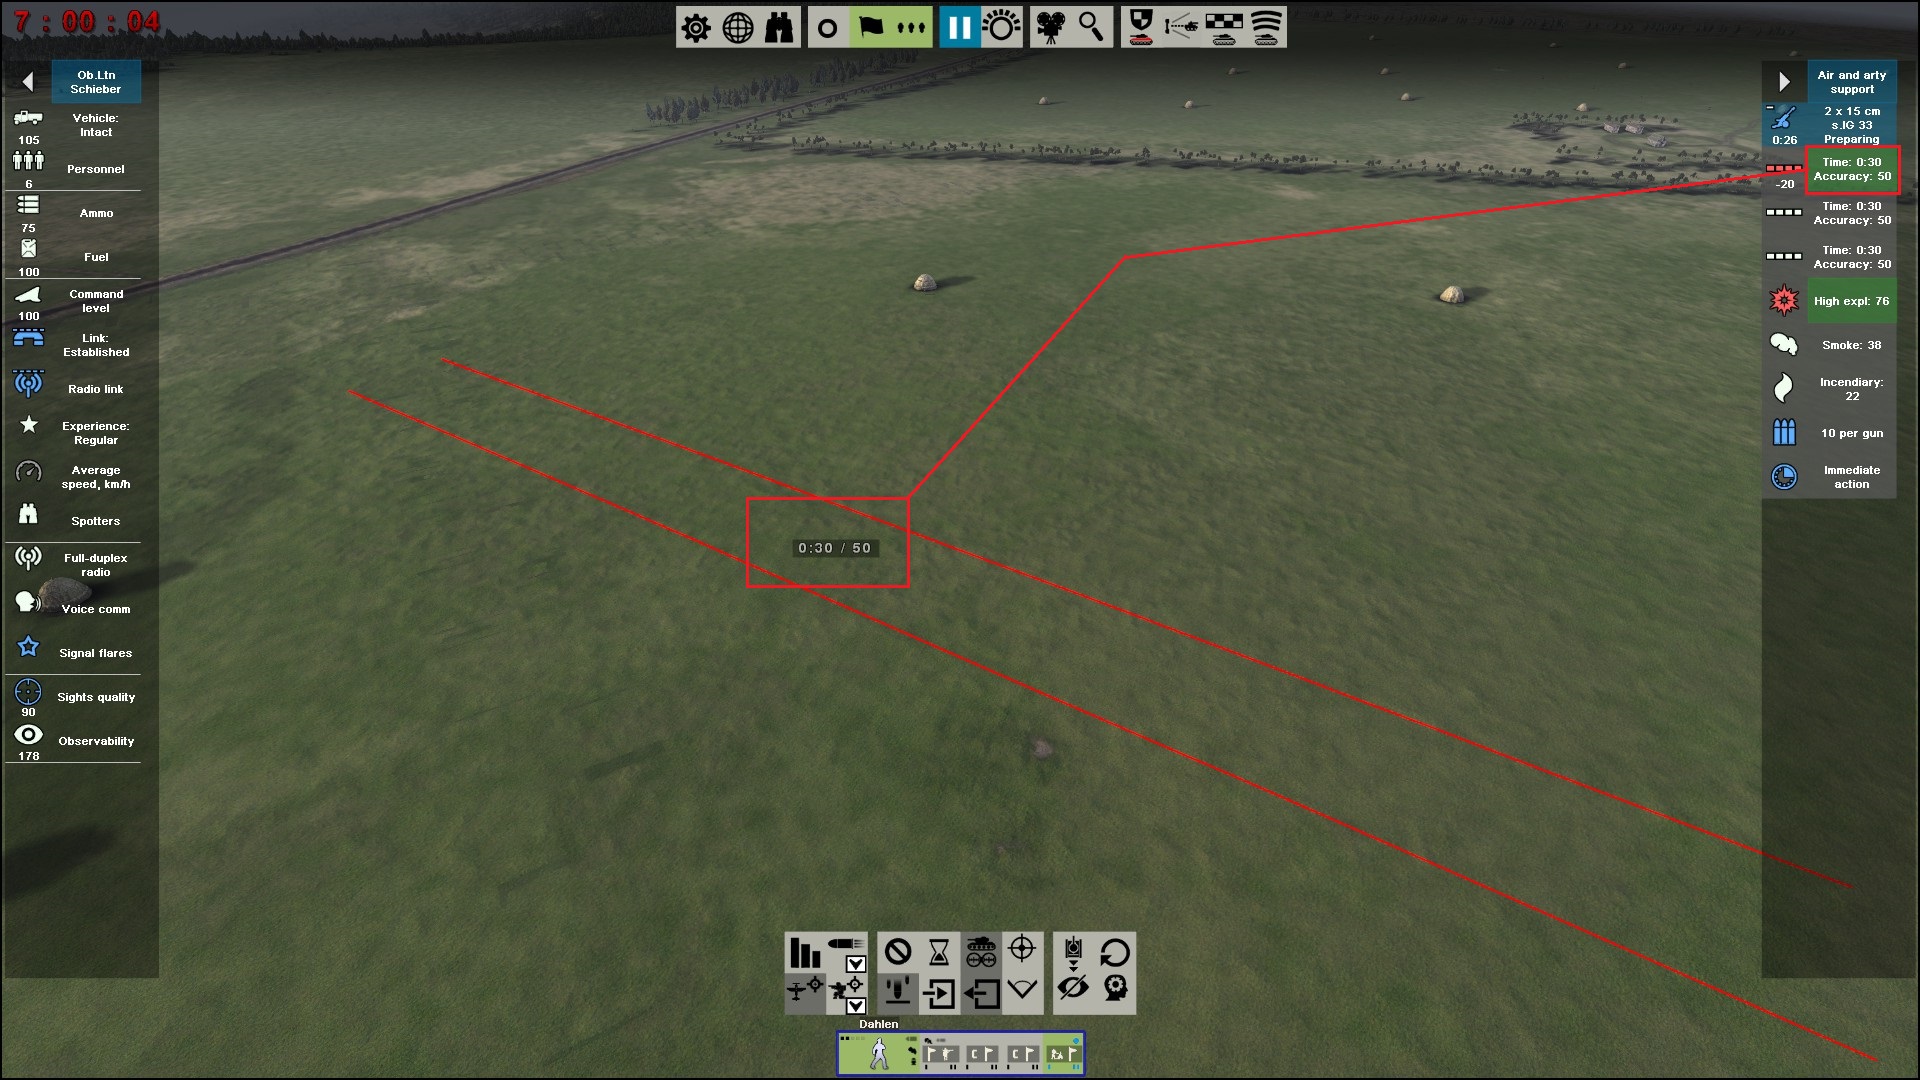
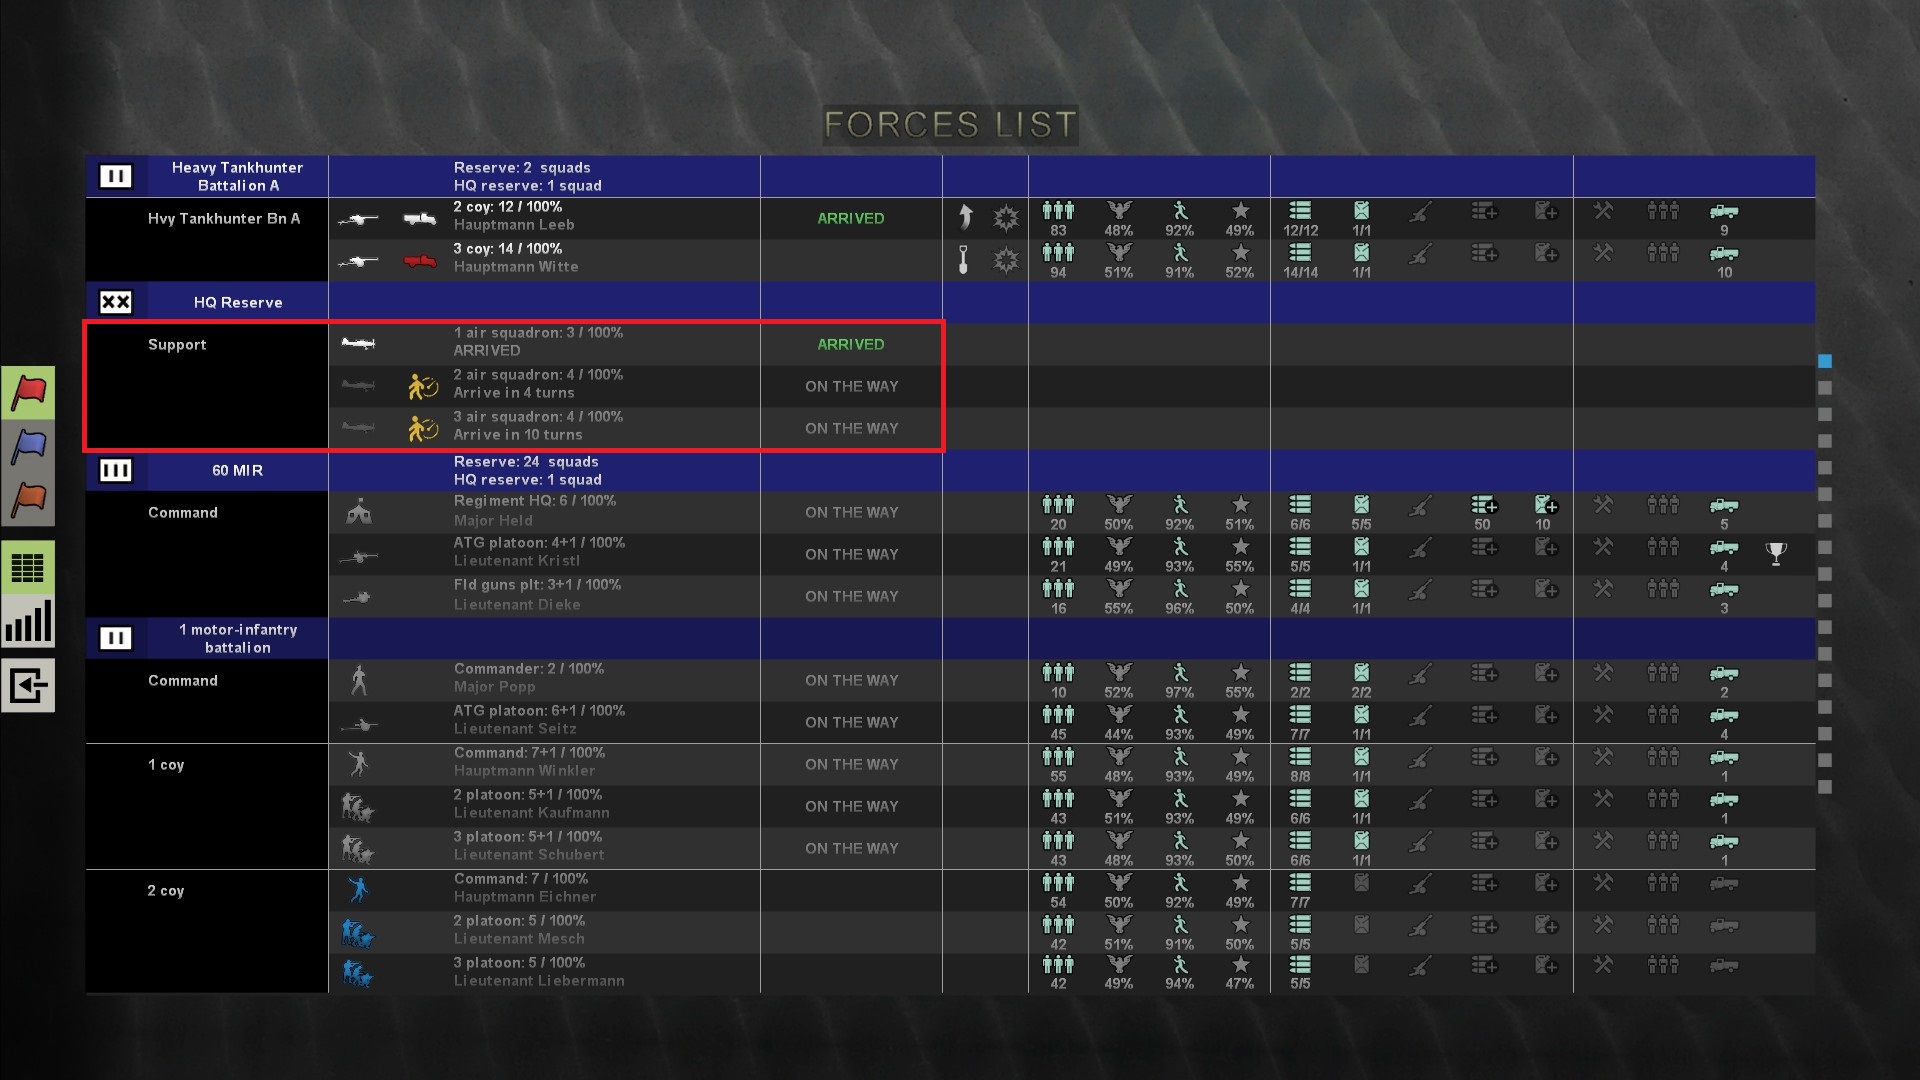
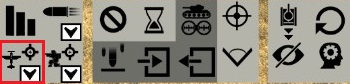
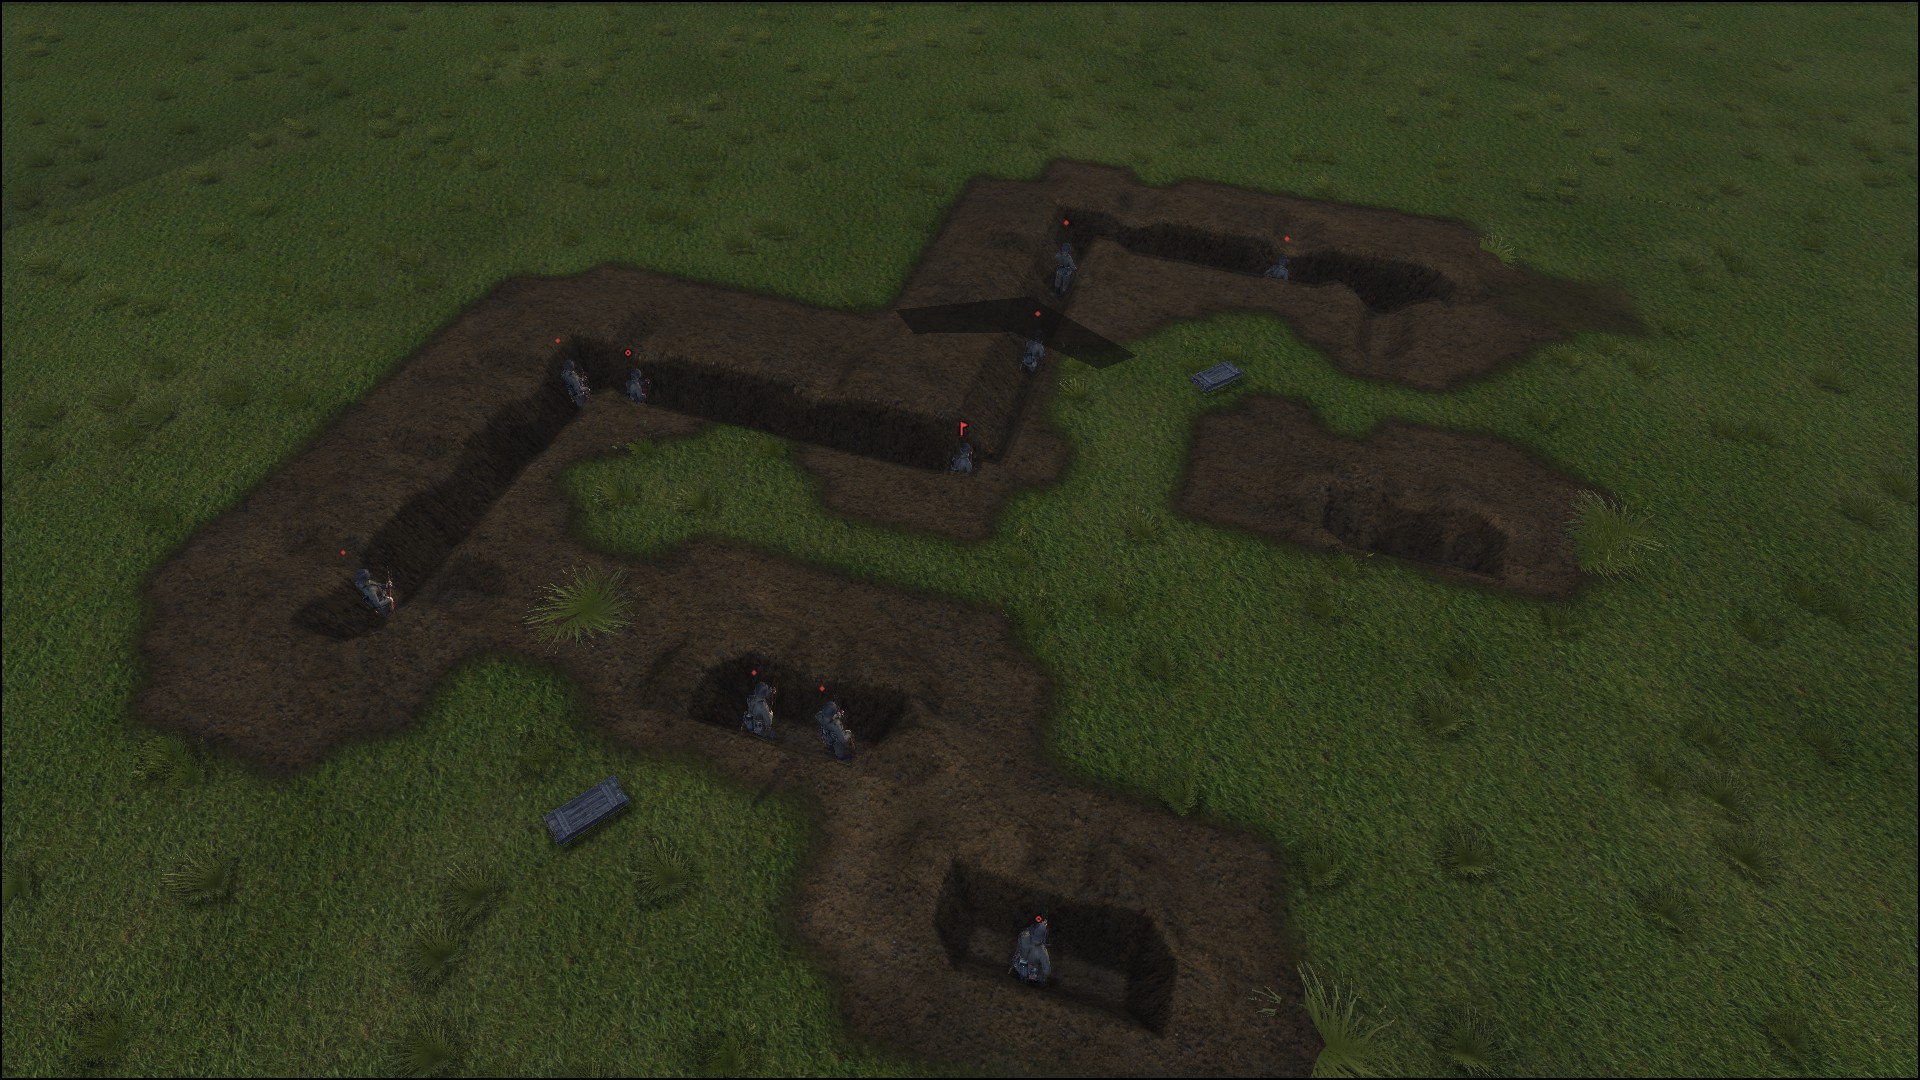
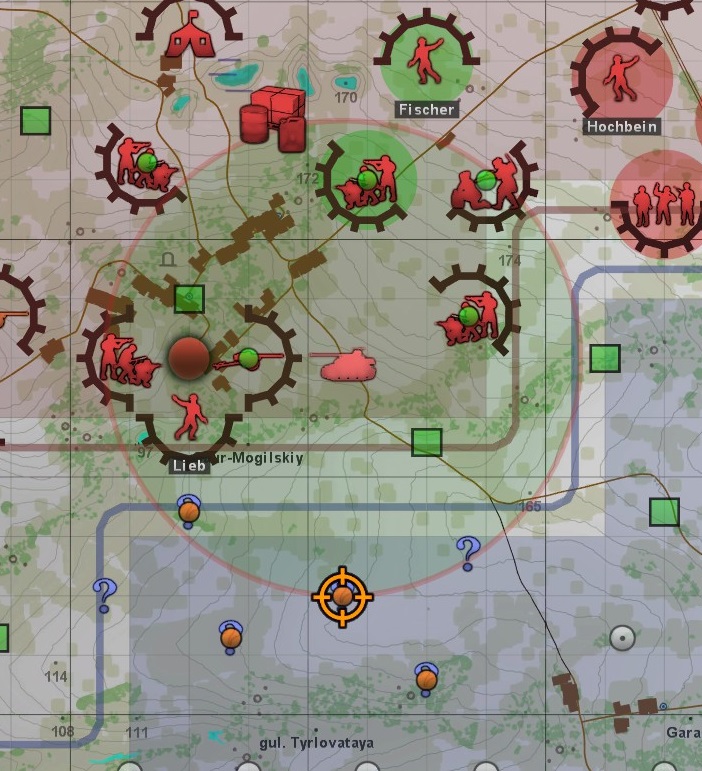
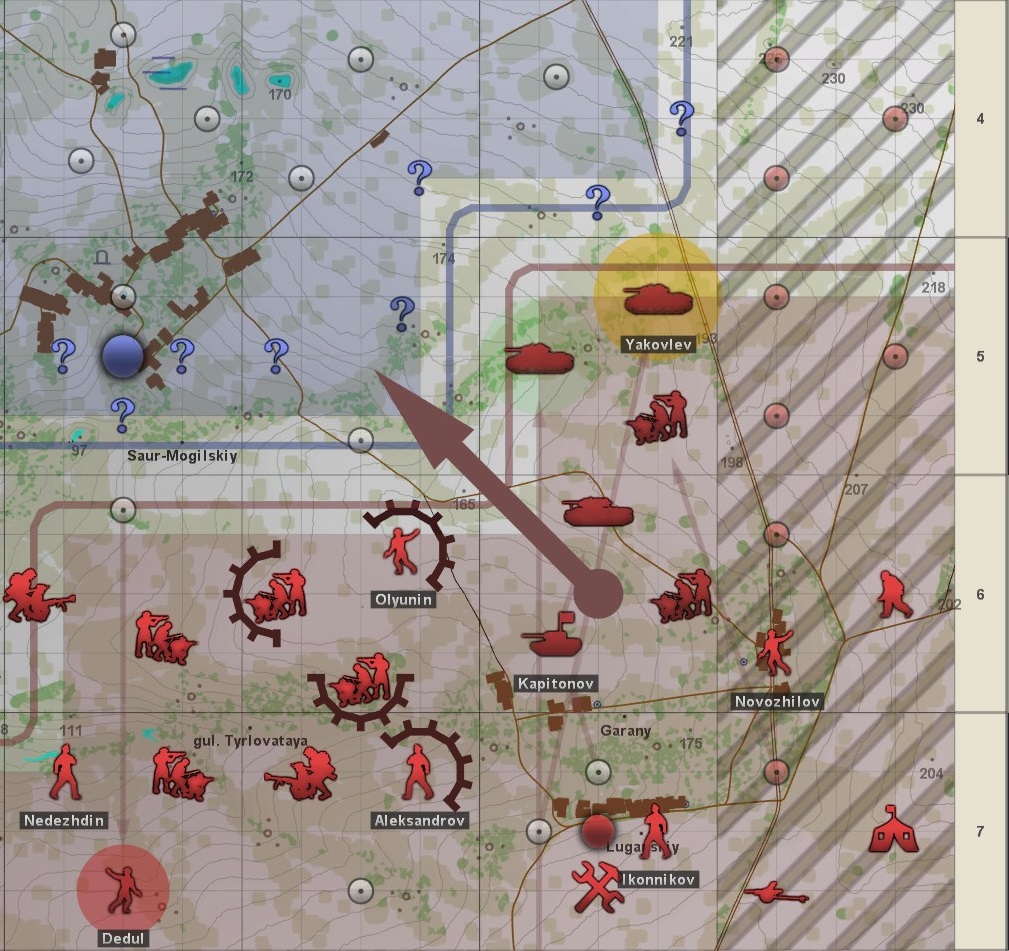
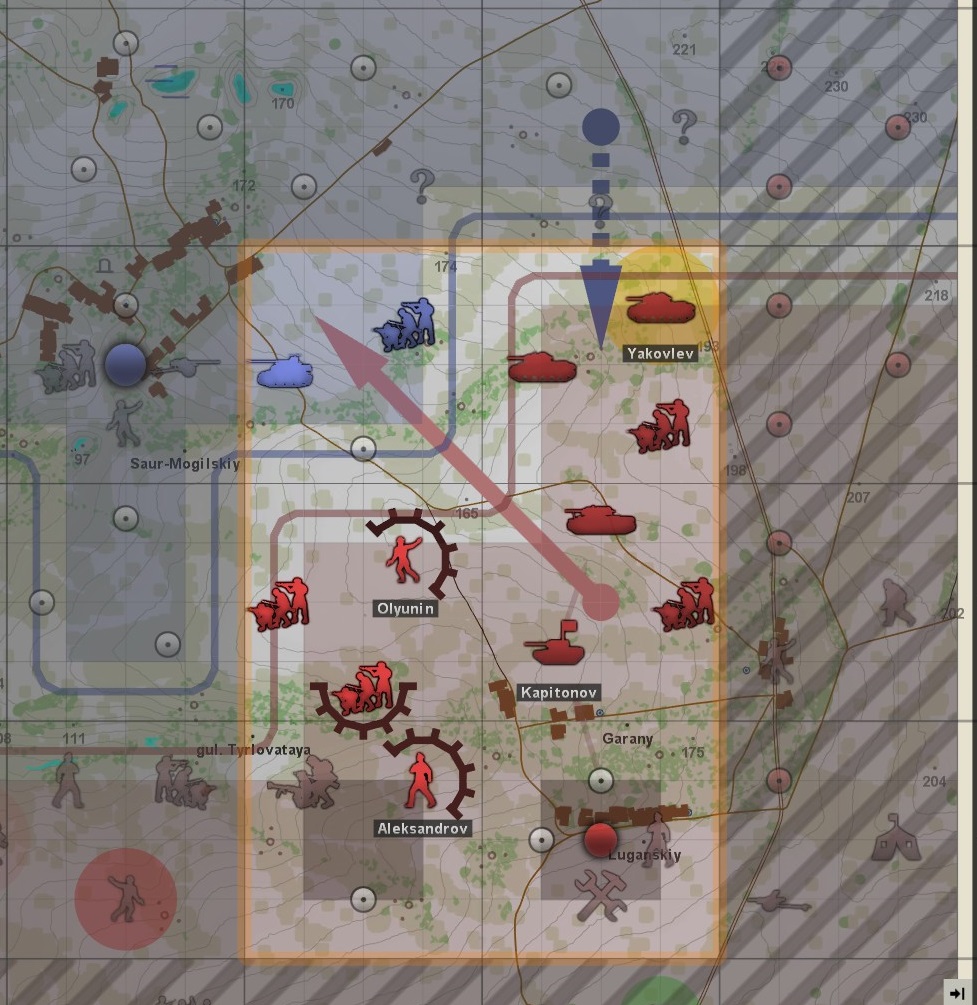
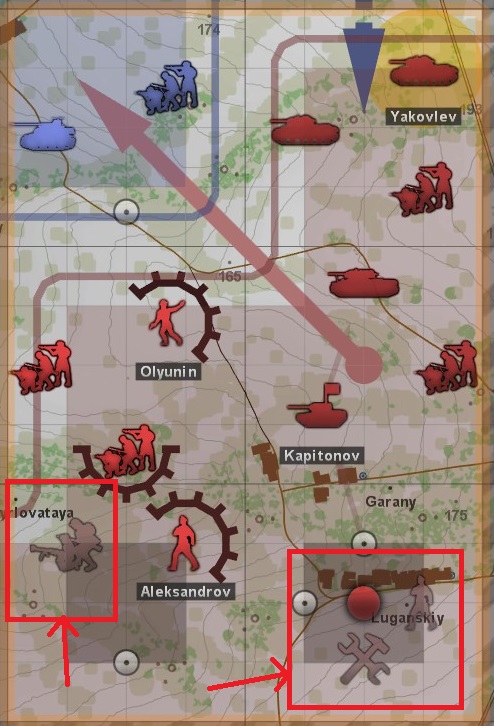
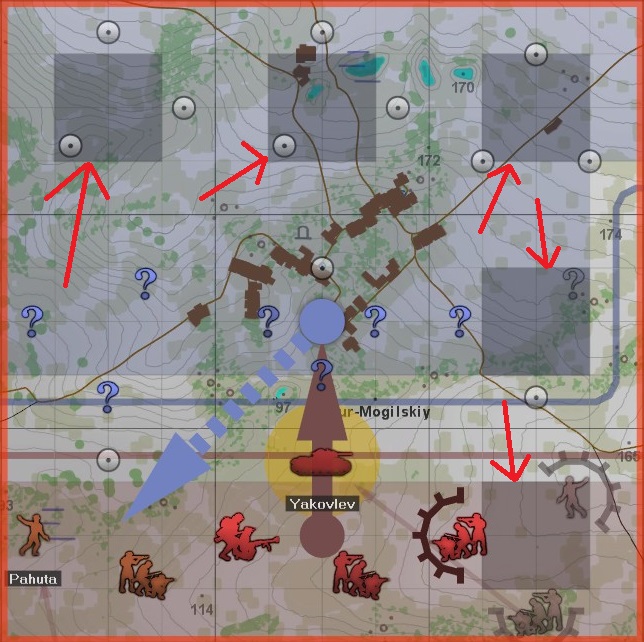
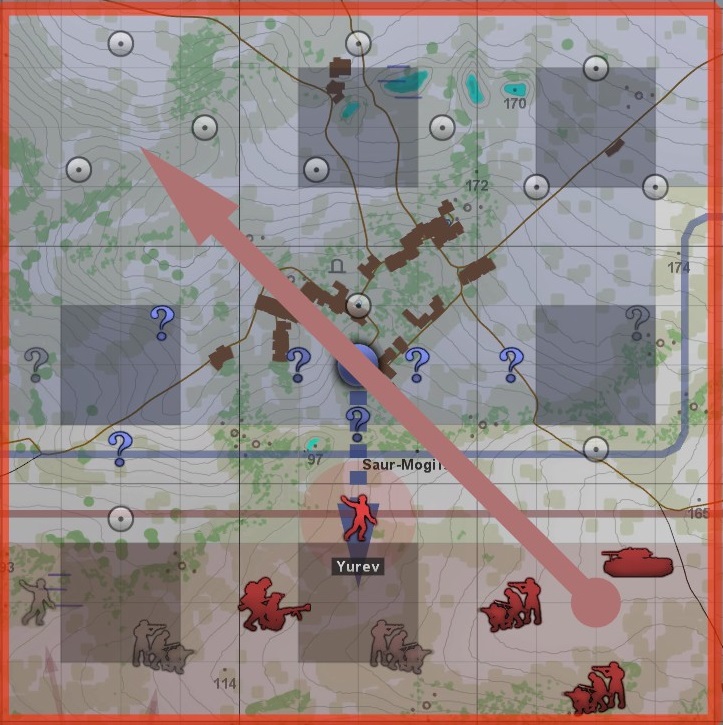
Yes there is a battle generator ! I use it all the time . The Tank Icon on the lower right of your start game screen . You can design your army by year , and size . From a small skirmish of 3 units to about 130 men < mech units and tanks .> . You can adjust the scenereo from hill to highway to fields , forest , gullies etc . All kinds of weather conditions apply optional . Bonus with this is that you get the most expensive tanks and units for free if you choose them . It's a break from the campaign mode and battles run on Countdown or over 3 hours and can be changed back and forth during the game to force the AI enemy to move . You'll find that your game play and victory's will increase . If your needing a Graviteam Fix and have an hour to play this is perfect . The huge battles go on for days sometimes , so that feeling of acheivment is pro-longed .
MP
MeatPupPeT 21 Aug, 2018 @ 3:05pm 
Well it was a great video ! Rock on Garth !
ack-ack  [author] 15 Aug, 2018 @ 8:07am 
The stuff about the campaign map is probably still relavent, but the info regaurding artillery might not be since I know the UI has changed in a recient big patch. I probably won't be updating this since I'm taking a break from this game for a while.
MeatPupPeT 12 Aug, 2018 @ 2:21pm 
is this still relevant ?
Strelok 19 Jul, 2018 @ 8:55pm 
need update for new patches!
Hot Sloppy Tuna 31 Dec, 2017 @ 1:37am 
Great tutorial "ack-ack" especially concerning artillery. I'll be referencing it in the Set-Up Tutorial I'm working on and will mention you by name if you don't mind.
Hot Sloppy Tuna 29 Dec, 2017 @ 9:38pm 
Mefisto: Hit Left Ctrl and Backspace simultaneously to get rid of UI. To take a clutter-free pic it aiso helps to adjust the screen view settings (upper middle buttons) to get rid of highlighted stuff and what not. Makes for better pics.