MapleStory

MapleStory

176 ratings
THE ULTIMATE REBOOT GUIDE (very outdated)
By spreadnuts and 1 collaborators
1,000+ hours of knowledge compiled into a guide, with the goal of creating a more solid source of information for beginners who would typically have to click multitudes of links for assistance in the game. Created by Nóvà (Reboot). *NOTE: Alot of these sections are out of date in one or many ways due to my neglect. Take some of this information with a grain of salt. If you do happen to find an error, I'll 100% change it if you message me or comment, as I'm still active on steam.
4
3
   
Award
Favorite
Favorited
Unfavorite
Introduction to Reboot
-----------------------------------------------------------------------------------------------------------------------------

Hi, I'm spreadnuts (Reboot: Nóvà), and I'd like to thank you for clicking this guide. It covers almost every major aspect of gameplay in Reboot. Beginners and intermediate players alike will get a kick out of this guide and also perhaps pick up a few new pieces of information or tips by reading. My goal with this guide is for players to not have to dig through wiki links and reddit posts just to advance in Maplestory anymore by compiling all the information I've amassed in one place. Some of the information in this guide is pasted from my older website, so I apologize if my syntax changes unaccountedly. Remember to share this guide with friends, family, pets, etc. I'd like also to plug my guild Song, we're open to all levels. Feel free to apply!

Maplestory: Reboot is a unique server for players who perhaps have gotten bored of or never liked the layout of Classic Maplestory, in a nutshell. It also was one of the many attempts by Nexon America to revive their dying game (it worked).

______________________________________________________________________________

What is different about Reboot compared to other servers?

  • Completely free-to-play - Anything that would usually be bought with money on other servers can be obtained on Reboot with mesos or through other means.

  • Stronger mobs and bosses - Reboot boasts a harder game for more dedicated players, but it is not too challenging. It welcomes casual and hardcore players alike.

  • No pay-to-win gambling - Unlike other Nexon-hosted servers, Reboot has no gambling systems (Gachapon, Marvel Machine).

  • Simpler equipment system - Scrolls and bonus potentials are nonexistent in Reboot. Focus more on the game, and less on the hassle of managing armor.

    Essentially, Reboot is tailored towards players who want a fuller singleplayer experience. In other servers, paying large sums of money / getting funded by other players is essential to progression towards later points in the game. In Reboot, these concepts are virtually nonexistant.
Starting Up (What do I pick?)
-----------------------------------------------------------------------------------------------------------------------------

This is always a big deal to new players, and for good reason. There's a huge amount of classes to choose from, and you want to pick a good one because it's going to be what you're playing with for the rest of your time in Maplestory.

Here's my tip to you: Play all the classes if you don't know what to pick!

First and second job advancement skills usually reflect how the class will be played for the rest of the game. A good idea would be to go on reddit.com/r/maplestory and make a post asking what class you should play, detailing your preferred way of play in the post so that people can help you narrow your choice out. Don't be afraid to make a new character because you don't like your current class. After all, this is the longest-term investment you'll be making in the game.

NOTE: If you have some characters past level 30 that you didn't enjoy, don't delete them! They might be useful later for a little game mechanic called Link Skills, which are covered in this guide.

______________________________________________________________________________

Setup and Keybindings

Troubles are unavoidable with the quick addition of multiple skills and limited keys to bind them to. In order to save you trouble down the line and make sense of the initial confusion, take into consideration this section.


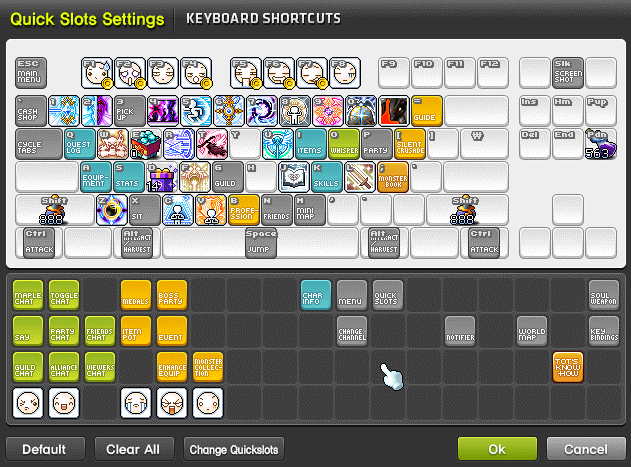
Sampled here is a picture of my setup. I've in my setup removed more than half of the GUI bindings (most of which can be accessed through the main overlay) to make space for the multitude of skills and buffs I have. The idea of my setup is to have your pinky on 1, with the most frequently used skills in the close range of your hand. Buffs and Hyper Skill Actives are noticeably farther from the place of my resting hand.

Here's a list of bindings that I suggest removing because they're so unfrequently used / aren't used in states of urgency (Starts from top left):
  • Say
  • Party chat
  • Friends chat
  • Guild chat
  • Alliance chat
  • World map
  • Boss party
  • Item pot
  • Enhance equip
  • Menu
  • Quick slots
  • Key bindings
  • Notifier
  • Medals
  • Toggle chat
  • Maple chat
  • Event

By no means does this mean it's a horrible thing to have these as bindings, they're just keys that personally I've removed because I don't find them useful enough to take up space.

Stylizing how you play Maplestory with your keybindings takes a long time. Try to find a setup based around what's most comfortable for you.
Levelling
--------------------------------------------------------------------------------------------------------------------------

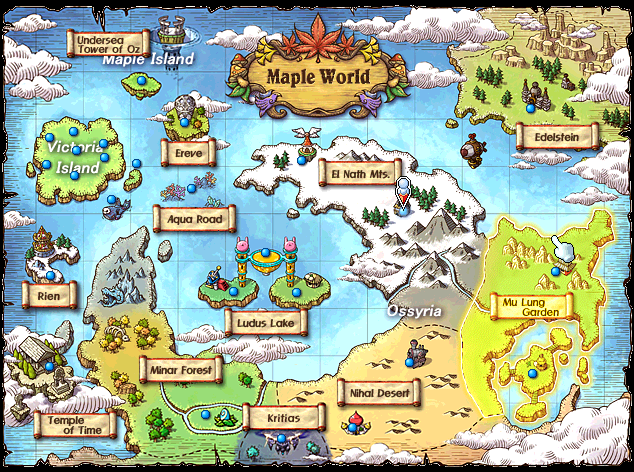
Note that farming with different classes will produce different results regarding speed of experience gain. Find what maps are right for your class. There are many different resources for levelling in Reboot online. Keep in mind that some of them may be outdated.

Maple World

​[Lv. 0 - 10] Job Quests
[Lv. 10 - 30] Golem's Temple 3
[Lv. 30 - 37] Seaside 2
[Lv. 37 - 50] Hardwave Beach
[Lv. 50 - 60] Riena Strait Theme Dungeon
[Lv. 50 - 60] Wild Boar Land
[Lv. 61 - 76] Silent Swamp
​[Lv. 76 - 85] Ice Valley II
[Lv. 85 - 90] Sahel 2
[Lv. 90 - 100] Lab - Area C-1
[Lv. 100] Normal Zakum Arms (2 runs per day)
[Lv. 100 - 107] West Leafre Forest
[Lv. 107 - 124] Toy Factory <Apparatus Room>
[Lv. 125 - 130] Black Mountain Entrance
[Lv. 130 - 137] Red-Nose Piraate Den 2
[Lv. 137 - 146] Goblin House
[Lv. 140 - 150] Dimensional Invasion Party Quest
[Lv. 140 - 150] Monster Park PQ
[Lv. 150 - 158] Temple of Time Questline
[Lv. 146 - 157] [*70] The Dragon Nest Left Behind 2
[Lv. 157 - 170] Road to Oblivion 4
[Lv. 170 - 180] [*120] Armory 2
[Lv. 170 - 180] Knights' Chamber 1
[Lv. 180 - 190] Deserted Southern Ridge
[Lv. 190 - 203] Forsaken Excavation Site 2
[Lv. 203 - 213] Scrapyard Hill 5
[Lv. 213 - 231] Black Heaven Deck 1
[Lv. 221 - 250] Black Heaven Maze 5/7

Arcane River
[Lv. 200 - 203] Fire Zone
[Lv. 203 - 210] Forked Road 2
[Lv. 210 - 217] Deep Forest of Chew
[Lv. 211 - 220] Torrent Zone 3
[Lv. 220 - 231] Lachelein (Galluses)
[Lv. 221 - 250] Lachelein (Dreamkeepers)
[Lv. 224 - 250] Hidden Area (Chu Chu Island)

This levelling guide is meant for fast grinding to higher levels. Nowhere does the game tell you you must follow this path. Maple World is a vast, interesting place, so by all means, explore it your own way.

______________________________________________________________________________

Powerlevelling
  • At level 33, you'll get a quest bubble above your head. Save it because it can be used as a timesaver. When you find yourself done the Riena Strait Theme Dungeon, click the bubble and spam through the dialogue until you've entered Alishan. From there, you can get to Henesys fast by going to the portal found at the top left of the map.
  • Assign a key to the Maple Guide. As soon as you're level 10, you can open it using the key and skip your main questline to get to Henesys instantly, where you can head to golems. In general, the Maple Guide is a very useful resource, in that it's a crude guideline for levelling and can help you get around maps quickly if you haven't invested in or don't have enough Mesos for a Hyper Teleport Rock.

Possible ways to multiply your experience
  • Pendant of the Spirit (10 - 30%)
  • Kin Ring (10% + 5% BONUS exp)
  • Monster Park Extreme Gold Potion (10%)
  • Experience Coupon (1.5x - 4x)
  • Bishop Skill: Holy Symbol (50%)
  • Event: 2x Drop and EXP Weekends (2x)
  • Kanna Skill: Kishin Shoukai (Instant mob respawns, higher mob cap)
Progression and Essentials
-----------------------------------------------------------------------------------------------------------------------------

This is a hard section to organize. Maplestory is littered with quests and out-of-place or random, unexplained GUIs which can get confusing, very fast. Beginners find themselves often turned away from the game due to a lack of linearity or a sense of goal, which is to most veteran players an asset but nevertheless one not handled well by the developers. Prequests, Crusader Codex, bosses and much else will be covered in order to help you achieve a better sense of what to do next in this section.

______________________________________________________________________________

Level 1-150

Maplestory gets saturated at level 150. It should be very straightforward, simple and fairly fast to get to this point in the game, but some still may need a little bit of help. A few tips can be found here:
  • Unless you're a heavily farming-oriented class such as a Luminous, get in to a 2 man party whenever the possibility arises. Oftentimes people will tell you that they do not want to party, usually due to a lack of understanding of the system's benefits. As long as you and your party members are within 10 levels of eachother, you will, unless you are clearing more than half of the map on each spawn (unlikely at early levels), both gain more experience no matter what. If you are on a map such as Copper Drakes, consider even adding 1 or 2 more members. The key is to have everyone grinding at full capacity and having only 1 or 2 mobs left on the map when they respawn. More info on EXP[strategywiki.org]
  • Can't kill Normal Zakum at level 100? Make sure that all of your equipment has at least 5 stars' worth of Starforce Power on it. Though it falls off in the late-game until all of your gear is cubed, Starforce Enhancement is the only practical method of gaining extra range in the early game. To access the Starforce Enhancement tab, open your Inventory and click the Equipment Enchant button on the bottom right of the GUI window.
  • Refer back to the Levelling section on how to grind faster with the use of EXP coupons and equipment.

Guilds will take interest in you at this point. Find a guild that you like, and do daily bosses with them when you can. Don't be afraid to ask questions. The majority of the wikis are outdated, so the main way of getting information if not from here is through other players. Shameless plug to my guild, Song!

Prequesting Post - Lv. 150

Once you've gotten to Level 150, almost every significant prequest will be available to get endgame gear.
  • Temple of Time: Pink Bean access (Pocket item)
  • Crimsonheart Castle: Gollux access (Ring, earring, belt, pendant)
  • Cave of Horntail: Horntail access (Daily boss)
  • Magnus Simulator: Easy Magnus access (Daily boss)
  • Heliseum: Normal / Hard Magnus access (Boots, cape)
  • Lion King's Castle: Von Leon access (Daily boss)
  • San Commerci: Commerci PQ access, Solo Voyage access (Gloves, weapon, eye accessory)
  • Ghost Ship: Questline reward (Badge)
  • Job quests: Questline reward (Emblem)
  • Boss Arena: If your job does not have a questline for an emblem, do this instead. (Emblem)
  • Root Abyss: Root Abyss boss access (Hat, top, pants, title)
  • Masteria Through Time: Questline reward (Title, level 9 shop android)
  • Kritias: Kritias dailies access (Boss reset tickets)
  • Yu Garden: Yu Garden dailies access (6 epic pot scrolls per week)
  • Arcane River (Lv. 200+): Arcane symbol dailies access (Arcane symbol level up)
  • Alien PQ (Lv. 200+): Alien PQ access (Nebulites)

During and After Questing

Here's what you should be doing while you finish all these prequests every day so far:
  • Normal Zakum x2 (Mesos)
  • Normal Hilla x2 (Mesos)
  • Easy / Normal Horntail x2 (Mesos, decent filler accessories)
  • Easy Ranmaru x2 (Pick up and learn as many recipes as possible)
  • Commerci Solo Runs (You can get PQ carries early if you're in a good guild)
  • Easy Gollux x3 (Kill all body parts and leave twice, killing it the third time for 11 coins a day)
  • Root Abyss (Mesos, CRA access after 10 kills and guild contribution)
  • Monster Park (Coins used for Extreme Potions and perhaps a Greed Pendant)

Assuming you have the full Pensalir / Frozen set, here's what you should do with all of your cubes, potential scrolls and stamps.
  • Use all epic potential scrolls on your BiS items and then after that in conventional cubing order (Secondary > emblem > badge > weapon > armor (highest to lowest level) > accessories)
  • Master Craftsman's Cubes go on each epic potentialled gearpiece. Continue cubing each piece until it has at least 3% mainstat on it.
  • Stamps go on your BiS gear until 3 lines is reached. If you have absolutely no use for them (unlikely), put it into your storage if possible, otherwise keep it.
Start working on Smithing, Mining, Herbalism and Alchemy as much as possible (Ardentmill). When your Smithing is level 10, create a Japanese Weapon for your character (recipes obtained from Ranmaru). This will be your main weapon until Fafnir. You should aim to get every profession to level 10, but if you're too lazy, focus on Smithing, Alchemy and Herbalism. You'll thank yourself later!

Begin cubing your gear in conventional cubing order for 6% mainstat epic potentials. Your weapon, secondary and emblem should have %MAtt / %Att instead of mainstat. By the time this is done, you should have around ~800k (super rough estimate) range. If you cannot be carried by players in your guild, find those of equal skill so you can beat bosses like Hard Gollux and Pink Bean.

Get and max out a Big Spider familiar. It's essentially a permanent 1.6x drop coupon that can be summoned at will.

Somewhere between this, you'll be level 200. Do Arcane River ASAP so you can begin your Arcane Symbol dailies, which increase your range a fair amount and allow access to true endgame bosses.

If at this point you refuse to join a guild which can provide CRA or HMag carries, your workload will be significantly heavier. Start working on Link Skill characters, meso farming mules and perfecting BiS gearpieces. If you're in a guild, get your full Fafnir set and Tyrant Boots + Cape.

By now you should be completely set up with endgame equipment other than your armor set. After this comes hours upon hours of meso farming, dailies and events so that you can solo endgame bosses like CVellum, HMag, Hellux, Damien, etc. If you're lucky, you might have a few Sweetwater pieces.

Here's what your dailies should look like post - Lv. 200:
  • Normal / Chaos Zakum x2
  • Normal / Chaos Horntail x2
  • Normal Hilla x2
  • Normal Von Leon x1
  • Hard Von Leon x1
  • Easy Gollux x2
  • Hardlux / Hellux x1
  • Commerci Solo Voyages
  • Commerci PQ
  • Root Abyss
  • Monster Park
  • Yu Garden dailies
  • Kritias dailies
  • Arcane River dailies
Link Skills
-------------------------------------------------------------------------------------------------------------------------------

Link Skills are a feature that was introduced in the 2011 Legends Update. Players by the update are encouraged to play all of the classes offered in MapleStory, though admittedly it becomes very monotonous and grind-ey over a short period of time. Accessible through the [●] tab, link skills increase the stats of a character once thresholds of other characters are met. These thresholds are level 70, level 120 and level 210. Players looking for the next step in upping their range usually find themself grinding for long hours, stopping with 12 (maximum) characters at level 120.

_______________________________________________________________________________

Class Link Skill

Skills can be linked in the basic skill tab [●].

Level 1: Level 70
Level 2: Level 120
Level 3: Level 210

Angelic Buster (Terms and Conditions)
Increase skill damage for 10 seconds when activated (90 second cooldown).
Level 1: +60% skill damage when active.
Level 2: +90% skill damage when active.
Level 3: +120% skill damage when active.

Beast Tamer (Elf Focus)
Permanently increases boss damage, critical rate, max HP and max MP.
Level 1: Boss damage +4%, Critical rate +4%, MaxHP + MaxMP +3%.
Level 2: Boss damage +7%, Critical rate +7%, MaxHP + MaxMP +4%.
Level 3: Boss damage +10%, Critical rate +10%, MaxHP + MaxMP +5%.

Cannonneer (Pirate Blessing)
Permanently boosts all stats, Max HP and Max MP.
Level 1: All Stats +15, MaxHP +5%, MaxMP +5%
Level 2: All Stats +25, MaxHP +10%, MaxMP +10%
Level 3: All Stats +35, MaxHP +15%, MaxMP +15%

Demon Avenger (Wild Rage)
Permanently increases damage.
Level 1: +5% Damage.
Level 2: +10% Damage.
Level 3: +15% Damage.

Demon Slayer (Fury Unleashed)
Permanently increases boss damage.
Level 1: +10% Damage to Bosses.
Level 2: +15% Damage to Bosses.
Level 3: +20% Damage to Bosses.

Eunwol / Shade (Close Call)
Chance to ignore death.
Level 1: Ignore Death Chance +5%
Level 2: Ignore Death Chance +10%
Level 3: Ignore Death Chance +15%

Kinesis (Judgement)
Permanently increases minimum critical damage.
Level 1: Minimum Critical Damage +4%.
Level 2: Minimum Critical Damage +8%.

Hayato (Keen Edge)
Permanently increases all stats, weapon attack and magic attack.
Level 1: All Stats +10, Weapon Attack +5, Magic Attack +5.
Level 2: Unavailable.
Level 3: Unavailable.

Zen/Jett (Core Aura)
Adds random stats to STR, DEX, INT, LUK, Magic Attack and Weapon Attack.
Level 1: STR, DEX, INT, LUK, Weapon ATT, Magic ATT. (Small Boost)
Level 2: N/A
Level 3: N/A

Kaiser (Iron Will)
Permanently boosts max HP.
Level 1: +10% MaxHP.
Level 2: +15% MaxHP.
Level 3: +20% MaxHP.

Kanna (Elementalism)
Permanently increases damage.
Level 1: +5% Damage.
Level 2: +10% Damage.
Level 3: Unavailable.

Luminous (Light Wash / Permeate)
Increases Ignore Defense (PDR).
Level 1: Ignores 10% Defense.
Level 2: Ignores 15% Defense.
Level 3: Ignores 20% Defense.

Mercedes (Elven Blessing)
Sends you to Elluel (30 minute cooldown). Passively permanently increases experience gain.
Level 1: (Passive) +10% EXP. (Active) Sends you to Elluel.
Level 2: (Passive) +15% EXP. (Active) Sends you to Elluel.
Level 3: (Passive) +20% EXP. (Active) Sends you to Elluel.

Mihile (Knight's Watch)
Temporarily increases knockback resistance to 100% (180 second cooldown).
Level 1: 100% Knockback Resist for 90 sec.
Level 2: 100% Knockback Resist for 110 sec.
Level 3: 100% Knockback Resist for 130 sec.

Phantom (Deadly Instinct)
Permanently increases Critical Rate.
Level 1: +10% Critical Rate.
Level 2: +15% Critical Rate.
Level 3: +20% Critical Rate.

Xenon (Hybrid Logic)
Permanently increases all stats.
Level 1: All Stats +5%.
Level 2: All Stats +10%.
Level 3: Unavailable.

Evan (Rune Persistence)
Increases the duration of runes.
Level 1: Rune Duration +30%
Level 2: Rune Duration +50%
Level 3: Rune Duration +70%

Aran (Combo Kill Blessing)
Increases Combo Kill Marble Experience. (Blue, purple and red orbs that appear on the map)
Level 1: Combo Kill Marble EXP +400%
Level 2: Combo Kill Marble EXP +650%
Level 3: Combo Kill Marble Exp +900%

_______________________________________________________________________________

Best Link Skills

In rough order of prioritization. You can't link a 2nd duplicate class to your own. Some of these may not be good for your class, which is why the list goes to 15.

1. Mercedes: Passive experience boost for grinding from level 1-250.
2. Evan: Runes grant 200% EXP and help grind faster.
3. Aran: EXP baubles give great boosts of EXP for grinding.
4. Kanna: Damage for bossing and mobbing.
5. Demon Avenger: Damage for bossing and mobbing.
6. Luminious: Ignore Defense (PDR) for bossing and mobbing.
7. Zen/Jett: All Stats, Weapon Attack and Magic Attack for bossing and mobbing.
8. Beast Tamer: Boss Damage, Critical Rate, Max HP and Max MP with versatility in survivability and bossing.
9. Demon Slayer: Boss Damage for bossing.
10. Phantom: Critical Rate for bossing and mobbing.
11. Hayato: All Stats,Weapon Attack and Magic Attack for bossing and mobbing.
12. Cannoneer: All Stats, Max HP and Max MP with versatility in survivability, bossing and mobbing.
13. Xenon: All Stats for bossing and mobbing.
14. Angelic Buster: Temporary skill damage boost for bossing and mobbing.
15. Kinesis: Minimum Critical Damage for bossing and mobbing.
Additional - Kaiser: If you're a Demon class this is great for damage.
Guild
-----------------------------------------------------------------------------------------------------------------------------

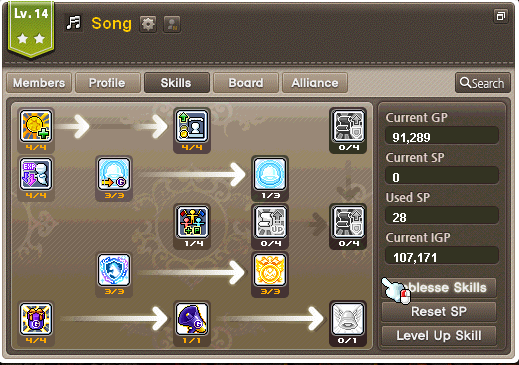
Guilds are an integral part of Reboot. They're one of the few aspects that make it feel truly Multiplayer, the stripping of an economy being one of the factors that makes it feel Singleplayer. Should you happen to not be in a guild past level ~150, I urge you to try to join a decent one. Guilds relieve an abundance of stress when it comes to things like finding grinding parties, getting carries and having nobody to talk to. They also offer a variety of perks such as free Power Elixirs and Guild Blessings, cheaper store items, less exp when lost, and actives that make party organization and upholding easier. Not to mention Noblesse Skills, which give huge boosts to range for boss fights.

_______________________________________________________________________________

Contribution

The foundation of every guild, contribution is a feature that allows progression and incentive for guilds to work together and for players to become active members of such institutions. Earned mainly by killing bosses, contribution is like the guild's EXP. When enough is collected, the guild will level up and 2 SP points will be rewarded that can be invested into the guild's skills.


Each player can cap an amount of 5,000 contribution every day. Listed below are the most rewarding bosses in terms of contribution. Note that ou must be in a party with at least one or more guild members when each boss is killed to get the contribution. Killing them solo will give a tiny fraction of contribution compared to when in a party.


  • Root Abyss: 3,300 (4 bosses, Pierre doesn't count)
  • Normal Zakum- 1,000
  • Normal Magnus - 2,000
  • Hard Magnus - 3,000
  • Chaos Horntail - 2,500

_______________________________________________________________________________

Flag Race

Flag races are jump-quest races guild members can do to earn SP for Noblesse Skills each week. To enter flag races, be in a non-ground force map and click the red and white envelope above your character's head. There are 3 Noblesse Skills whose SP resets each Monday. SP is assigned by the guild leader.

Boss Slayers (Cooldown 114min): Boss Damage +20% for 3 minutes. (10/10)
Undeterred (Cooldown 114min): Ignore Enemy Defense +20% for 3 minutes. (10/10)
For the Guild! (Cooldown 114min): Damage +20% for 3 minutes. (10/10)

Flag Race times: 1PM, 8PM, 10PM, 11PM, 12AM (UTC)

  • Getting a higher rank in the flag race gets you more points, but you must finish the race (3 laps) to register at all.

  • At the end of the race, points are tallied and the guild is ranked against others. The higher the rank, the more SP is earned.

    There are two relevant skills in Flag Race:

  • G teleports you to the closest guildie to the finish line.
  • H teleports a random guild member to you.

    When utilized properly, members of the guild can clear 3 laps in insanely fast times. The basic idea is to have one person sit at the finish line, using any Hs they have to get guildies to the end instantly, clearing 1 lap. After that, they can AFK while any members with a G teleport to them to clear instant laps. Any other guild members that happen to have an H when they get to the finish line should also use it for more instant laps by other members.

    Happy flagging!
Meso Farming (PRESUMABLY OUT OF DATE)
-----------------------------------------------------------------------------------------------------------------------------

Meso farming is an essential part of playing on Reboot. Everything gameplay-based is bought with it and it's the single thing that will buy you cubes and push you towards the end-game. You're going to need a lot of it, so why not make it as easy as possible for yourself?

_______________________________________________________________________________

Classes

​Kanna: Widely considered the best class for meso farming in Reboot. Kannas have a versatile skillset for wide-range mobbing. They also have their signature skill, Kishin Shoukai, which acts as a turret and increases mob spawns significantly.

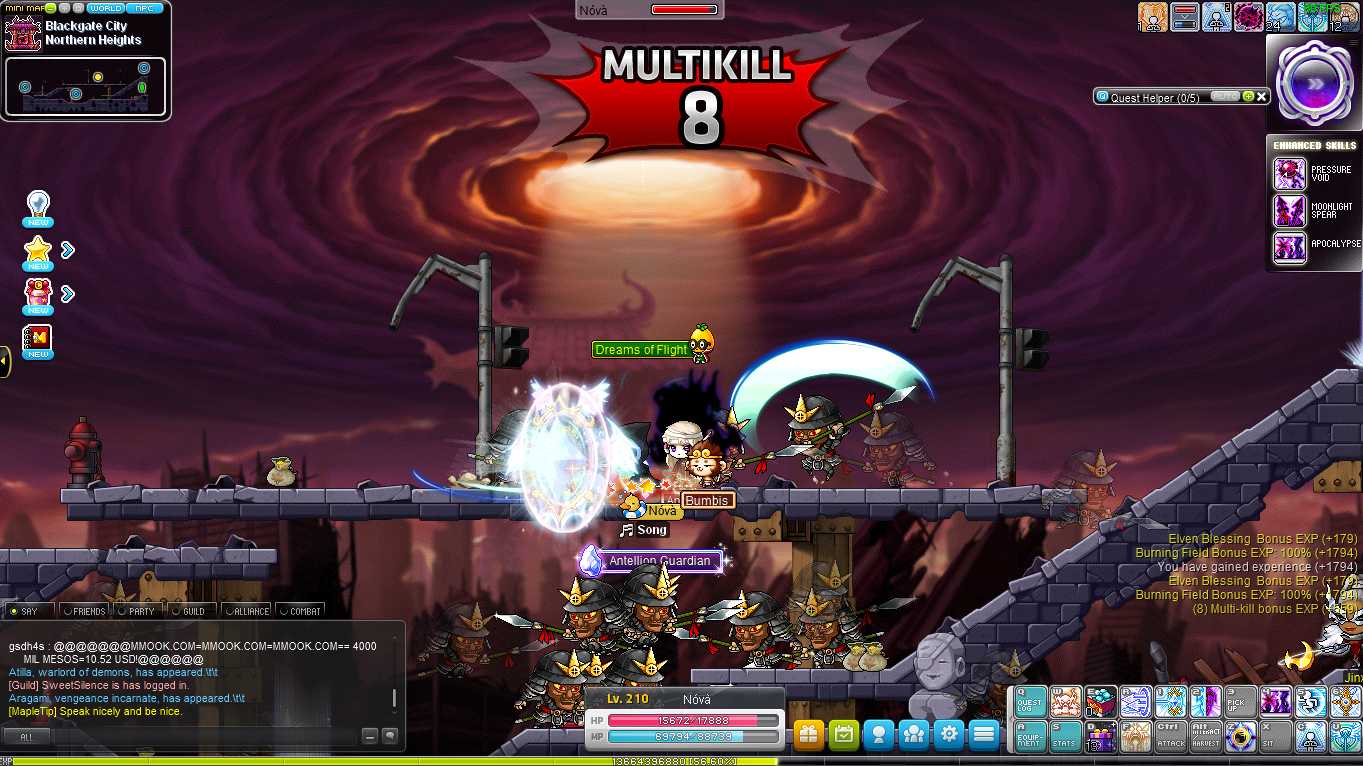
Phantom: A great class for meso farming. Phantoms can steal Arrow Platter from Bowmasters and utilize it to take up entire maps. Arrow Platter's near insta-kill also allows Phantoms to not be able to be KSed in maps such as Northern Heights.

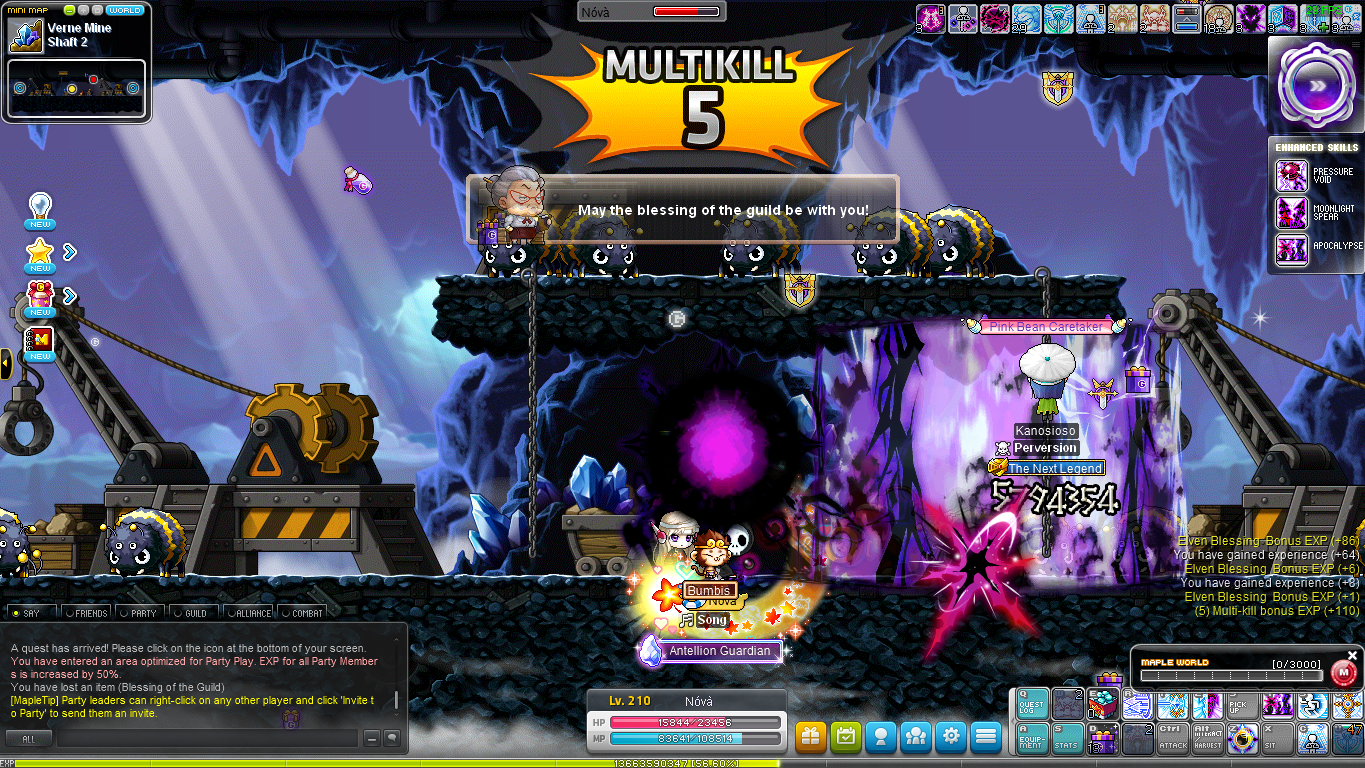
Luminous: Luminouses, though they are usually the road less taken for meso farming, excel at farming on maps with terrain usually unfit for grinding, such as Wolf Spider Cave. In maps where classes such as Kannas can only farm decently such as Mysterious Path 3, Luminouses excel, being able to take 2 or even 3 platforms at once with their Reflection.


_______________________________________________________________________________

Maps

Mysterious Path 3: Extremely good spawnrate, but the map has multiple platforms, making it unfit for some, but great for parties.

Fantasy Theme Park 3 Training Dungeon: When you can't find a GS or MP3 map, go here. Good for Kannas.

Ulu Estate II: Decent meso farming alternative map.

Ghost Ship 2: Two long platforms, good for a lot of classes. Considered by some the best map for solo farming.

Wolf Spider Cave: An okay map, if everything else is taken. Mobs drop two bags, but the map is very misshapen.

_______________________________________________________________________________

Tips
  • Get a Big Spider familiar for a quick boost to your farming (~1.5x drop rate)
  • Log in every day during Hot Weeks. Sometimes they'll give you 2x Drop Coupons.
  • Run Dimension Invasion PQ and extract Pensalir equips for Philosopher's Stones (sell for 300k).
  • Buy a pet for $5 or do Normal/Hard Hilla to get the Blackheart pet (Hard Hilla > Normal Hilla drop chance)
  • Sell Twisted Times (unless saving for Meister Set), Sunset Dews, Reindeer Milks and Spell Traces.
  • If you see a hacker, or a player who is suspicious, don't falter to report them. Let's keep the game clear of bots.
Best-in-Slot Gear
-----------------------------------------------------------------------------------------------------------------------------

BiS as a term is used rather openly, in that it doesn't necessarily mean the perfect piece of gear because some pieces are unrealistic to obtain or limited to events. In this section, the most optimal will be listed before less desired gear. It, in the end, is all endgame.

This section felt very unorganized to whip up. True endgame is very debated, gear being deceptively simple what with sets, class needs, events and other hidden factors. Feel free to comment and help out!

_______________________________________________________________________________

*Absolab and Sweetwater should only be worn if you have the entire set, because together the bonus is stronger otherwise Fafnir is preffered.

Primary Weapon: Absolab / Sweetwater / Fafnir | % M/Attack
Secondary Weapon: Princess No / Treasure set / Evolution Lab / Frozen / Regular | % M/Attack
Katara: Sweetwater | % Attack
Hat: Absolab / Sweetwater / Fafnir | % Main
Overall: Absolab / Sweetwater / Fafnir | % Main
Shoes: Absolab / Sweetwater / Tyrant | % Main
Cape: Absolab / Sweetwater / Tyrant | % Main
Belt: Superior Gollux Belt / Tyrant | % Main
Gloves: Absolab / Sweetwater / Tyrant / High Quality Dimension Gloves | % Main
Face Accessory: Sweetwater / Aquatic Letter Eye Accessory | % Main
Eye Accessory: Condensed Power Crystal / Sweetwater | % Main
Shoulder Accessory: Absolab / Royal Black Medal Shoulder / Krexel Pauldron | % Main
Earring: Superior Gollux Earrings | % Main
Pendant 1: Superior Gollux Pendant | % Main
Pendant 2: Reinforced Gollux Pendant | % Main
Ring 1: Superior Gollux Ring | % Main
Ring 2: Reinforced Gollux Ring | % Main
Ring 3: Master SS Ring / Reboot Shop Rings / Blackgate Ring (e.g. Vengeful, Dark Critical) | % Main
Ring 4: Reboot Shop Rings / Blackgate Ring (e.g. Vengeful, Dark Critical) | % Main
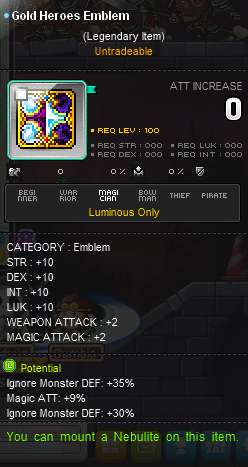
Emblem: Gold Leaf Maple Emblem / Dragon Emblem / Angel Emblem / Boss Arena Emblem | 65% PDR + % M/Attack
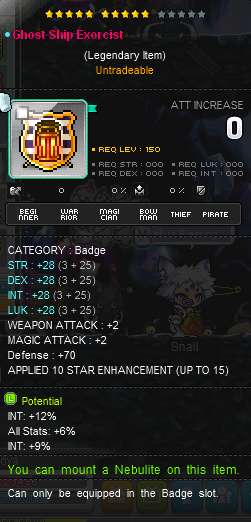
Badge: Ghost Ship Badge | % Main
Pocket: Pink Holy Cup | N/A
Medal: Antellion Guardian | N/A
Cubing
-----------------------------------------------------------------------------------------------------------------------------

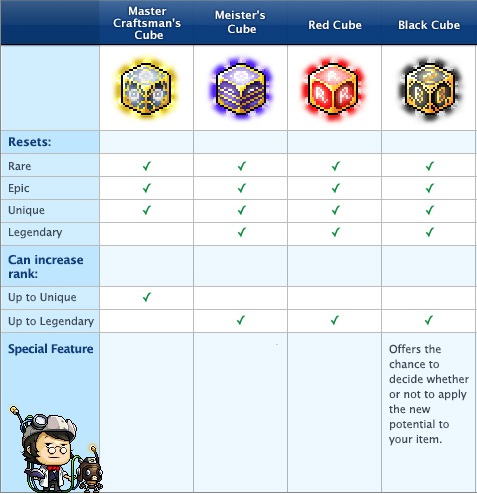
Having the best equipment in the game is not enough to be able to solo end game bosses. That's where cubing comes in. Cubes are items that reset and have the chance to raise the level of potentials on your equipment. There are four levels of potential (Worst to best): Rare, Epic, Unique and Legendary. You can have up to three lines of potential (Use Potential Stamps to increase the number of lines on your gear). There are two ways in which you can get potential on your gear. You can find your gear with the potential, or use Potential Scrolls on your gear in order to get it.

_______________________________________________________________________________

Cubes

There are three different types of cubes that you can buy in Reboot: Master Craftsman Cubes, Red Cubes and Black Cubes.

Master Craftsman Cubes cost 7,500,000 mesos at the Henesys General Shop.
They can raise potentials from Rare to Epic, and Epic to Unique.

Red Cubes cost 12,000,000 mesos or 1,200 Reward Points in the Cash Shop.
They can raise potentials from Rare to Epic, Epic to Unique and Unique to Legendary.

Black Cubes cost 22,000,000 mesos or 2,200 Reward Points in the Cash Shop.
​They can raise potentials from Rare to Epic, Epic to Unique and Unique to Legendary.

​Q: How do I get Epic Potential Scrolls?
A: Finish the Yu Garden questline (6 scrolls per week)

Unlike other cubes, Black Cubes, when used, will allow you to choose between the new and old potential. This is useful when you have a good potential already, but want an even better one.

_______________________________________________________________________________

Methods

Cubing rates post-v170 (Thanks JackDragon from reddit):
https://docs.google.com/spreadsheets/d/1VsAIdS8pjjNRGd6DlFsFjl0PSPkWu-qfZdyWzzt-1E8/edit#gid=242399709
https://docs.google.com/spreadsheets/u/1/d/1od_hep5Y6x2ljfrh4M8zj5RwlpgYDRn5uTymx4iLPyw/pubhtml#

Looking at these 2 sources, we can gather these tips for cost efficiency:

  • The cheapest way to get to a legendary potential is to use Black Cubes from Epic to Unique, and then to use Red Cubes from Unique to Legendary. These sources show a large inconsistency in rates from Epic to Unique, with one showing that Reds cost significantly more than Blacks. The other shows that they're the same. Personally, I'd use Black Cubes because the sources show consitency in their price, and it's equal or lower than the Red Cubes.

  • The average price to get gear from Epic to Legendary is a very rough amount of 800,000,000 mesos.

  • If for some reason you have no access to Epic Potential Scrolls, use MCCs from Rare to Epic.

    Once your gear is legendary, Red Cubes should be used for cost efficiency until you get a decent or good potential, at which point Black Cubes should be used until you perfect it.
Jargon and Abbreviations
-----------------------------------------------------------------------------------------------------------------------------

Chances are that a whole bunch of game knowledge isn't going to get you the farthest you can go. A wide array of weird slang and seemingly nonsensical words can be found in the vocabulary of your average Mapler, and for that reason I've dedicated a section to all or most of the things you might encounter in your dialogues with other players. ______________________________________________________________________________

Jargon and Abbreviations
  • S> : Selling (Uncommon in Reboot)
    Example: S> Bossing services, $2 for Hard Magnus
  • B> : Buying (Uncommon in Reboot)
    Example: B> Kanna mule for 1hr
  • LF> : Looking for
    Example: LF> A guild that I can join so I don't die alone
  • R> : Recruiting
    Example: R> One more attacker for our grinding party
  • J> : Joining
    Example: J> Root Abyss party for guild contribution.

  • Cube: Item that resets your gear's potential. Comes in Red, Black, Master Craftsman, Meister.
    Example: Yup, I'll grind with you after I cube all this gear
  • Pot: Potential. Extra stats that go on your gear.
    Example: Darn, I've used 3 pot scrolls and they all failed.
  • Stars: Starforce enhancement amount. Gives extra stats to your gear.
    Example: How many stars does your staff have?
  • Neb: Nebulite. Socket-based items that increase stats on gear.
    Example: I have such a nice neb on my dagger.
  • BiS: Best-in-slot. Meaning the best gearpiece you can possibly have in that slot.
    Example: I've got 3 BiS items. Working on the wep right now.

  • E, N, H, C: Easy, Normal, Hard, Chaos. The difficulties for bosses.
    Example: CZak, EMag, NMag, HHilla.

  • RA: Root Abyss
  • Mag: Magnus
  • Zak: Zakum
  • Ark: Arkarium
  • PB: Pink Bean
  • HT: Horntail
  • Hellux: All body parts attached Gollux

  • Utgard / Pensalir Set: The universal level 140 gearset.
  • Frozen Set: Level 130 set given to burning characters.
  • Japanese Set: Alternate Level 150 set made through crafting.
  • Fafnir Set (Faf): Main Level 150 set, considered to be endgame.
  • Sweetwater Set (SW): Alternate Level 160 set, considered BiS.
  • AbsoLab Set: Main Level 160 set, extremely hard to come by, the absolute endgame.

  • CPQ: Commerci Party Quest
  • DIPQ: Dimensional Invasion Party Quest
  • APQ: Amoria Party Quest
  • RnJ / R&J / RJPQ: Romeo and Juliet Party Quest

  • Contrib: Guild Contribution points
    Example: R> RA for contrib.
  • Guildie: Guild member
    Example: How many guildies are on rn?
  • JR: Guild admin
    Example: Yeah, the leader just promoted 2 new jrs.

  • PT: Party
  • CC: Change Channel
    Example: Please CC, I was in this channel first.
    Example: CC15 (Used in parties to tell other players to change their channel)
  • DMT: Double Miracle Time
  • 2x: 2x Drop / EXP Weekend (In context)
    Example: When's 2x?
Guide Changelog
(05/06/2017) 1.0.0: Released!
(05/06/2017) 1.0.1: Fixed various errors. Thanks Reddit!
(05/09/2017) 1.1.0: Re-did Cubing section.
(05/15/2017) 1.2.0: Added Link Skill section.
(10/29/2017) 1.2.1: Updated guide description.
_______________________________________________________________________________

Proposed Changes

  • Add pets section
  • Inner ability section
  • Hyper stats section
  • Add Tower of Oz section
  • V Matrix guide
  • Add more to Meso Farming
  • BiS section more in-depth
11 Comments
pRogz 17 Apr @ 11:09am 
Is this still up to date for leveling?
Eleanor Shellstrop 20 Apr, 2021 @ 8:45am 
Yeah, I've been looking around a bit. It mostly looks fine, some areas give less xp than before, but overall it looks ok. At least nothing is game breaking !

Thanks for the reply
spreadnuts  [author] 19 Apr, 2021 @ 9:58am 
honestly, i have no idea. it's been a few years since i last played, although you probably can't go wrong asking questions on the subreddit.
Eleanor Shellstrop 13 Apr, 2021 @ 5:44am 
This guide is pretty amazing, well done sir.

I guess I am too late to the party though, how much of this is still relevant today ? Are the leveling areas still useful for farming a bit of xp ?

Cheers
Mushroom Game 26 Feb, 2018 @ 10:59am 
you can't farm mesos in any of these maps if you are over level 200
ANYTHINGTOE 21 Dec, 2017 @ 8:31am 
nice compact and detailed guide, one of the better ones I've seen over the years
Pistol_P 13 Dec, 2017 @ 5:14pm 
Is there a new guide for getting mesos for the new patch?
RemilJones 5 Jul, 2017 @ 11:28am 
You could have a friend with beast tamer that has cat skills for better mobbing, bossing, and grinding instead of a bishop. That's my personal preference though.
caducous 10 Jun, 2017 @ 7:38am 
leveling guide is quite shit
Dekeloni 5 Jun, 2017 @ 5:48pm 
What an awesome guide, Thanks a lot. Will use in the future :)